Education Pro Theme
The Education Pro theme has been customized for Open Educational Resource (OER) sites on the OpenLab, but it can be used for any type of site.
Activate Theme
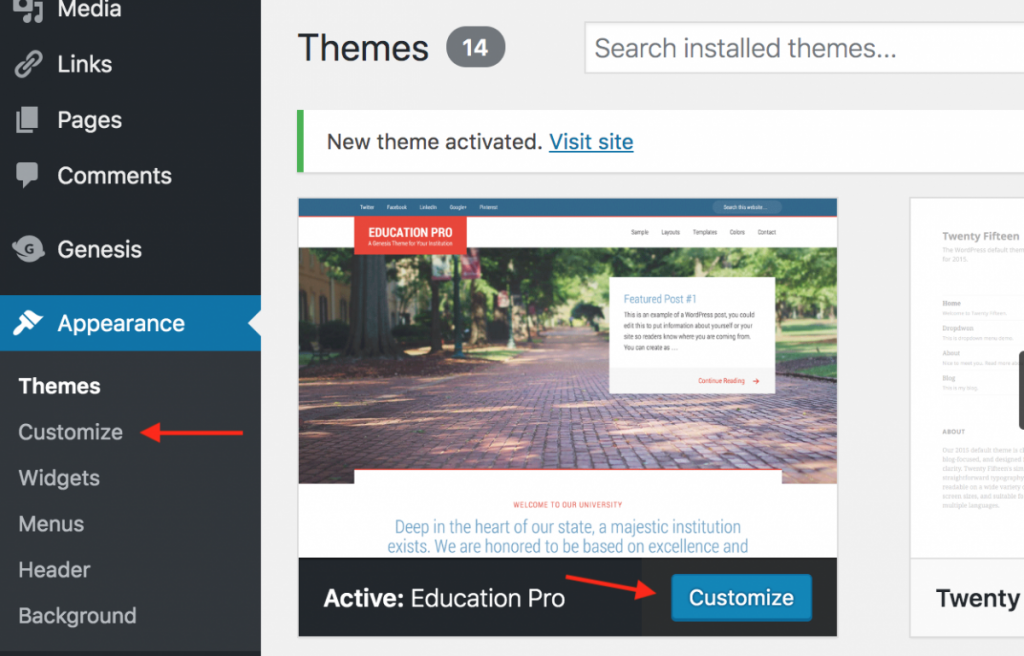
1. To activate the theme, go to Dashboard > Appearance > Themes, and choose the theme by hovering your mouse over Education Pro, and clicking Activate.
Customize Theme
Once you have activated the theme, it is ready to use as is. However, there are a number of customizations you can make by going to Dashboard > Appearance > Customize.

There are a number of customization options, but we suggest the following:
1. Color scheme: Go to Theme Settings > Color scheme to choose from one of the four available color schemes. All use accessible color contrast ratios. When you choose one, you’ll see a preview of how the colors would look on your site. Once you’ve chosen the one you like, click Publish.

2. Site layout: Also in Theme Settings, you will find the site layout. The default layout (Primary Content, Sidebar) includes a sidebar with widgets on the right-hand side. You can also choose Sidebar, Primary Content to show the sidebar on the left side. If you choose Full Width Content, your posts and pages will stretch across the entire page, with no sidebar. If you choose this layout, you cannot display widgets.
3. Breadcrumbs: In Theme Settings, you can choose to add breadcrumb navigation to your site. Breadcrumbs show your site visitors where they are on your site, with links that allow them to go back to previous pages. It is especially helpful if you have many subpages on your site. For example, if you have a Final Exam page, which is a subpage of Assignments, the breadcrumbs on that page would show links for Home > Assignments > Final Exam. We suggest selecting Breadcrumbs on Pages, but you can also display them in other places as well, such as single posts or category archive pages.
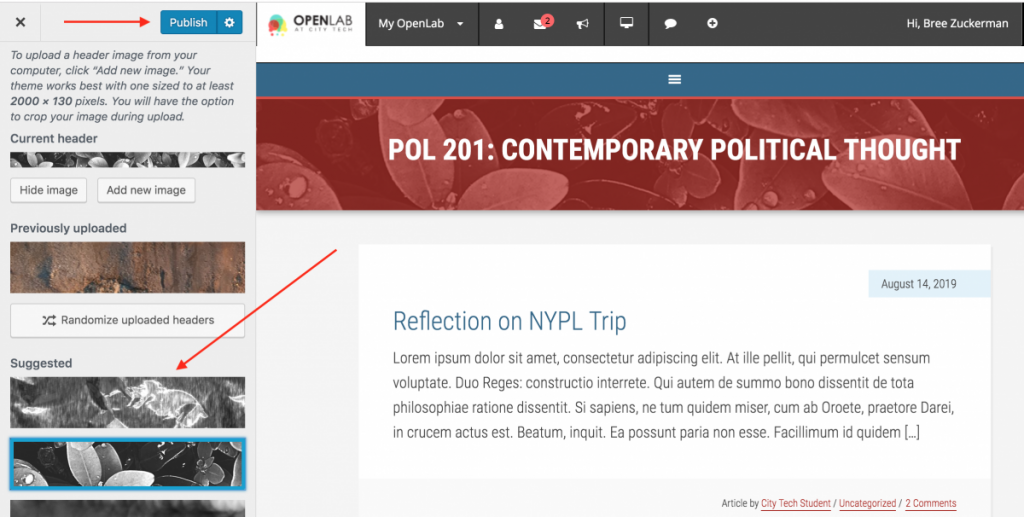
4. Header image: Go to Appearance > Header, where you can find a number of different header images to choose from. To ensure readability of your site title, we suggest choosing one of the existing options. You will see any of the images you choose appear as a preview. When you’ve chosen the one you want, click Publish to save the header image.
-
- You can also choose to upload your own header image, but you’ll want to be sure that it is at least 2000 px wide, and it doesn’t affect the readability of your site title. Click Add new image, upload your image, and click Select and Crop. Drag the selected area to the part of the image you want to use; it’s best not to increase the height of the selected area. When you’re finished click Crop Image, and then Publish.


