Fridays Final Submission and Archive:
- Do not miss the deadline or your final project will be marked as late and this will lower your final grade.
- Upload three files as follows:
- A single PDF of your slideshow as presented in class
- A single PDF of your plotted sheets
- A single Revit file used to create your sheets
- File Naming – all files must include your name and the project, semester, course & professor. For example for Fuad Butta his files should be named as follows:
-
- Fuad-Butta Facade Study – FA20.BT3.King – Slideshow.pdf
- Fuad-Butta Facade Study – FA20.BT3.King – Sheets.pdf
- Fuad-Butta Facade Study – FA20.BT3.King.RVT
-
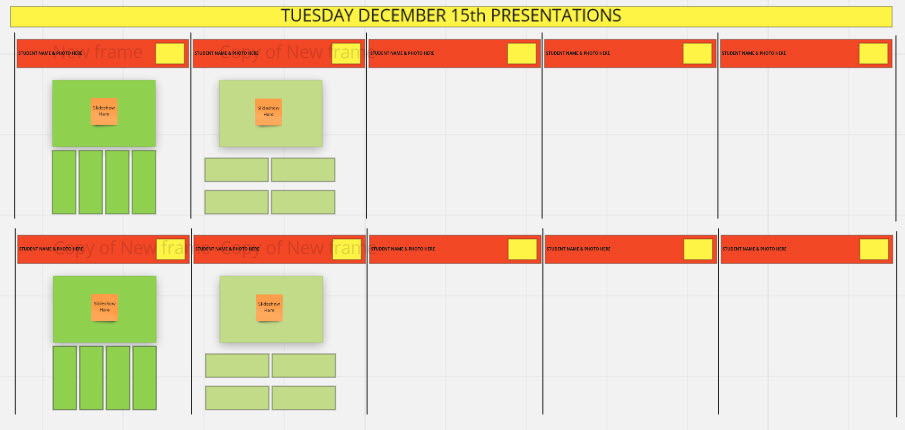
Presentation Dates: Half of you present on Tuesday December 15th and the rest of you will present on Thursday December 17th. Attendance at both presentations is required by everyone. All work will be presented in MIRO. Here is a link to the final presentation board Final MIRO board
For Archive Purposes you will have until Friday December 16th at midnight to submit your presentation in Blackboard – do not miss this deadline!!!!! You are permitted to make modifications to your final Revit sheets for Friday but the rest of the presentation will be final on the day you present.
Tuesday’s Group Includes: (9 students)
Fuad Butta, Galina Drozdova, Reymond Jimenez, Alexander Karasavidis, George Mejia, Peter Mentis, Cheriyah Wilmot
Thursday’s Group includes: (8 students)
May Mohamed, Renard Wagstaff, Pearl Cabrera, Syed (Danyal) Hassan, Zequan Li, Brandon McAdam, Anamarie Perez, Rudolph Pierre, Michael Singh, Jose Vasquez
Details to Show:
- The models you have been provided as a template ask you to solve how your system works in the following conditions. Your details Plan/Section/Elevation/Isometric – should include these conditions :
- Inside Corner
- Outside Corner
- Parapet
- Window – Head/Sill/Side Edge
- Base of wall at ground
Tuesday/Thursday Miro Pinup & Presentation:
- You will be expected to make your own oral presentation. Along with the jury I will listen to the presentations. Be prepared to answer questions on how your system works – how it is installed etc. There are 4 categories of discussion that should be highlighted as follows:
- Structure – how does the system work structurally – what holds it up and how does it connect back the concrete slab and steel beam/column elements.
- Waterproofing – What is the strategy for keeping the water out? Is there caulk and backer rod, is it a rainscreen? Where in the section is the waterproofing?
- Thermal – What is the insulation located? What other thermal strategies are in use? Thermal breaks, etc.
- Fireproofing – How is the construction fireproofed? Where is the smoke stopping/safing and smoke seal?
PowerPoint Slideshow:
- Title Slide: The first slide must include your name & photo, the semester, course and professor. Include the names of the two systems you are presenting.
- [Start Loop – repeat once for Opaque once for Glass Curtain Wall]
- Research Slides: The slideshow should include your research & shopping list for all the materials used in your wall assembly.
- [Your Assembly Animation needs to be inserted separately-see end of post]
- Assembly/Installation Animation: A part of this will be a fixed-slide animation as we demonstrated in class – using screen captures. I suggest you use the https://gifmaker.me/ site. There should be two of these one for the Opaque system and one for the glass curtain wall. Consider that it helps to include close up views of the details you have developed.
- Details from your Revit Drawings: The slideshow is helpful for showing the process of assembly – and it allows you to zoom into specific details to aid in your presentation. It helps to write out what you want to say as a guide to what you should present here.
- [End Loop]
- In the slideshow color code elements for enhanced visibility.
-
- GREEN – for all structural elements
- BLUE – for all waterproofing
- ORANGE – for Thermal
- RED – for fireproofing
-
- Compile this presentation to a single PDF and insert it into MIRO. It should be the first on your MIRO board. We are using the same MIRO board for the final presentation.
Revit Plotted Sheets
- (Opaque System) & (Glass Curtain Wall System)
- Two sheets are required for each of these presentations – so each of you will have 4 sheets.
- Please select the correct template in MIRO for your format (Horizontal or Vertical) – see below for instructions.
- These drawings should rely primarily on your 3d families. As always when you can group 4 views together (plan/elevation/section/isometric) to illustrate your facade assembly. You can add 2D detail items to clarify your details.
- All drawings must include annotation – ALL VIEWS – NOT JUST ONE OR TW
Final Recommendations:
- I recommend that you review the three presentations samples in the MIRO board. While they are not perfect they give a good idea of what is expected of you in the presentations. Remember to follow the guidelines listed above – the guidelines for previous semesters has varied.
- Write out what you want to say and explain. Do this before you complete your drawings and add annotation. This will help you to decide which details you should include. Often you can use a single detail or group of 4 to explain multiple points –
- First step – make a mock-up of your full presentation sheets in Revit. Do not blindly build the model without first creating the sheet. This will prevent you from over building the model – with items that will not be visible in your final drawings. Then work to model based on what you want to say and what you need to present. Then add your annotations.
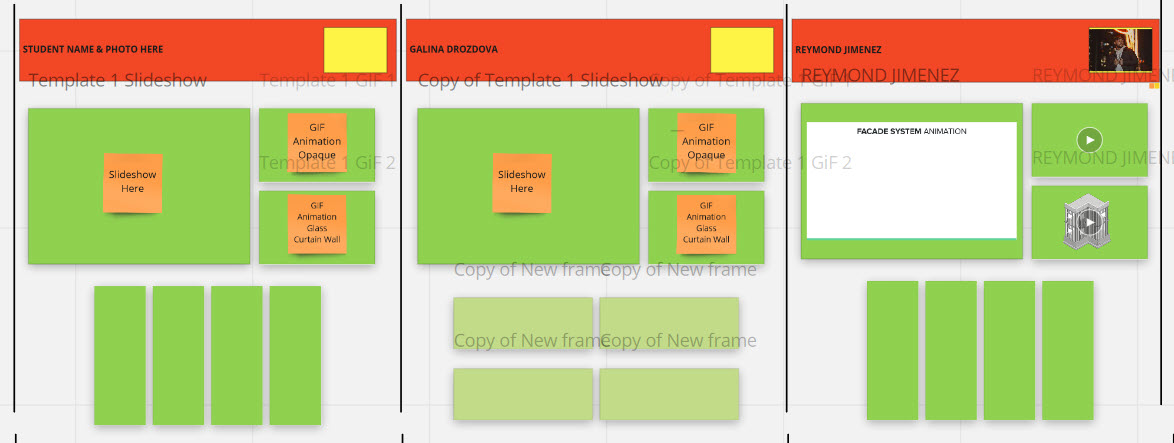
Templates in MIRO: Final MIRO board
I have setup a template for you to post your slideshow and for your 4 plotted sheets – please copy the horizontal or vertical format to your spot- add your name and photo to the title bar.
I suggest you immediately select your spot for the presentation. Please make sure your presentation is located in the correct group – Tuesday Dec 15th or Thursday Dec 17th
We have an updated layout thanks to Reymond – you will need separate areas for the two GIF animations. Please be sure your slides are in order!!