Lab Description:
This lab is a basic demonstration of creating an app for Android devices. In this lab, we create a simple app named My First App that will allow us to enter in text and then output that very text after hitting send.You need to download the ADT (Android Development Tools) and install it in Eclipse. After open a new project in Eclipse from the Android folder and select Android Application Project. In this menu, you will give you application a name, your project a name, your package a name, and your target and minimum Android OS requirements.
Now that you created your project, you should know about important folders located in the project folder. It will contain a folder called “src/”, this folder will contain a class called Activity that will run when start your app. Another folder called “res/”, it will contain important subfolders that we will use which are “layout/” , “values/” (directory for XML files that define the strings located in the app). Now go to the “/layout” folder and open the “fragment_main.xml” file. With this “fragment_main.xml” file, type <Linear Layout “things you want to modify in the app like height, width, and etc> </LinearLayout> and inside the brackets set the width, the height, the orientation of apps interface. To define the height or width, type android:layout_’what you modify (like the height or width’= “to a number value, match_parent, or wrap_content” (“wrap_content” attribute cause text on the screen to go to the next line when it reaches the end of the screen and “match_parent” attribute causes the view to fill entire area). To define the orientation, type android:orientation=”horizontal or vertical”. In the “values/” folder, and open a file called “strings.xml”. This file is where all the strings shown in the app’s interface will appear. Strings that are mentioned would be for the app’s name, for any buttons used, and etc. Within the file put ‘<resources> </resources>’ and within resources to define the string, you type ‘string name=”nameyouwanttoassigntothestring”> The message you want to say </string> . Repeat this process for any other strings you will use, for our purposes we will make one for button text, message field text, settings, and activity. To create a button, you to go “fragment_main.xml” file and add to code ‘<Button … />”, in between those brackets set the height and width of button’s text, and the string it will use to put on the button from the strings.xml layout file. This button will be what makes the app output the text we just wrote. To define the string that appears in the button, you use ‘android:text=”@string/button_send (the one defined for the send button in strings.xml) ” ‘.Now we will add a message in the textbox to tell the user to enter text in the texbox. We will accomplish this by adding code in ‘<EditText … />’. You will specify height, the width, the string that displays in the text box using “android:hint=” and then the string you will use, you made in the strings.xml file, and a weight value to consume the remaining space left after the string. Now we will make the output screen to display the user text. Let’s go back to “fragment_main.xml” file, and add a response for the send button. To create response go to the button part of the code and add ‘android:onClick=”themethodfromMainActivityclass”‘. So now open MainActivity class (located in “/src” folder). In main activity java class, add a method for button response. The method will be defined as public void “name of method” with parameters ‘View view’ to show text user entered when button is clicked. In this method we add an intent (an app’s “intent to do something”) object to start an activity called DisplayMessageActivity. We must import the intent class to allow the ability of the use of intent.
Create a second activity by click new in eclipse and then click on Android Activity. Select Blank Activity and click next. Fill in the activity name you will use for the output screen. Next we will get the text the user enters from the intent we created earlier by calling getIntent() and extracting the data from MainActivity by using intent.getStringExtra(Main Activity.EXTRA_MESSAGE);. Now let’s display what the user wrote. We will override the method of OnCreate in DisplayMessageActivity. We will add the a call getIntent(), extract the message from it, then create the text view by constructing an object for TextView, setting size of the text outputted. Below that code, use setContentView(textView); to set text view as an activity layout. Finally we are done with the app, we can execute it using the Android emulator called the Android Virtual Device in Eclipse. Go to “Window” menu and click on Android Virtual Device to create the emulator. In this submenu click new and select the specs of the phone you like to work on. Click Run and your app will execute for the first time.
Screenshots:
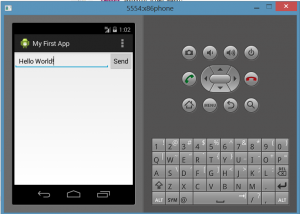
Message Entry
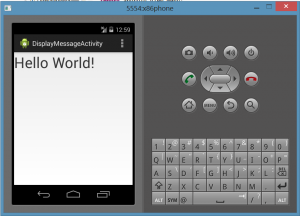
Message Output


