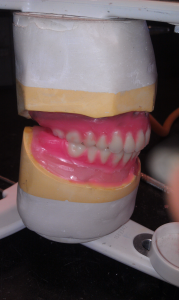
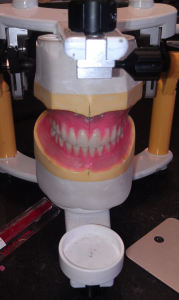
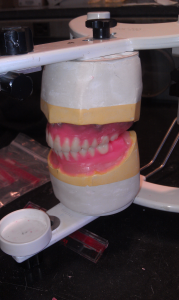
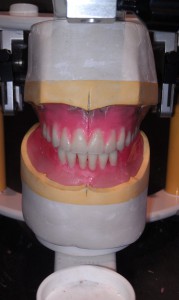
Set up of mandibular anterior and posterior teeth and festooning.

The set-up of mandibular anterior teeth are as follows:

You might notice that these steps are fairly similar to the maxillary set up of the anterior and posterior teeth.

1: First you do the same as you did with the maxillary and cut out a block of wax using you’re roach carver. for the two mandibular centrals.

2: Next you take and place them in making sure that they are at least 1mm away from the maxillary centrals horizontally.

3: If they do not fit you may need to take a hand piece and grind down the baseplate a bit. That way you can have room for them so they will not be up too high. Make sure that they are level with each other.

4: Next you Cut out another block of wax with you’re roach carver and place the laterals in right nest to the centrals, also making sure that they are level with each other.

5: Next its time to put in the canines. These teeth potrude out just a hair so they can protect the postrior teeth. they are just a bit above the centrals and laterals.

The set-up of Mandibular Posterior teeth are as follows.

1: As you are aware you must cut out the bloc of wax for you’re two pre-molars on the left and right sides.

2: Next you position them according to the curve of spee and the curve of the teeth naturally making sure that the occlusion for the Maxillary and mandibular casts are aligned correctly. It should be in a U shape.

3: Just as the maxillary should be in an upside down U shape.

4:Next are the left and right lower first and second molars. Y0u must cut out the wax again and place the first molars in the spots next to the second pre-molars. Then following the same procedure for cutting out the wax you place the second molars next to the first molars on the right and left sides.

5: Make sure that these teeth are slightly on an upward curve because they are following the teeth on the opposing jaw. which is creating the curve of spee. Next you cut out another piece of wax with you’re roach carver for the third molar.

6: After you cut out room on both sides first see if you are able to fit the molars in. ONLY if you are able to fit them in and have perfect occlusion you are ready to festoon.

7: If not you have to remove the third molar take a hand piece and gently grind away at the tooth. BUT make sure that it is not the occlusal surface that you grind away. Make sure it is the side you are putting into the wax.

The steps for Festooning are as follows:

1: Lastly after finishing both maxillary and mandibular set- up of you’re teeth you are ready to festoon

2: You must hold you’re roach carver on a 45 degree angle so you do not create food traps. also make sure you do not have any diastimas (space between the teeth causing gaps)

Setting up Posterior Teeth.

The set up of maxillary Posterior teeth are as follows:

1: After  you have set up the maxillary anterior teeth now it is time to set up the posterior teeth.

2: it follows the same method of removing the wax with the roach carver in little cubes and placing the teeth in the correct order.

3: when you place the four pre molars onto the wax make sure to constantly check with you’re occlusal plate to make sure they align they should be 1mm off the plate and that the lingual cups are the only ones touching the plate.

4: the teeth should also have a straight axis.

5: next you cut out the wax again for the first and second molars you place the first molar in and make sure when you use the occlusal plate that the lingual cusps are the only ones touching it. this tooths axis should be on a slight tilt because the teeth have the curve of spee.

6: lastly you take place the second molar into the space you cut out of the wax. the tooth might not fit so you will need to take a hand tool and shave down the tooth a bit. make sure to use the occlusal plate to constantly check and make sure that this tooth is not touching the plate but follows the curve.

7: lastly take the plate and check the whole maxillary model making sure that what you do the one side you do to the other side. following the curve on both sides and making sure that you have occlusion.


set up of anterior teeth

The steps to setting up anterior teeth are as follows

1: First you make sure you’re midline is prominent so you can set up the teeth accordingly

2: Next you take one of the centrals and place it next to the midline and make a mark next to the tooth then remove the tooth heat up you’re roach carver and cut out the little block of wax you have just marked.

3: Then you take the tooth and place it in. Make sure that the axis is straignt and do the same procedure for the other central. Then take the occlusail plate and place it under the incisal edge of the teeth to make sure they are both level with each other.

4: Next you repeat the same procedure lining up the laterals and making a mark then cutting the block of wax out with the roach carver. Make sure that the laterals are one millimeter off of the occlusal plate and that they both have a slight curve. The axis is also slightly tilted.

5: Finally the canines after repeating the same procedure with cutting out the wax with you’re roach carver you place the canines in. You make sure that these teeth are level with you’re centrals and that the axis is on a slight tilt. After you finish placing these teeth in make sure all of the inscisal edges make almost like a U shape. Also use you’re waxing spatula and put a little wax over the tooth up to the neck.

6: Be sure to keep you’re work neat and the wax smooth.