Enable Media Replace Plugin
This plugin allows you to replace an image in your Media Library, and automatically swap the old for the new version in all posts and pages where it is included.
Start by activating the Enable Media Replace Plugin.
There are two different ways of replacing images, the first being easier and quicker, but more restrictive.
Method 1: Just replace the file, keep the original file name and link
This method is simpler and the changes take place immediately, but it has two restrictions:
- The new file must be of the same format as the original. (For instance, if the original file is a jpg image, the new one must also be a jpg image). If your new image is of a different type, you will need to either convert it or use method 2.
- The file name will be kept the same as the original, and so will the link.
To get started with this method:
1. In your Dashboard, go to Media > Library.
2. Find the image you want to replace. Hover your mouse over the title, and among the options, choose Replace media.
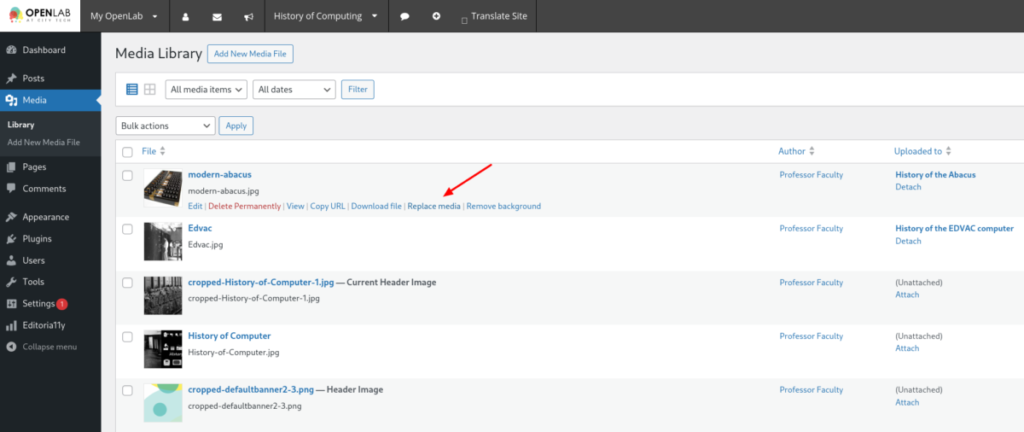
3. Click the white box labeled New and select the new image file. Remember that in this method you need to select a file of the same format as the original. In this example, the original is a jpg image, so the new one must be the same.
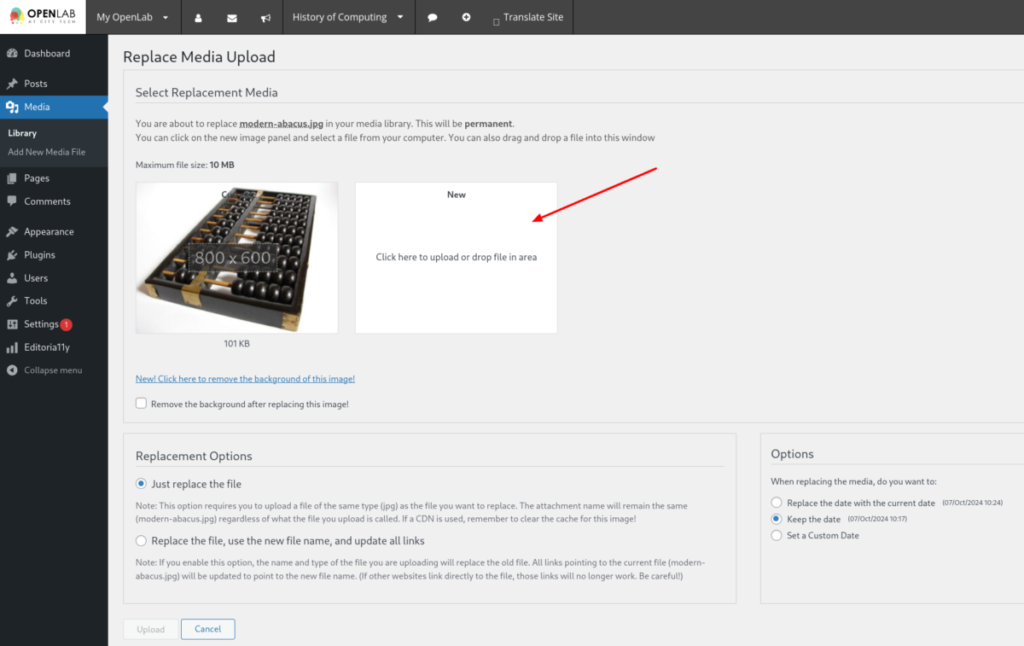
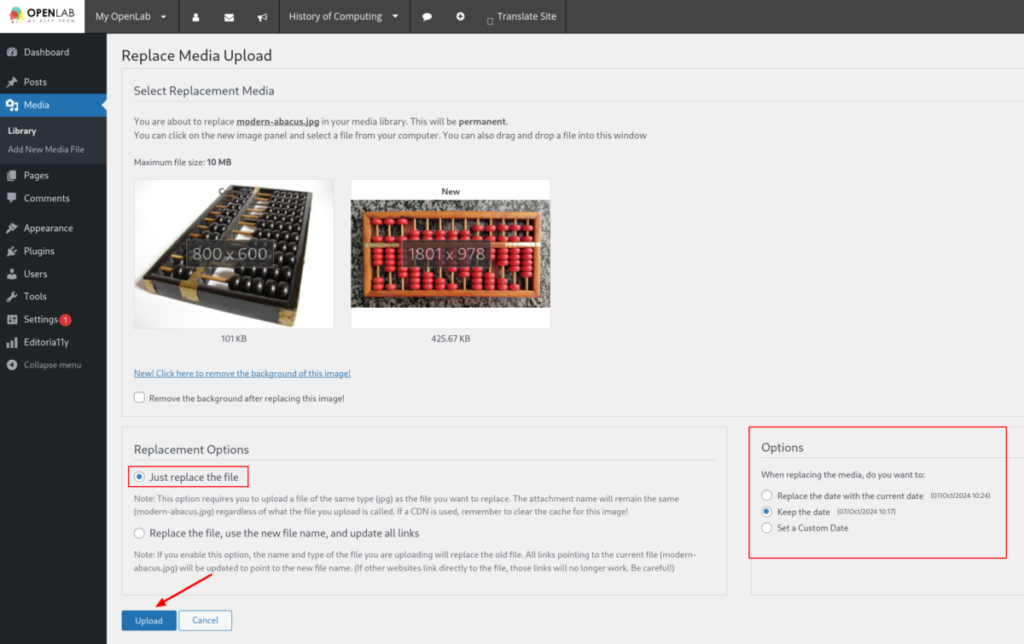
4. In Replacement Options, leave “Just replace the file” checked.
5. In Options, you can keep the date that the original image was posted, change to the current date or set a custom date.
6. Click Upload.
7. Now your image will be changed in the Media Library and in all posts and pages that contain it. If you check your post and you still see the original image, you need to clear your browser’s cache.
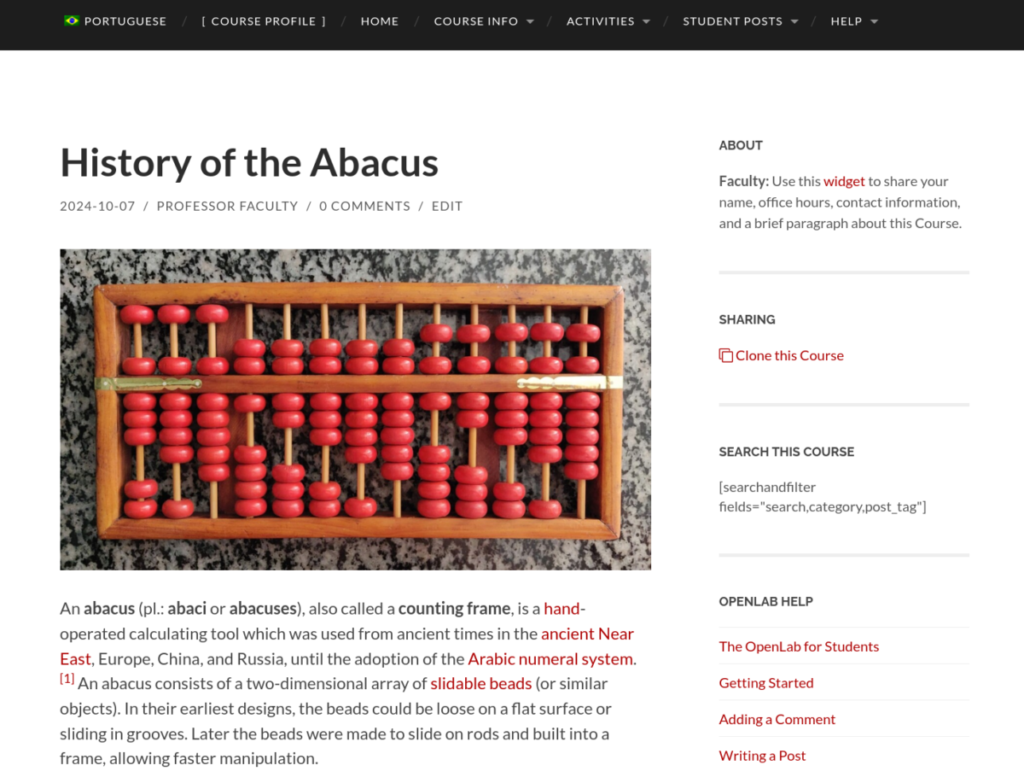
Method 2: Replace the file, change the file name and the links
In this method, your new file doesn’t have to be the same format as the original, and you don’t have to keep the same name or link. Notice: In this method there will be a delay of around 12 hours before the new images show up due to server caching.
The first 3 steps are the same as in Method 1 above:
1. In your Dashboard, go to Media > Library.
2. Find the image you want to replace. Hover your mouse over the title, and among the options, choose Replace media.
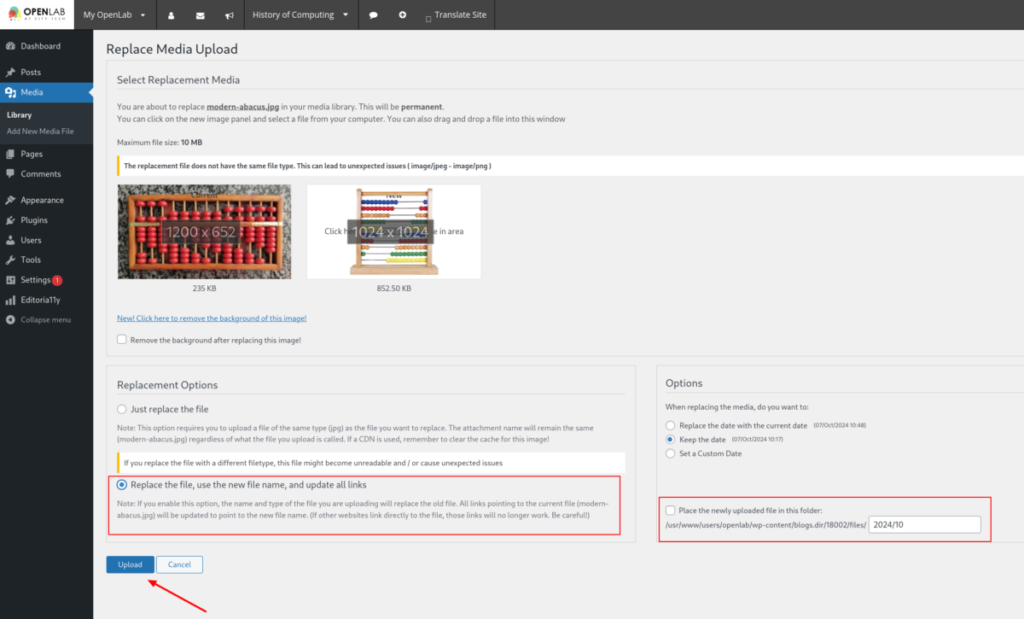
3. Click the white box labeled New and select the new image file. Remember that in this method you need to select a file of the same format as the original. In this example, the original is a jpg image, so the new one must be the same.
4. Then, in Replacement Options, select “Replace the file, use the new file name, and update all links”.
Note: all the links will be updated to the new image, which means that the old links will no longer work. If some external website is linking directly to that image, the image will no longer show up there.
5. In Options, you can keep the date that the original image was posted, change to the current date or set a custom date.
6. You have the option to place the newly uploaded file in a specific folder. This is suggested when it’s an image that you need to update regularly. Otherwise you can just leave the option unchecked.
7. Click Upload.
8. Wait for approximately 12 hours, and the image will be changed in all posts and pages where it is included.


