Easy Custom Sidebar
Step One: Create your Custom Sidebar
1. First, activate Easy Custom Sidebar under Plugins in the left-hand menu of your Dashboard.
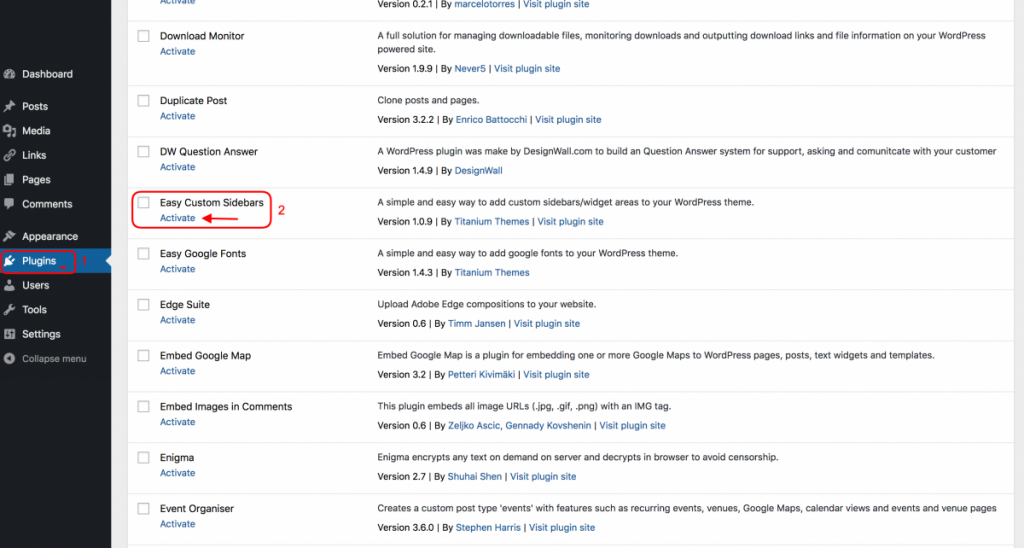
2. Go to Dashboard > Appearance > Theme Sidebars
3. Enter the Sidebar Name that you prefer (“Custom Sidebar 1” in this example) and click Create Sidebar.
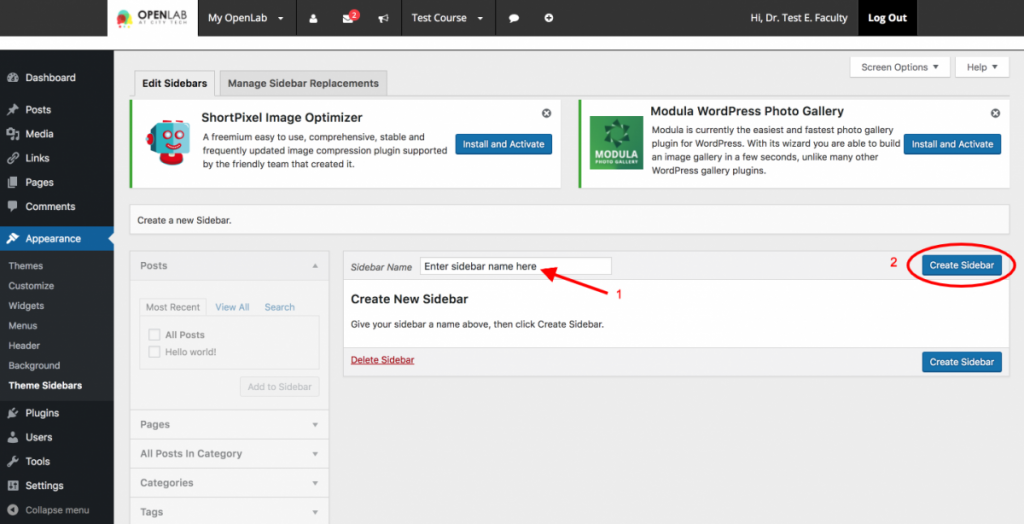
Once you have created your new sidebar you will be redirected to the Edit Sidebars screen.
Step Two: Edit your Sidebar
Now you can add, edit or delete your custom sidebars. You can also choose which pages, posts, categories, etc. you would like to apply this sidebar to.
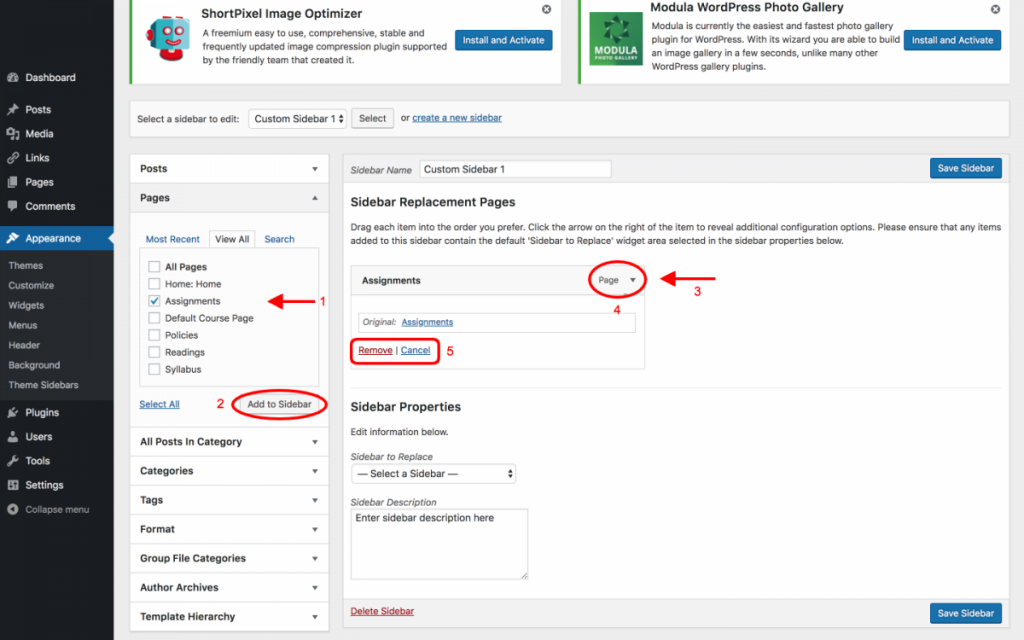
1. From the metabox on the left, select the items (posts, pages, categories etc.) to which you want to apply the Sidebar Replacement.
2. Click Add to Sidebar
3. Once added, the Item will appear on the right.
4. Click Toggle Options to show/hide additional options for this item.
5. Use Remove if you want to remove the current item from this custom sidebar, use Cancel to close the additional options menu for this item.
Step Three: Choose Sidebar to Replace
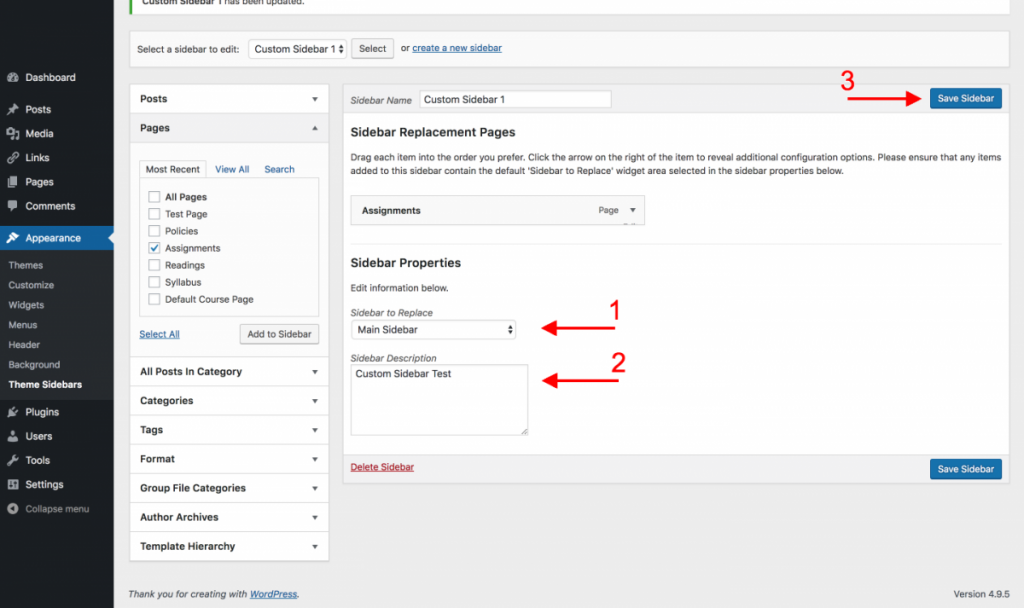
1. Click Sidebar to Replace to choose the widget area that this sidebar is going to replace (In this example we selected Main Sidebar.)
2. Click Enter Sidebar Description and add a description for this custom sidebar (it will appear on the admin widgets screen).
3. Click Save Sidebar to save it.
Step Four: Add Widgets to the new Custom Sidebar
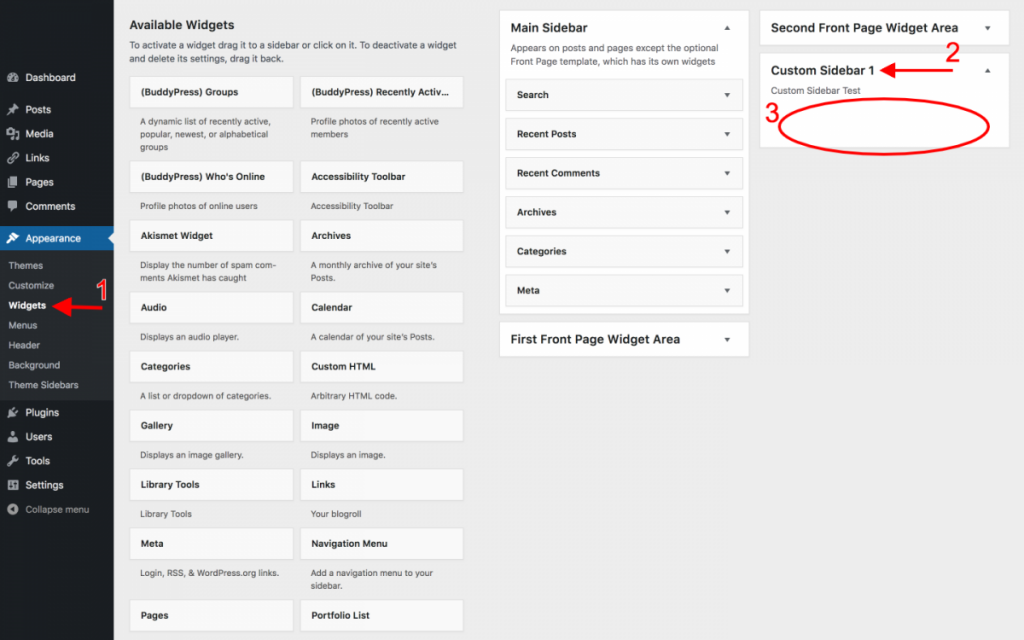
1. Go to Appearance > Widgets on the left hand admin menu.
2. Locate the new Widget Area we have created (in this example called “Custom Sidebar 1”). Notice that the description is the one we have already entered when we created this sidebar before.
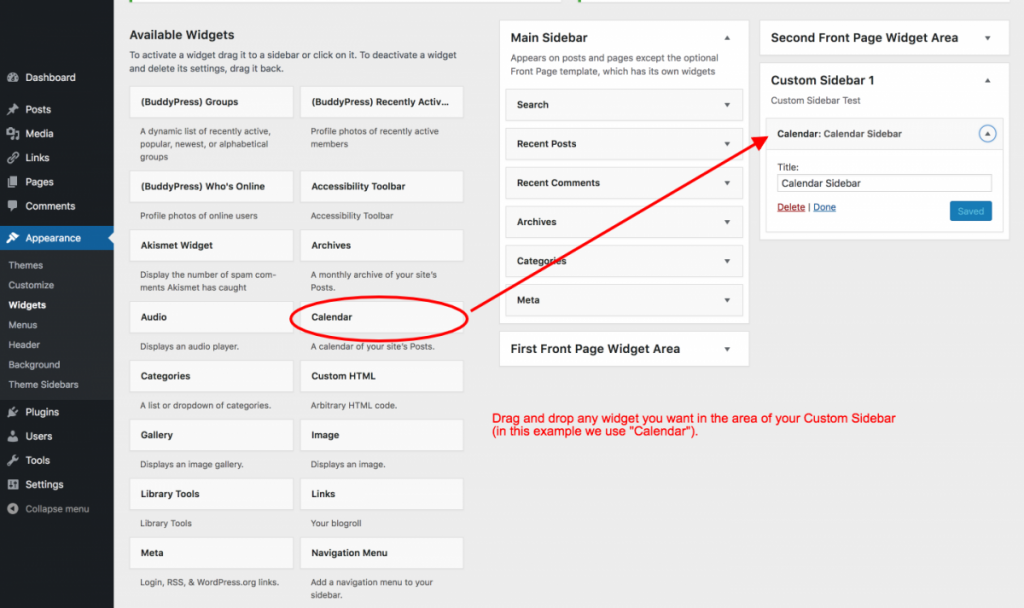
3. Drag and drop any Widgets from the Available Widgets menu to this widget area (number 3 in the screenshot). You can add multiple widgets.
Step Five: see the Sidebar on the Front-End
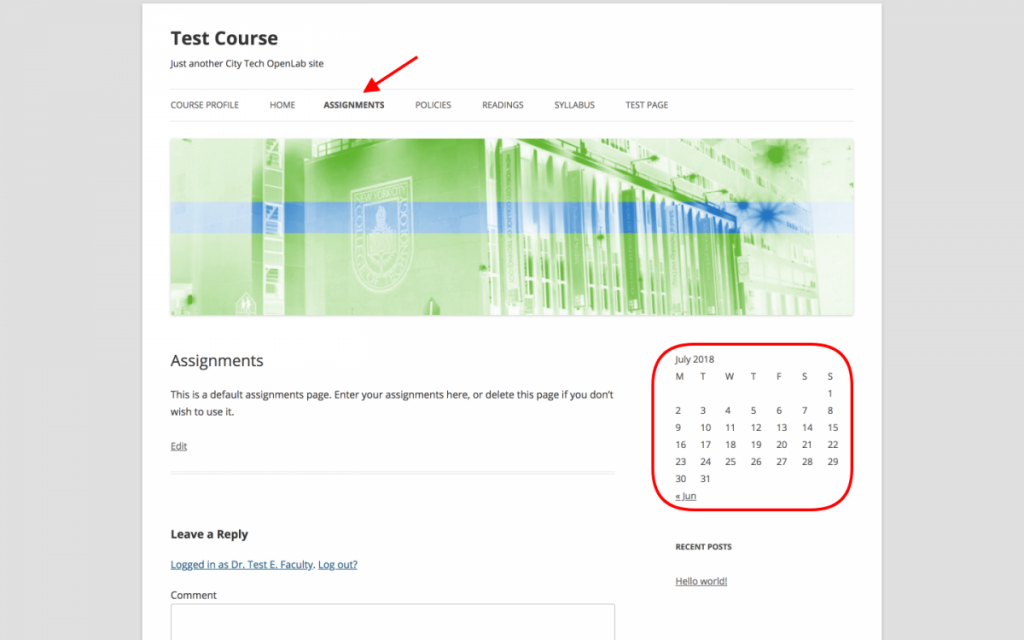
Take a look at the page in which you created the new sidebar replacement (in this example “assignment”). Notice the new Custom Sidebar!


