Weeks 3 & 4 ALL ABOUT INK

For The next 2 week’s readings please read and COMMENT that you completed the reading on each of the following blog posts.  You MAY read ahead, and it is suggested that you READ These before beginning the #Inktober challenge.


Week 3

Week 4

  • pen-and-ink-illustration-an-introduction
  • the-modern-art-of-hatching
  • master-study-the-art-of-albrecht-durer


Week 3 Sketches

MORE Studies from Reference towards your FINAL Project 1 ILLUSTRATION

Fill your 4 pages by drawing careful studies design elements that factor into your final art. For each of you this will be different.

Also CONSIDER The idea of developing a visual vocabulary!  If you don’t understand this….YOU DID NOT DO THE READING.  🙂

The important part here is that you SKETCH FROM REFERENCE.  For each design element try several sketches and points of view.  Consider these studies towards the final art piece.


Just a reminder, here are your Sketchbook Requirements : 

For this course students are required to keep an ongoing sketchbook which will be utilized a minimum of 1 hour, 30 min per page, for a total of 4 timed sketchbook pages per week.

  • Students can not to tear out pages and pages must be dated. Students may of course draw MORE than the required 4 pages. Sketchbooks will be reviewed weekly as part of peer critique.
  • This Sketchbook will have the specific purpose of being a PROCESS journal.

Project One Final Pencil Sketch

Hello Class!  Be prepared to critique and turn in for grading Project One at the start of class next week: Tuesday 10/2


Brandy Ortiz – Celestial Seasonings Morning Thunder Tea

DUE WEEK 4 ( 9/21) FOR GRADING:


PROJECT 1, PART 3: FINAL PENCIL DRAWING


Incorporating the feedback you received on your concept sketches for Project 1, create a final pencil drawing to present to your art director.  This should be drawing at 1.5 or 2 times print size.


  • Base these drawings on the feedback you received on your concept sketches. These drawings must be in proportion to the specs of your final art.
  • This drawing should be done at your highest level of finish, and should incorporate the use of reference to improve upon your chosen concept sketch.
  • Use Adobe PS or a photocopier and light box to scale UP your drawing and transfer it to drawing paper or bristol board.
  • DO NOT INK
  • Create a digital mock up of your art with the text on the can or Box using InDesign.  Print this for submission with your illustration.


* Continue Collecting Reference Images related to your concepts as well as inspirational images and reference. Be prepared to share your inspiration by next class.

IMPORTANT :

*Be sure to ensure your art is drawn to the correct proportions BEFORE you begin.

*Be sure to tape down your edges clean finished edge.


Advice on Inking

Ink can be a messy medium!

Before you begin your work in this medium, here are some helpful tips and tricks.

1472596863412

  • Always warm up.

Just as you would warm up before exercise, warm up before using ink. Take the time to work on your lines and strokes on a separate sheet of paper before you begin working on your actual illustration. This will ensure that you have proper command of your hands.

This image is of comic book artist Jacob Halton’s inking warm-up, which he does in the morning to “get command of his hands”.

1472596872881

  • Don’t tape down your page.

Marks are easier to make when moving your hand in certain directions, so move your page around in order to make this possible. Work your hands in the way that they move naturally.

  • Begin with thicker lines.

This is a way to keep warming up your hands. Thicker lines are safer to work with until you feel confident enough to move onto the drawing’s fine detail portions.

  • Work in a way that minimizes smearing.

Don’t try to work on the illustration in a left-to-right method, or in any order like that. Instead, think about where your hand may smear the ink, and work in a way that minimizes that smearing. Some artists place a piece of paper or paper towel under their inking hands in order to help with this process.

  • Address large areas of ink last.

All paper, including watercolor paper or Bristol board, will warp when wet. It’s much easier to draw controlled lines on completely flat paper. Therefore, draw your lines before soaking any large areas with ink, otherwise known as executing an ink wash. Another method is to fill in large areas of ink, and then either allow for drying time or use a hair dryer before moving on to finer details.


Inktober Prompts

Here are the official Inktober prompts from Mr. Jake Parker himself. There are always a ton more of these floating around, so feel free to search and find one that better suits you, or don’t use prompts at all! Stock up on pens from ArtSnacks and JetPens or your friendly neighborhood (cooperatively owned and run) art shop, Artist & Craftsman. Remember this is another opportunity for Extra Credit in this course!

unnamed

Call for Entries: collectiveartsbrewing.com

Class-  Here is a chance to get some professional exposure for your work and earn some money from it!  And you thought this was JUST an assignment!


Watch this video about the competition from a previous winner.


We are looking for the best new and emerging artists around the globe to be part of our FALL 2018 CALL FOR ART.  This year marks an important milestone for Collective Arts. Our beer can be found coast-to-coast in Canada, and in the USA we are available in New York, Massachusetts, Connecticut, Maine, New Hampshire and Vermont. Collective Arts will be launching in Chicago and Nashville this fall and our beers can be found in Australia! We want to show the world YOUR work as we continue to grow. 


Project 1: Beverage Label Reboot, Part 2


Bitter American


DUE 9/25 :


PART 2: Concept Sketches


  • Create between 3 and 4 concept sketches to present to your art director in your sketchbook.
  • Base these drawings on the feedback you received on your thumbnails. These drawings should be in proportion to the specs of your final art. They should fully and accurately describe your visual concepts to your art director and provide clear images for him/her to choose from.
  • These sketches should be done at a high level of finish, and should use your sketchbook work as well as your reference to help you come up with the best possible sketches.


* Continue Collecting Reference Images related to your concepts as well as inspirational images and reference. Be prepared to share your inspiration by next class.

IMPORTANT :

*Be sure to use a ruler to ensure your rough sketches are the correct proportions  BEFORE you begin them.


Week 2 – Jillian Tamaki on Idea Generation

Please Read Jillian Tamaki, Idea Generation

THEN, RESPOND TO IT IN OUR DISCUSSION FORUM:

In a few sentences discuss the article.  Consider questions like:

What are Concepts?  What methods does Jillian Tamaki use to generate hers?

Are there specific steps she takes?

Do you have other methods unique to your process?


Be sure to read eachother’s observations BEFORE posting your own.

Sketchbook Week 2 : Visual Vocabulary

This short excerpt from Yuko Shimizu‘s blog post considers the importance of developing a unique visual vocabulary. After reading this article, consider how you can use your sketchbook as a tool to developing your own visual vocabulary.


“ I believe many of you who are reading my blog are aspiring illustrators. If you are, here is something you may want to remember, or to work on, if your art school instructors haven’t taught you already: we have to be remembered by something we are good at, so when a prospective client sees a topic that needs to be illustrated, they know who to call.


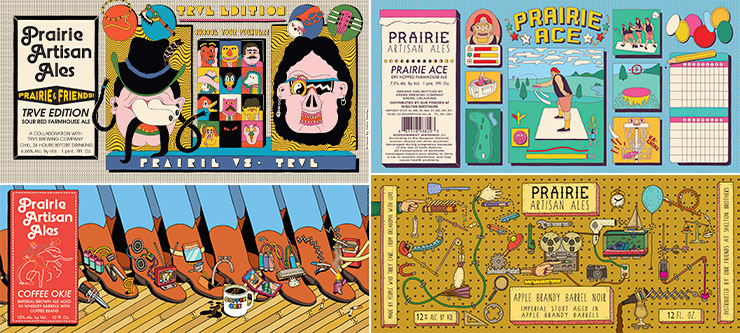
The most obvious themes prospective clients think of in connection with my work are Japanese or Chinese themes. I am Japanese, but I had also studied Cantonese for three years, and I have strong interest in Chinese culture. And people somehow see that in my work. There are other themes, like sexy girls, action and sports, comic-book look, snow, and water and underwater themes.”


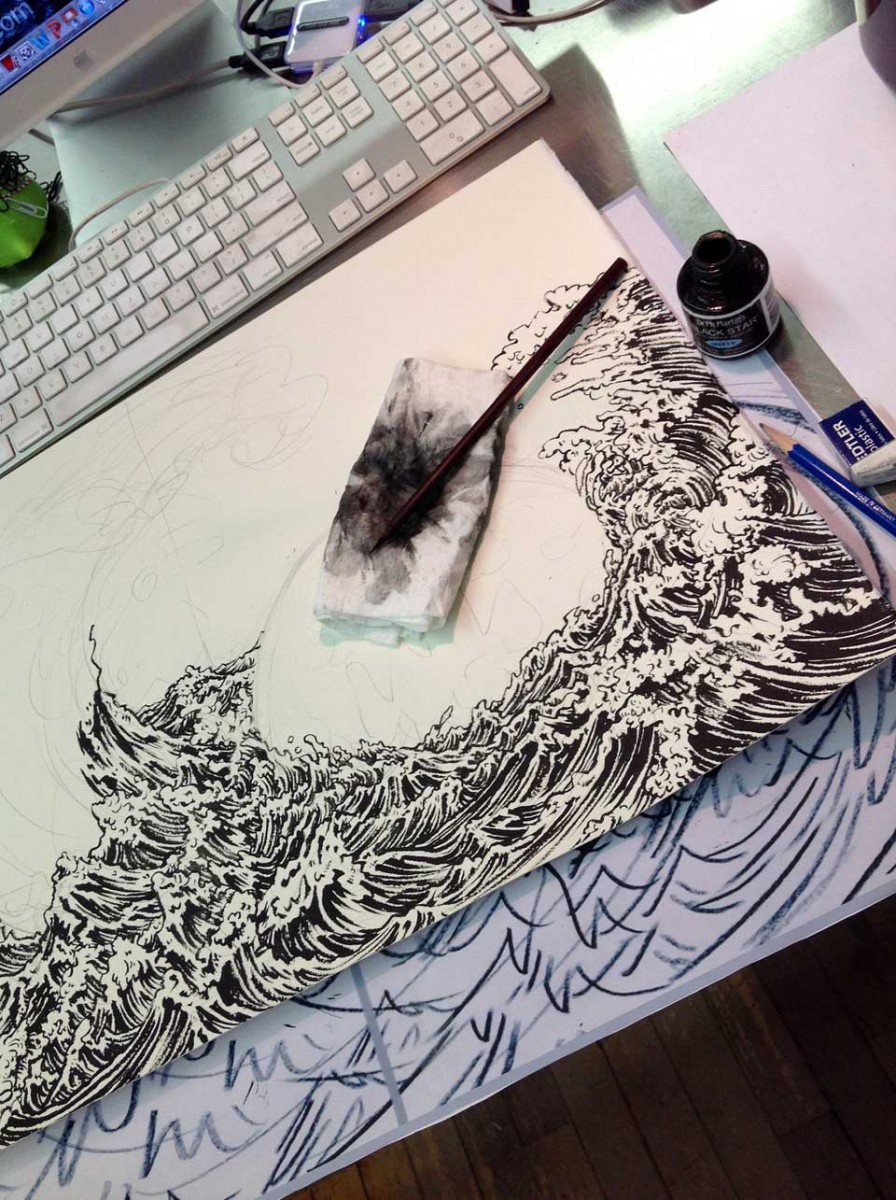
What kind of things are you interested in drawing?

What visuals might become important visual signatures for you?  Draw 4 pages exploring YOUR visual Vocabulary in your sketchbook.

Post your thoughts on this along with your 4 Sketchbook Pages.

*Be sure to Tag them Sketchbook!

Week 2 – How Next Level Design is Driving the Beer World

This Article by Veronica Meewes for the online design magazine PUNCH, explores the “new generation of eye catching label design” with a close up on five example breweries and the inspiration behind the labels that have become “ their visual calling card.”

After reading this article, consider how YOUR label design is a visual calling card for the product.  

  • Write a few sentences describing the intention of your label.
  • Find a label design which uses illustration in a manner you find interesting, eye catching or inspirational.
  • POST the designs along with your comments on them for DISCUSSION next week.