Managing due dates and assigning problem sets are some of the most frequent actions for a WeBWorK professor. This post will guide you through the necessary steps for assigning existing problem sets, and managing their due dates.
When your WeBWorK course was created for you, it was created with a collection of problem sets ready-made for you. You can find the list of problem sets by clicking on “Hmwk Sets Editor” in the lefthand column.
You should see a grid a the bottom of the page listing all the pre-made problem sets and their (outdated) due dates.
Each problem set has several characteristics that are important to understand.
1) Visibility – if a problem set has “Yes” in the “Visible” column, then it is visible to any student to whom it is assigned – regardless of whether or not the assignment is Open or Closed. All assignments are created with a “Yes” visibility value.
2) Open – the “Open Date” marks the time when students may begin scoring points for a particular assignment. A student cannot view any problems in a set that has not yet reached its open date.
3) Closed – the “Due Date” marks the time after which students may no longer score points for a particular assignment. If a student is assigned a problem set and works out problems AFTER the due date, their answers will not be scored (but WeBWorK will still tell them if their answers are correct or incorrect).
It is recommended that any problem set only be assigned in WeBWorK when it is also assigned to students in class. (Core classes have a pre-made problem set for every class scheduled in the departmental syllabus.) If you assign a problem set to students BEFORE you actually assign it in class, it is recommended that you turn the problem set’s visibility to “No”.
We will now see how to edit all three of the aforementioned characteristics.
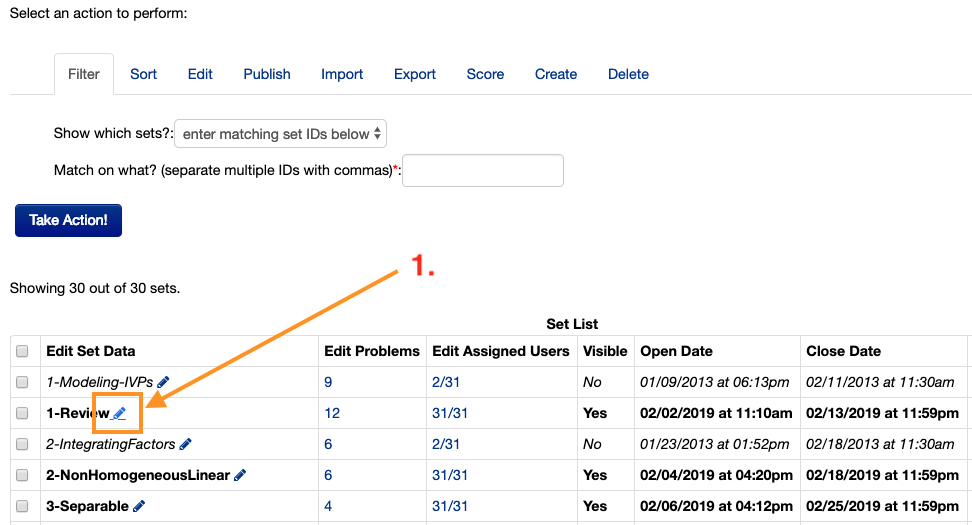
To change the Open Date or Due Date for a single assignment,
just click the pencil icon next to the set name:
To change the Open Date or Due Date for multiple assignments,
select the “Edit” tab:
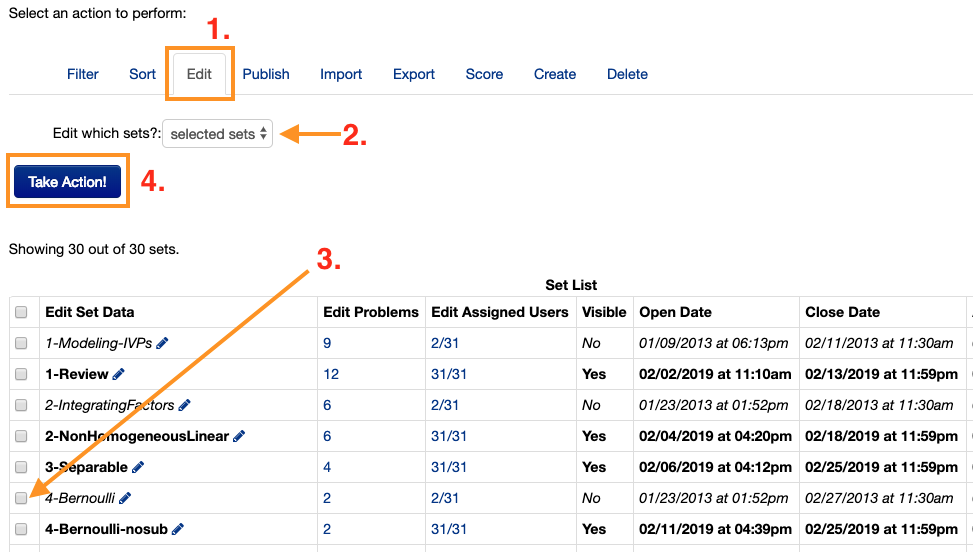
and then check the box next to the problem sets whose dates you wish to change.
No matter which method you used, you’ll now have the option of changing any of the dates for the selected problem sets:
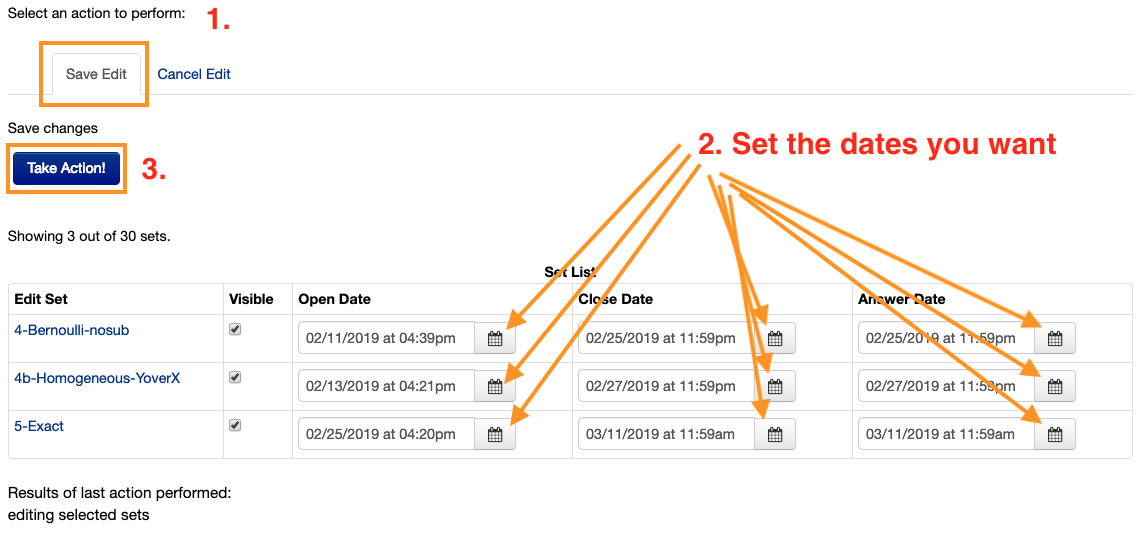
Open Date: the date that students may begin working on the assignment.
Close Date: the date that students stop receiving credit for their work on this set. The set will remain available to students.
Answer Date: the date that students will be able to access the correct answer (and solution, if available) for the problems in this set. Keep in mind that students will have access to the answers after this date – so if you want to re-open a problem set, be aware that students may have already seen the answers!
It is also possible to set individualized due dates (in case a student needs an extension for a particular problem set or sets). We’ll handle that in “Advanced Topics”.
One final note about the “Answer Date”: When a student (or you, even) downloads a copy of a problem set, they have the option of including the answers in the resulting PDF file. This option will only work for students after the “Answer Date”. I usually set the answer date for 1 or 2 days after the due date – that way, I have a chance to extend the due date for a problem set, if necessary, before students can download the answers.
Assigning Problem Sets:
Once you’ve set the due dates, you must assign the problem sets to your students. This is a very easy process:
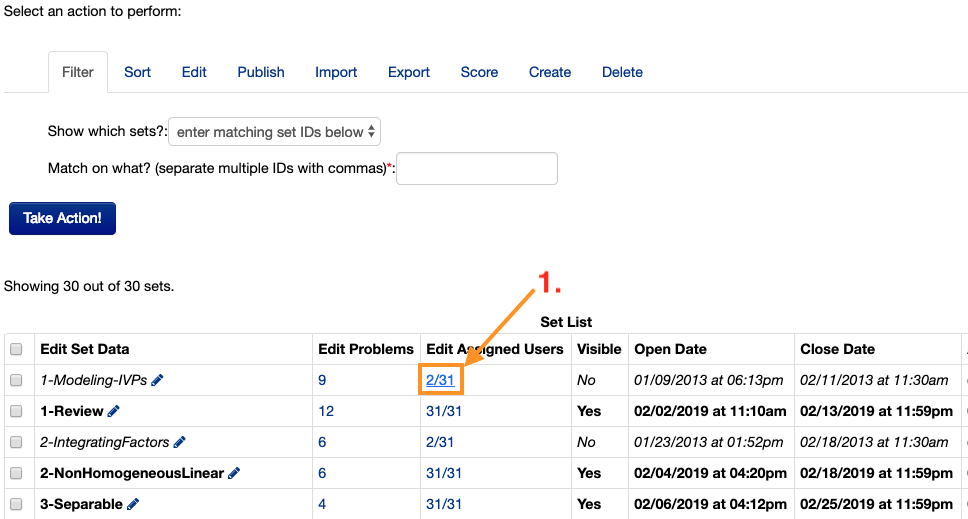
Just click on the link in the “edit assigned users” column.
Then, on the next page, there’s a big blue button that does exactly what we want:
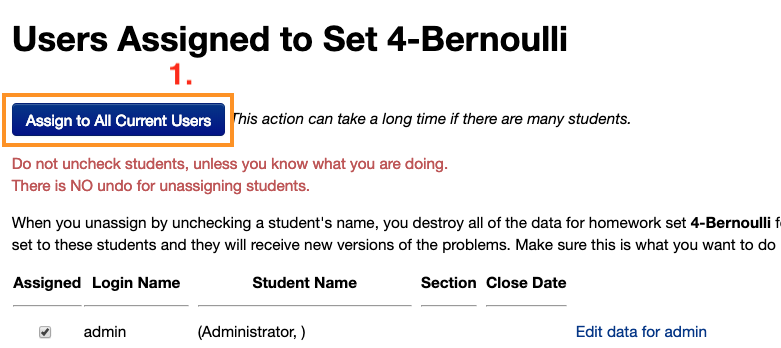
And that’s it!
Only in rare circumstances will the following be necessary:
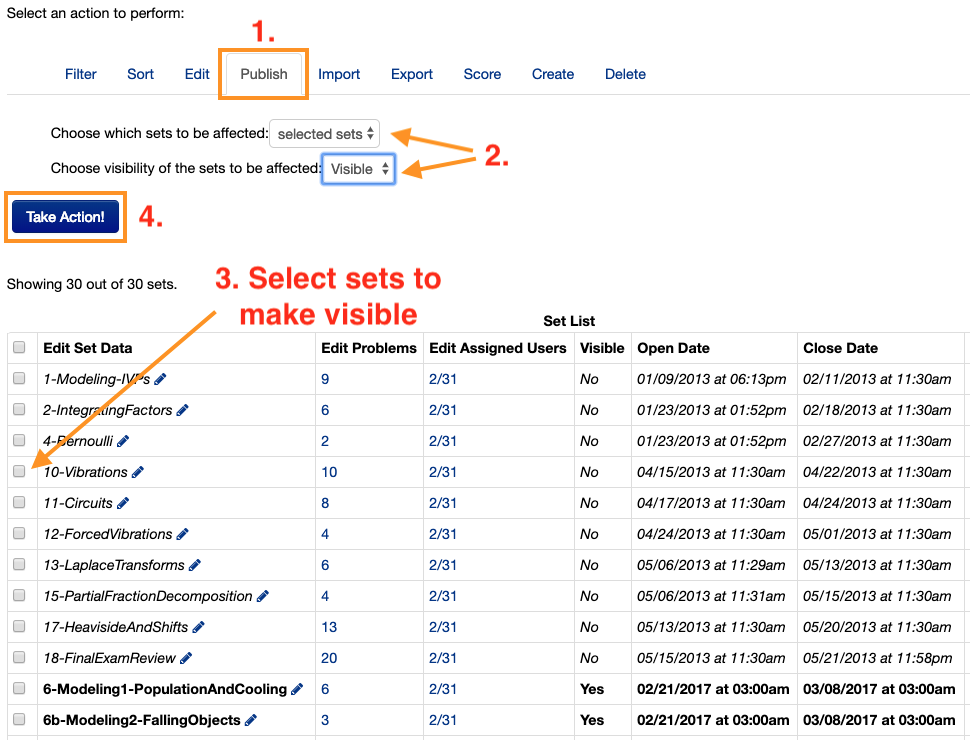
To make a problem set visible or hidden,
select the “Publish” tab, and select either “hidden” or “visible” from the dropdown menu. Then select the sets that you want to make visible (or hide) and finally, Take Action!