
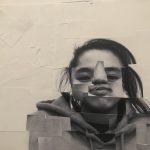
For this project, I learned a lot about broad value range and narrow value range, two words at the beginning had no clue what they meant at all. I gained more experience on photoshop since i am a newbie at it so that’s is useful for me and something i can apply in the future. The things i could have done better might have be the painting, since i was kind of rushing it even though it doesn’t look like it, but with more time i could have put into it, the results would have been more better. However, I’m still proud at the end of the finishing of the painting.
Valued- Added Portraits: Phase 2

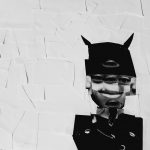
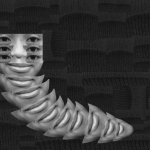
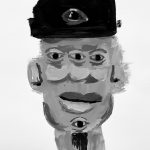
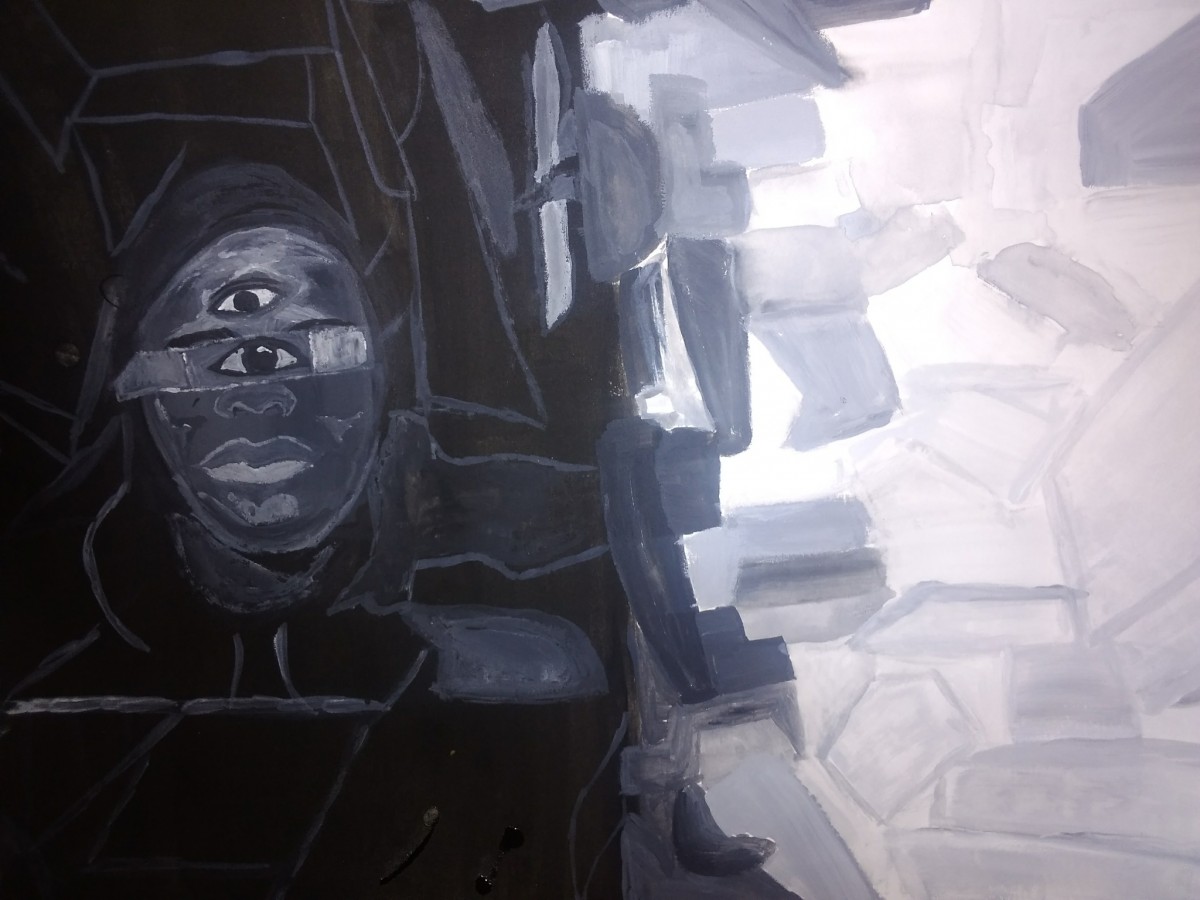
For this phase of the project, you can tell the different between my images of which one is broad value range and which is narrow value range. For the broad value range, i wanted my figure to stand out with the plain white background compare to the narrow value range that has a black background. The center point for the broad value range image is the three eyes i have since it draws more attentions and how it looks unique and alien like. Meanwhile for my narrow value range image, the focus point is the nose in the column of eyes because its only one nose in the sea of eyes and that my lower face is like a tail, almost like a sea animal that’s alien like roaming the sea. the hours i spent on this was 3 hours max.
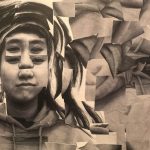
Valued- Added Portraits: Phase 3
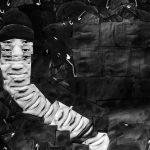
So here you see the 4 images i worked on for this project. The painting is based off of the broad value range image that i had to glue on paper. while the narrow value range is digital made on photoshop and is based off of the narrow value range i also had to glue on paper. The easiest i have to say was the painting since I had some knowledge on doing shadowing to contrast and adding highlights to certain spots to bring out the features. This was the most complicated project to do because i didnt’t get it at first and didn’t understand until a little later. The narrow value range is the revision i did with the help of my fellow classmates and teacher and their feedback to how improve my work more. I spent a whole day if you count all the hours invested to each image you see.
Project#3:phase 4
This project was very interesting. My favorite part of this project was painting, it allowed to practice some different techniques to help improve my painting skills. I also love making collages out of copies of a photograph of myself to create something new. I kearbel alot about broad and narrow value ranges. These ate things I will take into account when creating an image or taking a photo .I also learned how to drag a viwers attention towarst the focul point of an image.
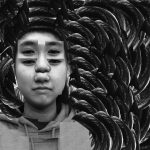
Project#3: phase 3
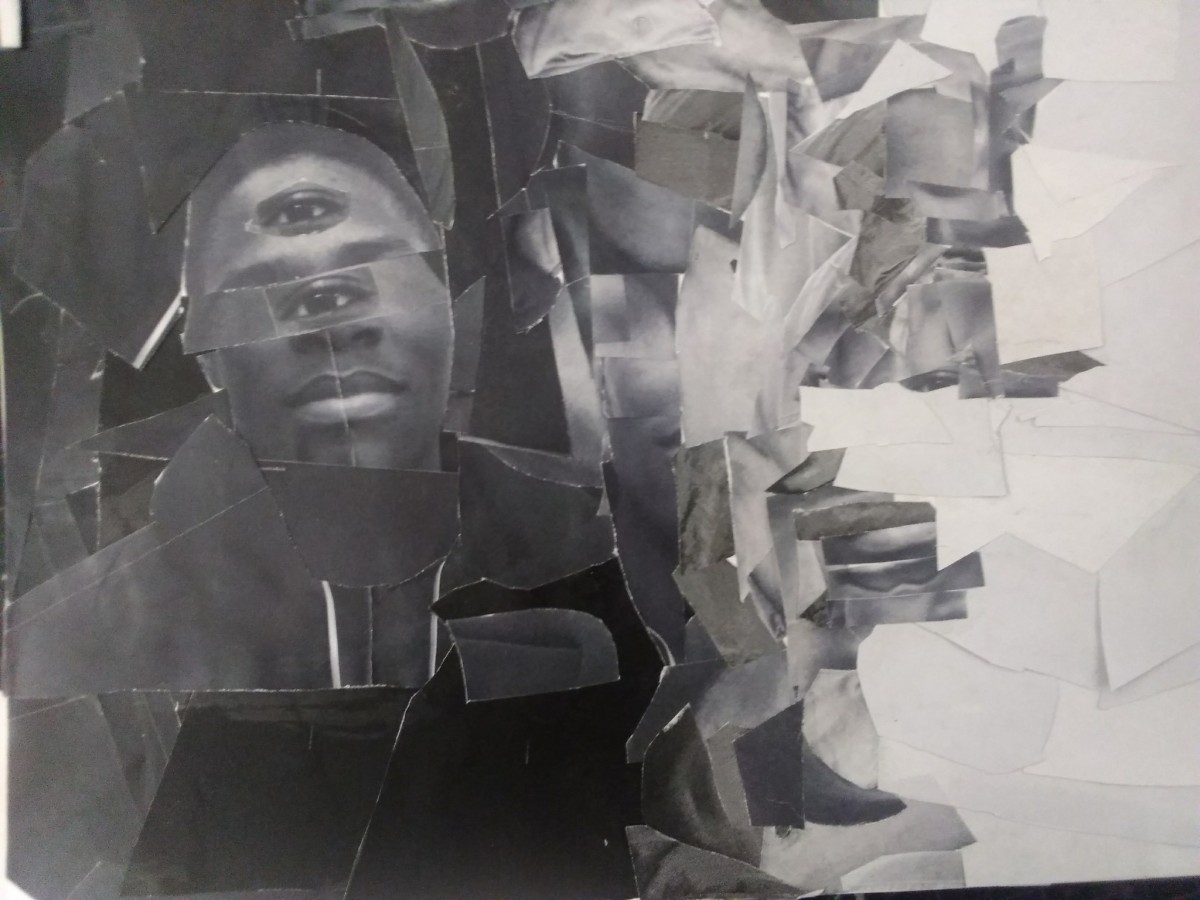

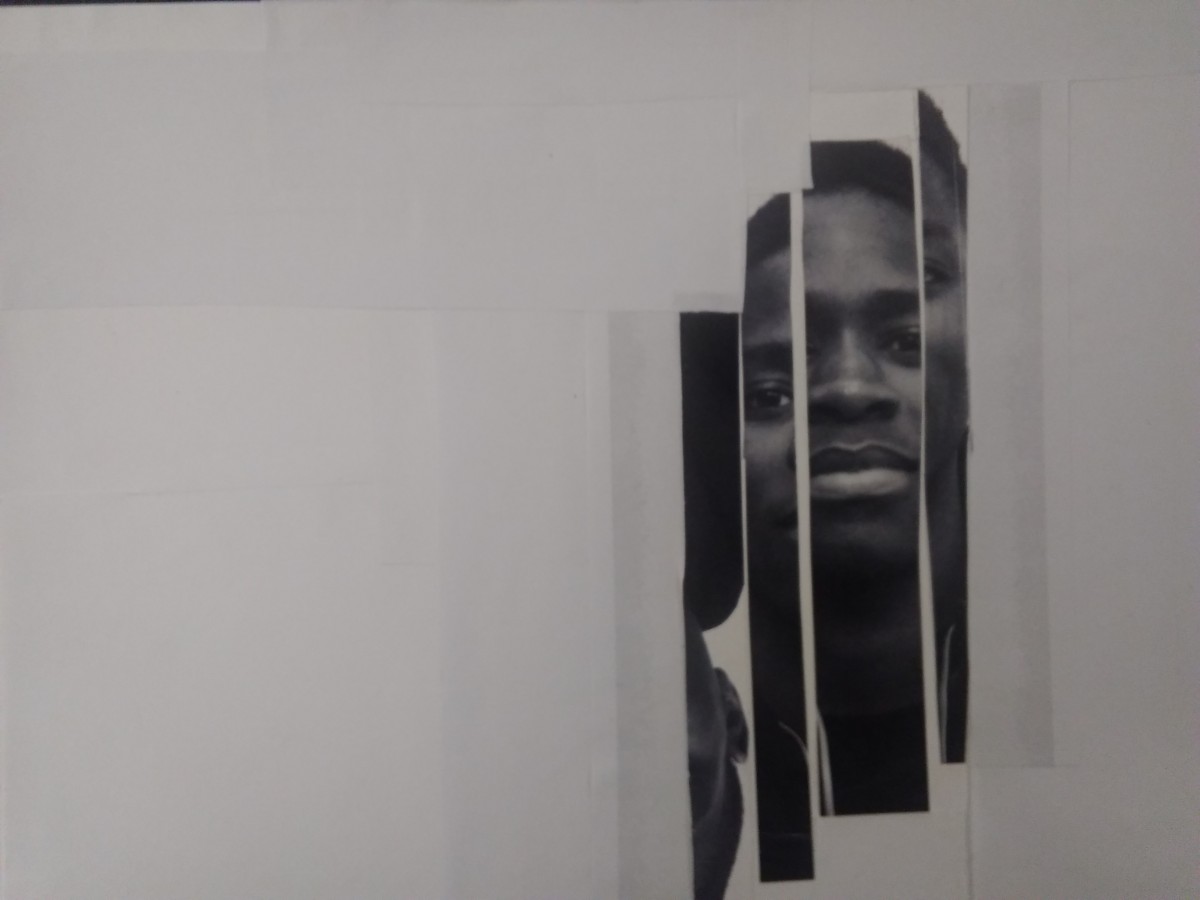
The first image is my painted Narrow Low-key collage created with gouache paint. The second image is the original collage I created and used as reference the create my copied versions of it. The third image is my Broad Value range digital collage. This image was created on photo shop. The last image was the original broad value range collage I created and used this image as a reference to create the the third image.
Time: 7 hours
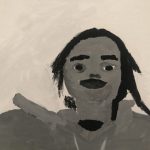
Project#3: Phase 2
Broad range
This is my broad image collage. This is image represents a broad range value because there is almost a neutral light to dark distribution in this image. The focus point in this image is my nose. The way the images is alligned kind of helps lead the viewer to the focus point.As you can there is a strong stable figure/ground relationship.
Narrow Low-Key Value range
This is my Narrow value range. This represents my Narrow low-key value range because there is mostly darkness in this image compared to the light, it also transition from dark to the little bit of light you see near the end of the right side of the image. The focul point in this image is the eyes. I put them in the central of my face and kind of stacked them to draw attention to themselves and kind if help lead the viewers eyes towards the focul point. This image has an unstable Ambiguous figure/ground relationship. There’s a lot going on with the collage in this image that makes it difficult for you to determine what is the figure and what is the ground.
Project#3:phase1


Hours worked: 1 hour
The first image represents a high-key/light value range. This is because there is mostly light in this image and less darkness or shadows in the image. This image also kind of graduates from dark to light creating the feeling of success or hope.The second image represents low-key/light value range. This is because there is little to no light in the image, instead there is mostly darkness and shadows. This image kind of expressea despair, mystery,and creepiness. Lastly, the final image represents broad a broad range image. This is because there a similar amount or equal amount of light and darkness in the image, there’s a neutral clash between light and dark. This image expresses balance.
Value-Added Portraits: Phase 3 – Develop

Value-Added Portraits: Phase 1 – Discover
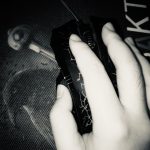
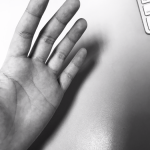

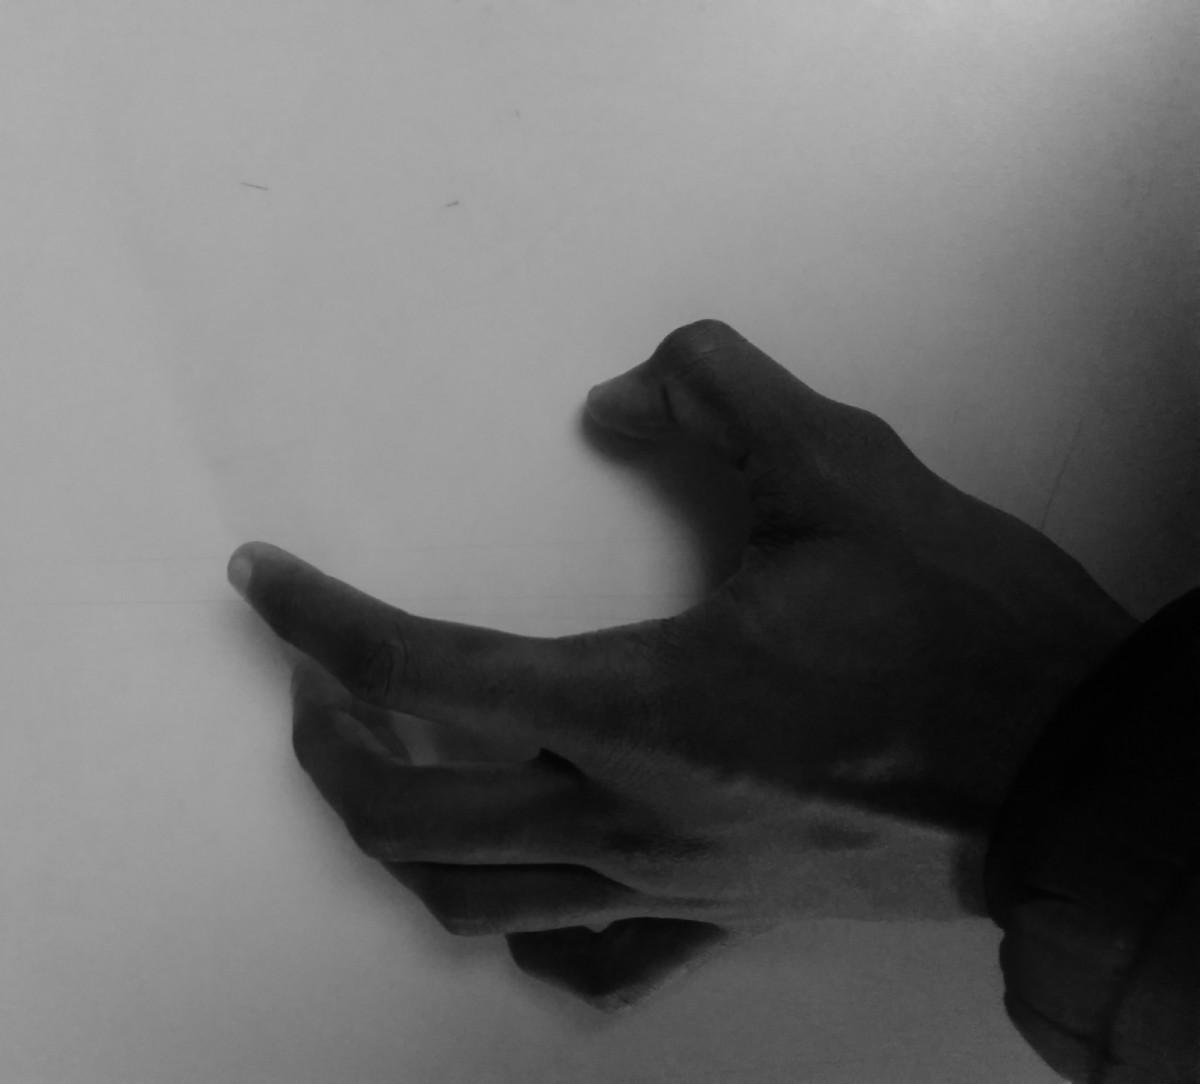
In these 3 photos, the lowkey is the darkest, it has a darker background and mainly focuses on the hand. It was taken at home with my mouse. The highkey has a lighter background and also focuses on the hand. The broad photo was taken in the class computer desks on a white keyboard as the background. Each of these creates a story of the hand working on a computer.
Value-Added Portraits: Phase 2 – Define
The right photo is the broad, you can see the broad range value because you can see the dark focus point from the white background. The focus point in the broad image is the nose.
The left i tried to make a high key type of photo that shows the dark focus on the figure which is the entire left side of the photo with a lighter background. But the main focus point is the eyes.

