
My task for this week was to solder the Wave Shield and then to test it with the SD card containing all .WAV files and the Arduino. My first step was to open the Wave Shield Kit package and check if all parts are there.
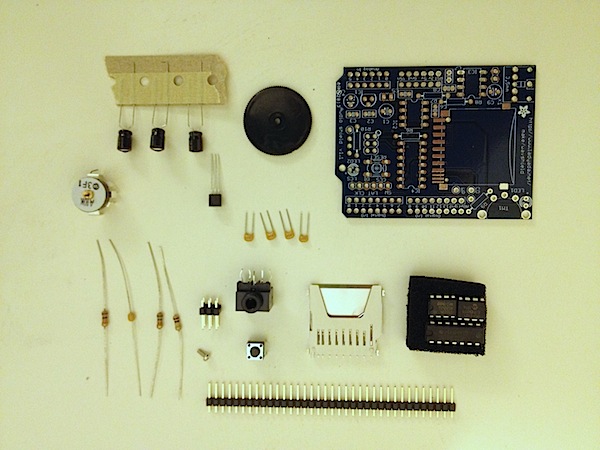
The kit contains the following components:
- PCB;
- SD card holder (surface mount);
- 3 IC chips;
- 1 voltage regulator;
- 1 thumbwheel potentiometer;
- 3 resistors;
- 6 ceramic capacitors;
- 3 electrolytic capacitors;
- stereo headphone jack with switches;
- pushbutton
- 6-pin ICSP header;
- 36-pin male header;
- jumper wire;
All components where there, so I was ready to start soldering.
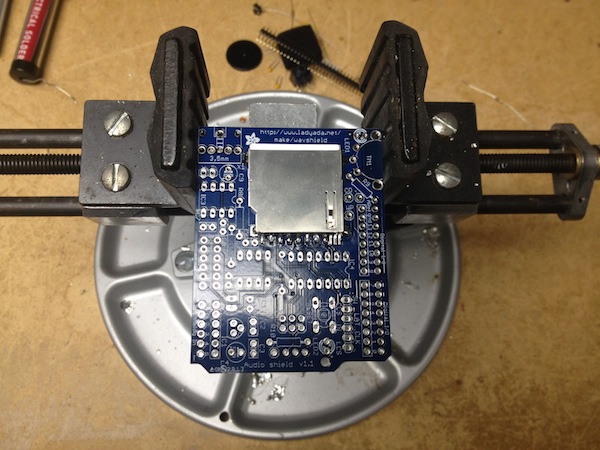
The first step was to solder the SD card to the PCB. It is the only surface mount component in this kit, and because the pins are very tiny and closely spaced, I had a bit of a hard time soldering them. Luckily the three rightmost pins (the thinnest ones) are not used, so I simply skipped them.
Next I added resistors and ceramic capacitors to the PCB. All these components are not polarized, so I didn’t have to worry about which way to place them on the board.

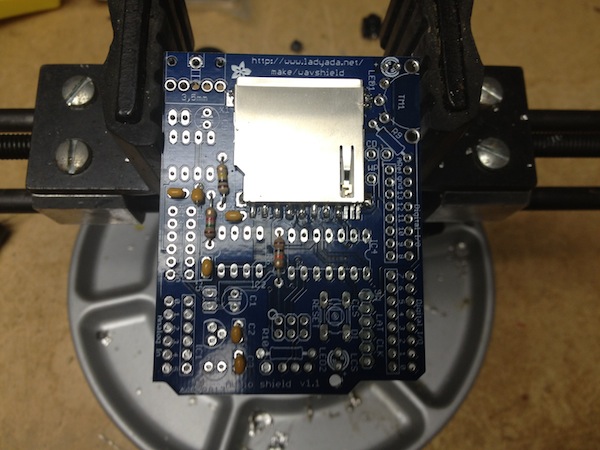
Then I populated the board with all the remaining components. When soldering the IC chips, I had to make sure that the notch in one end of the chip is lined up with the notch on the PCB’s silkscreen. Also, I had to watch the polarity of some components, like electrolytic capacitors. After an hour or so of soldering I was done.
Surprisingly, the hardest thing to solder were the header strips and the jumper wires. I broke the 36-pin header strip into 4 smaller pieces: 2 6-pin and 2 8-pin. Then I placed the headers into the female sockets on the board. The headers’ pins are much thinner than the sockets, so they kept sliding out. Also, I could’t bend the pins, because it would be much harder to put the shield on Arduino, if the pins are bended. So, finally I decided not to use the vise anymore, and soldered the headers on the table, using some finger acrobatics.
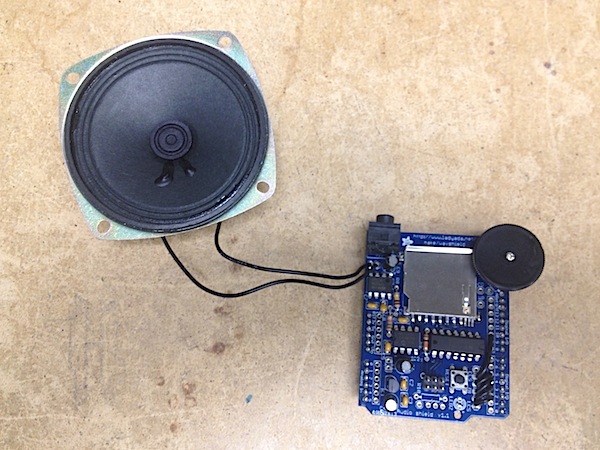
The last ‘hardware’ step was to add the speaker, which was really easy after the headers’ nightmare.
After I was done with the hardware, I proceeded to the software configuration.
The first step was to format the SD card for the FAT32 filesystem. Luckily when checking my SD card, I found out that it is already FAT32, so I just skipped this step.
Next I discovered that the Wave Shield is designed to play a very specific type of audio – 22kHz max, 16-bit, mono .WAV files. Since my files where 44kHz, they were not working. I had to convert all of them to a proper format. I decided to use iTunes, because it’s the easiest way to go, since all my files were already there.
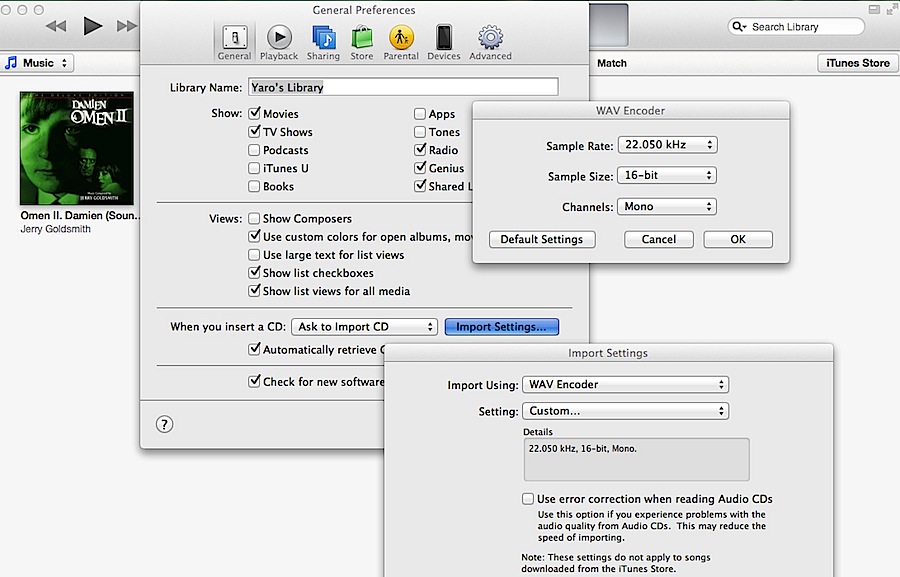
I opened iTunes and went to Preferences →General →Import Settings. Then in the pop up window I choose WAV Encoder under the Import using menu, and Custom under Setting. This gave me another pop up window with the WAV Encoder settings, where I changed the sample rate to 22.050kHz, sample size to 16-bit and channels to Mono.
After clicking OK I went back to the main iTunes window, shift-selected all audio tracks needed, then right-clicked and choose Create WAV Version from the drop down menu. In two seconds I had all my files ready and simply dragged them into the SD card.
I inserted the SD card into the slot in the Wave Shield, then hooked up the shield to the Arduino, connected Arduino to the computer and opened the IDE. Next, I downloaded the WaveHC Library specially created for the Wave Shield, added it to the Arduino IDE, then opened the dapHC.pde sketch from the WaveHC Library Examples menu, compiled it and uploaded it to the board. This Digital Audio Player sketch plays every .WAV file it finds on the SD card in a loop. After uploading the sketch, I was immediately rewarded for all my work: the shield was doing exactly what it was supposed to be doing: playing audio.
The next step will be to integrate the IR sensor both into the circuit and into the code, so that it actuates the Wave Shield. After we figure out how to do this, we will be adding other actuators (servo motors and LEDs) one by one. Also, Jorge is figuring out how to make the rabbit jump a little bit, so if we have time, we’ll try this as well. Another issue is to find out how to make the shield to play music randomly (not in the loop). Frank is working on this, and I’m also playing with the code over the weekend, but unfortunately with no positive results. Also, we found out that the Wave Shield is not loud enough to scare somebody, so we are planning to use John’s amplifier (or maybe some smaller model) with the shield. But this step is optional, because the shield is working now, so we will use the amp only after making sure the entire Hell Bunny system is working properly.


You guys appear to be in very good shape! I am impressed by how well laid out your update is!
Thanks for the really detailed update, it helps me to understand how far you have come with the Waveshield and the testing process. But it is too bad the sounds will not be “scared out your fur” kind of scary but with the amplifier we can definitely make it happen. Plus, it helps me to know what I should be focusing on in terms of the coding.