
Lab 1 – Intro to Arduino – Stephanie S.
Objective: To make our first physical contact with an Arduino, hook it up, test it and do the most basic code alterations.
Materials: An Arduino Duemilanove, and a cable connector, LEDs
Procedure: The first thing we all did was hook up our boards and make sure they were working properly. My neighbor, Irene, got me started quickly. The first thing that I noticed was the frenetic pacing of the blinking light, since I was already anxious it set me on edge so I uploaded the blink program and felt much better once it was changed.
When Professor Baker then told us to mess with the light, I speeded mine up and then slowed it WAY back down.
Both attempts were successful.
I then got a LED light, found pin #13 and inserted the light, being careful to mind the positive and negative points. See result below:
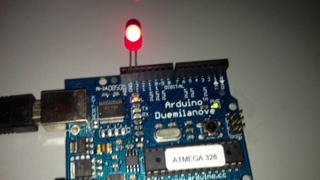
Thankfully, everything worked just fine and I didn’t have to trouble shoot.
We were then instructed to create two long and one short burst of light – (which would be the letter ‘G’ if it were in Morse Code and included a space afterward)
So then we all did that and below is the function portion of the code I created by altering what was already there.
void loop() {
digitalWrite(led, HIGH);
delay(2000);
digitalWrite(led, LOW);
delay(1000);
digitalWrite(led, HIGH);
delay(2000);
digitalWrite(led, LOW);
delay(1000);
digitalWrite(led, HIGH);
delay(1000);
digitalWrite(led, LOW);
delay(2000);
}
This was successful as well. I then traded boards with Irene, who was operating an Uno, changed the board in the Tools section, reconnected by selecting the new serial port.

