Contents
Needed for this class
- Lightroom Classic or Lightroom Photoshop App
Global Corrections
Global corrections adjust the entire file. In Lightroom classic, this includes everything in the basic panel: White balance, Tone and Presence. In the Lightroom/Photoshop App, it includes the controls under Light, Color and Effects.
Using the Histogram
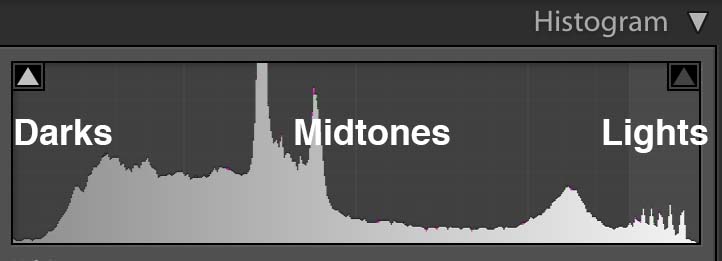
The histogram is a graphic representation of the tones in the photograph. It is a guide to exposure decisions. Most images look best when there is a full range of tones from black to white in the image. But there are no iron clad rules.
Below is a terrific photo shot by Bryan Rodriguez. The expression of the card player is perfect and you can feel him making a decision about what to play.
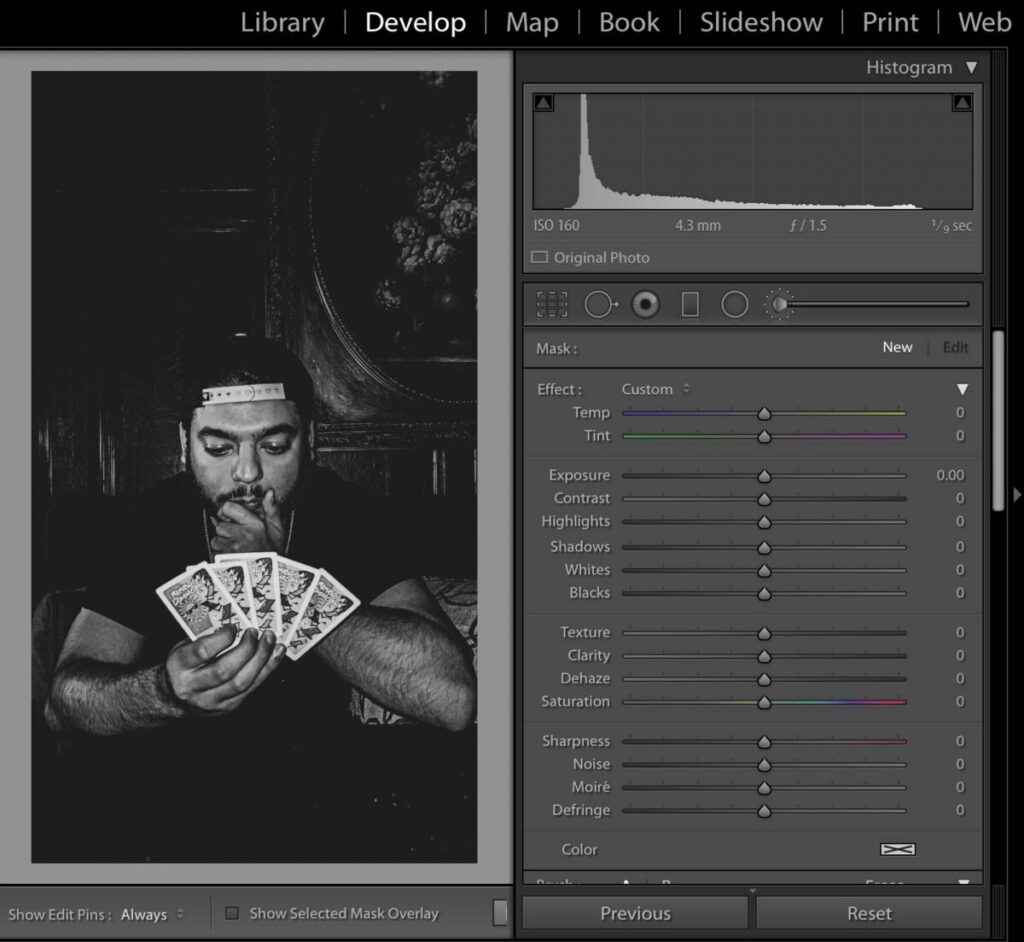
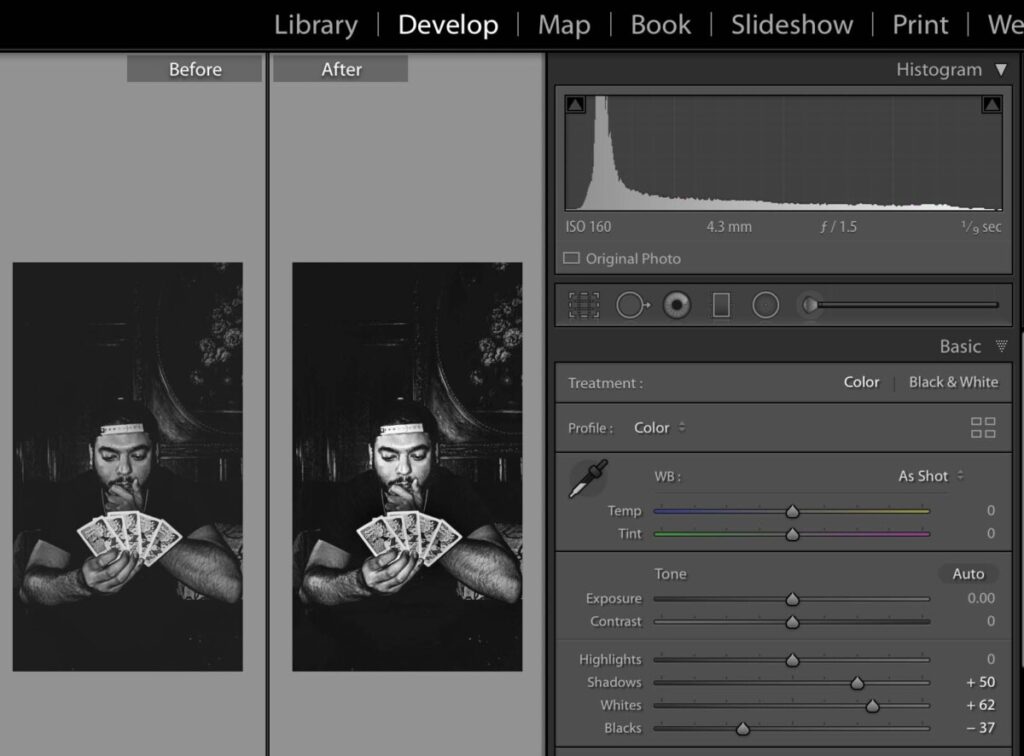
Looking at the histogram, we can see that most of the tones are dark. There is no true black or white. To raise the contrast of the image and use the full tonal range, use the following adjustments:
- blacks slider to the left until the data hits the left side of the histogram
- whites slider to bring attention to the right until the date just touches that aide
- shadows slider to +50 add detail to the dark areas
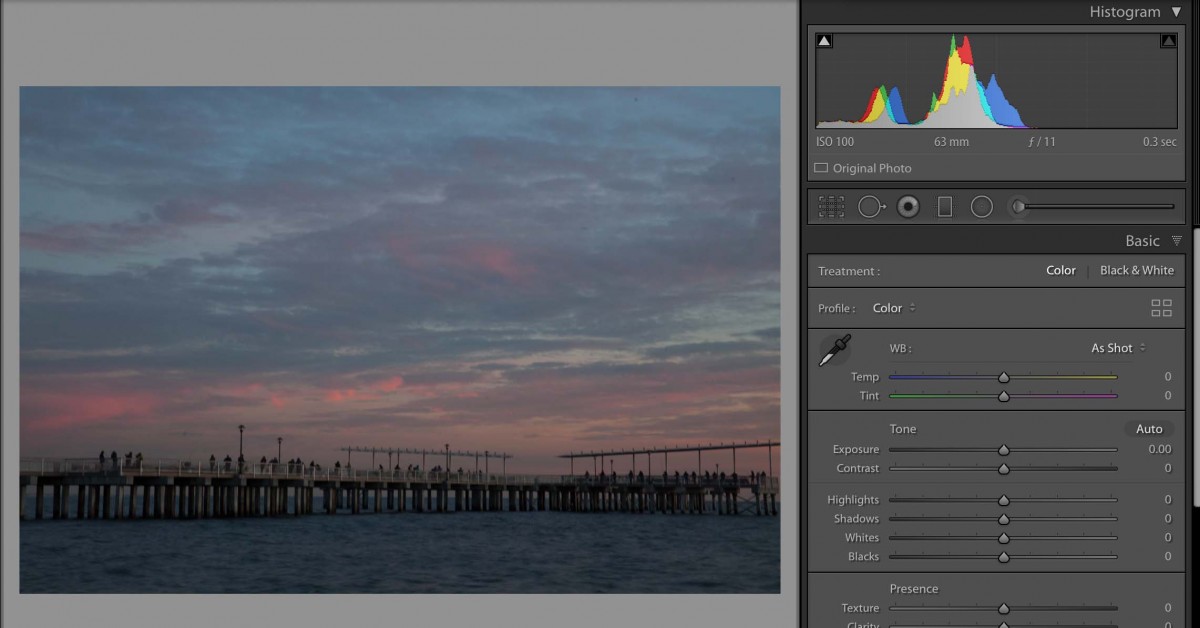
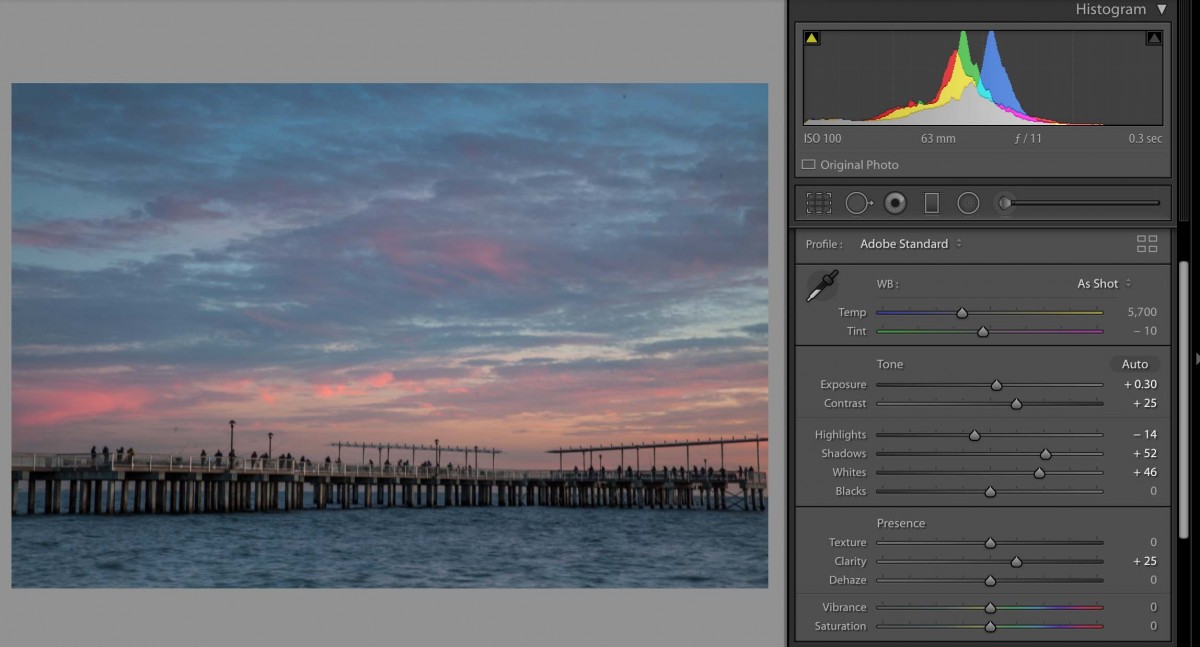
In this photo of the pier in Coney Island, the histogram shows that is underexposed. But we also know that it is an evening scene and that there is nothing in the photo that should be bright white.
A few tips for Lightroom Mobile:
- To access the histogram, tap on the image with two fingers. If you can’t really see the histogram background, brighten the display.
- To see the image before your corrections, press on the image.
Lightroom Workflow:
- Classic: Lens corrections and Transform panels. Correct lens aberrations and Transform, rotate and straighten.
App: Optics, geometry. - Classic: Crop. Left below the histogram. Keep the lock on to maintain aspect ratio.
App: Crop - Classic: WB on basic panel – Set white balance.
App: Color - Classic: Exposure section on basic panel – Read the histogram to set exposure. Most images should have the widest possible dynamic range, meaning that there should be data across the entire histogram.
App: Light
Both:
a. Exposure slider-use to adjust the overall tonality
b. Set black point-shift double click.
c. Set white point-shift double click.
d. Use shadows slider to brighten mid tones. - Classic: Presence section of basic panel – Adjust clarity (mid tone contrast)
App: effects - Classic: Presence section of basic panel – Adjust vibrance.
App: color - Classic: Presence section of basic panel – Use saturation with care: +10 at most
App: color - Classic: Detal panel – Sharpen-amount at least 50
App: detail
Aspect Ratio-the proportion of the width of the image to the height of a 2D image
Clipping-the intensity of the light falls outside of what can be recorded by the camera and there is a loss of detail.
Color Profile-the data for a digital device, such as a printer or monitor, which describes its gamut, or range of colors. Used to match the gamut from one device to another.
Exif Data-information stored by the camera in the file.
Gamut-range of colors
Histogram- a graphic representation of the tones in an image. A spike of data on the left side indicates underexposure, on the right overexposure.
Neutral Value-RGB values are equal or gray
Non-destructive Editing-adjust the image without overwriting the original image data. Instructions are written to a sidecar file that tells the software how to interpret the image.
White Balance-the setting that adjusts for the color temperature of the light and that will make a white object appear white or a gray object a neutral value
Workflow-the tasks to be performed and the order of those tasks. When working with Lightroom to optimize the appearance of your photos, the order of the steps makes a difference. Follow the workflow recommended below for the best results.
Lightroom Classic Resource
Lab Exercises
Homework
Midterm Project


Leave a Reply