Session 1
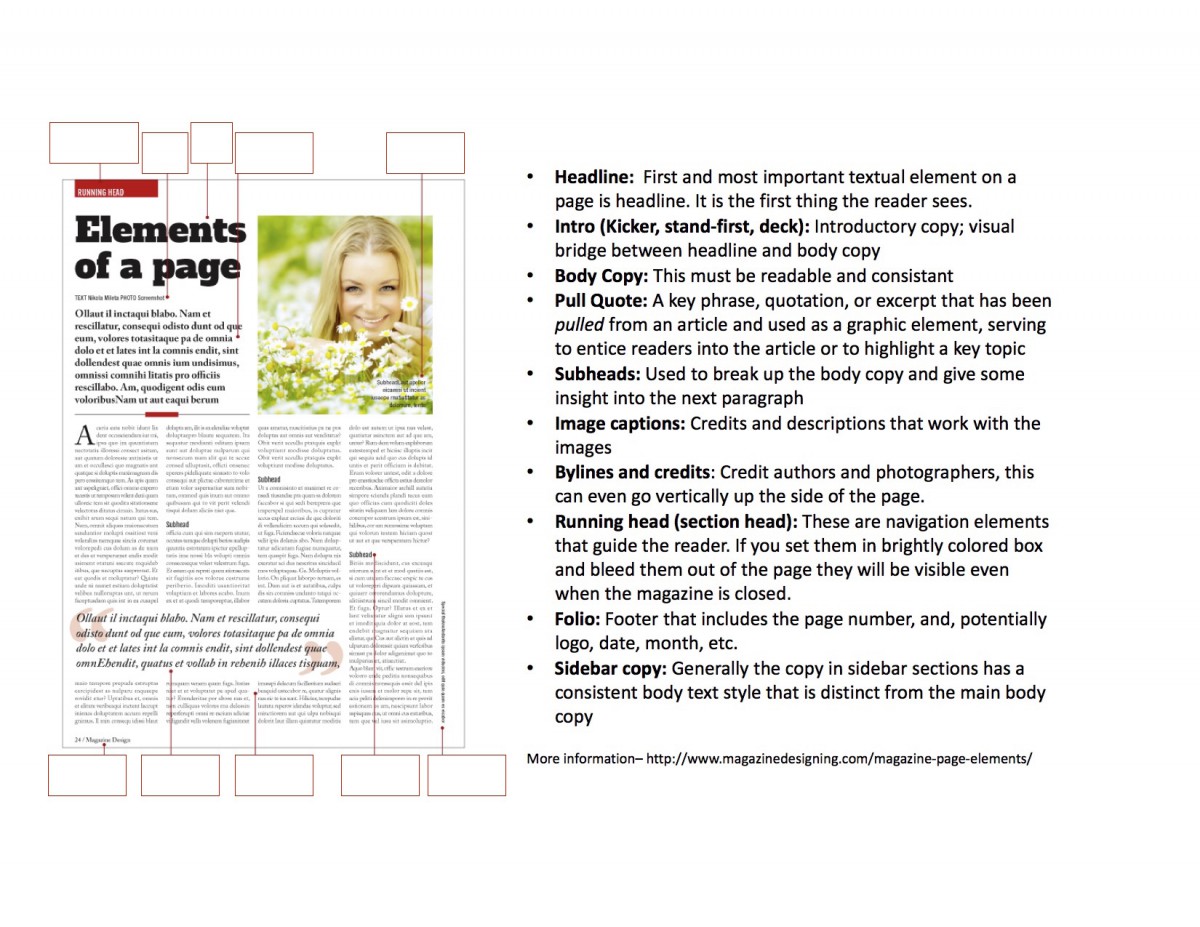
Introduction Check out these inspiring magazine layouts. In the discussion page, bullet point what strong design features they have in common.
Think of color palette, space, alignment, hierarchy (in typography and illustrations), repeating shapes, repeating techniques, and other design tricks you find in common.
2) Magazine Review – (Source for more details)
3) Audiences
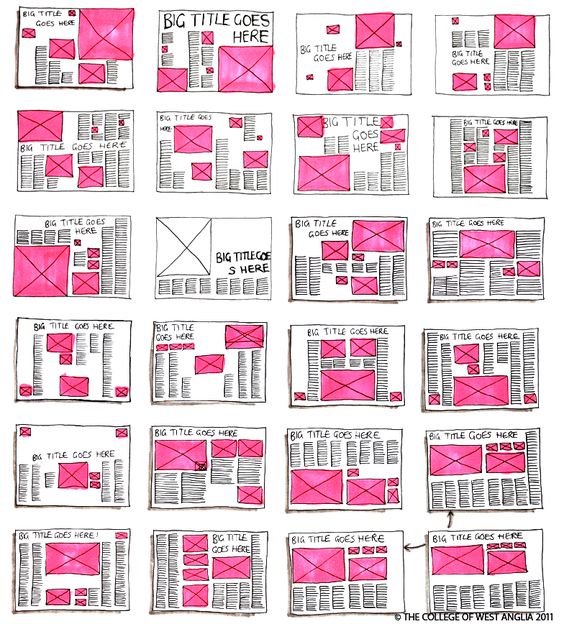
5) Workshop: Develop research for outline, and thumbnails
• What will be the heaviest form of content (lots of pictures? lots of body copy? Lots of key quotes? Lots of small captions?)
• How much white space will you leave and why
• How will content on facing pages relate?
• What style do you want to communicate
>> Sample outline to thumbnail <<
6) Homework
ePortfolio (5 points)
• Create an ePortfolio page for Project #2 Magazine
• Introduce the subject of your magazine, and summarize the content you will cover in order to explain your reasoning for the thumbnail sketches you present below
• Upload at least 5 thumbnail sketches into gallery format
Session 2
Introduction Critique
In groups of 4, share each other’s Type Book. Have one student take notes.
Discuss the difference between your experience with the digital book versus the physical book:
• How much of the book (in %) turned out exactly as you planned or imagined it?
• What are some examples of things that didn’t turn out how you expected (for example, size of objects, placement of things, color, neatness, readability)?
• What were some immediate changes you felt you wanted to make after it was printed?
• What are some surprises or satisfying outcomes of the printed book?
Write the names of your group mates, and their answers to these questions in this discussion board.
1) Build the master page InDesign
• Grid
2) Style sheets
Paragraph | Character | Drop Cap (advanced tricks)
3) Layers – for text, images, etc.
4) Placing Image
• Use Command D to place an image wherever you’d like
• Command+Selection tool moves the image to shape of bounding box
• Command+Selection+Shift moves image to shape of bounding box in proportion without distortion
• (Double click, or) Direct Selection Tool moves the image around within bounding box (can also crop w/ bounding box)
Embedding Image
• Frame Tool create the shape of bounding box
• Command D
• Selection Tool + Command + Shift + E will fit the image within the boundaries of the box proportionally
• Selection Tool + Command + Option + E will fit the image within all boundaries of the box even if distorted
4) Watch Graphic Design Basics with Ellen Lupton
• Symmetry vs. Asymmetry
• Scale
• Framing
• Hierarchy

