 1- The Olimex EKG Shield is calibrated to sense a heartbeat using standard electrodes. That input is fed into an Arduino A/D channel. A small Arduino sketch collects data and passes those via Bluetooth to your Android device for plotting. The Android application has the capability to upload the sampled data via an HTTPS RESTful API. Data on the server is stored in a Mongo database.
2- Both Arduino and Bluetooth use this application with the USB/BT library. I chose the Arduino Mega ADK for this project because it has a built-in USB Host interface. This allows for Bluetooth connectivity using a BTLE USB dongle. Older Arduino models might be able to leverage either a Bluetooth Shield or USB Host Shield, although none of those non-MegaADK configurations have been tested.
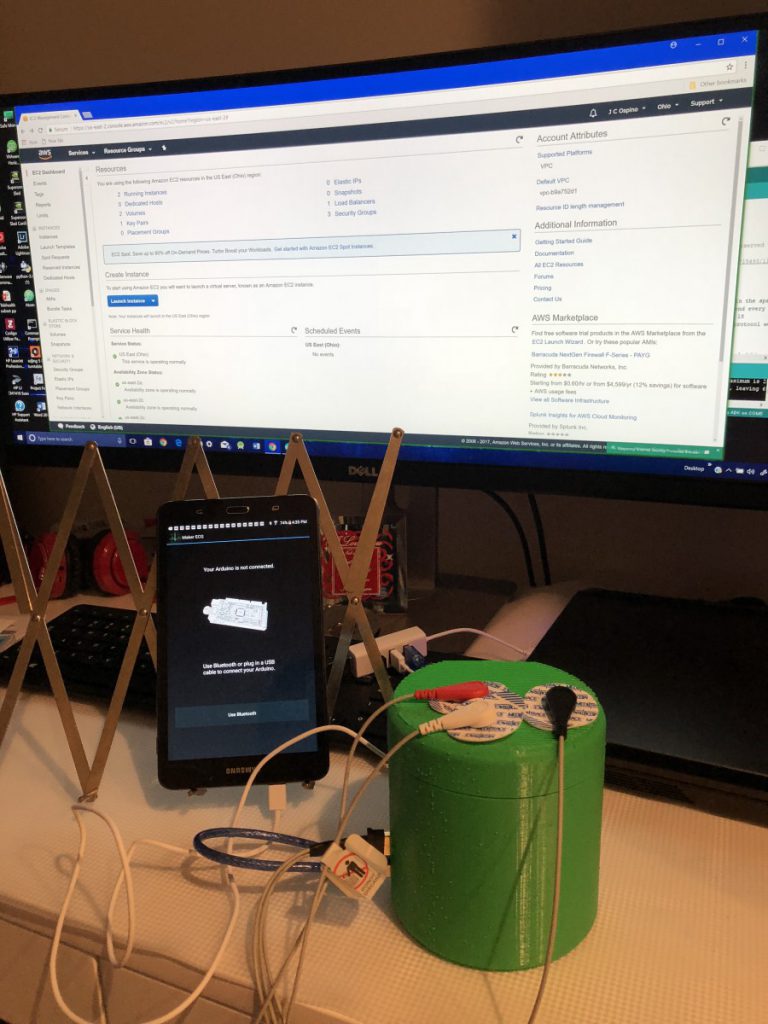
3- Hardware Requirements: 3-3-3 Android Device running Android 4.4.2 or later with BluetoothArduino Mega ADK Bluetooth LE USB dongle – to connect the Arduino ADK to the tablet.
4-Olimex ECG Shield– model ID SHIELD-EKG-EMG
5-Electrodes and cabling – Olimex also produces some covenient electrode cabling for use with their shield: mode ID SHIELD-EKG-EMG-PRO. This particular cable requires disposable EKG Electrodes. A Linux/OS X/Windows server capable of running Node.JS and Mongo DB.
Hardware Requirements
Android Device running Android 4.4.2 or later with Bluetooth Arduino Mega ADK (any version; available from a number of sources)Bluetooth LE USB dongle – to connect from the Arduino ADK tablet Olimex ECG Shield – model ID SHIELD-EKG-EMG. Electrodes and cabling – Olimex also produces some covenient electrode cabling for use with their shield. This particular cable requires disposable EKG Electrodes. A Linux/OS X/Windows server capable of running Node.JS and Mongo DB.
6-Directory Structure
src/android/MakerEKG- Android Studio project
src/arduino/bt_ekgkit- Arduino sketch (bt_ekgkit is the BLE version)
src/server/ekgsvc- Node.JS based web service for uploading and viewing data sets
7-Arduino Build Notes Built using Arduino tools 1.6.7
8-Download the Google Accessory Development Kit 2011 edition
http://developer.android.com/tools/adk/adk.html
https://dl-ssl.google.com/android/adk/adk_release_20120606.zip
Android Build Notes Using Android Studio 1.5.1
9-Server The server is implemented using Node.JS. MongoDB is used for persistent storage. A simple data viewing web site was implemented using Bootstrap.
Use npm and bower to install the dependent components.
$ npm install -g bower
$ cd src/server/ecgsvc
$ npm install
10-Bower needs some coaxing to install the browser JS components in the “public” folder. You must manually create a file in your home directory named .bowerrc.
$ vi ~/.bowerrc
Add these lines to the file:
{
“directory” : “public/components”
}
You can then run Bower.
$ bower install
11-Start your MongoDB instance. Check the settings in config.json. Update the Mongo URL as required. The defaults reference a database on localhost named “site”.
$ node index.js# this will run the server
For a simulated production environment, I run all of this on an Ubuntu server using the Node pm2 package to manage the service.

