PARTI DIAGRAMMING
Assignment A: Residential Program & Modules-Digital
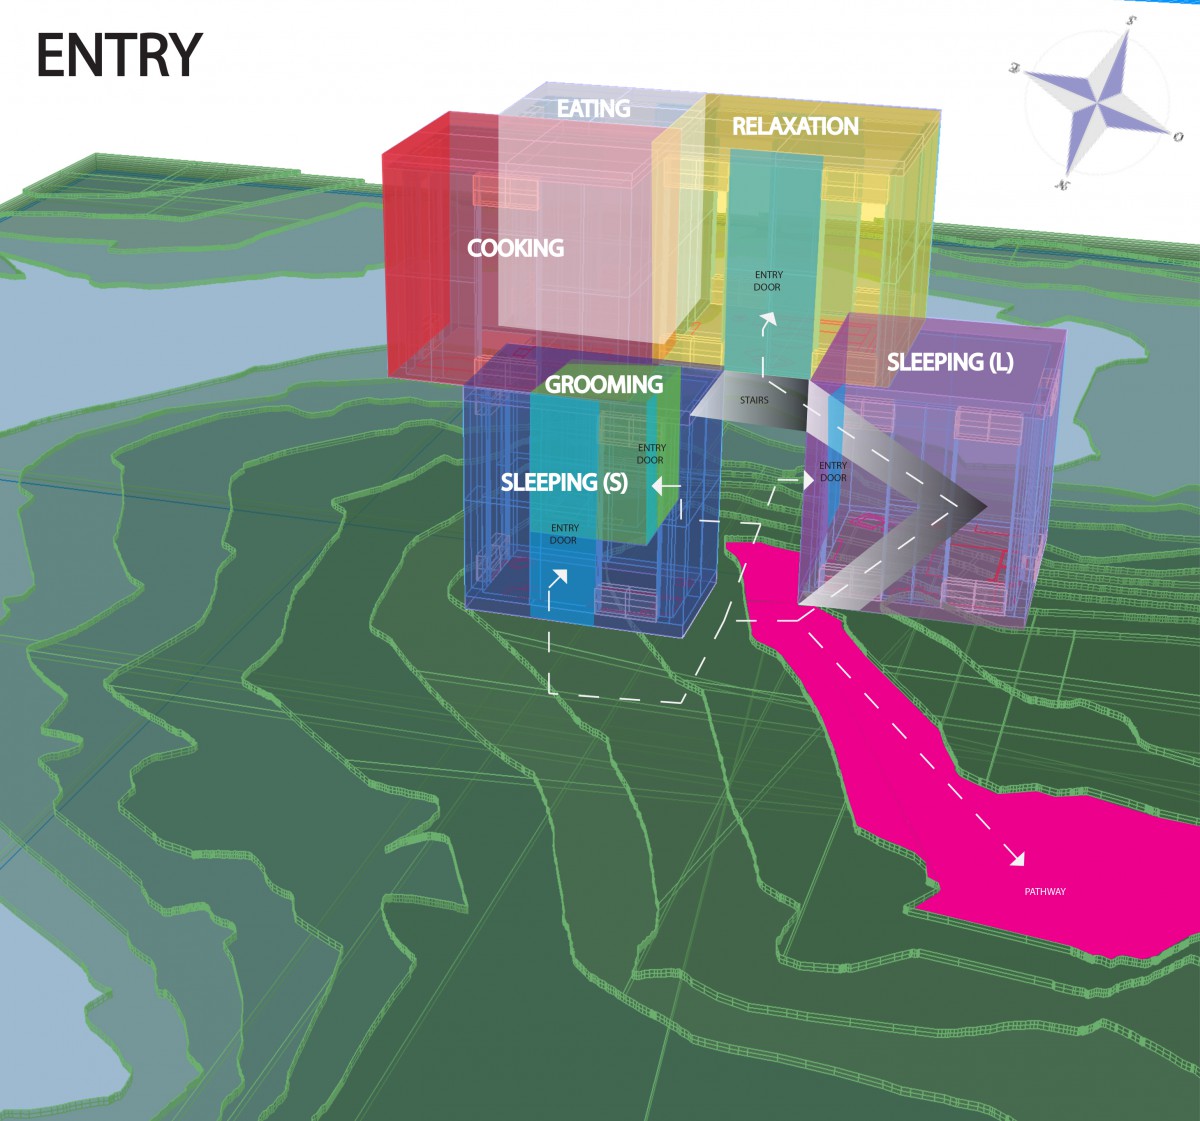
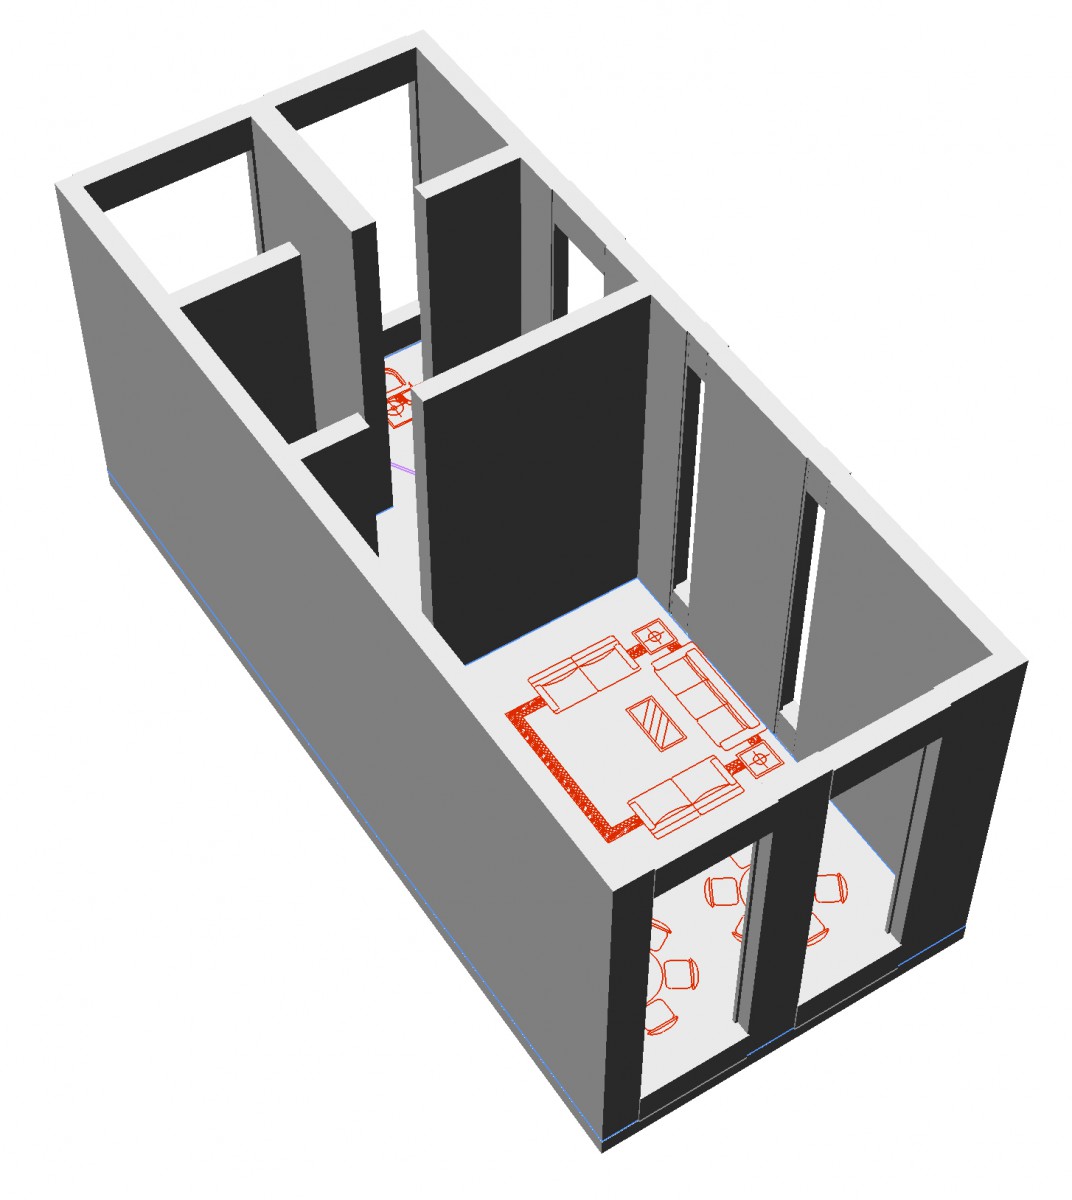
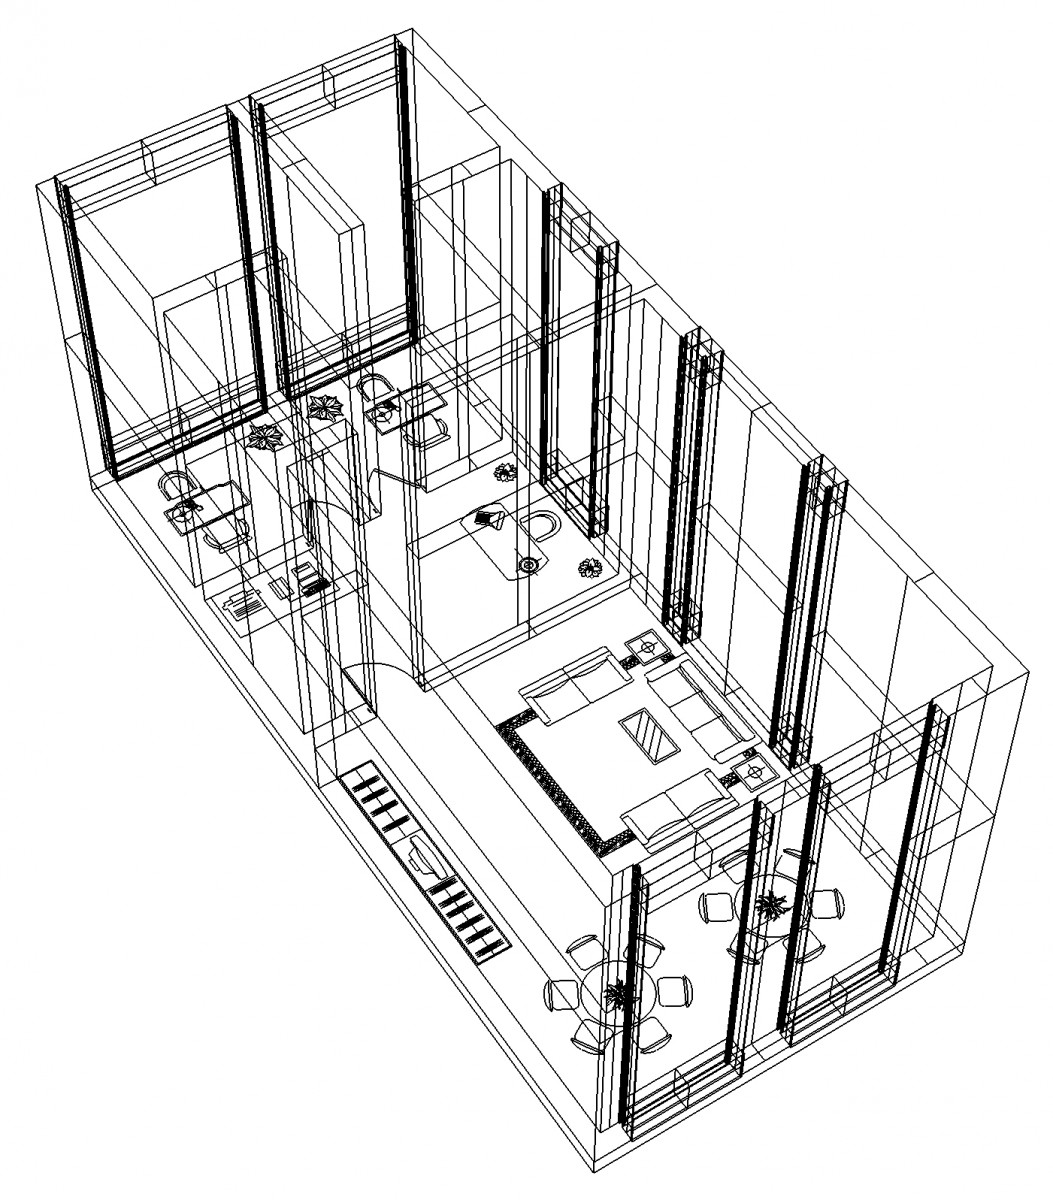
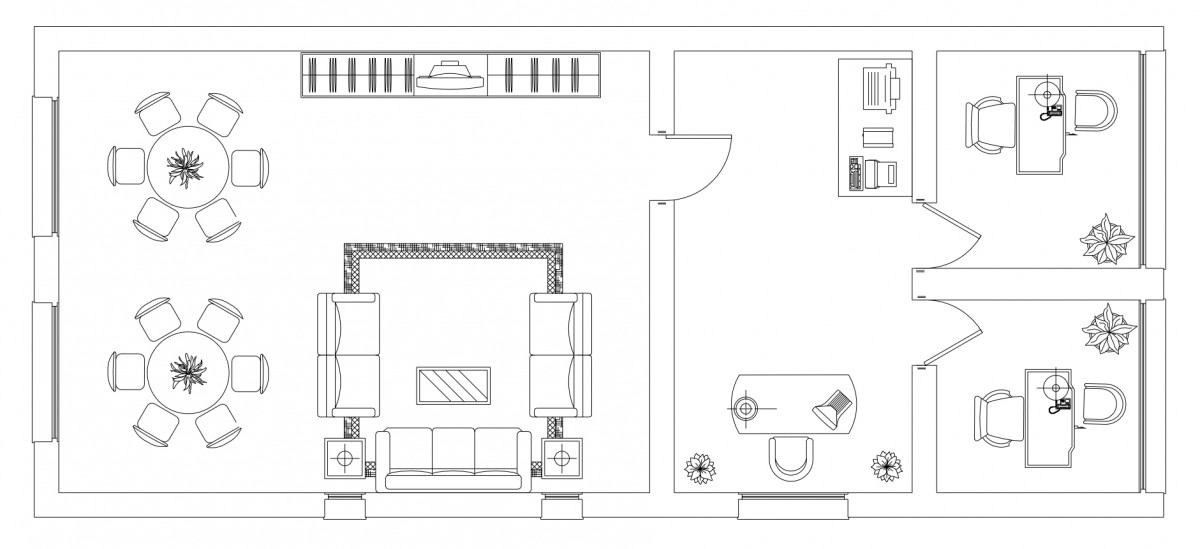
Relaxation
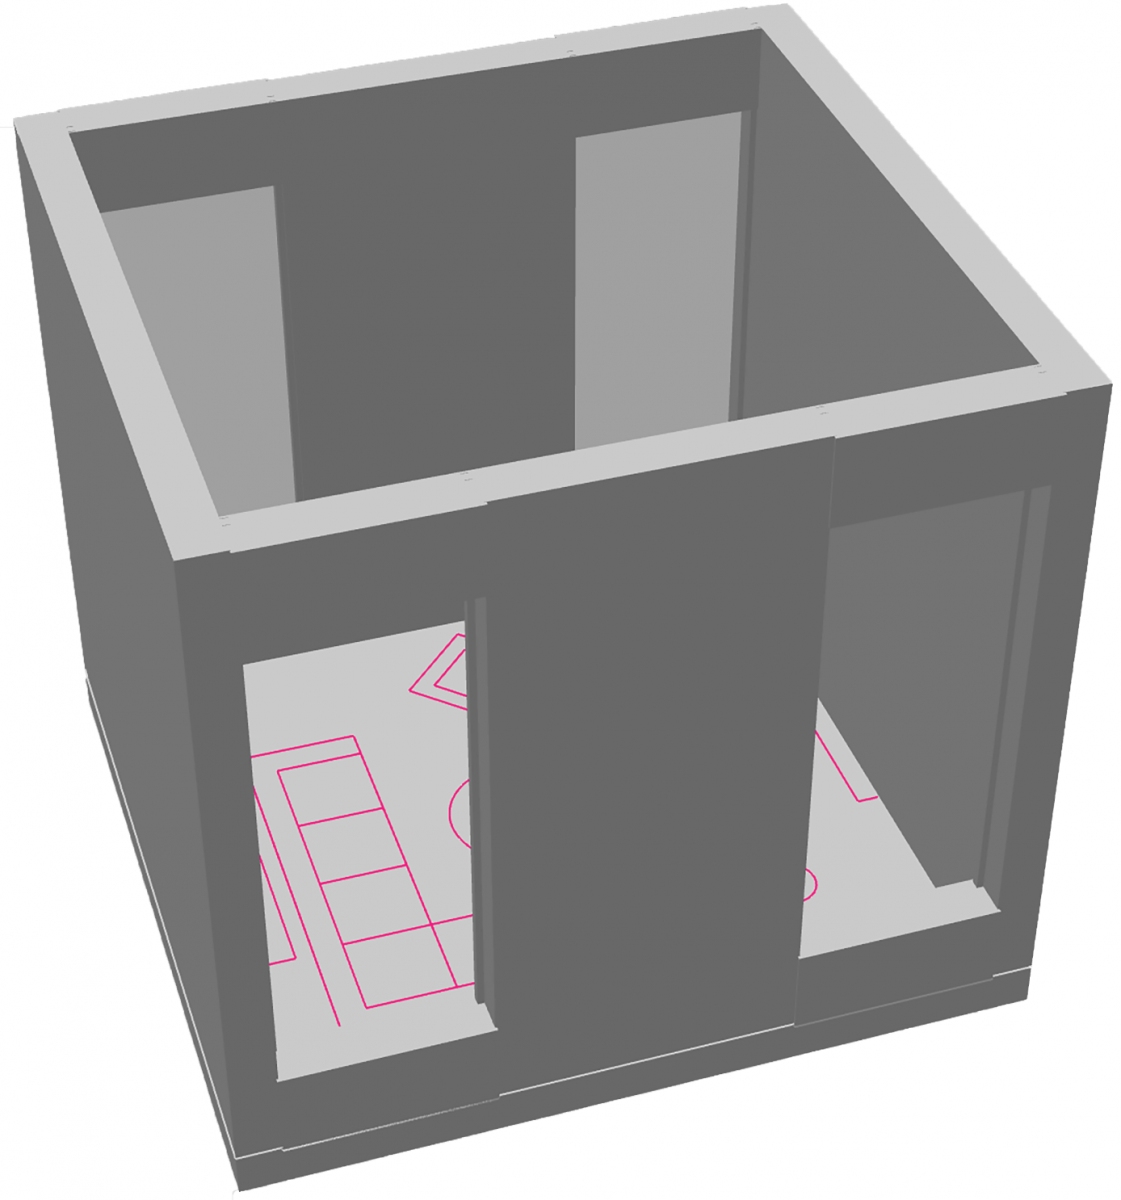

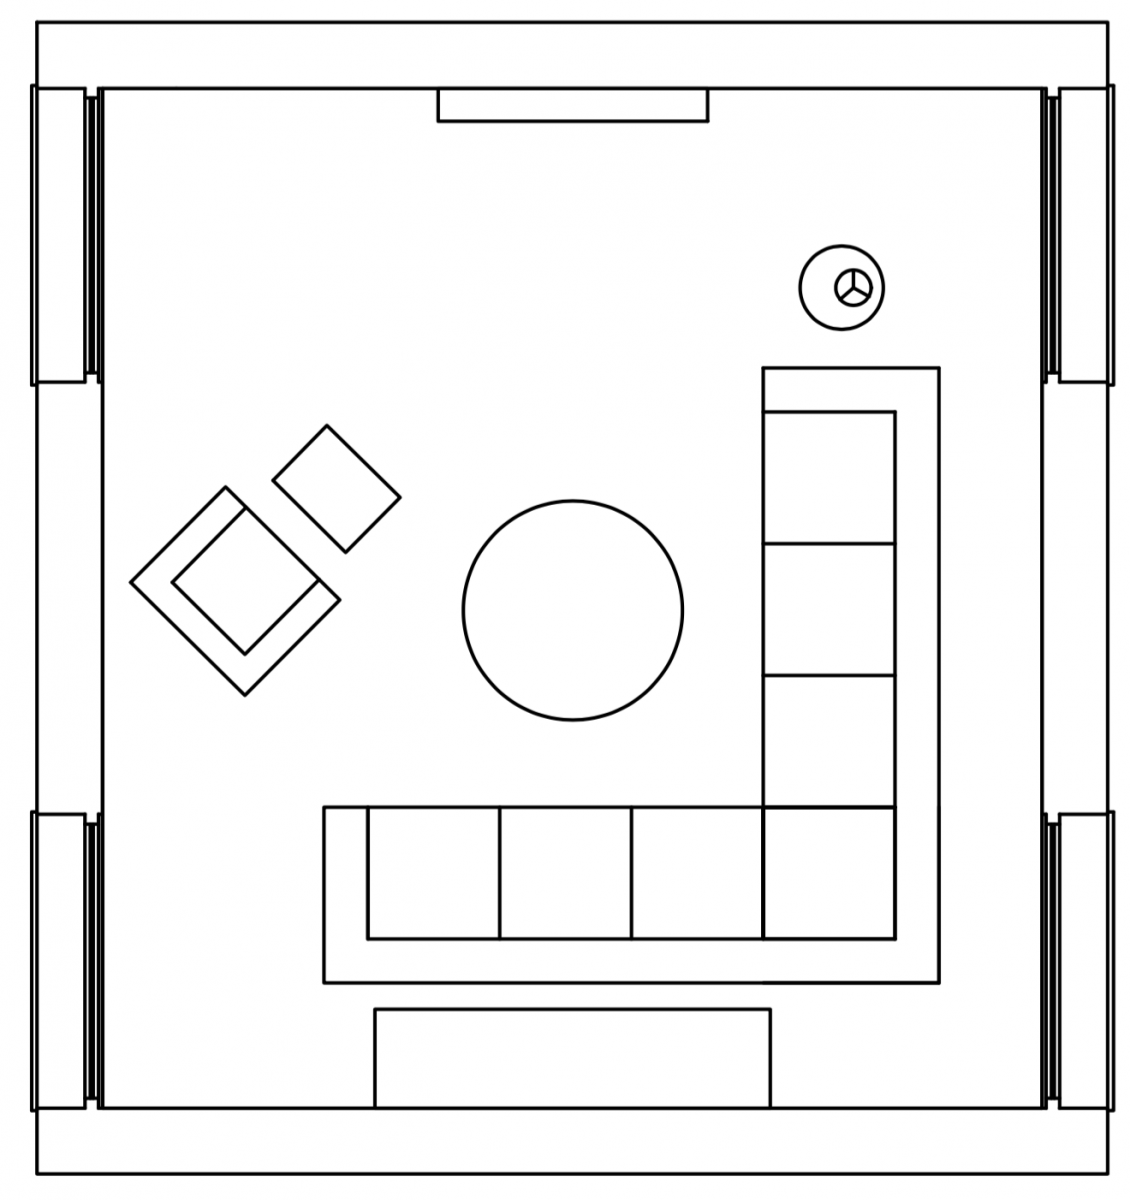
The purpose of the Relaxation Room is to provide a space for people to relax and enjoy their day. This will enhance their productivity and their sense of well-being. In addition, it provides a space to sit around with family and friends, hangout, and socialize. This relaxation will include resources such as a TV, sofa, table place, and couch seat.
Cooking
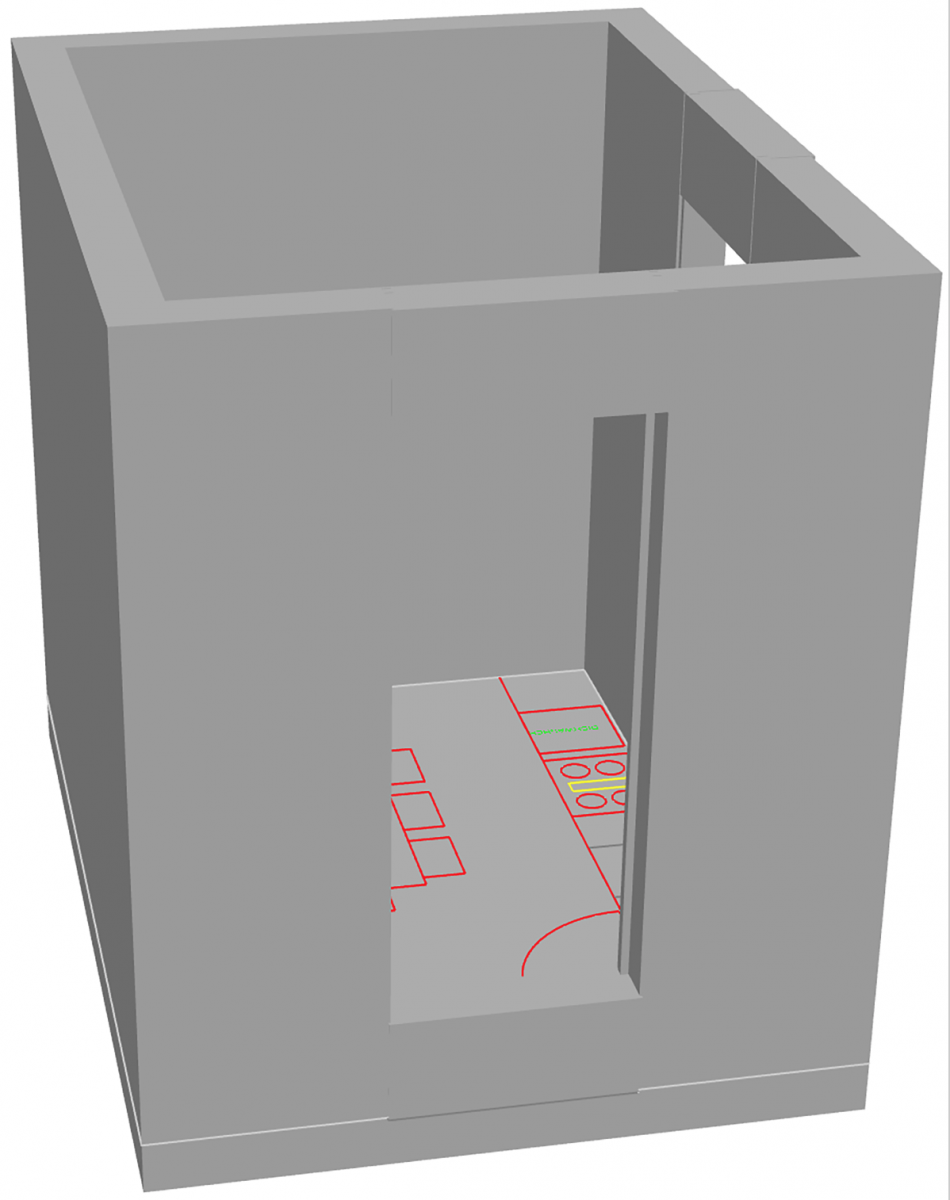
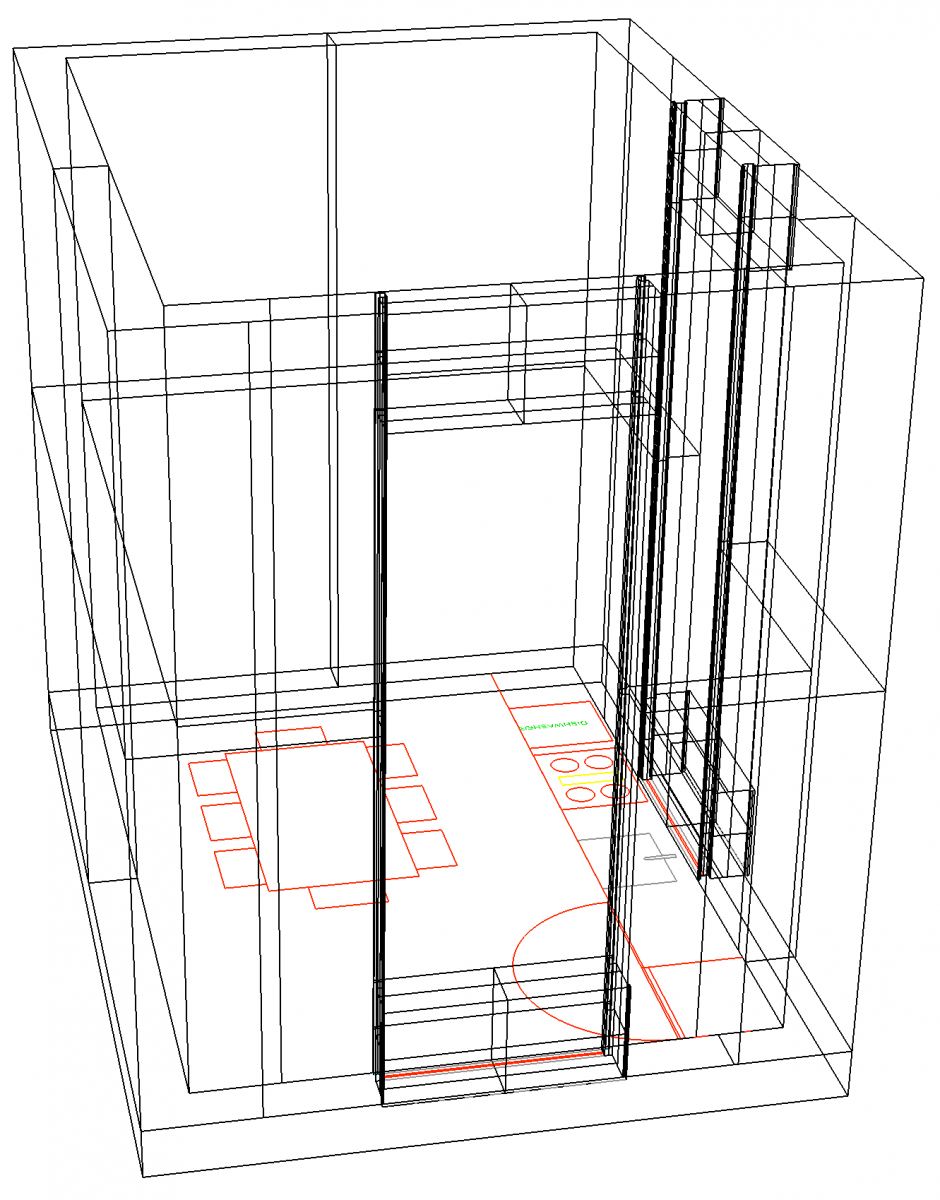
For the cooking area, I have limited space for the dishwasher, fridge, sink, and stove. The cooking room will allow to bring together all the elements of a great kitchen party, interesting people, lively conversation, and the inspiration to create great food.
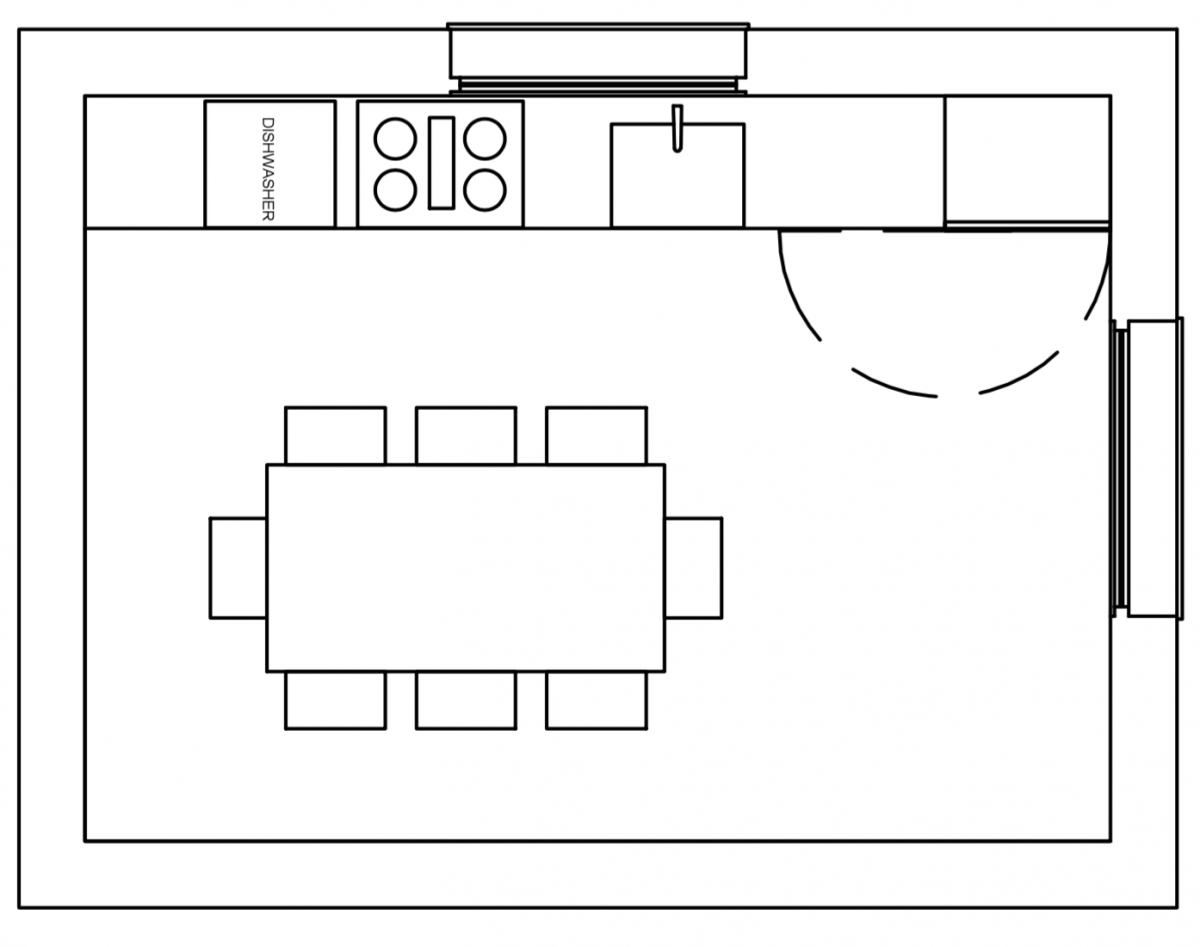
Eating
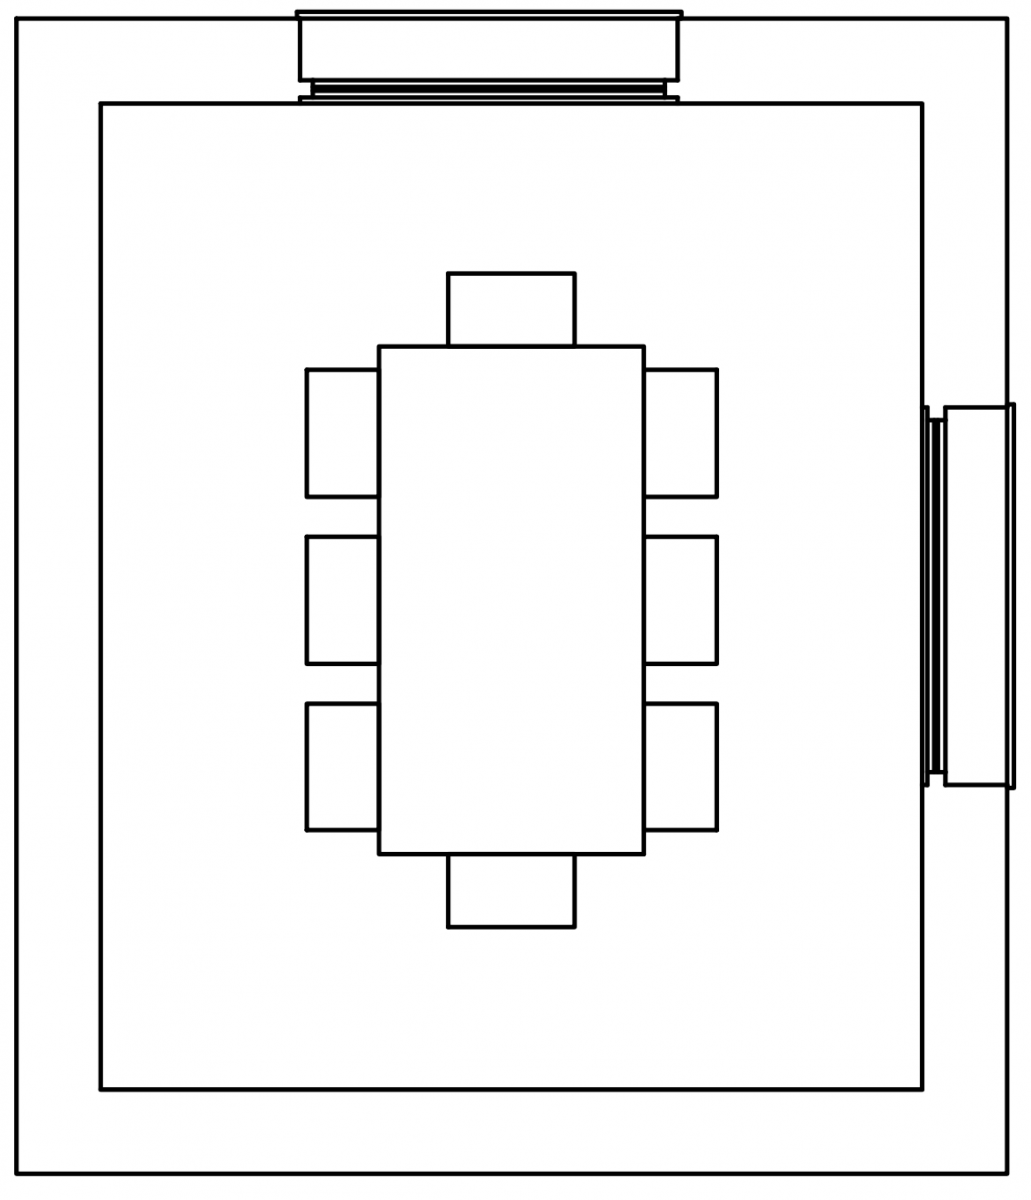
The eating room will be able to provide a comfortable and colorful setting to enjoy fresh foods prepared to eat daily for breakfast, lunch and dinner. The Eating Room is centrally located near the cooking room. Seating is available on a first-come, first-serve basis for 8 people at most.
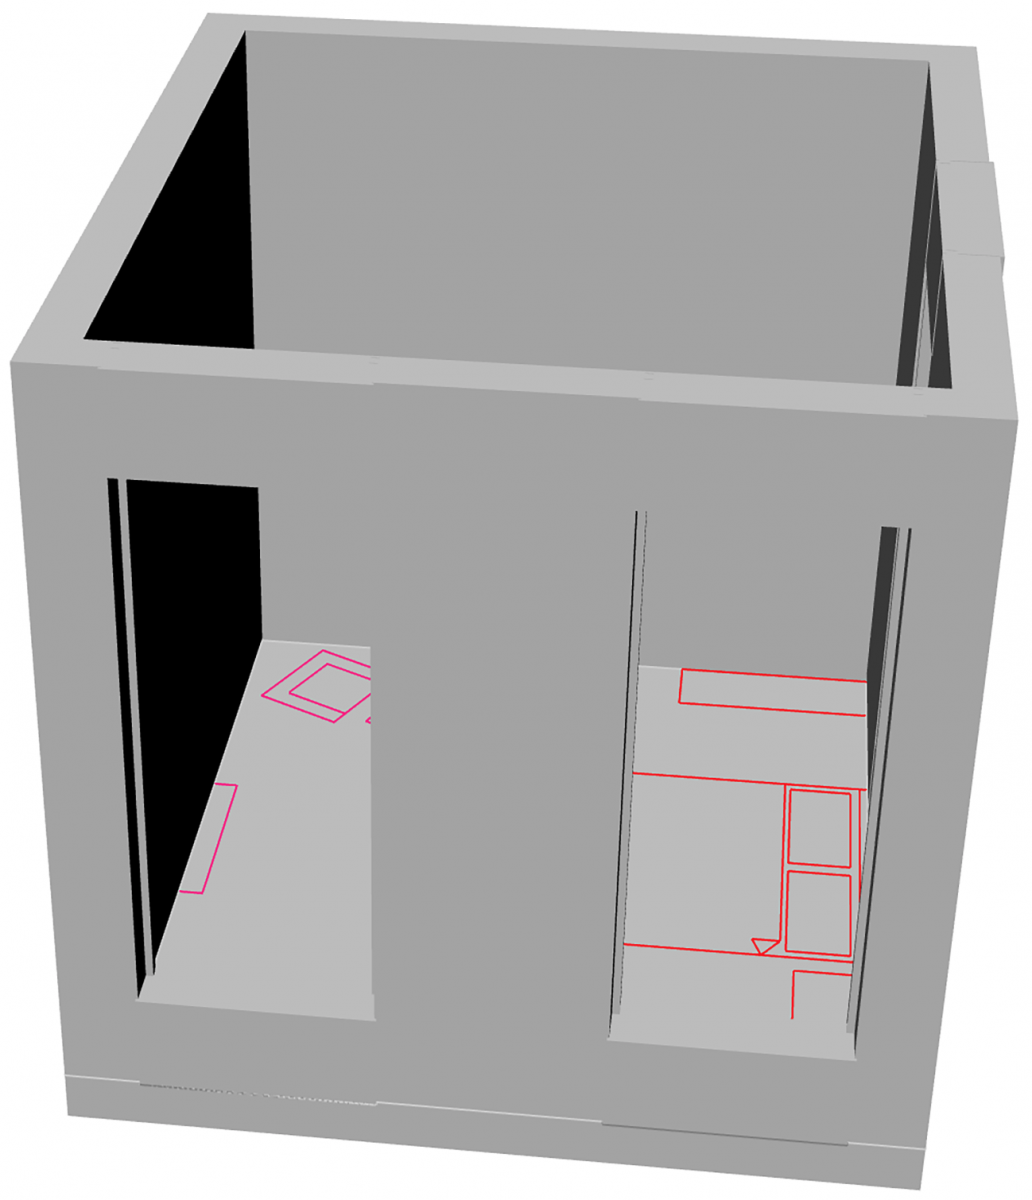
Sleeping (S)
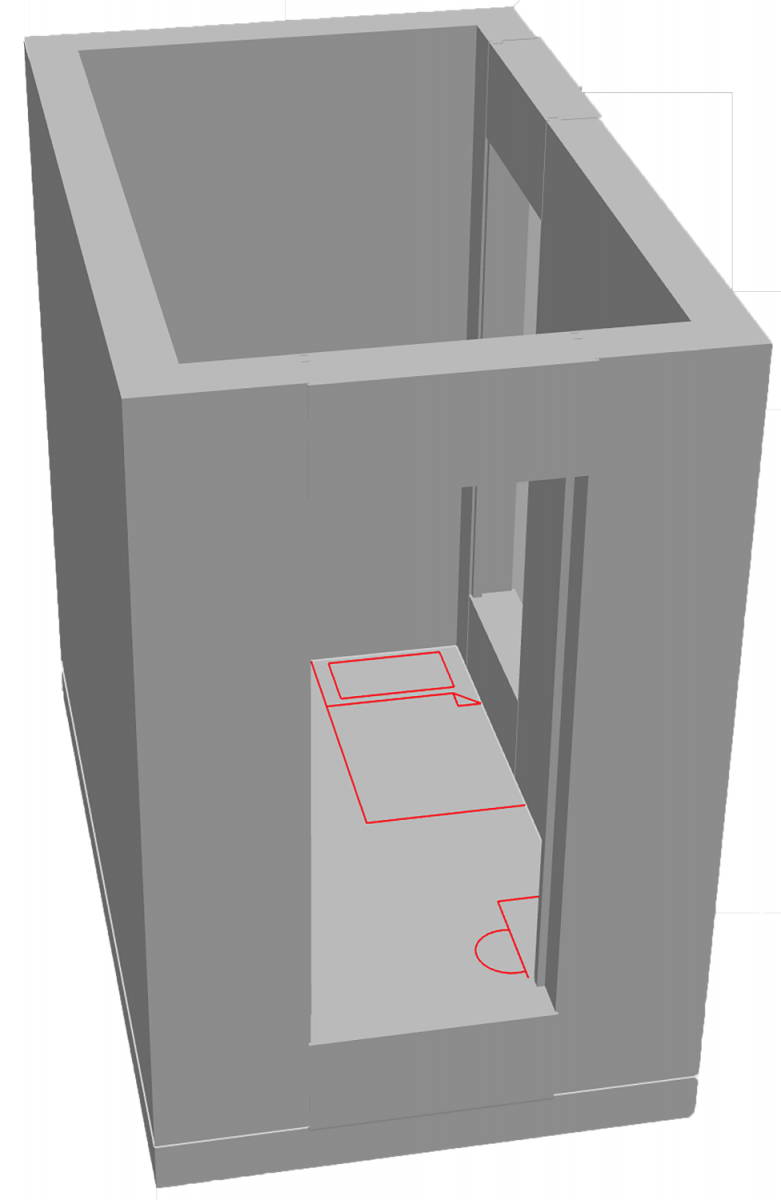
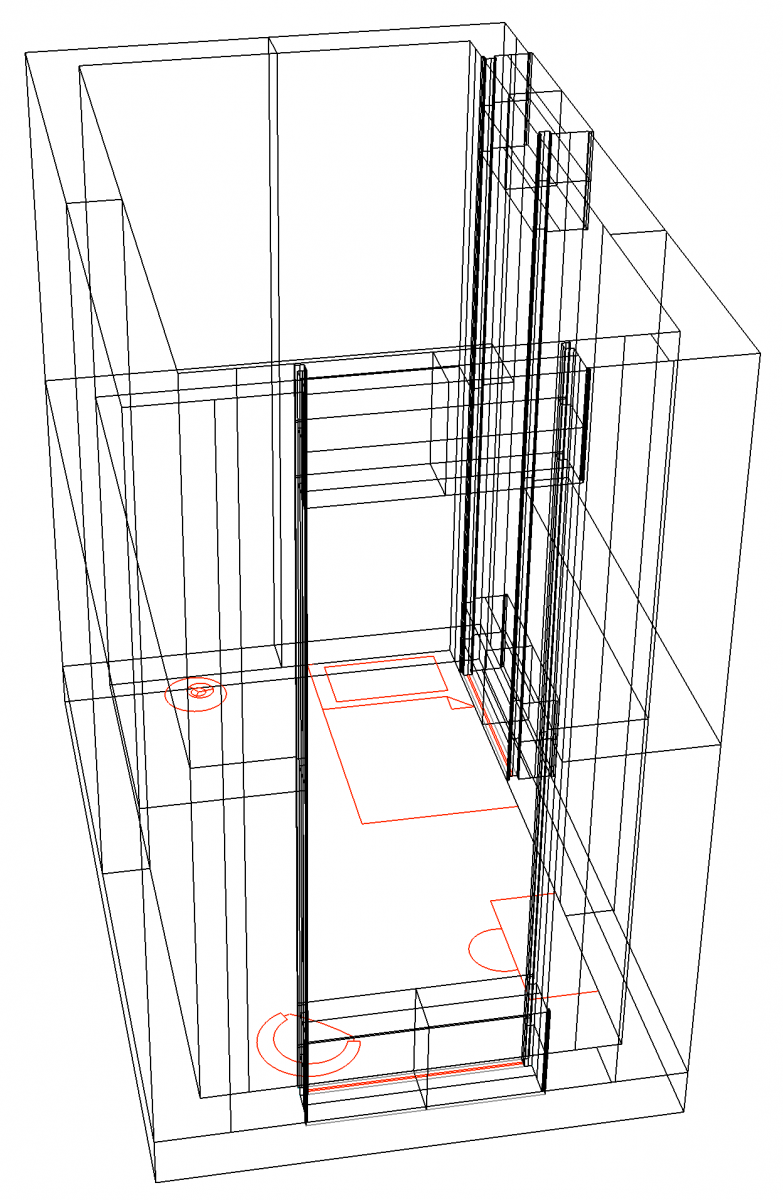
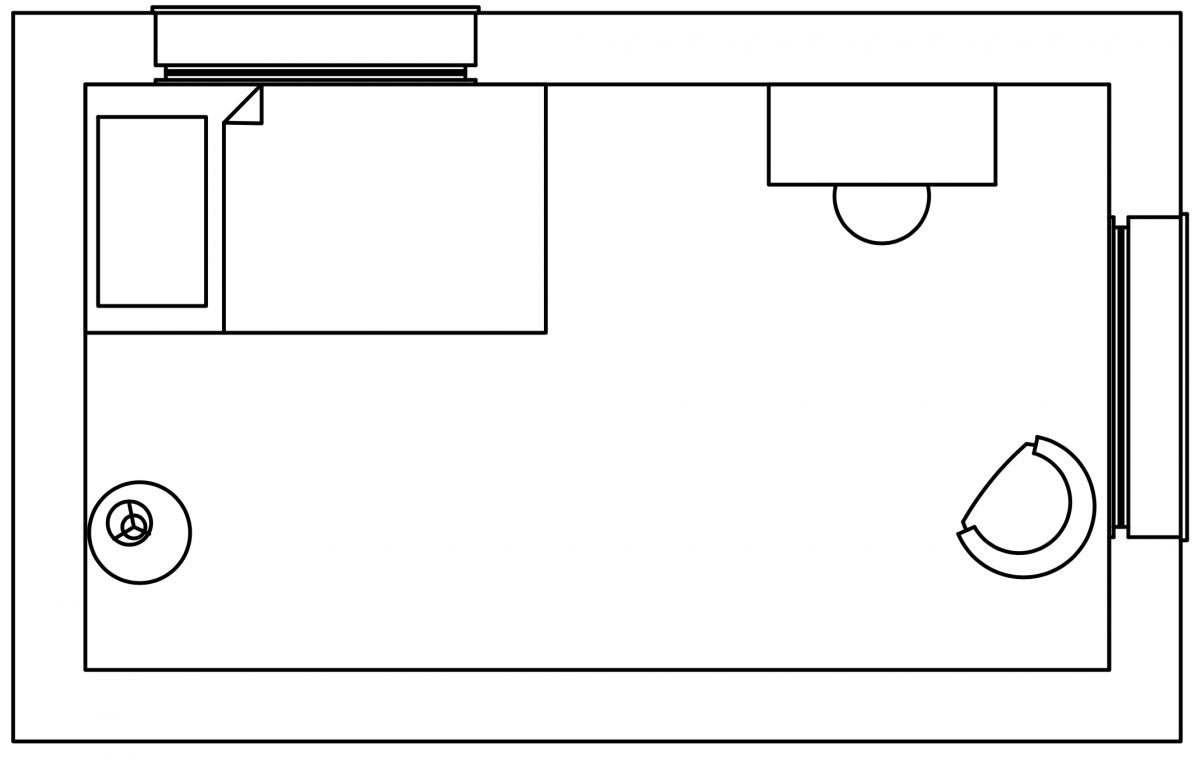 The small room will be for 1 person or a couple to come in and just relax in the this guest room. The room has enough space required, that it is just right for the one person or the couple to do what they have to do. The lighting of the room will be coming through two sides of the room. The light coming from the outside will be directly hitting the bed and will also give sun reflection right at the center of the furniture & cabinet.
Sleeping (L)
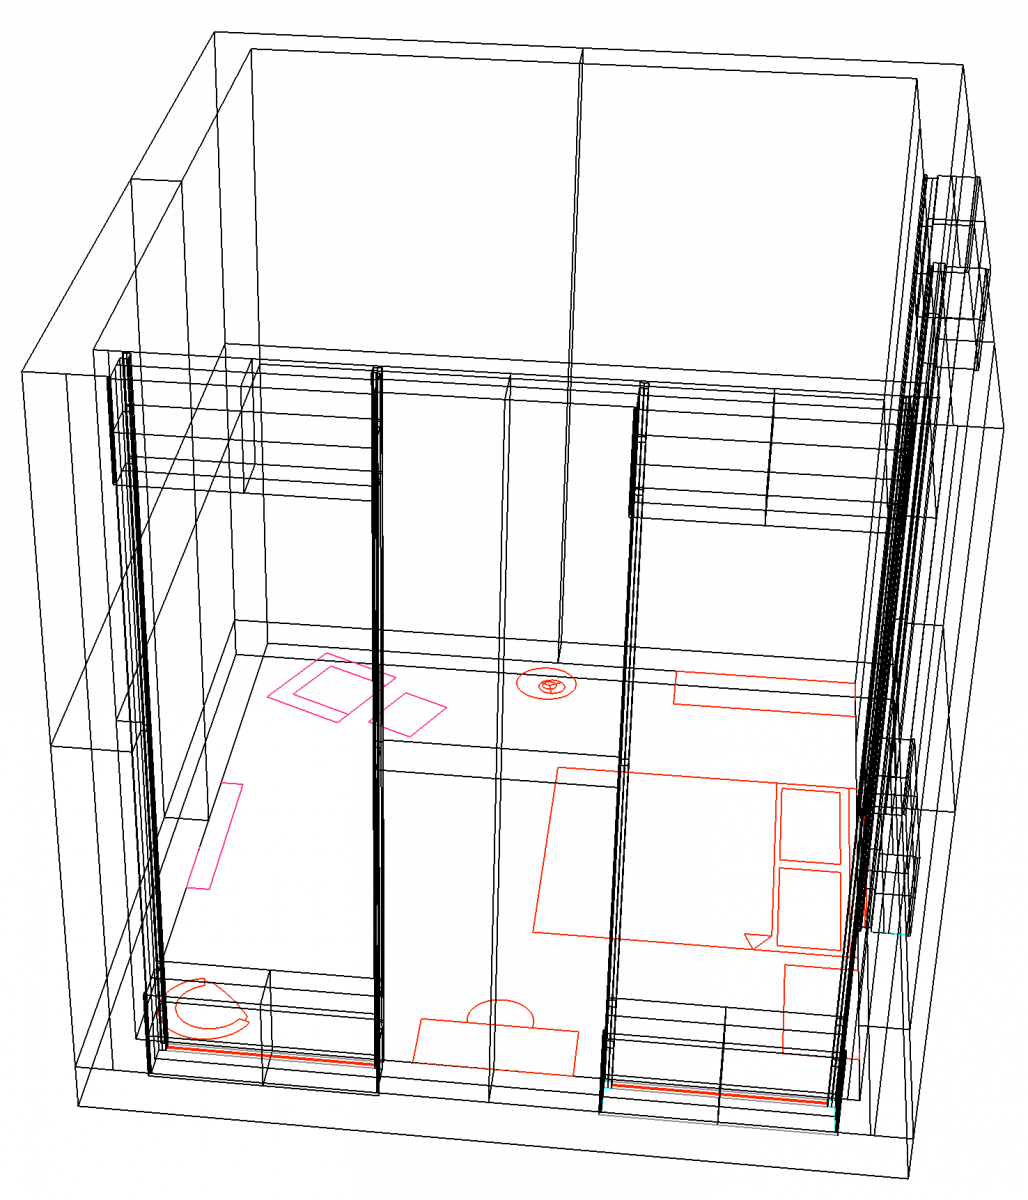
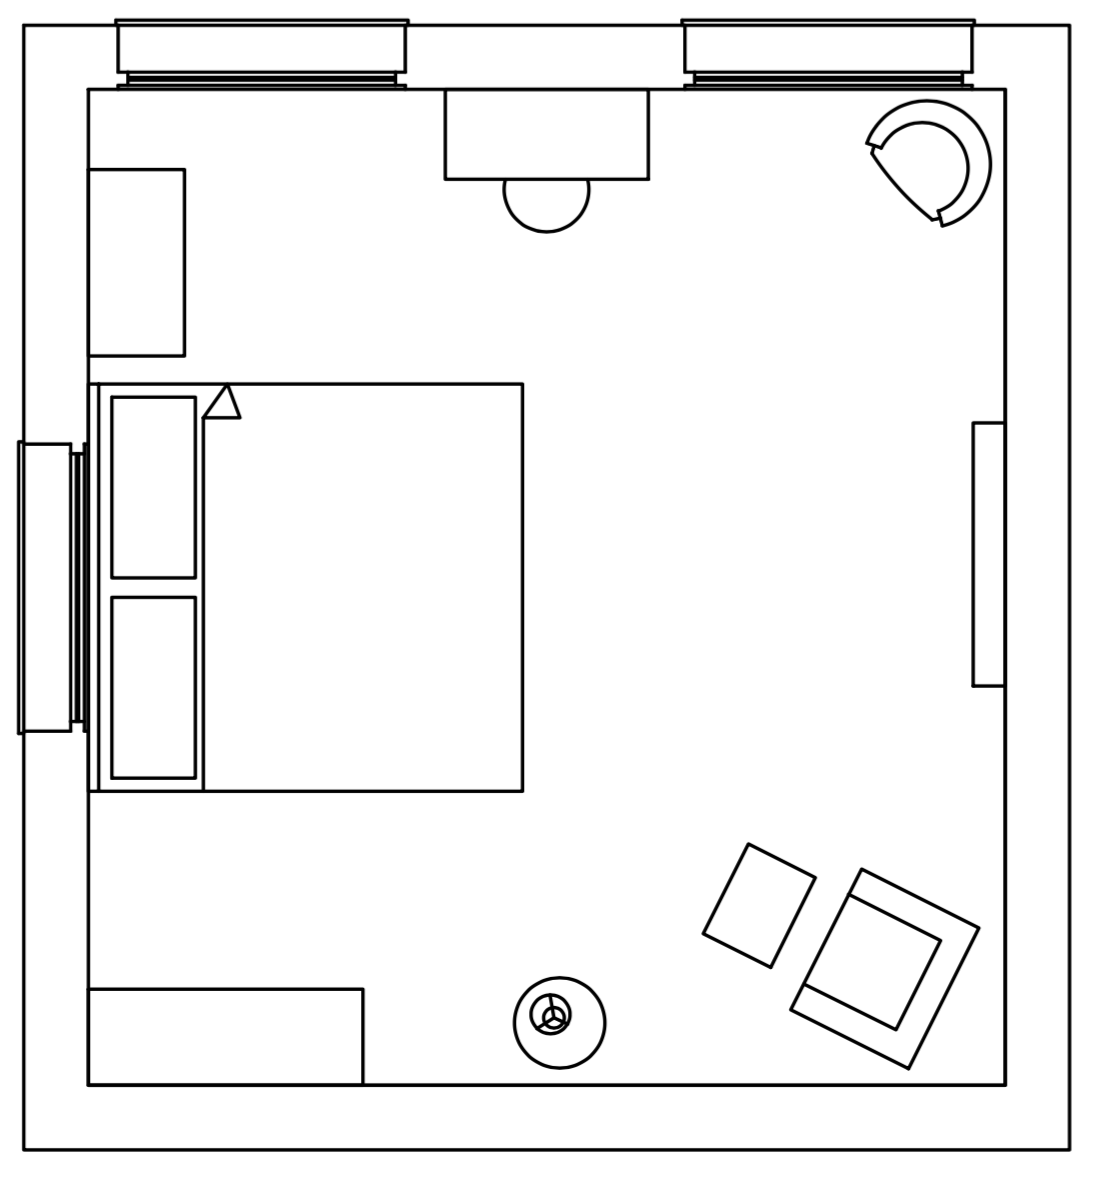 The large sleeping room is the master room. It is a decent size space with a queen-size bed, seating area cornered by the windows, large moving space, a couple of cabinets, and windows that can provide a view to see the outside of the environment.
Grooming
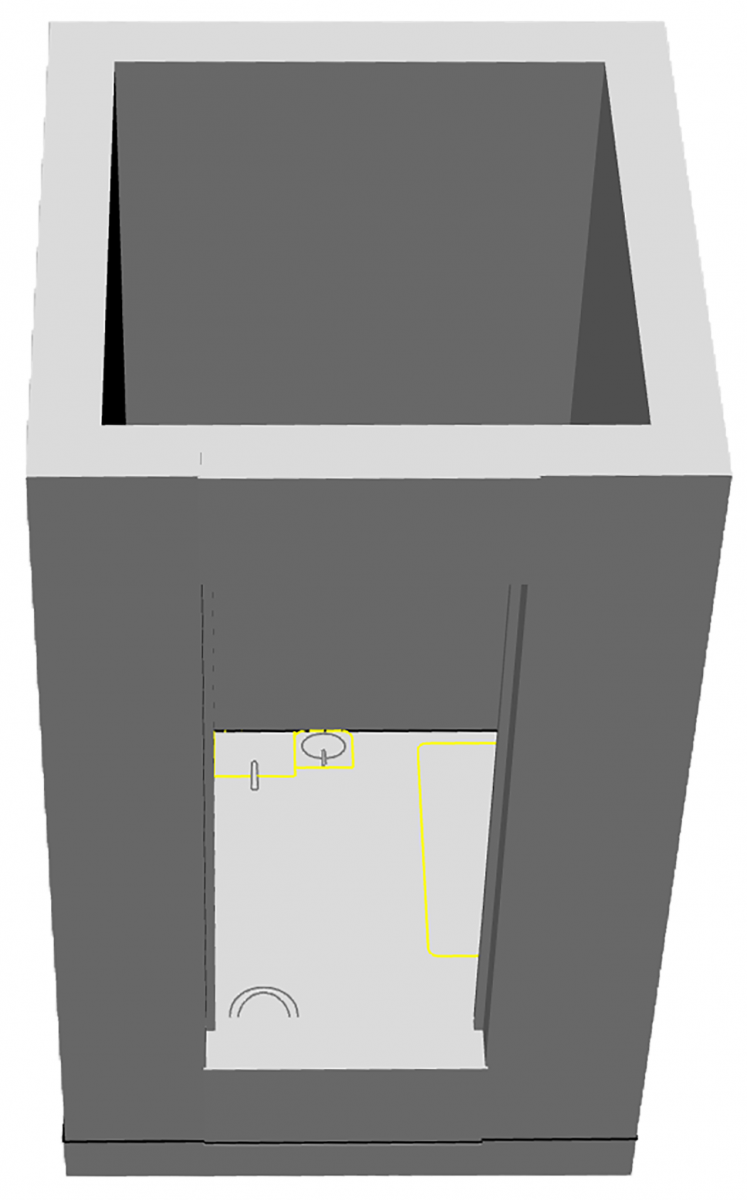
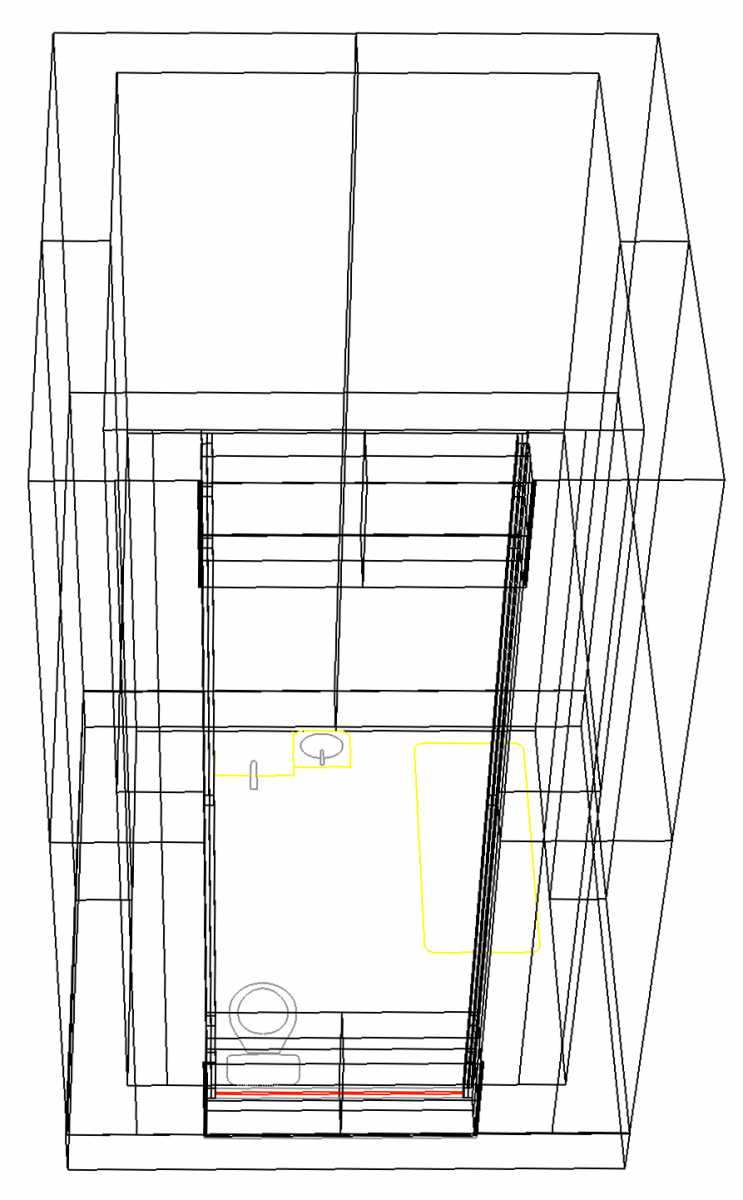
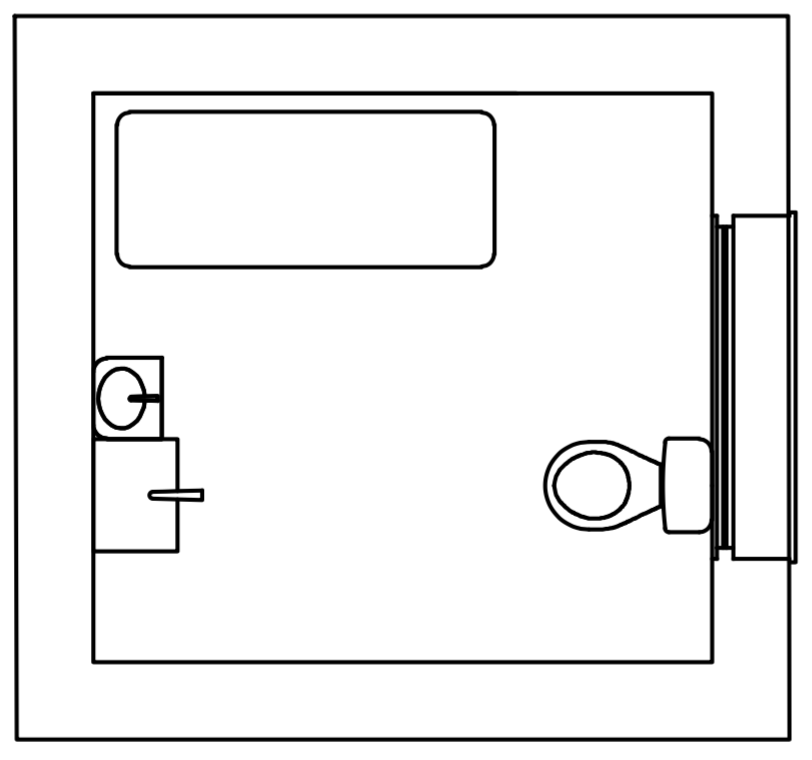
The bathroom might be the smallest room in the house. A lot happens in the bathroom, and the design must accommodate all of our activities. The bathroom space is to be sure it can accommodate enough space for the movement of people and have easy access to the materials around them in the bathroom.
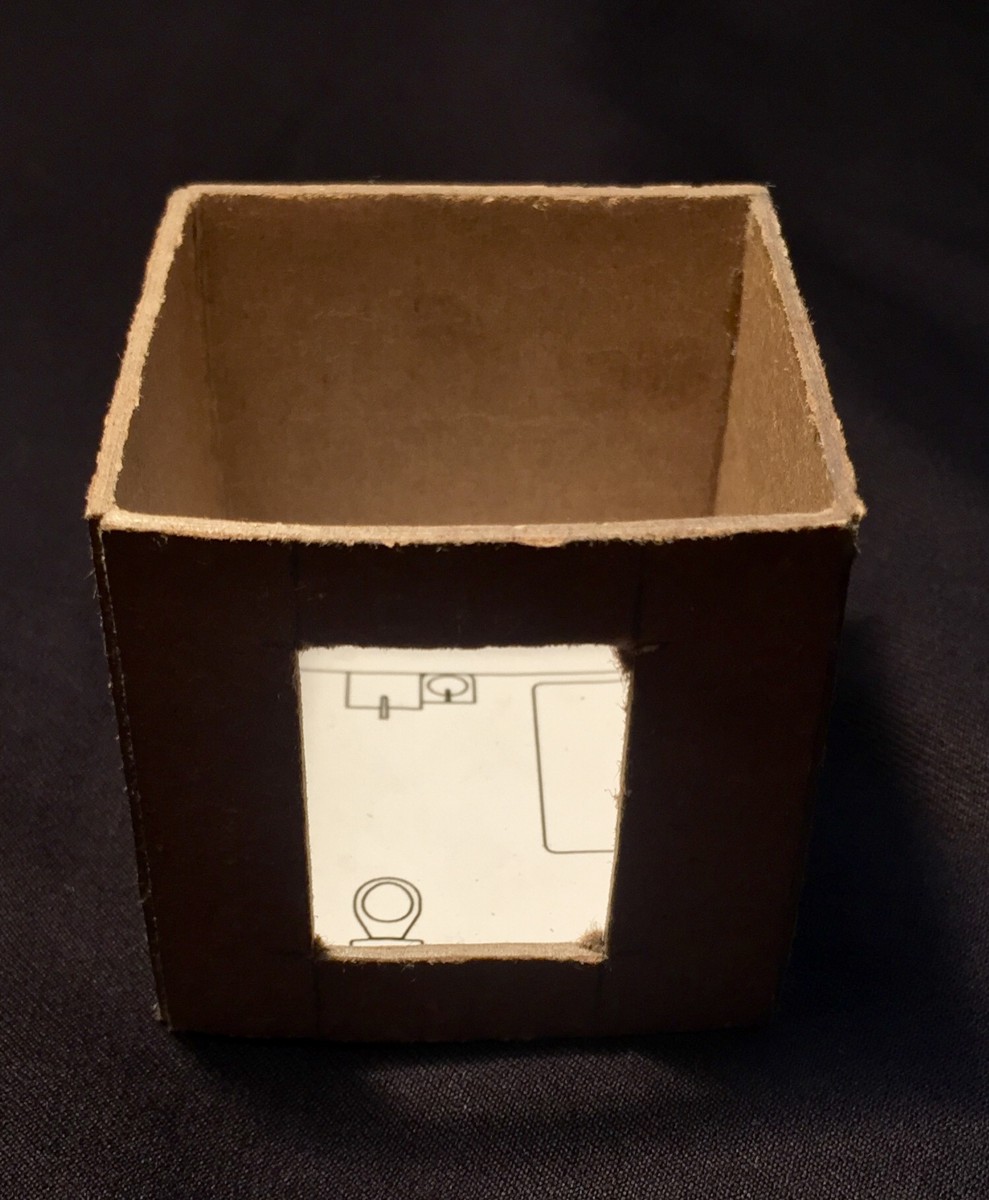
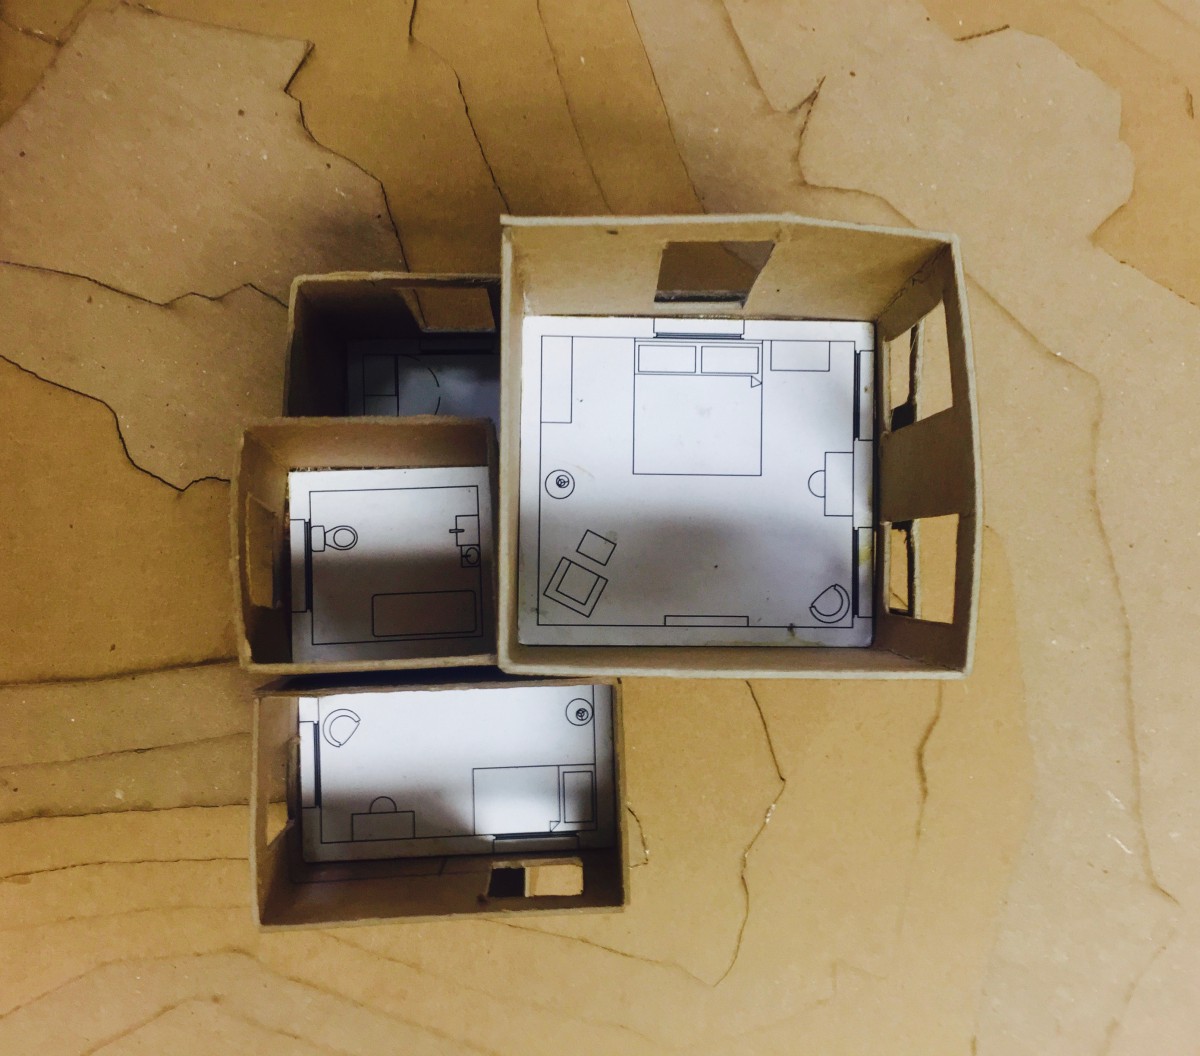
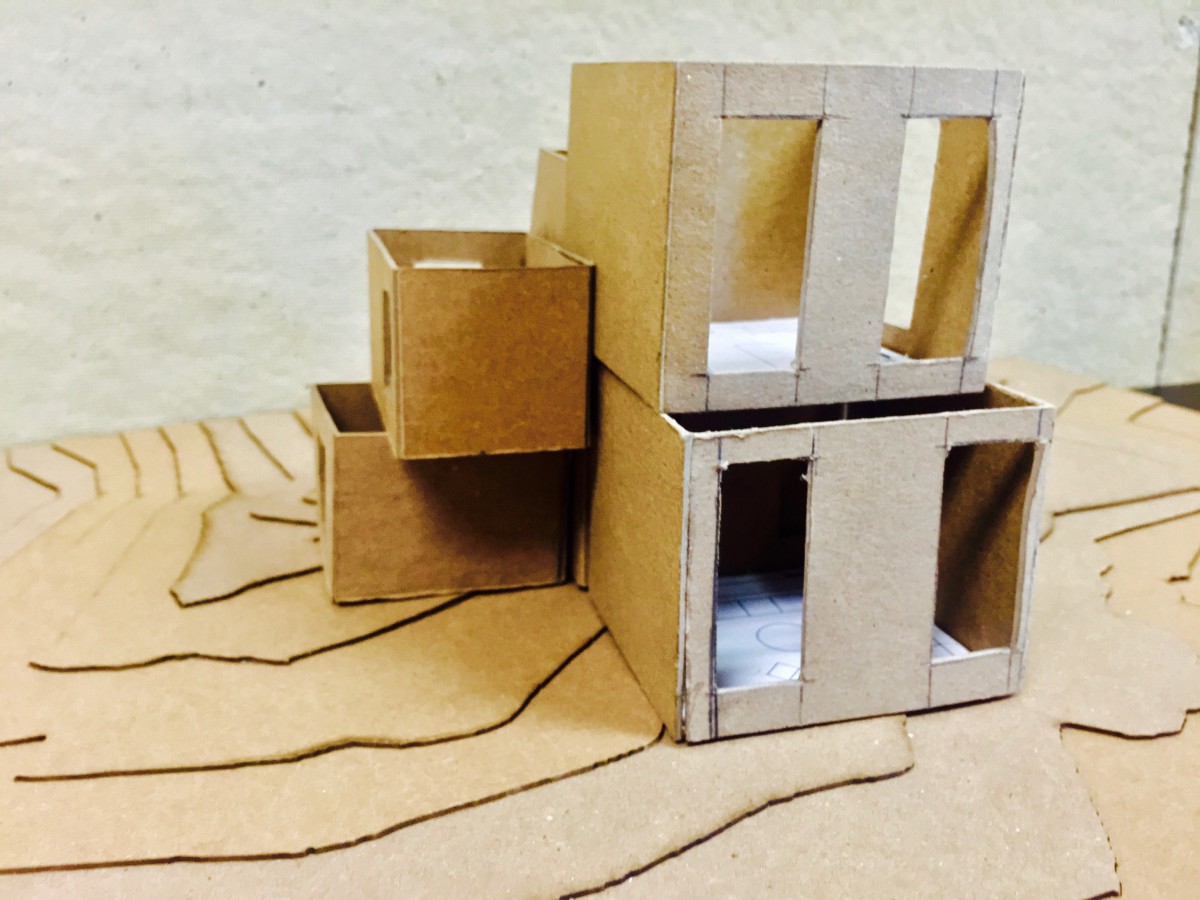
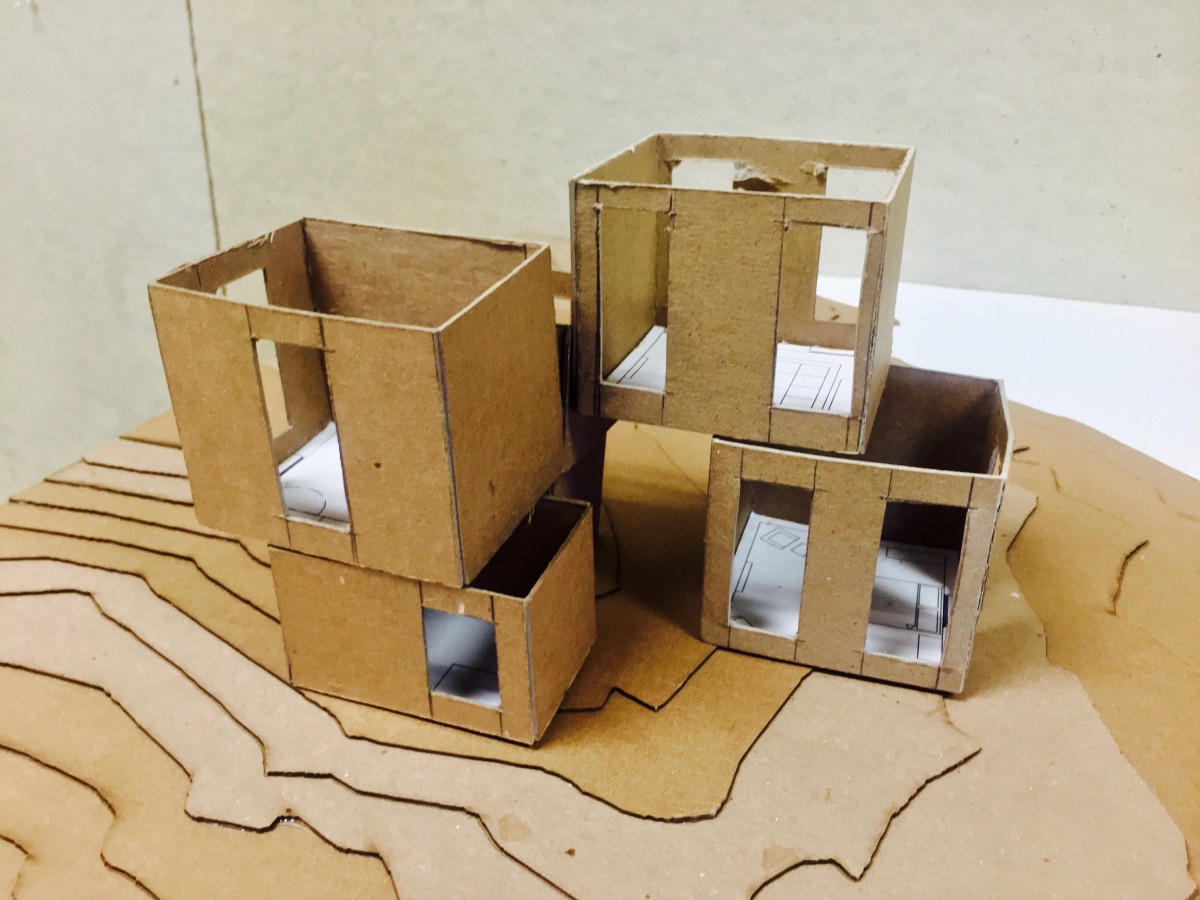
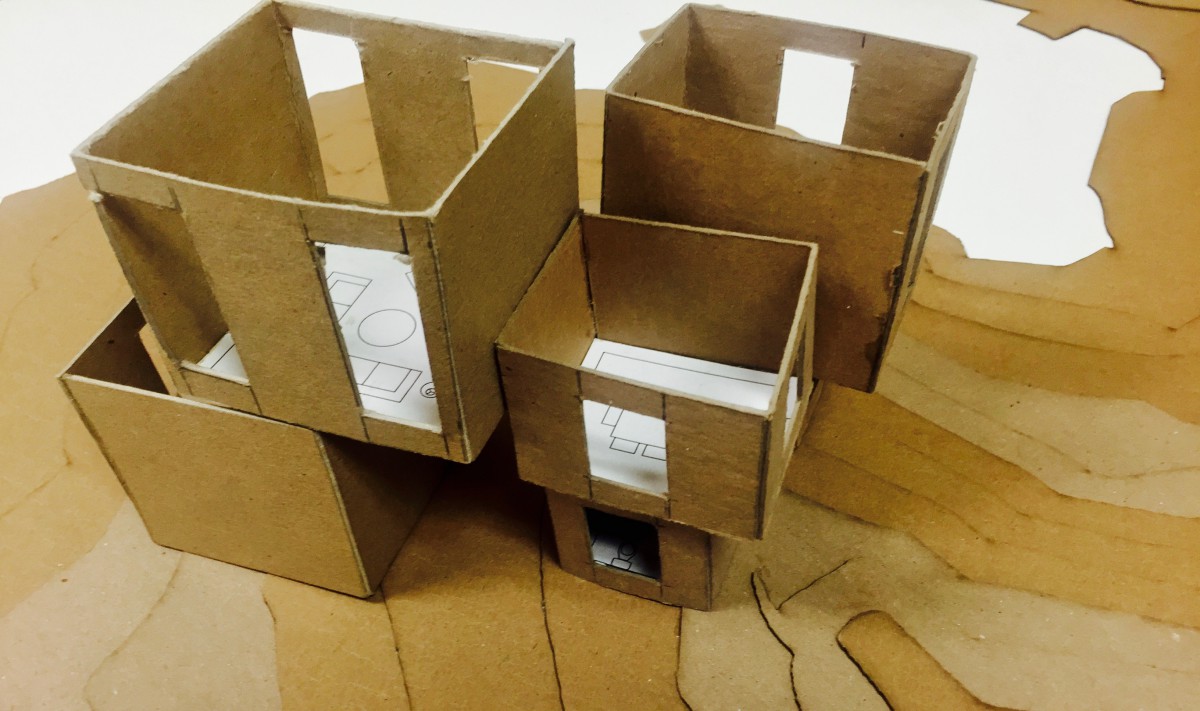
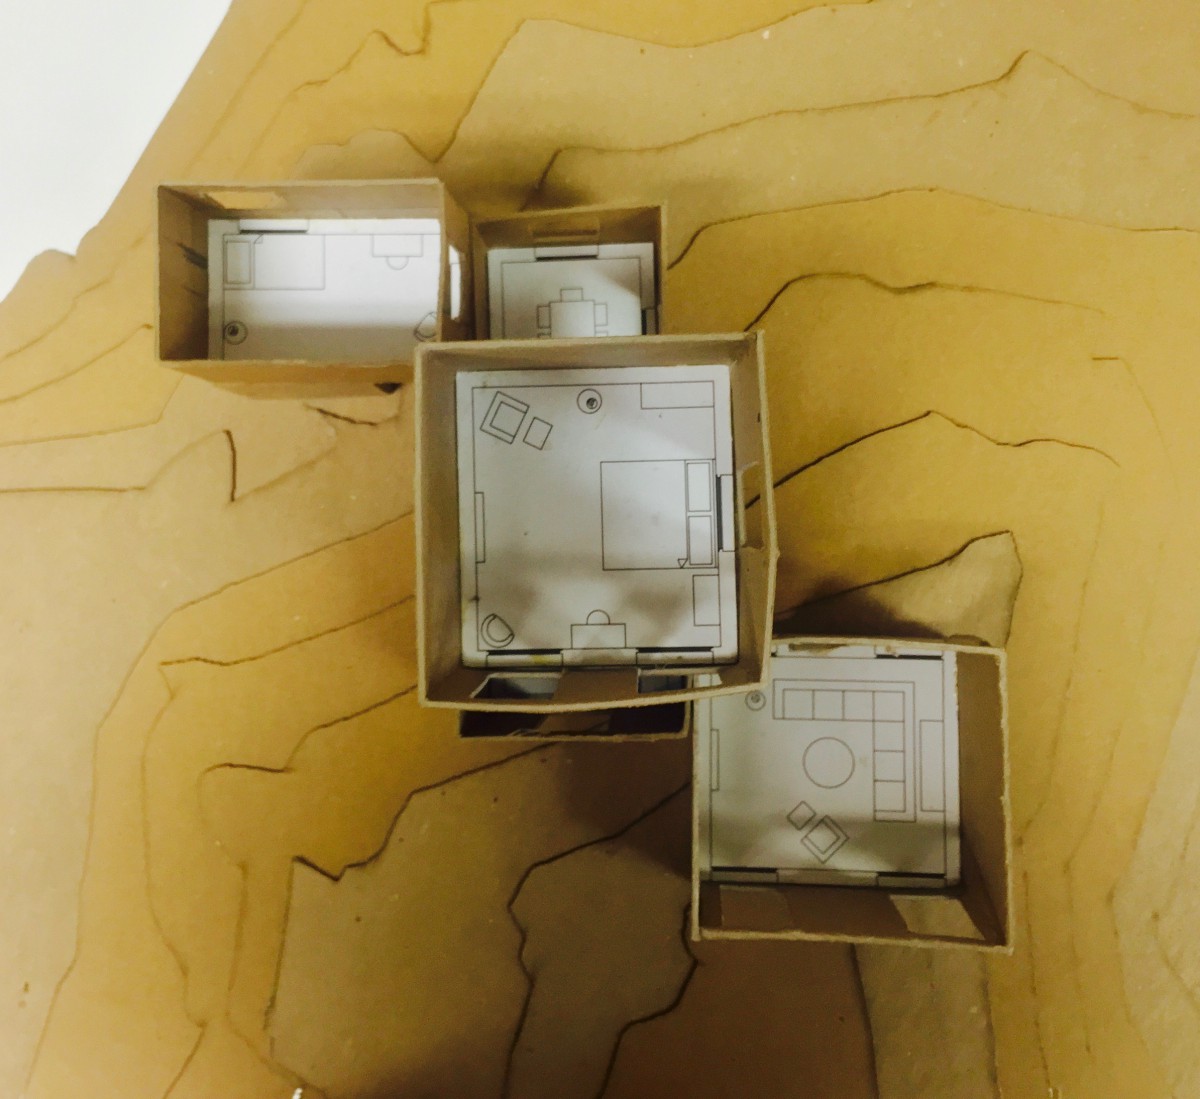
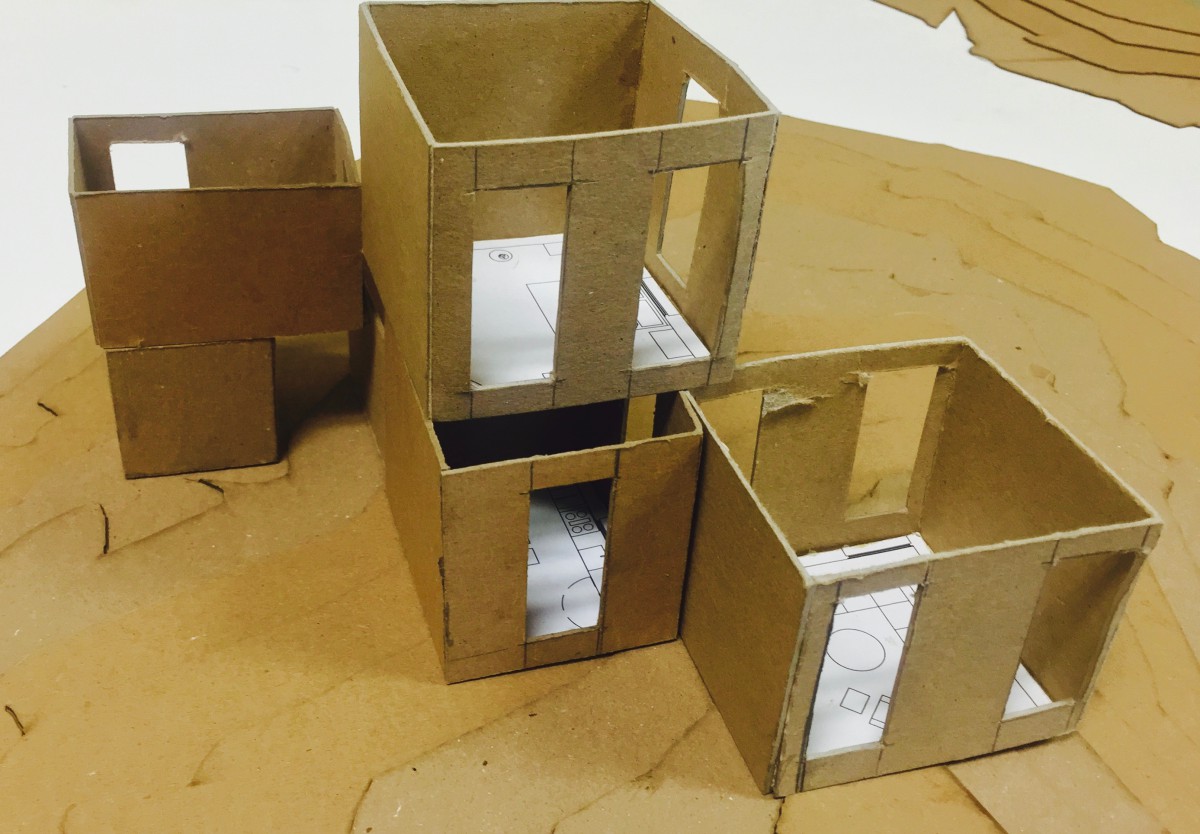
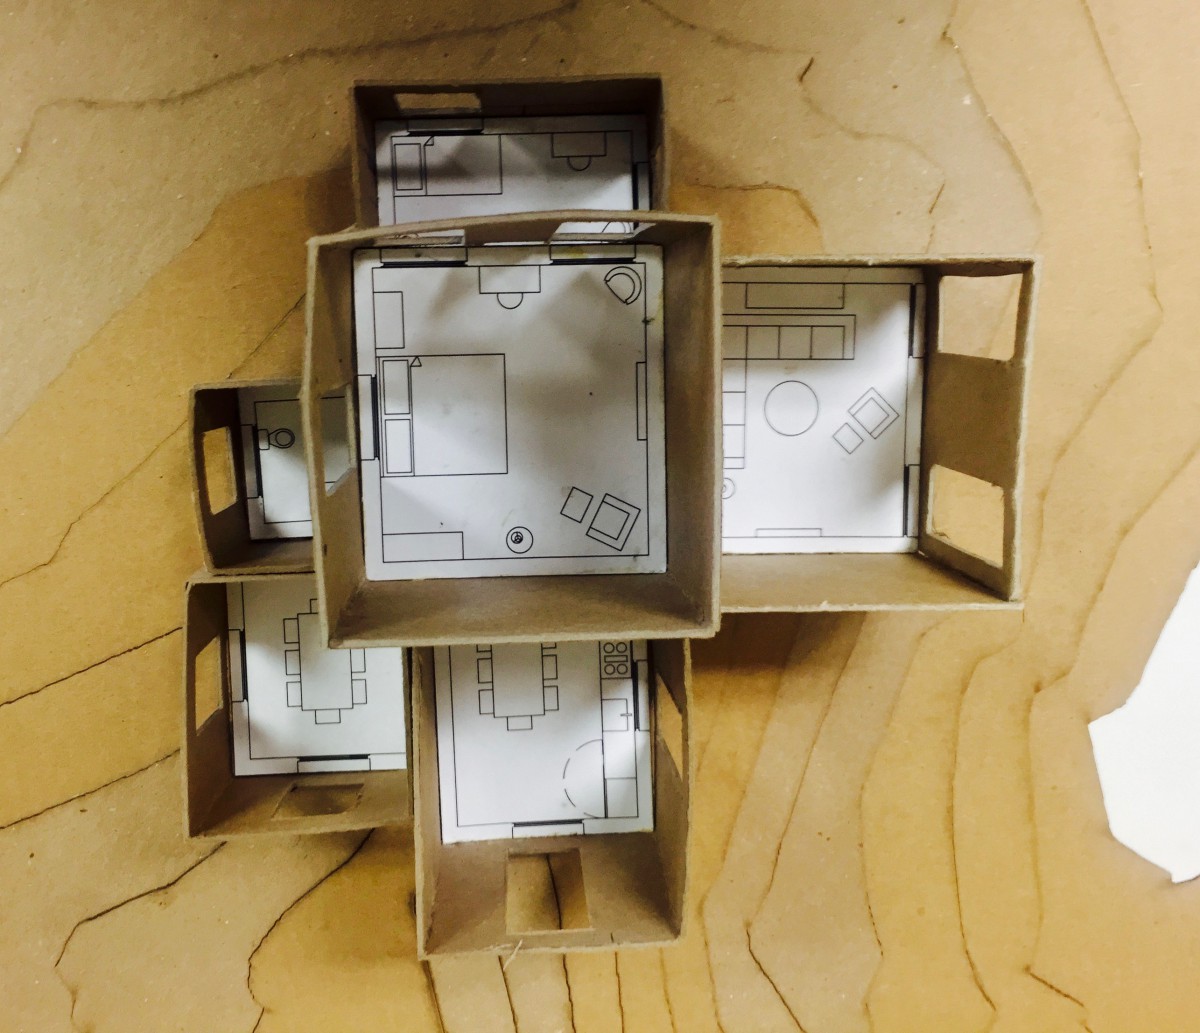
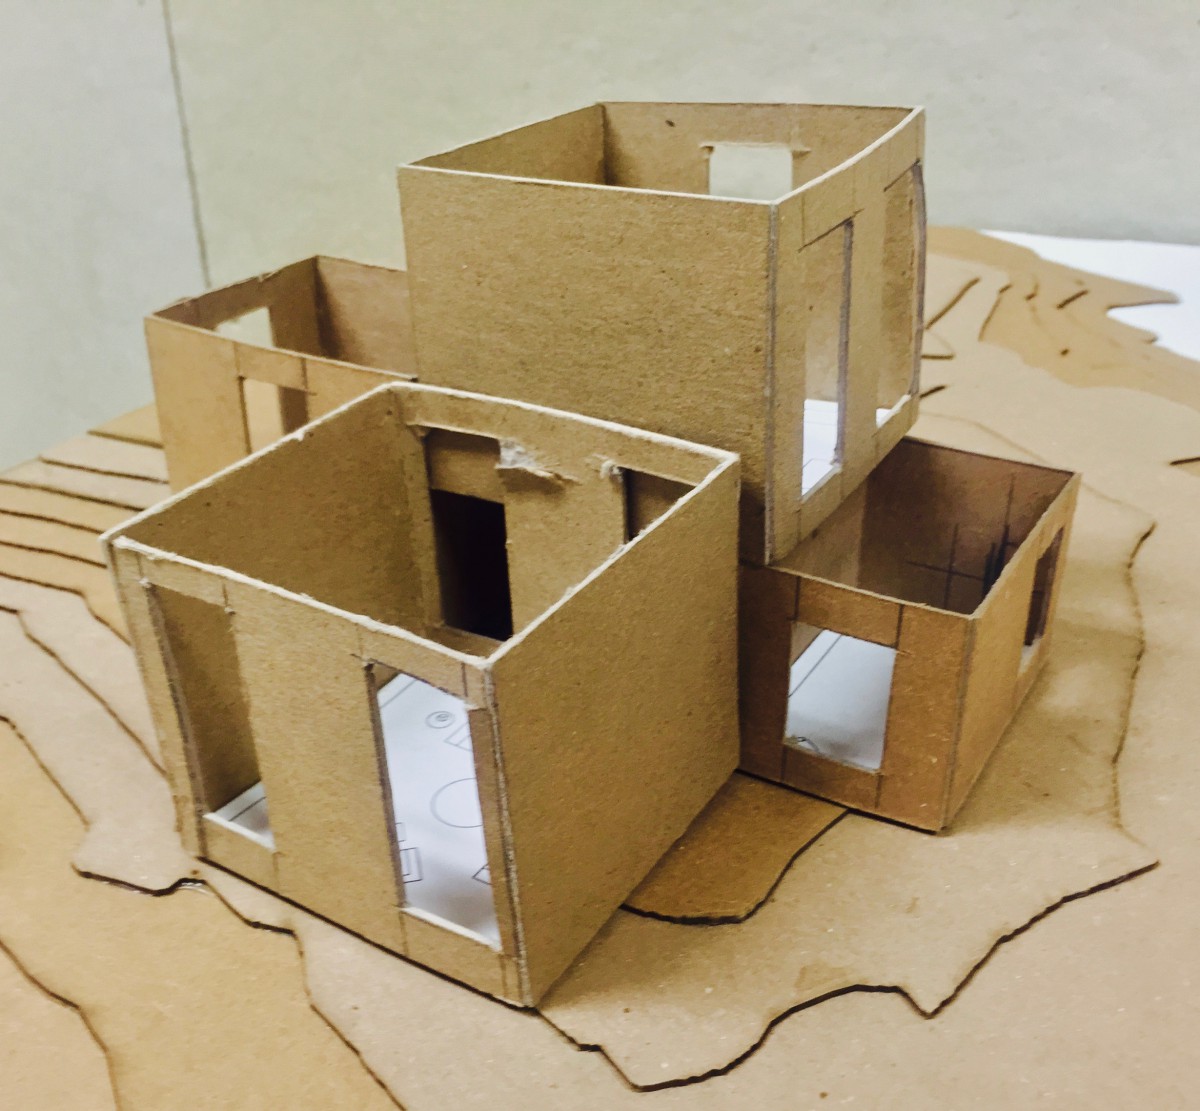
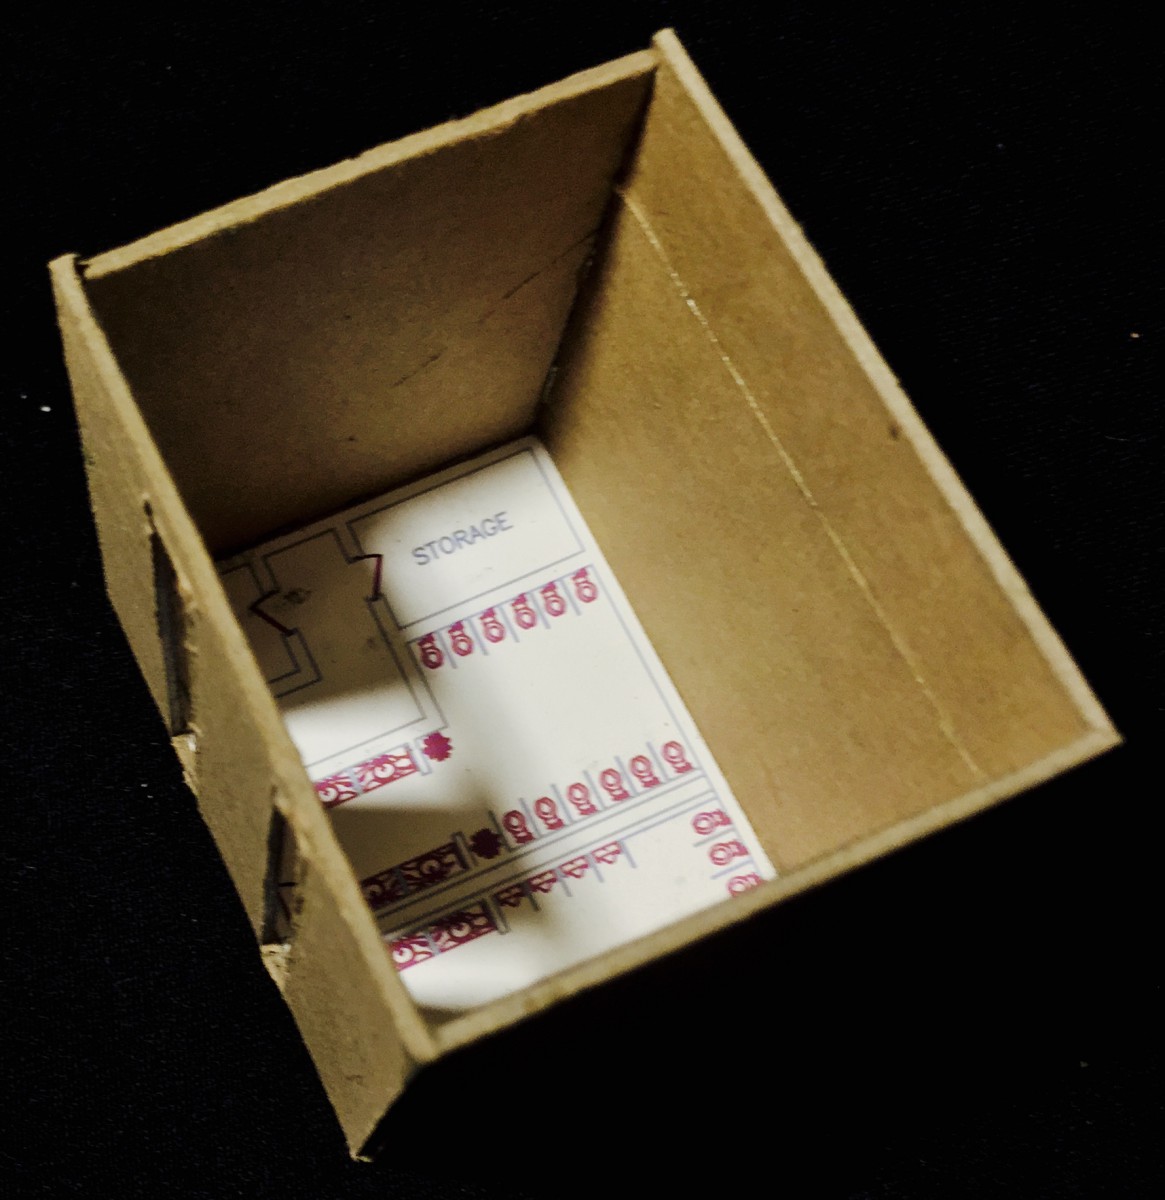
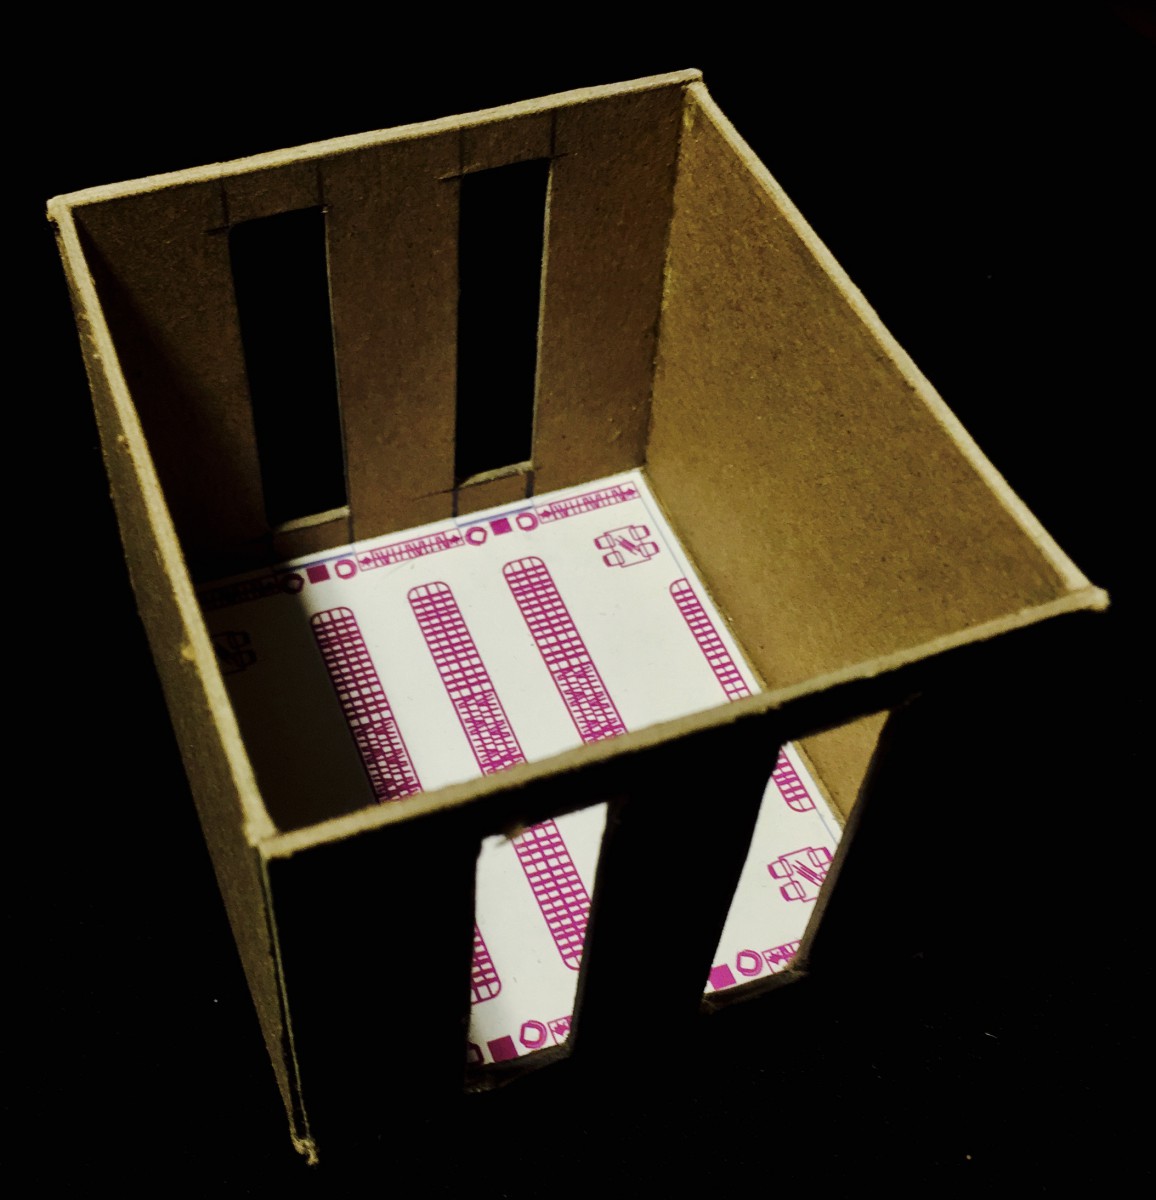
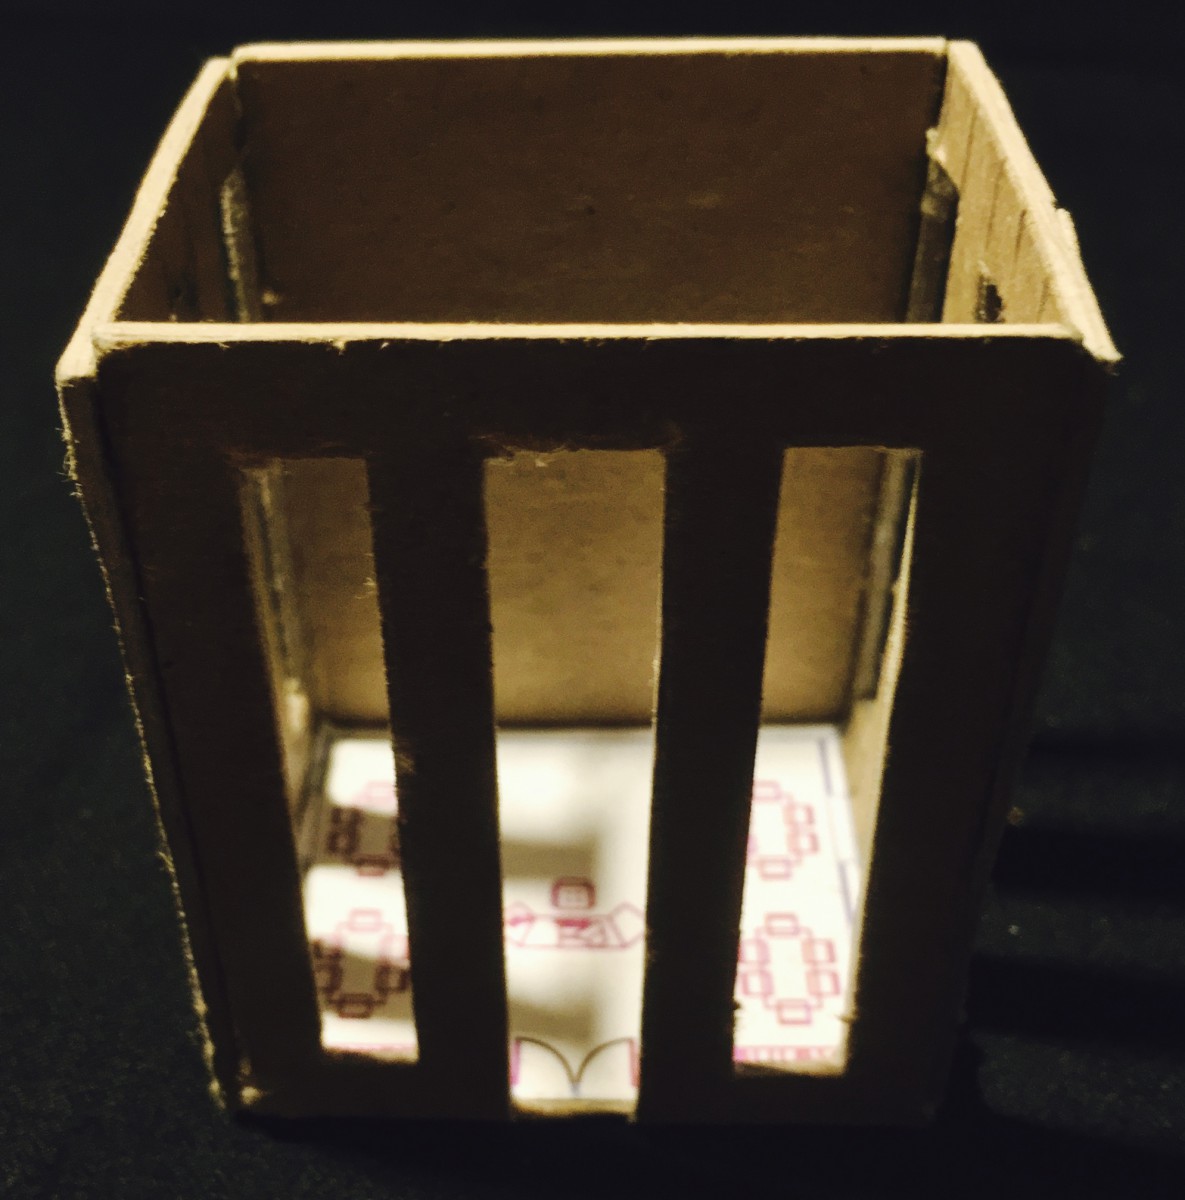
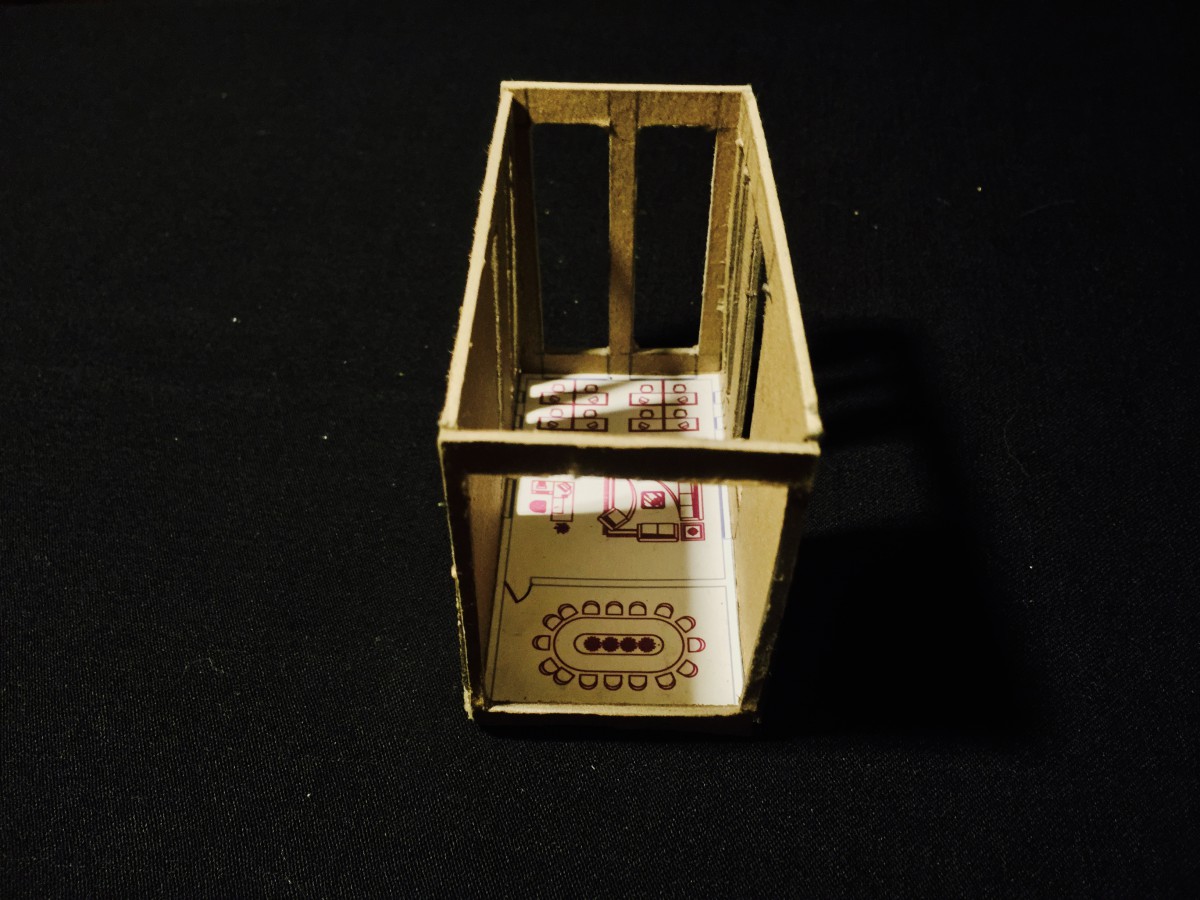
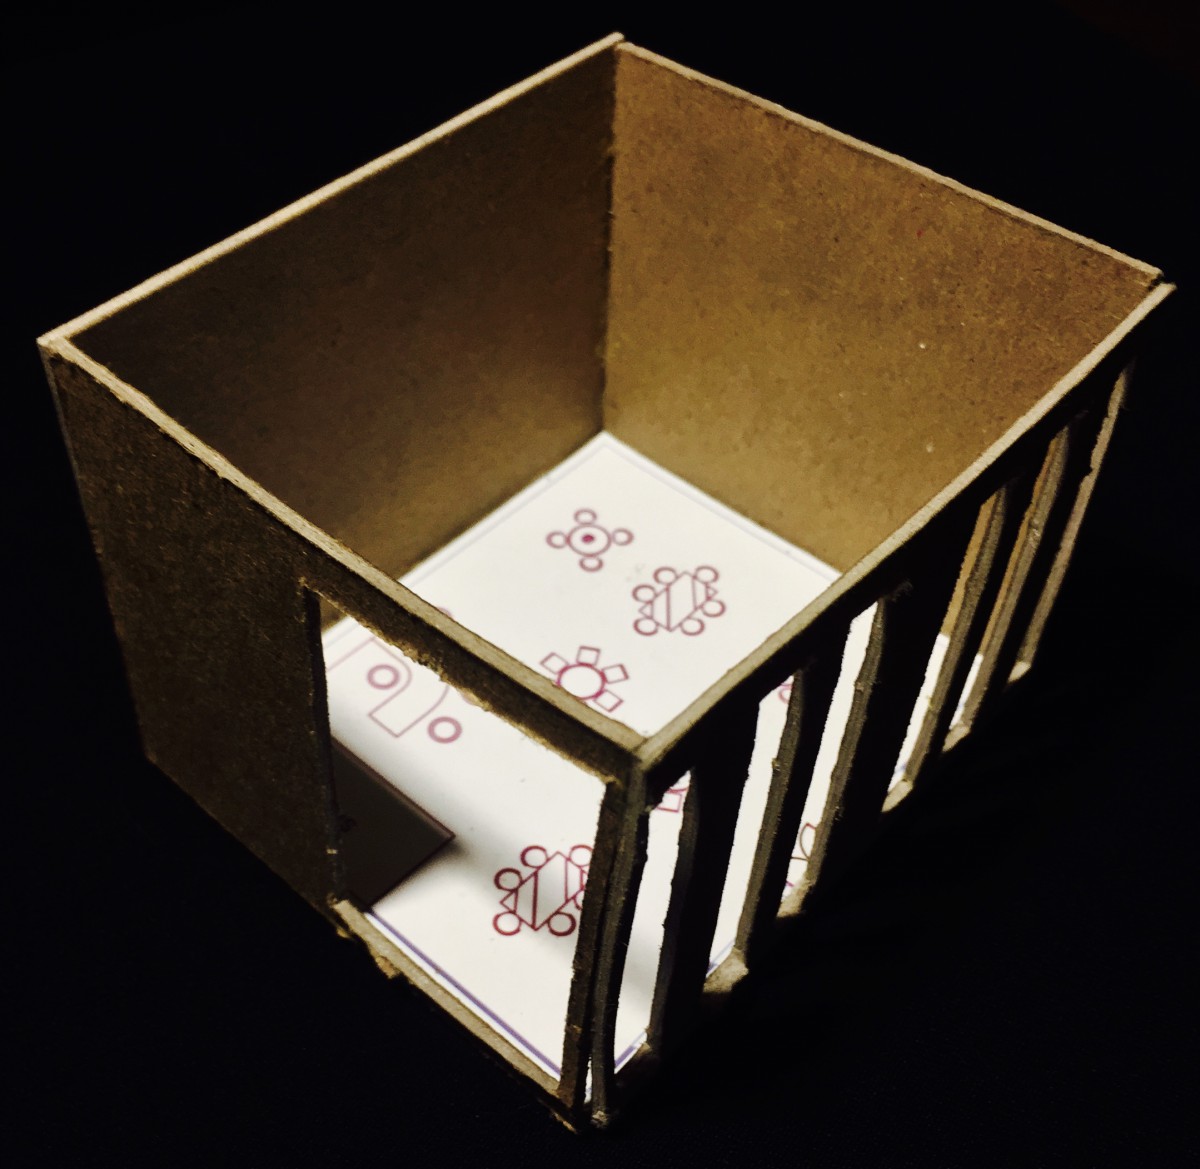
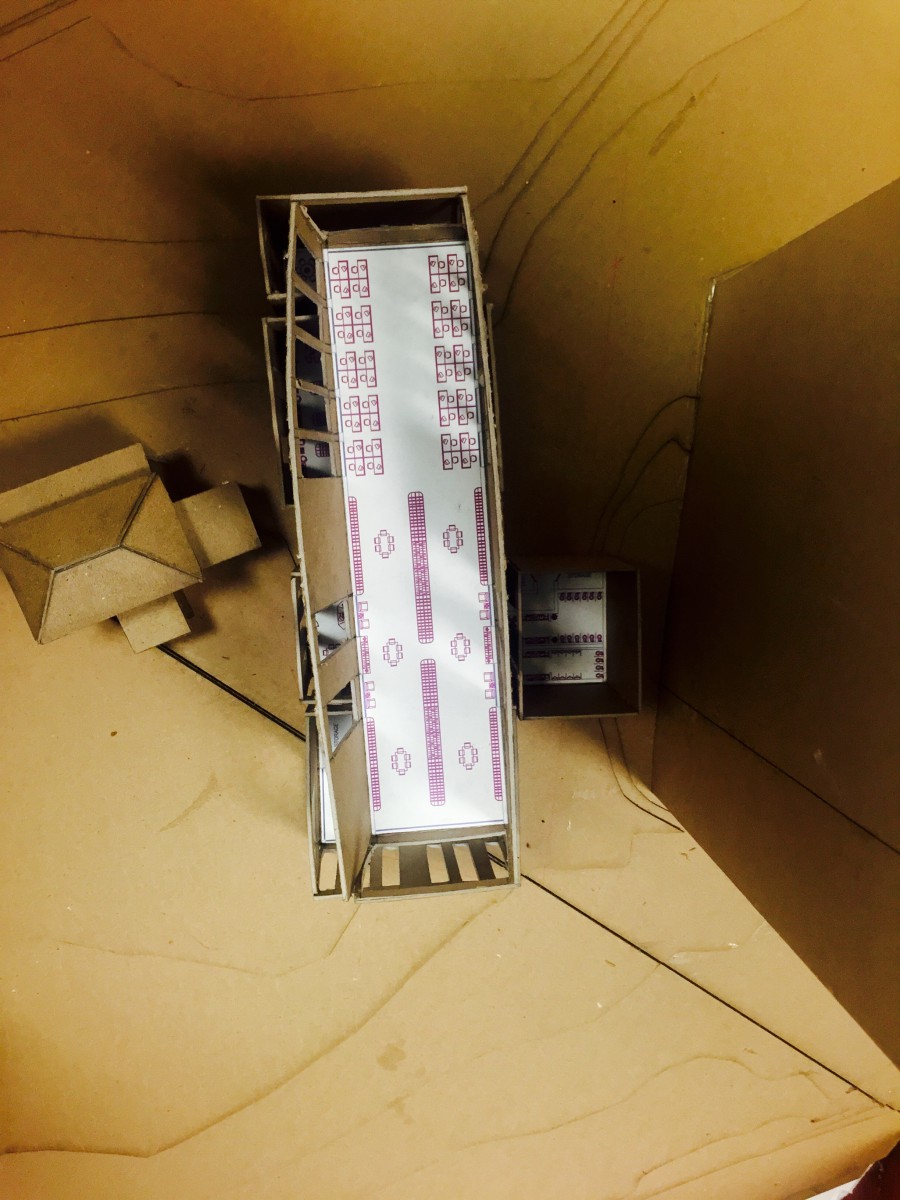
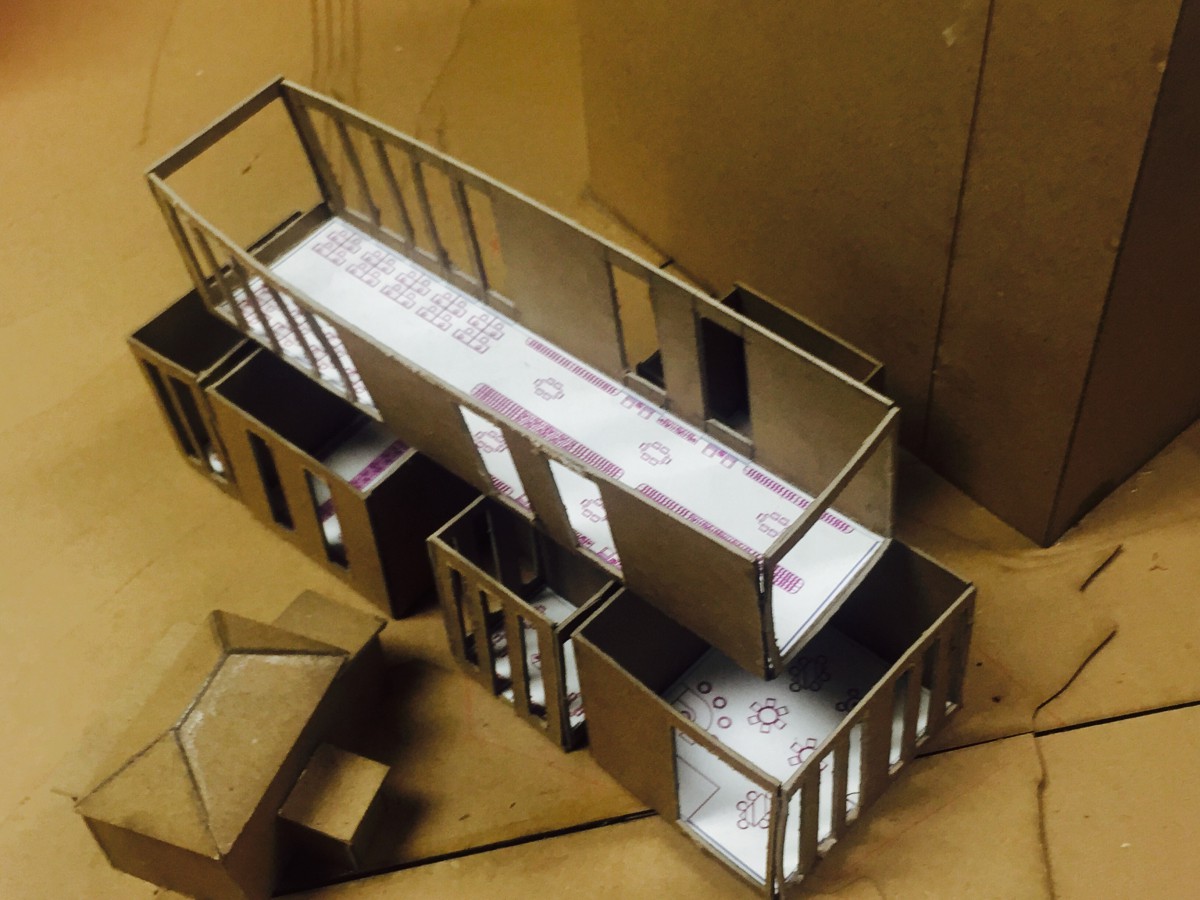
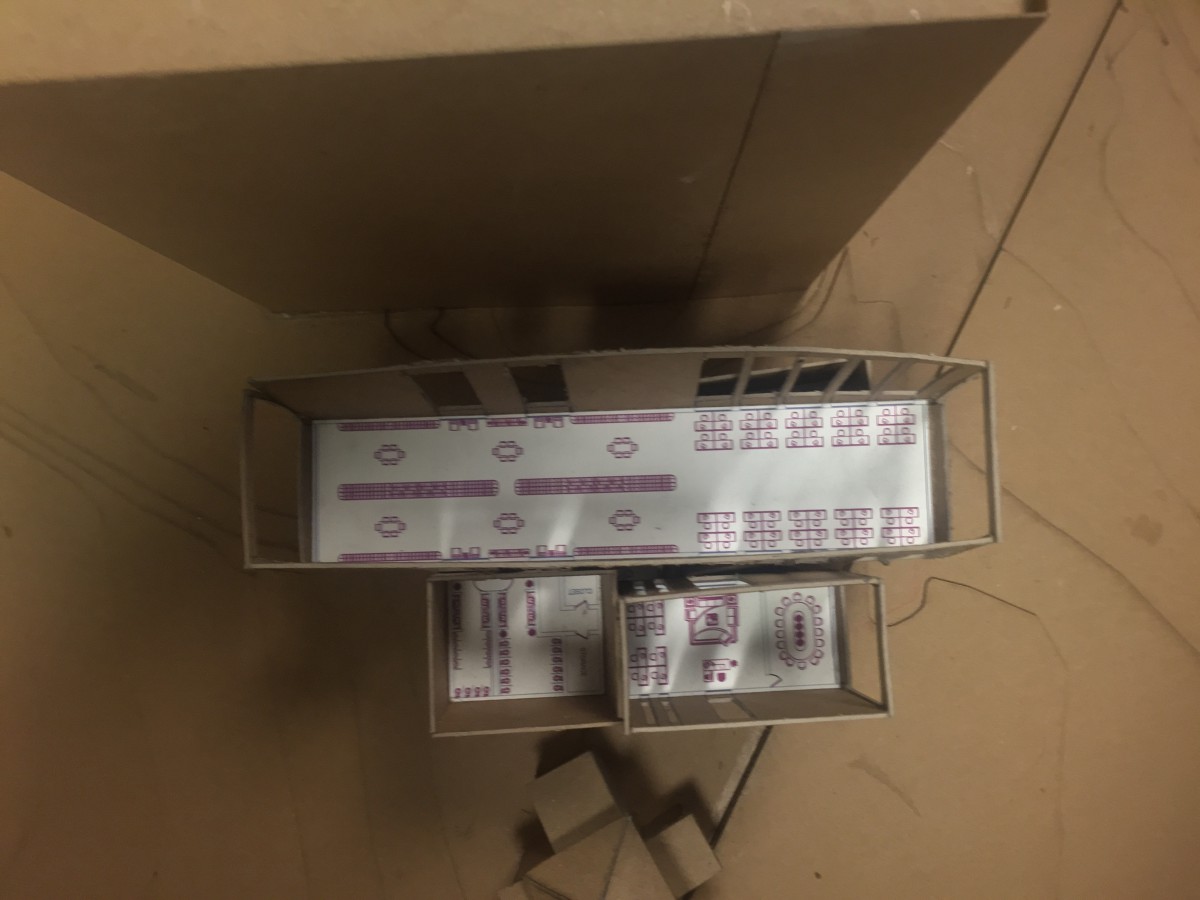
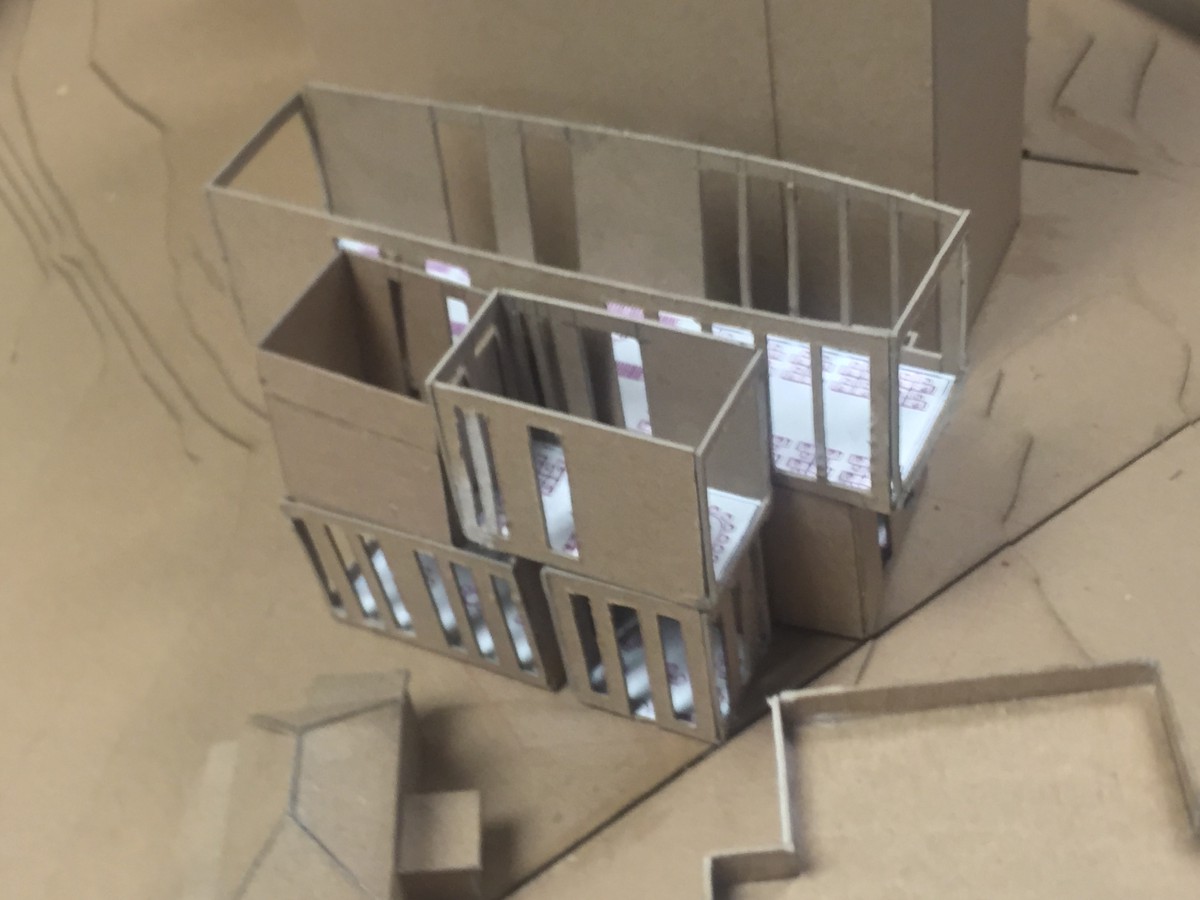
Assignment B: Residential Programs & Modules-Models
Relaxation

Cooking
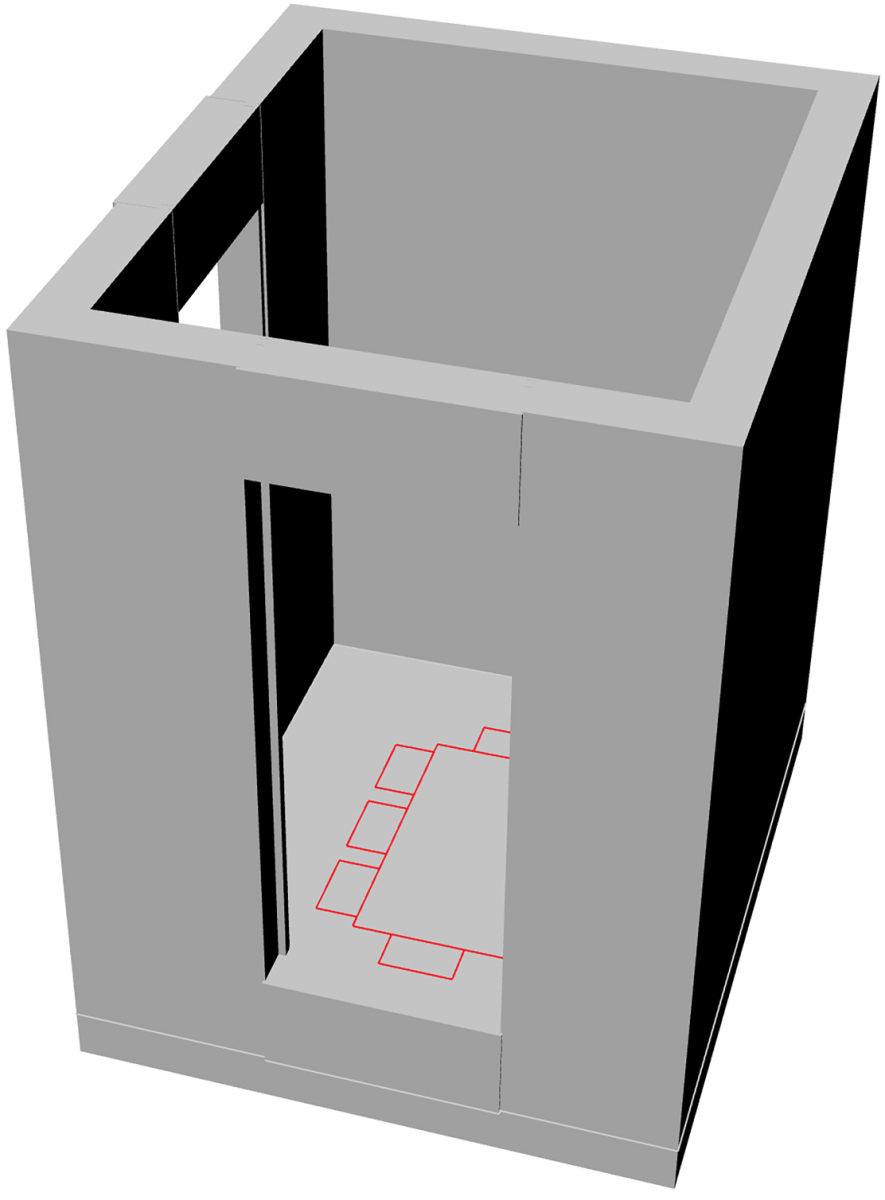
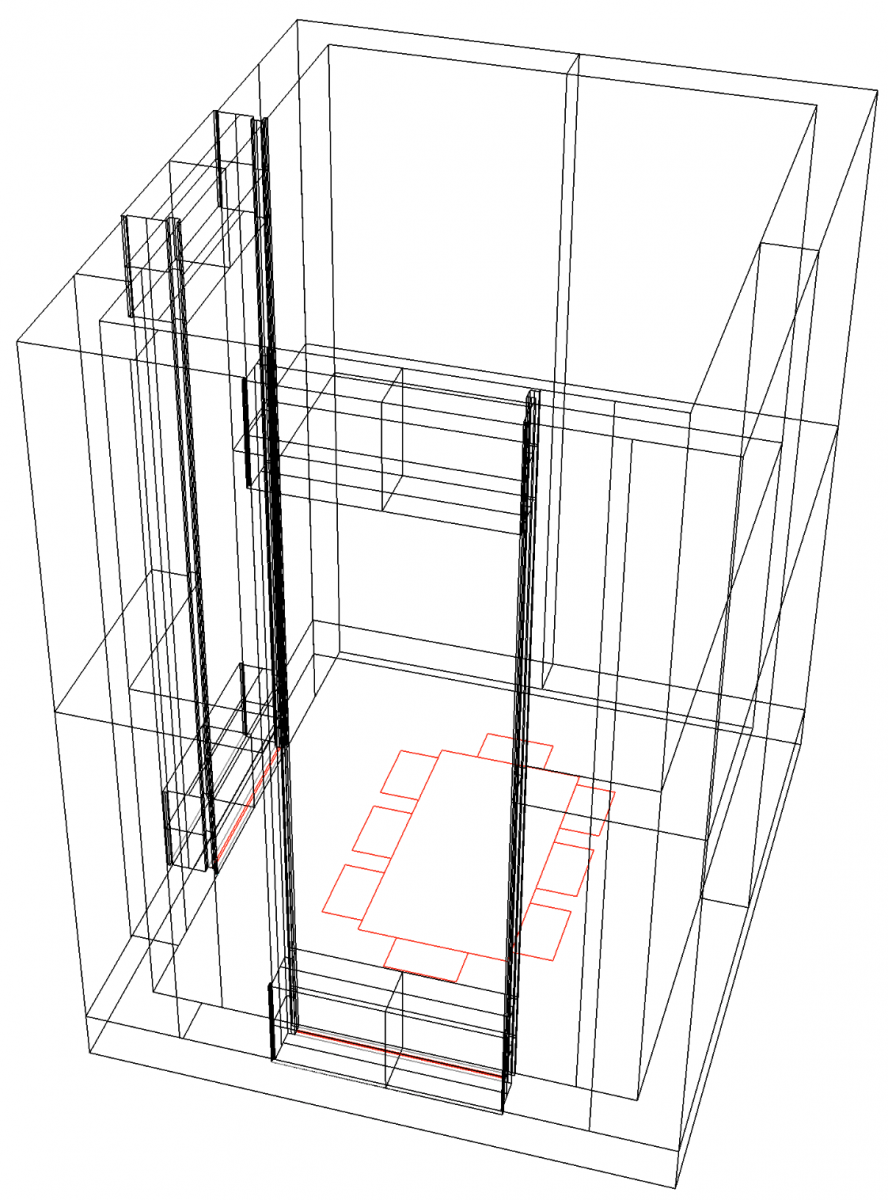
Eating

Sleeping (S)
Sleeping (L)
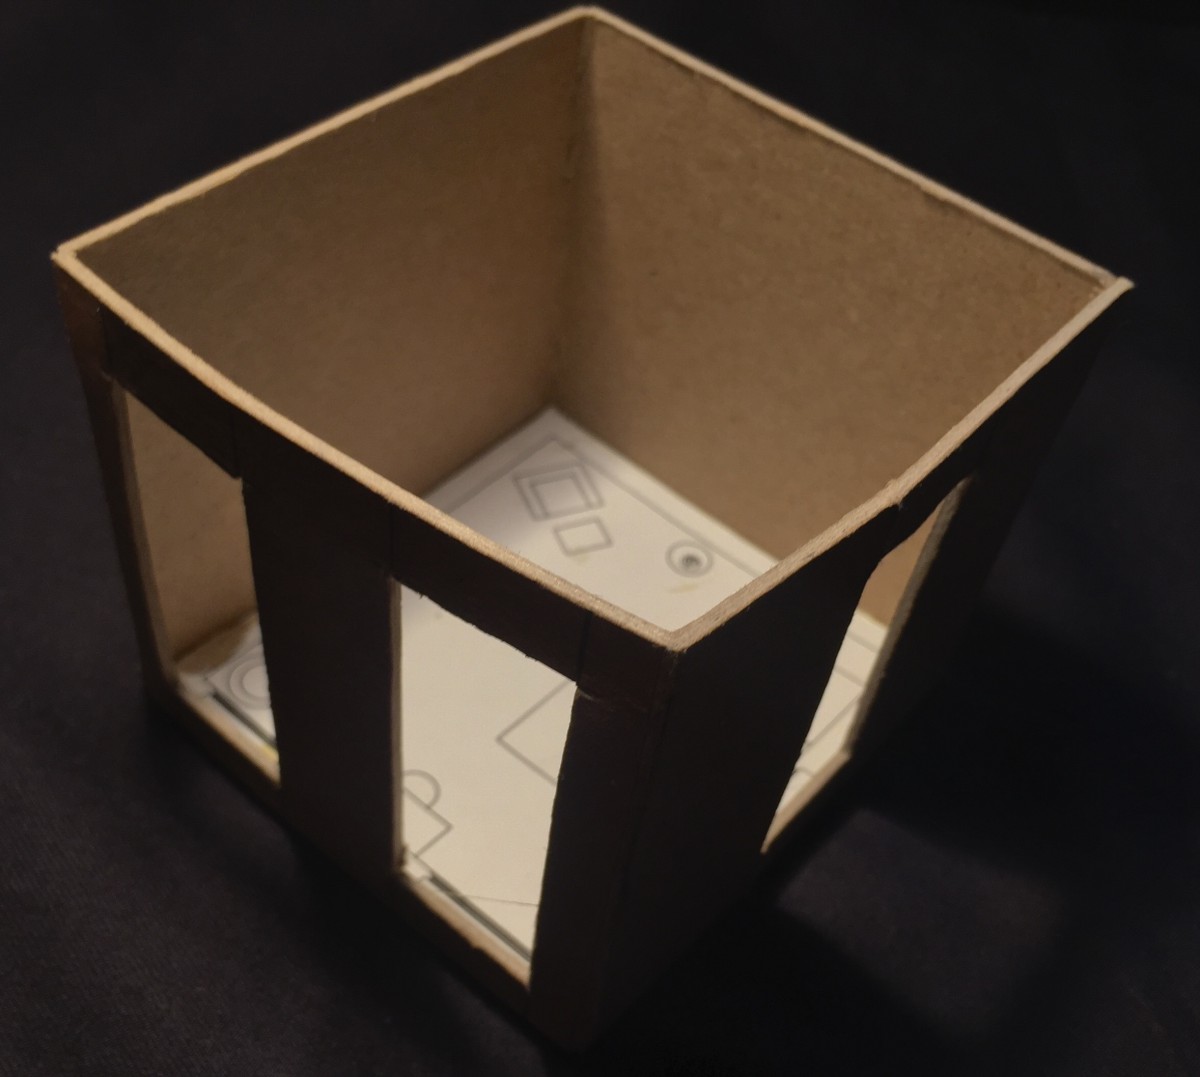
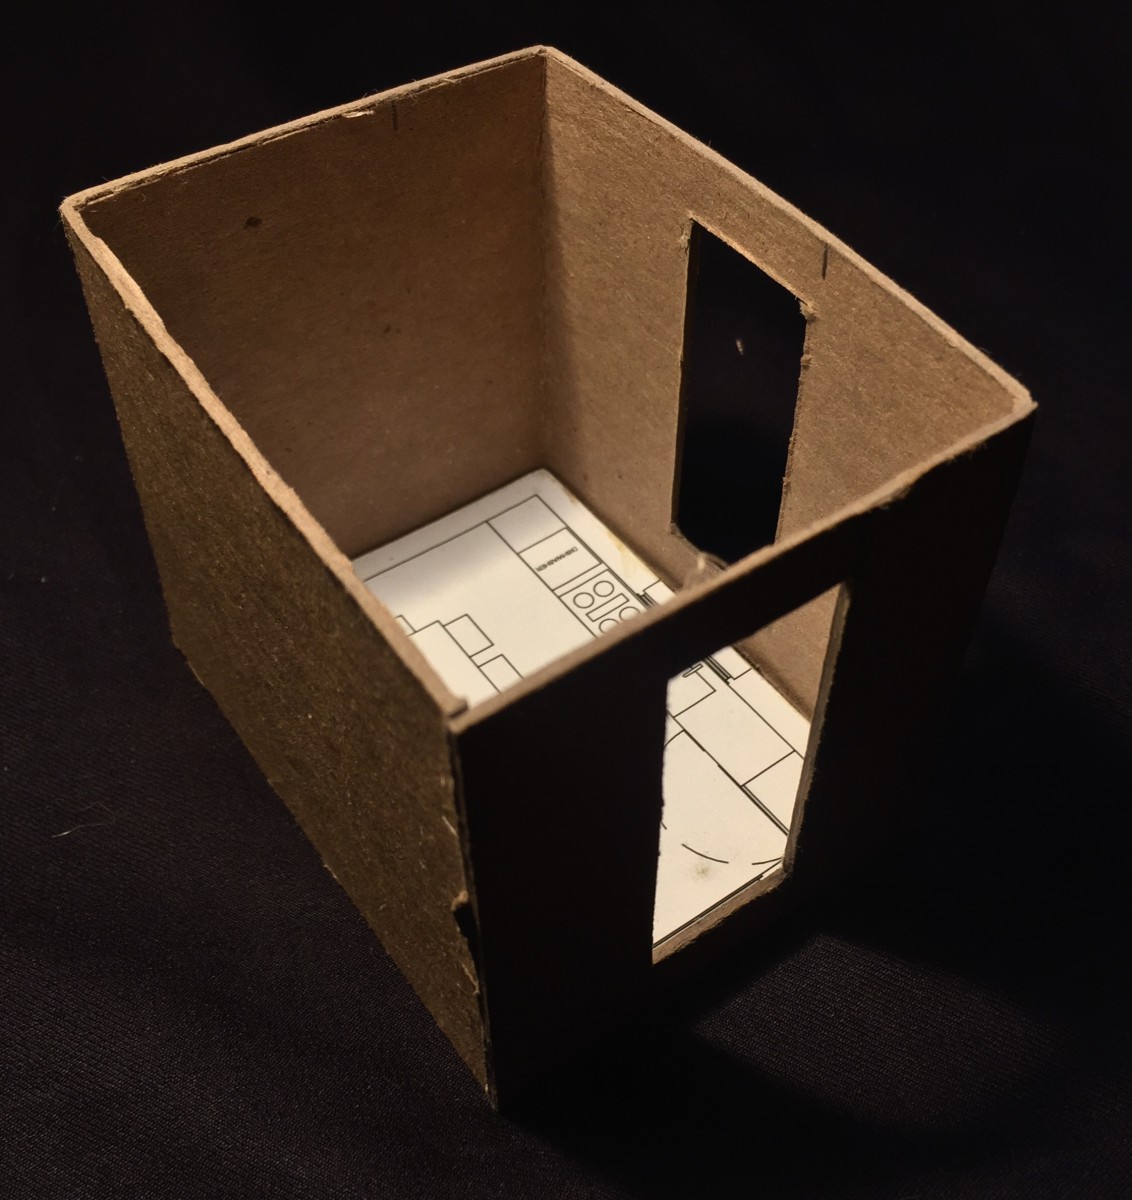
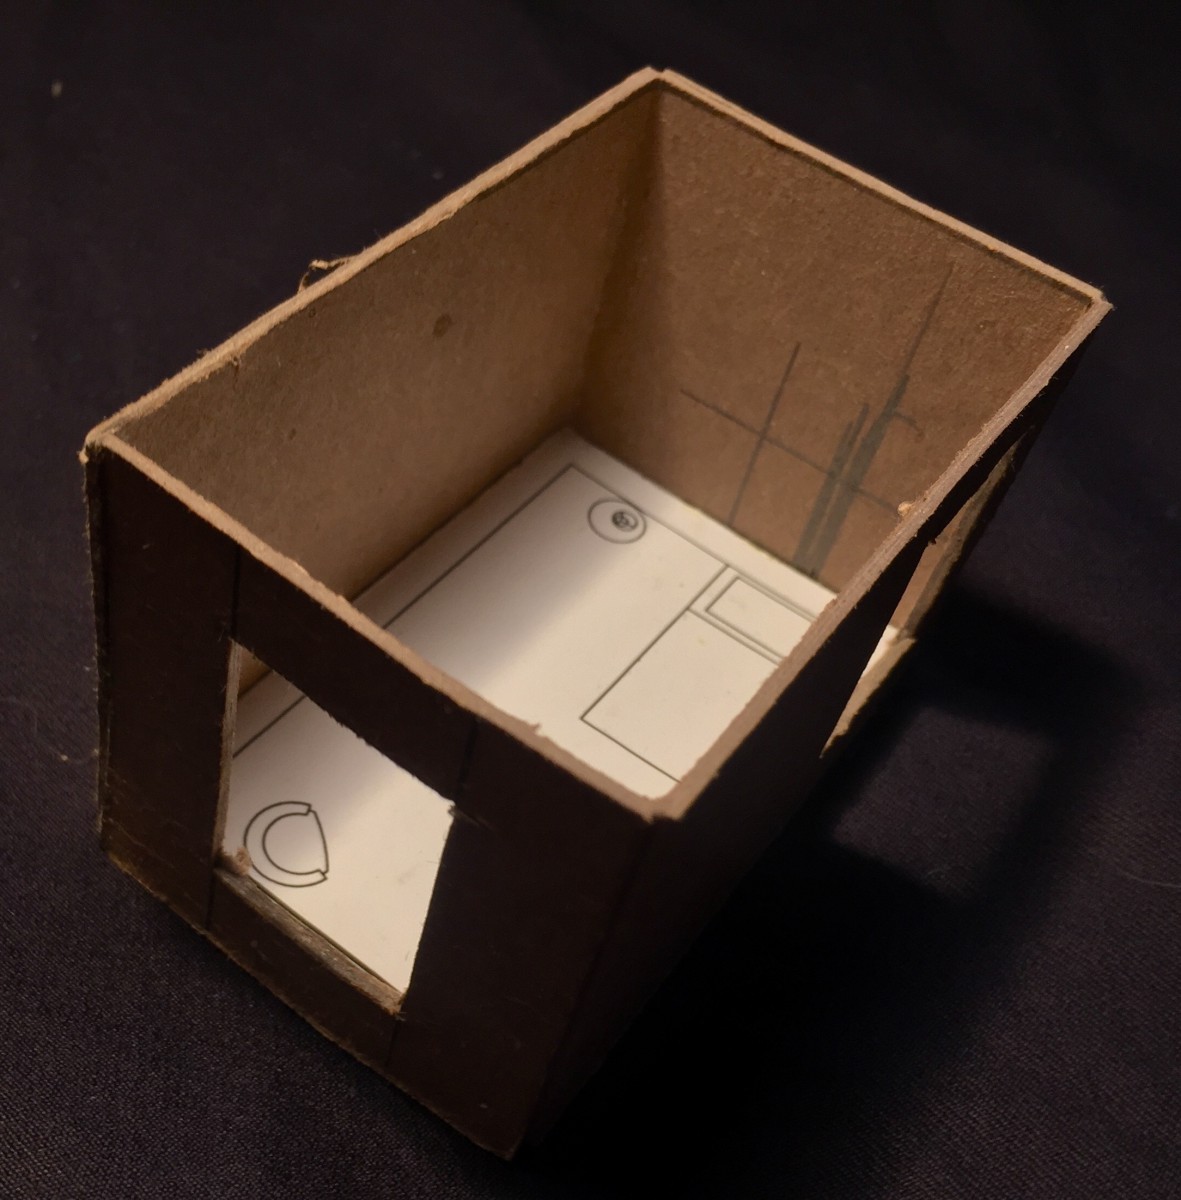
Grooming
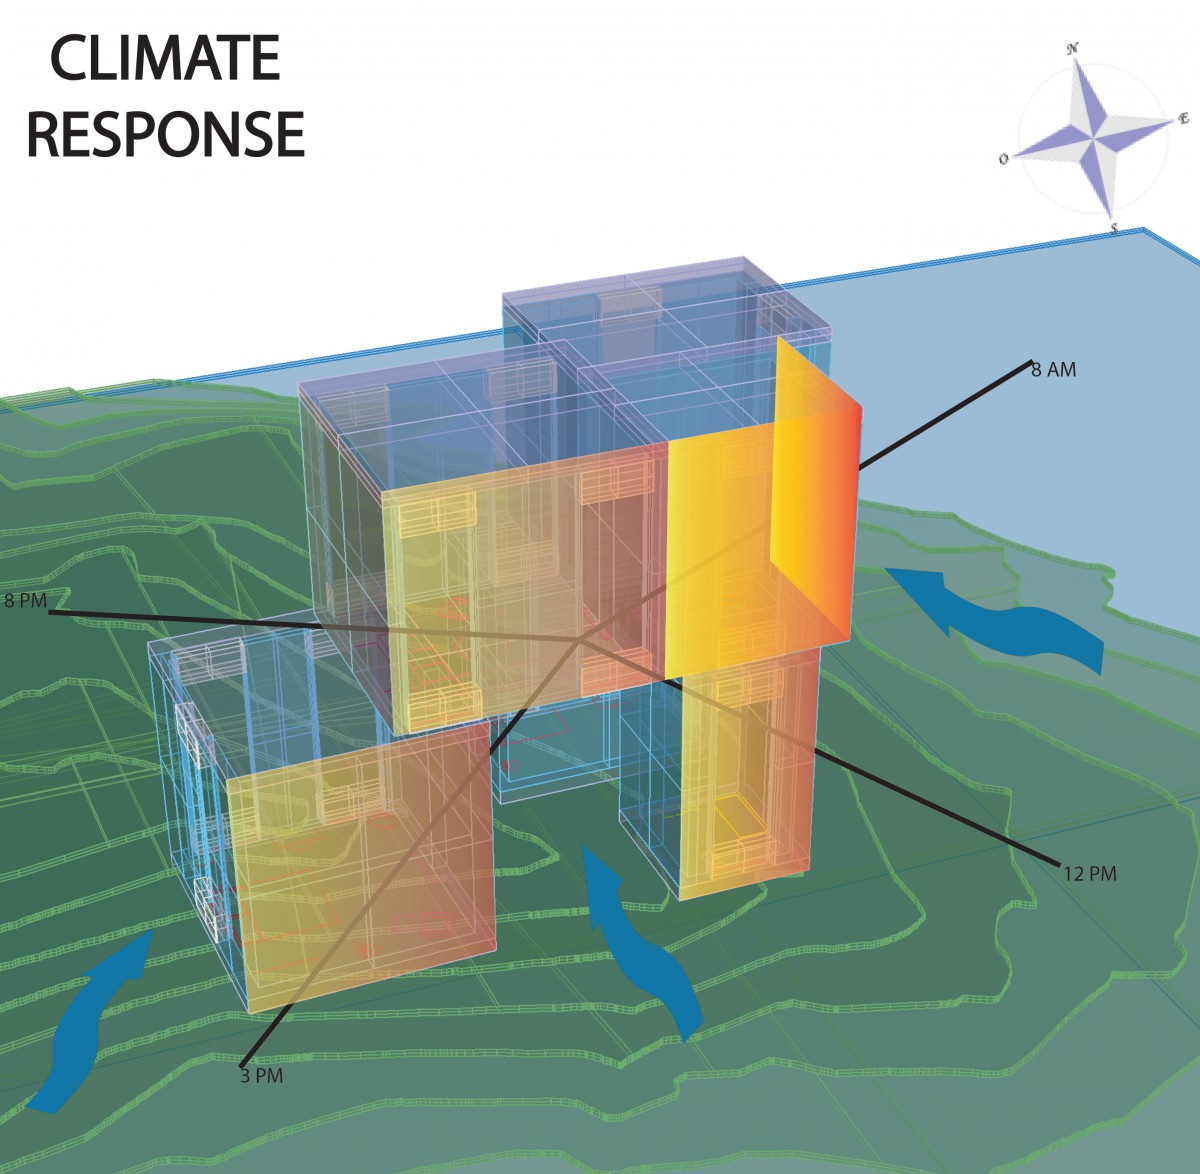
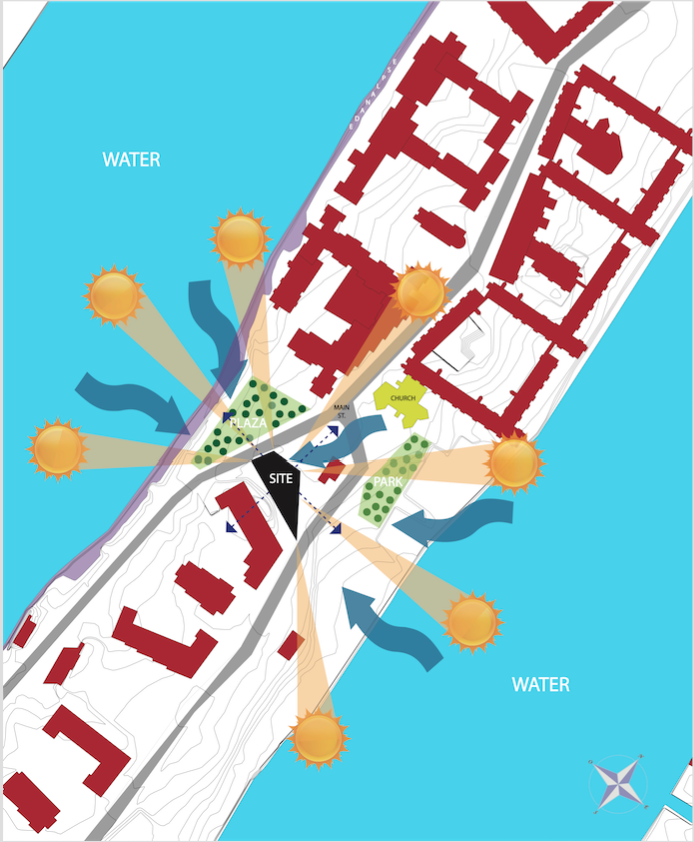
Assignment C: Climate Strategy & Site Analysis
Hot & Humid
Shade-
- Orientation of the Sun.
- Proximity of the building & outdoor space.
- Provide Outdoor Space.
- Making boundaries should require height, shape, & privacy.
- Effective windbreaks & reduce heat loss from a building during winter.
- Open spaces for the winds will be able circulate around the house.
- There would be a mixture of Hot/Cold breeze winds going back and fourth.
- Air pressure.
- Trees will shape out the space for activity and movement.
- Desirable views.
- Provide privacy for outdoor spaces.
- Building Form extended along the E.W.-axis minimizes east & west exposures.
- Reduce solar heat gain.
- Utilizes wind to promote cooling for evaporation.
- Provides solar shade for windows & outdoor space.
- Hot & Humid climate regions, high temp. are accompanied by very high humidly levels leading to immense discomfort.
Structure Material-
- Concrete
- Steel
These 2 types of materials are used to support the system due to the climate zone of Hot & Humid. This type of zone is consisted of tropical rain falls, strong winds, and possibly hurricanes, if the weather is strong.
- Resist heat gain.
- Increase shade of buildings.
- Use materials that will take longer time to heat up.
- Use materials that can reflect heat.
- Proper ventilation.
Assignment D: Residential Space Model & Views
Configuration #1


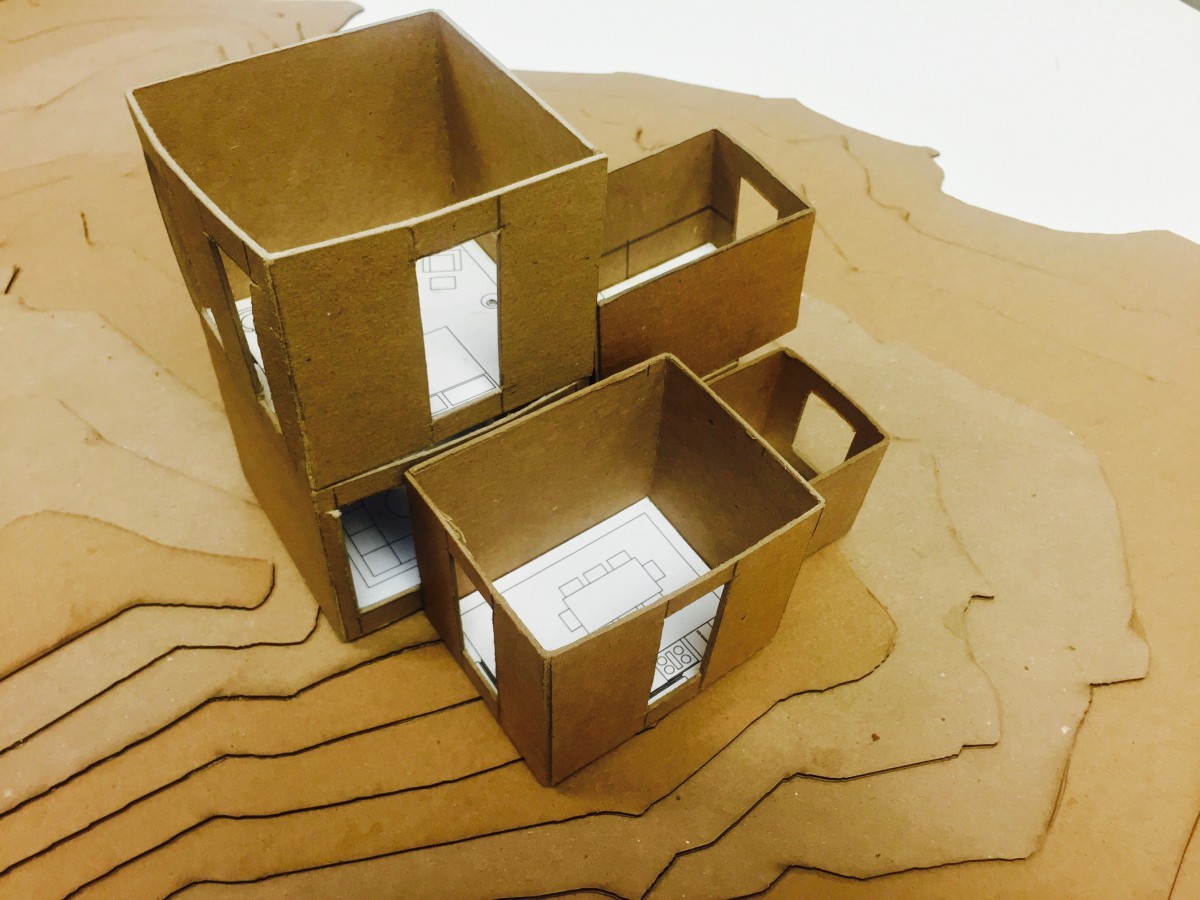
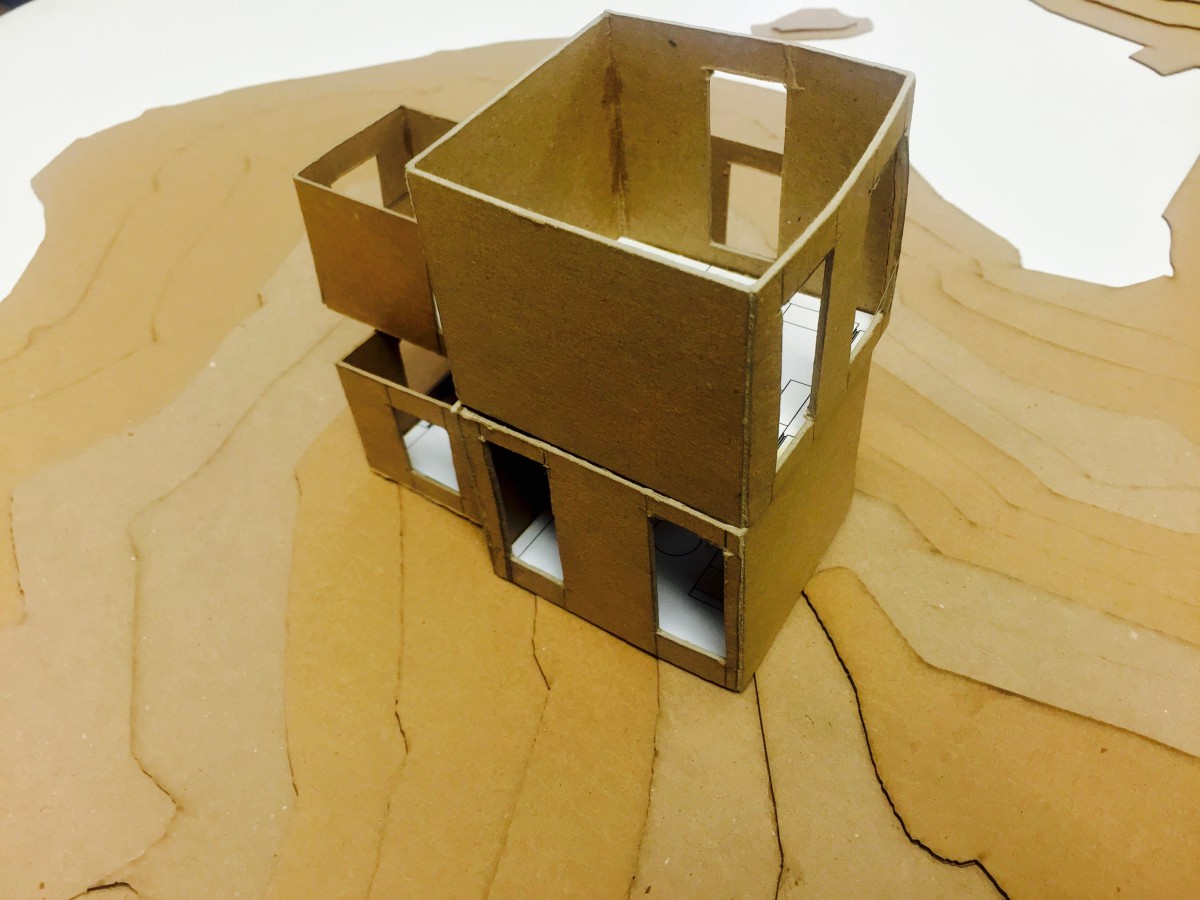
Configuration #2

Configuration #3

Configuration #4
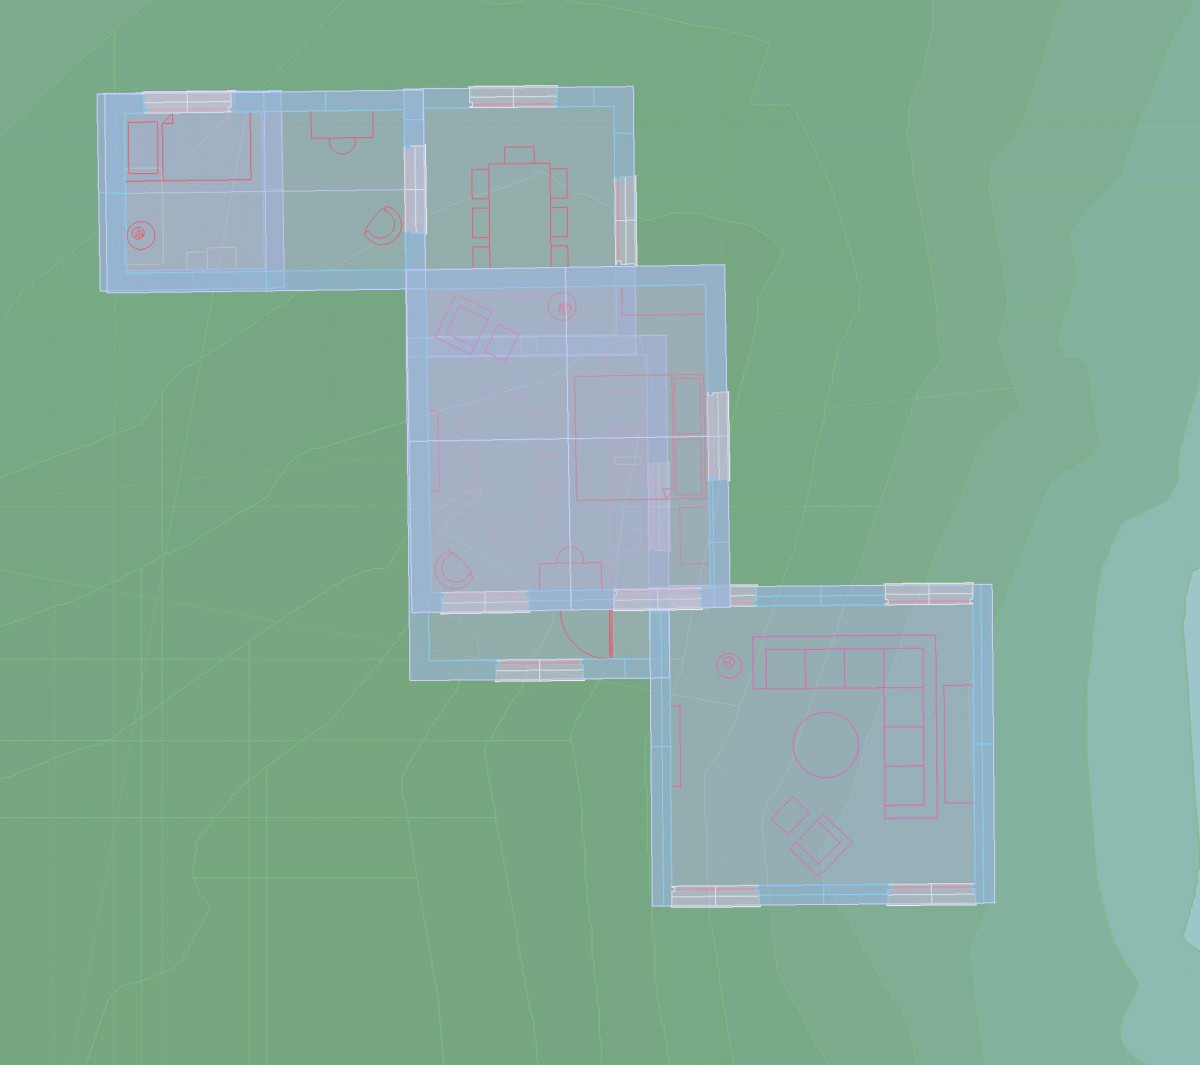
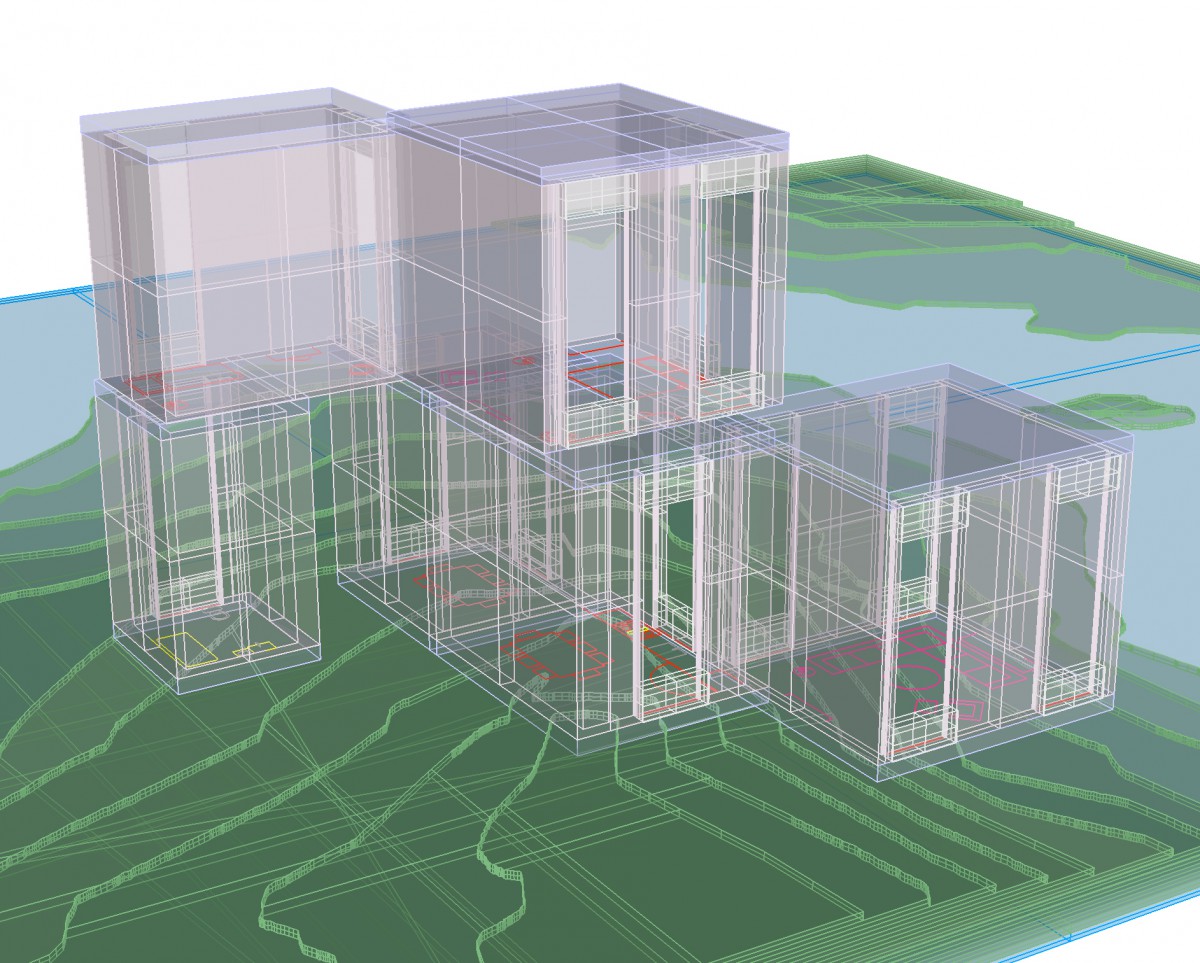

Configuration #5

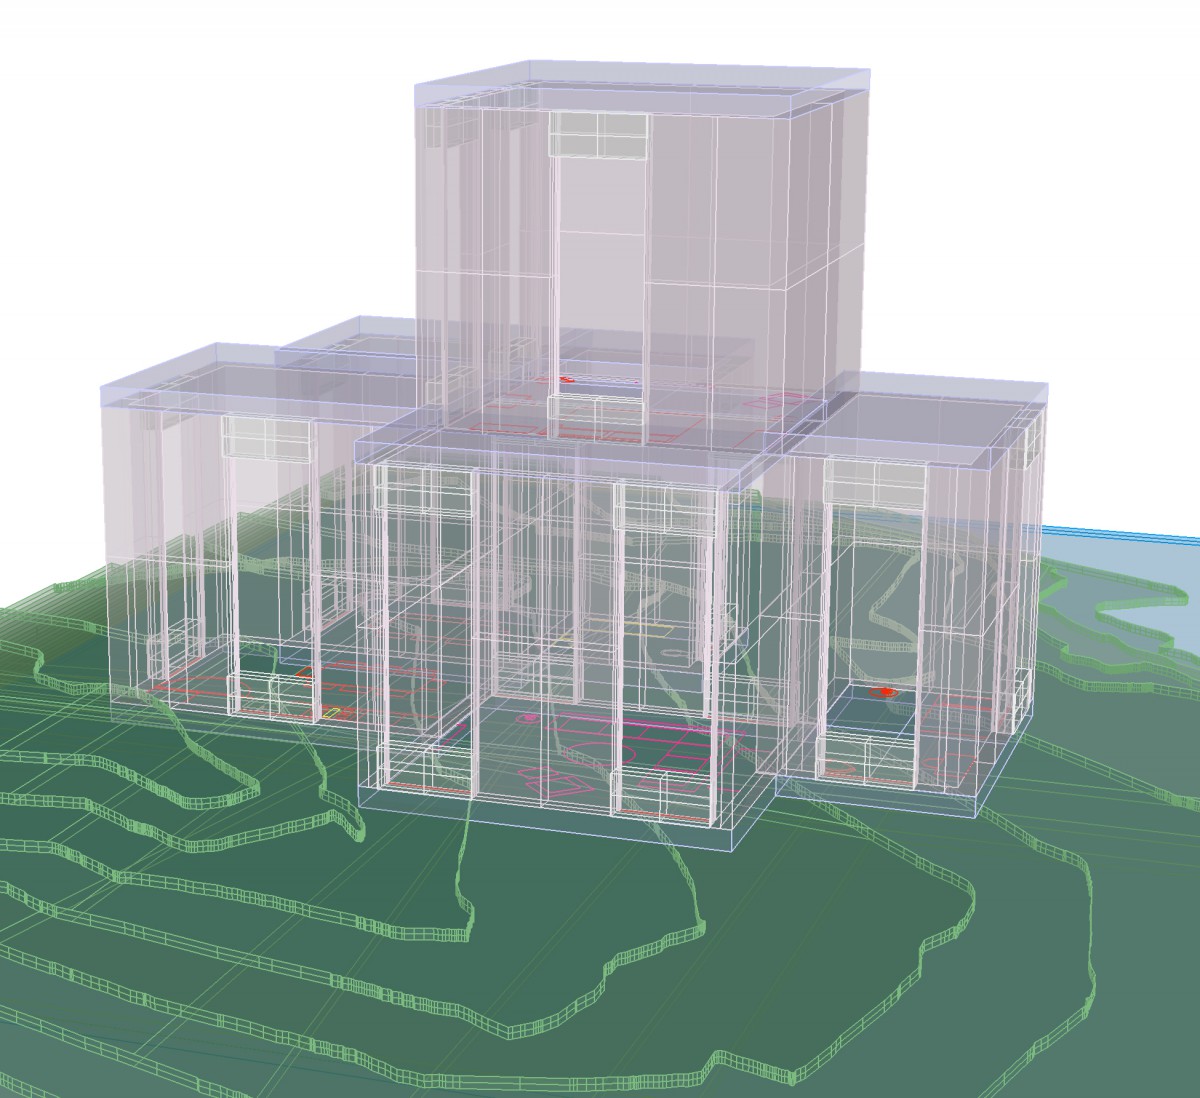

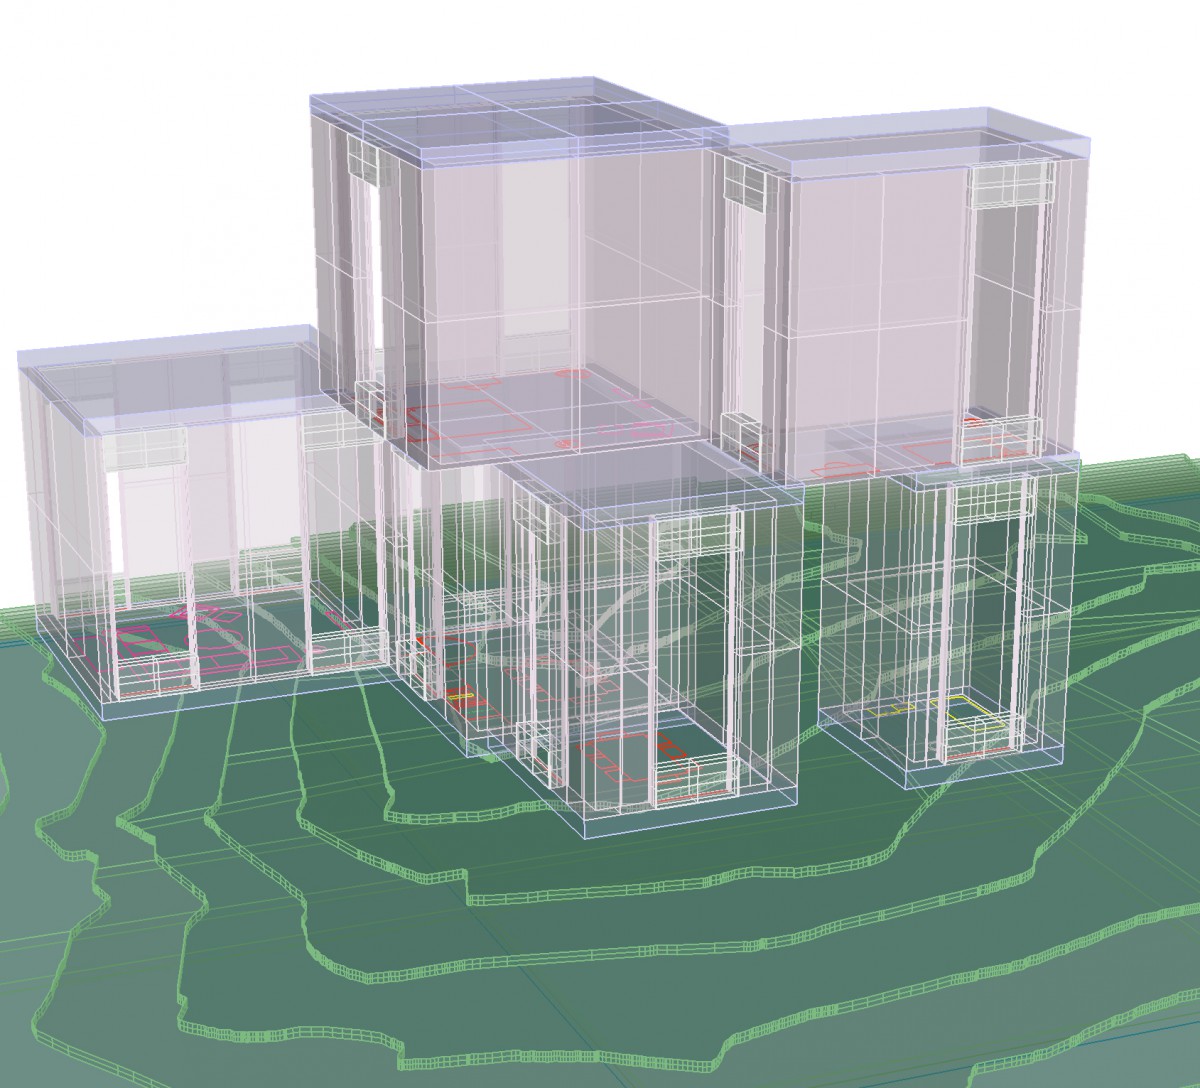
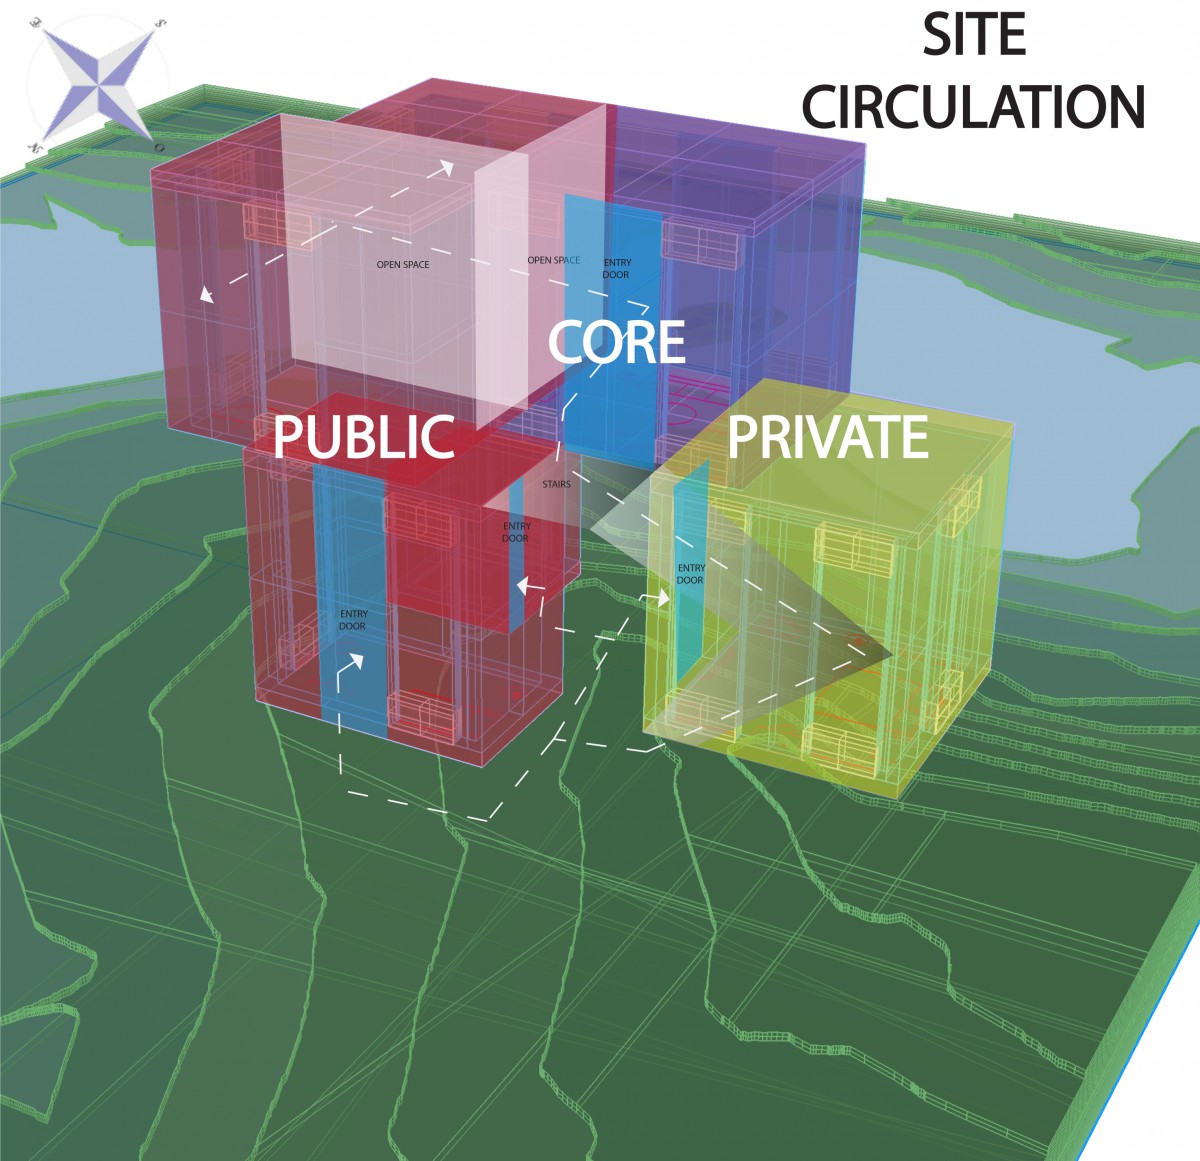
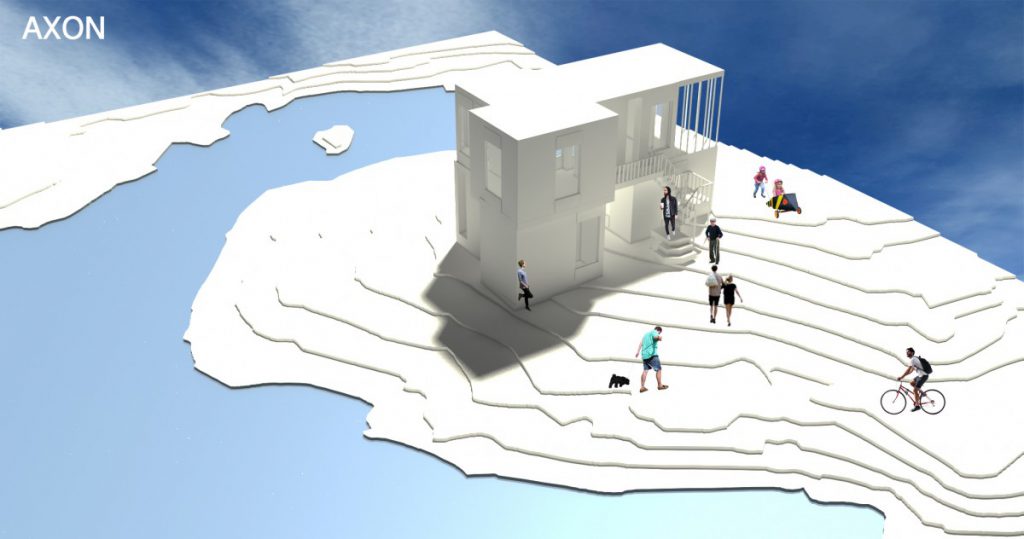
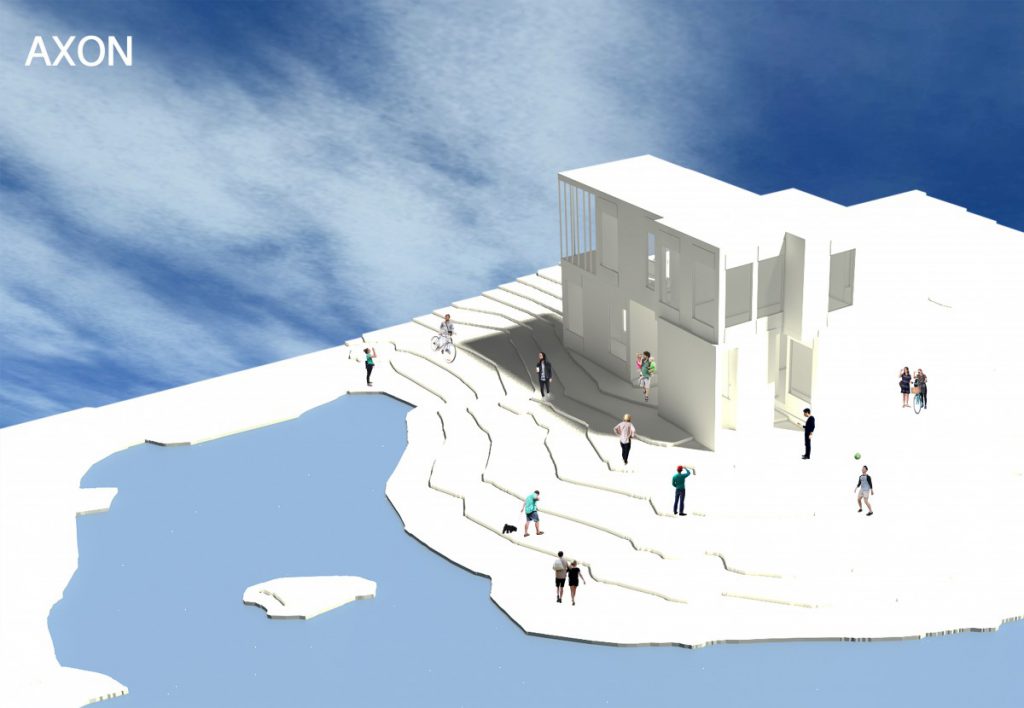
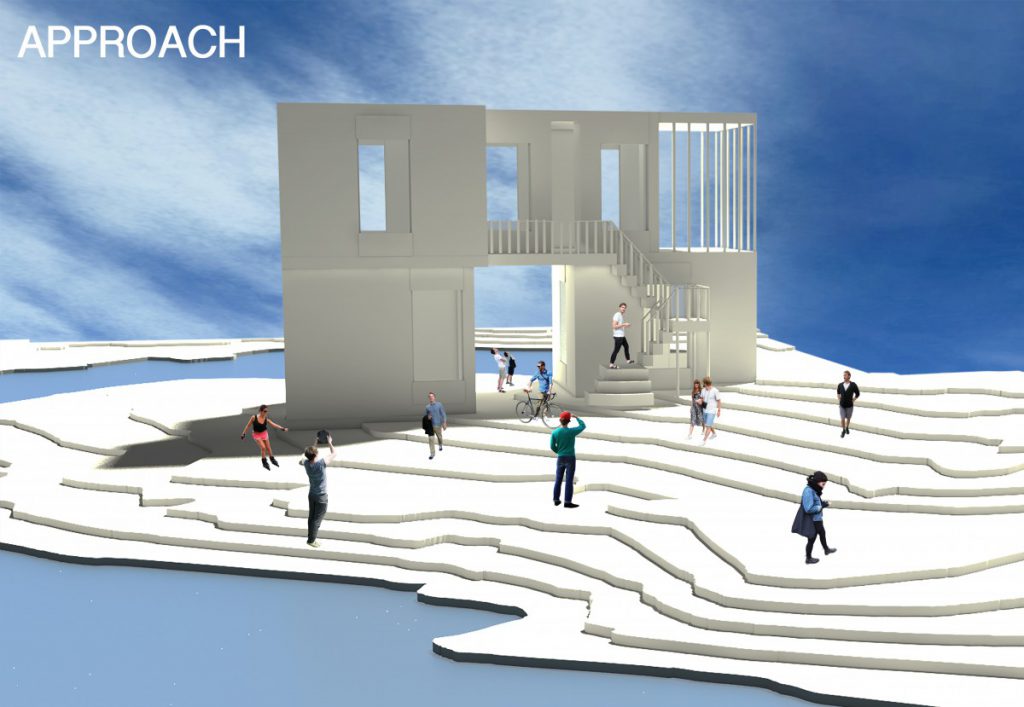
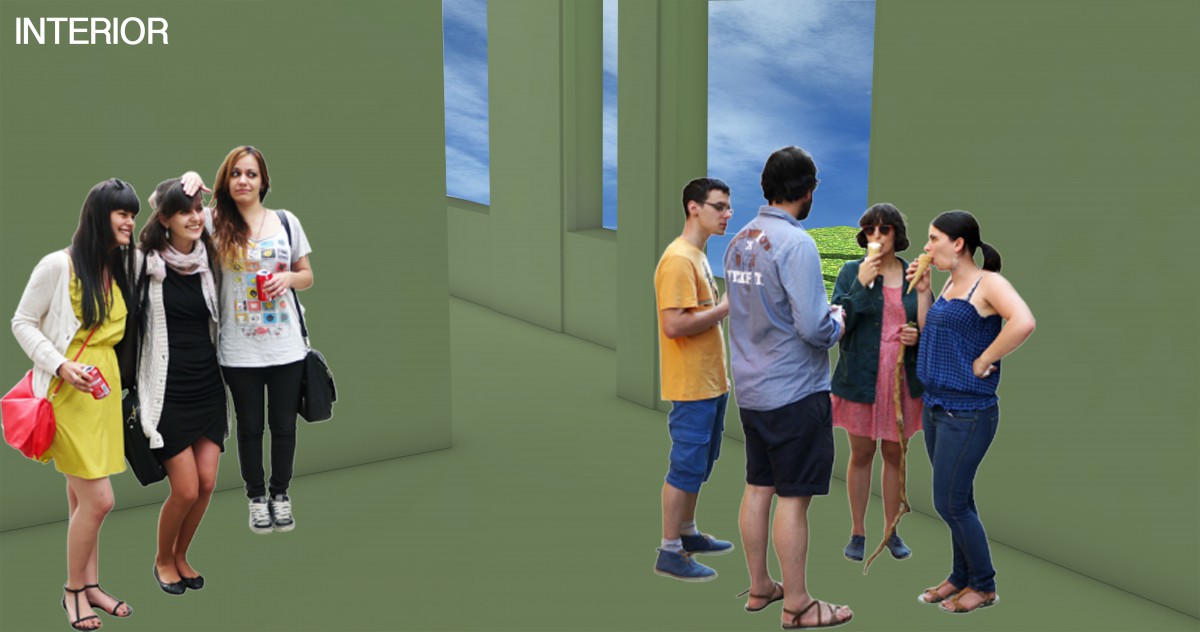
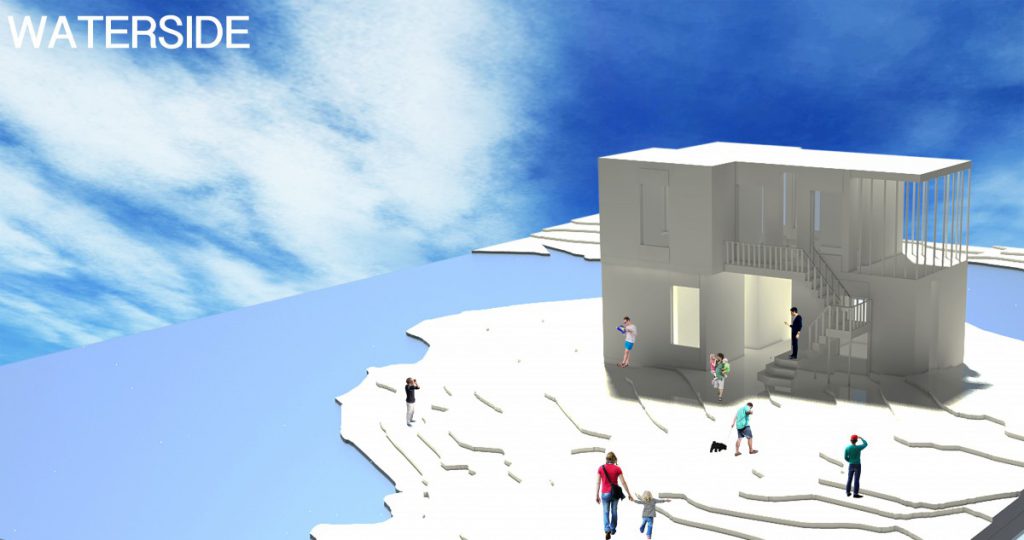
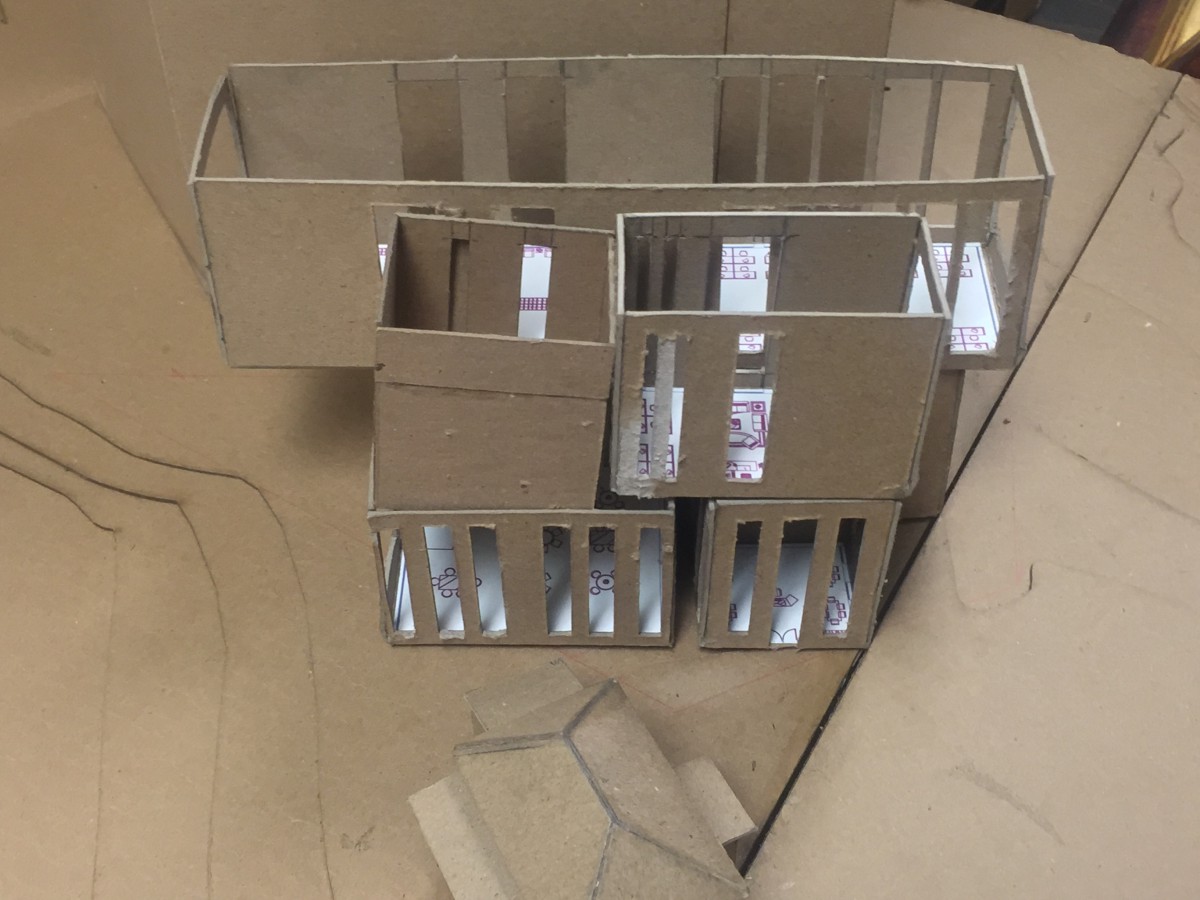
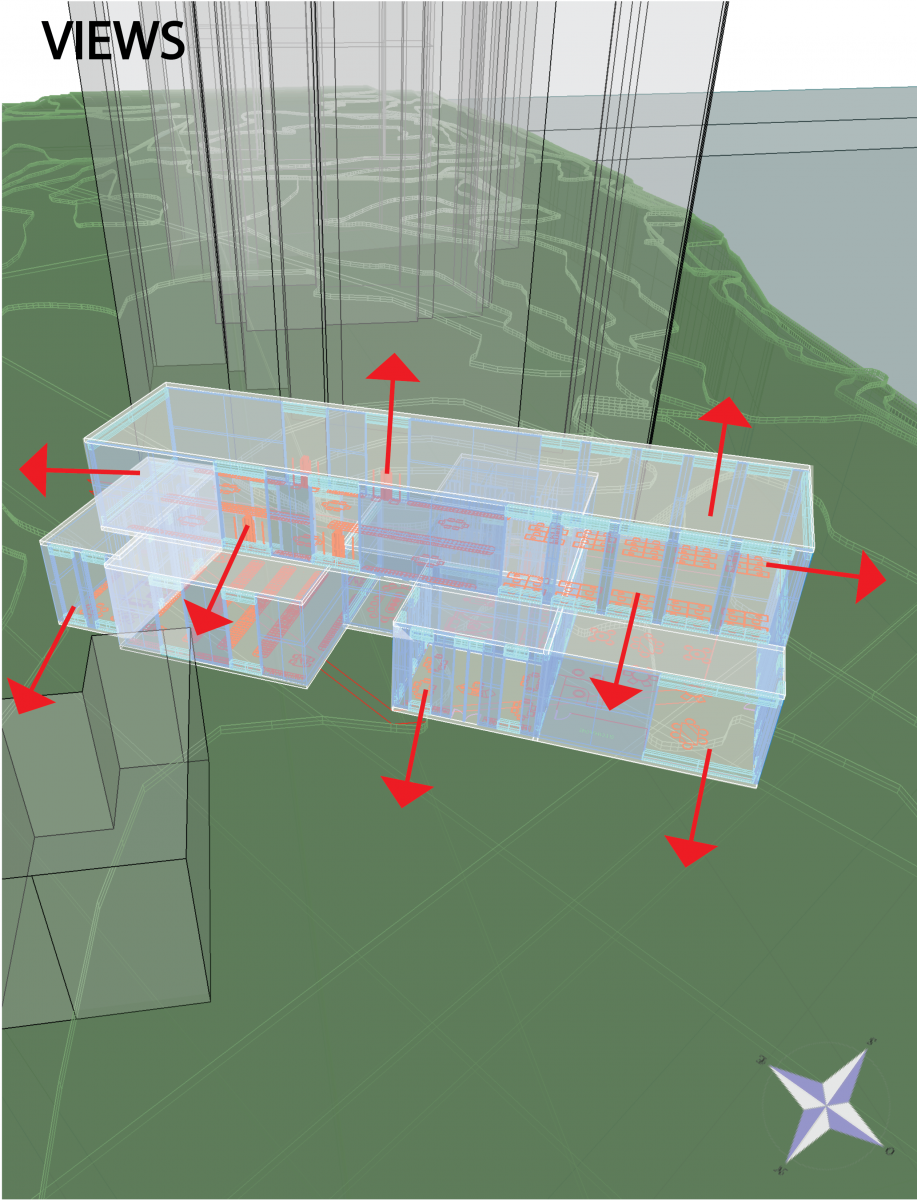
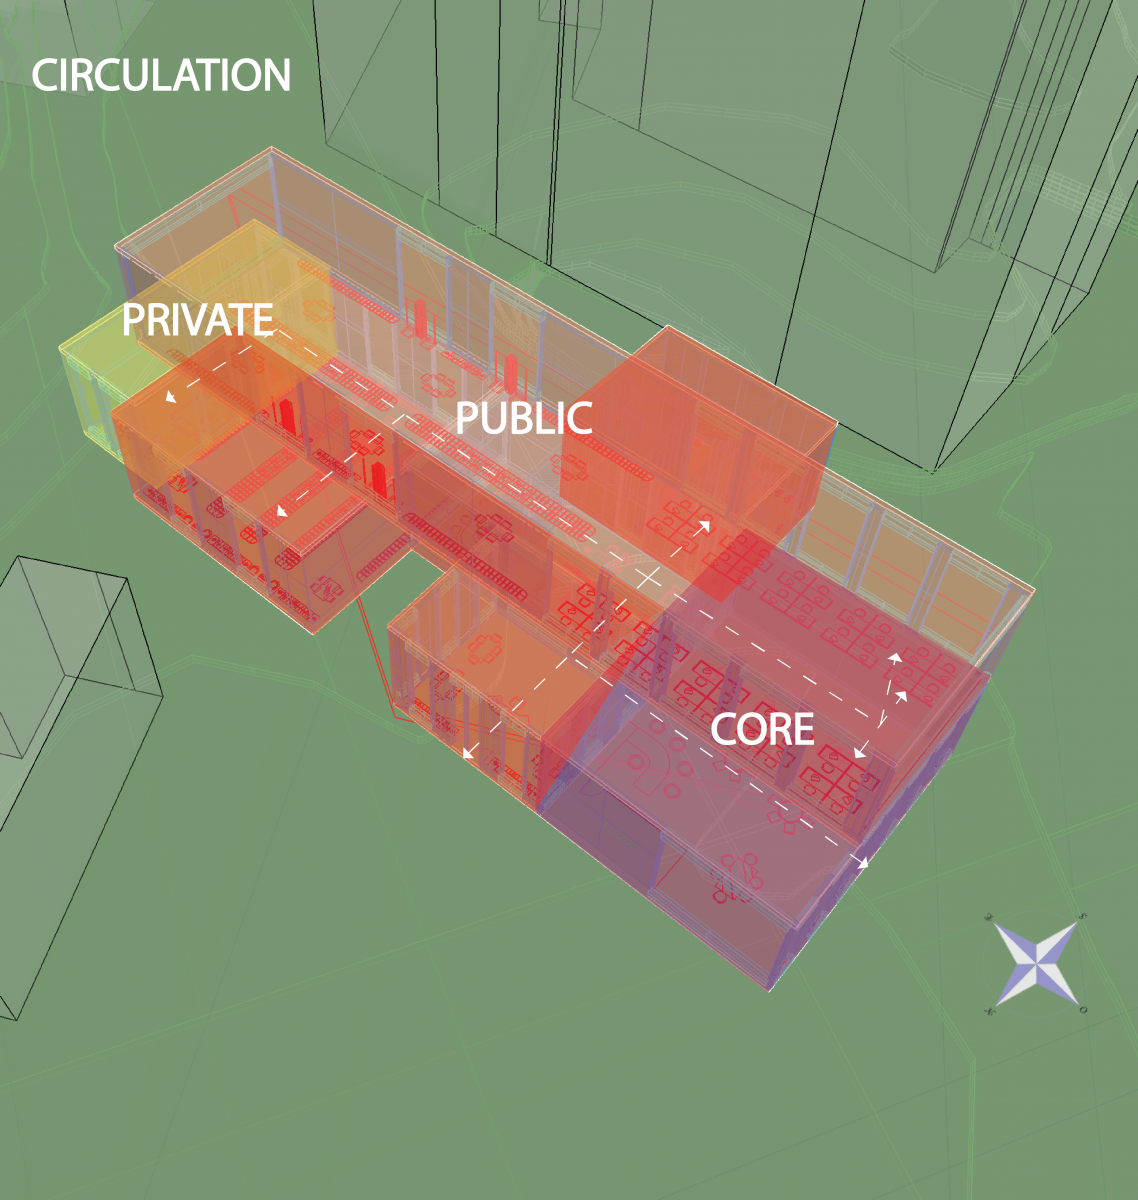
Assignment E: Parti Diagramming
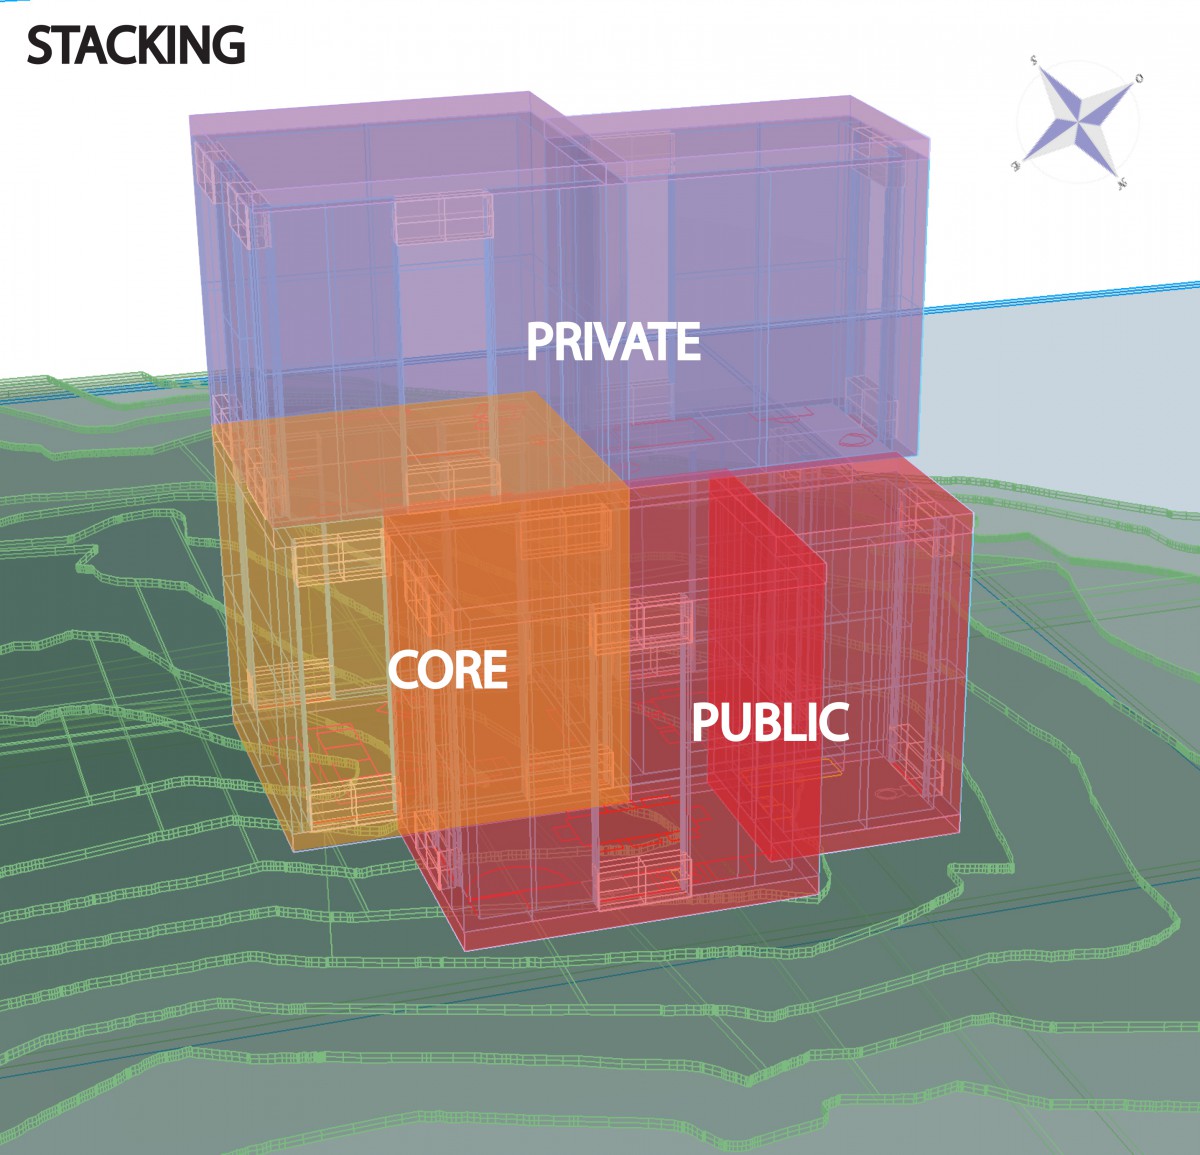
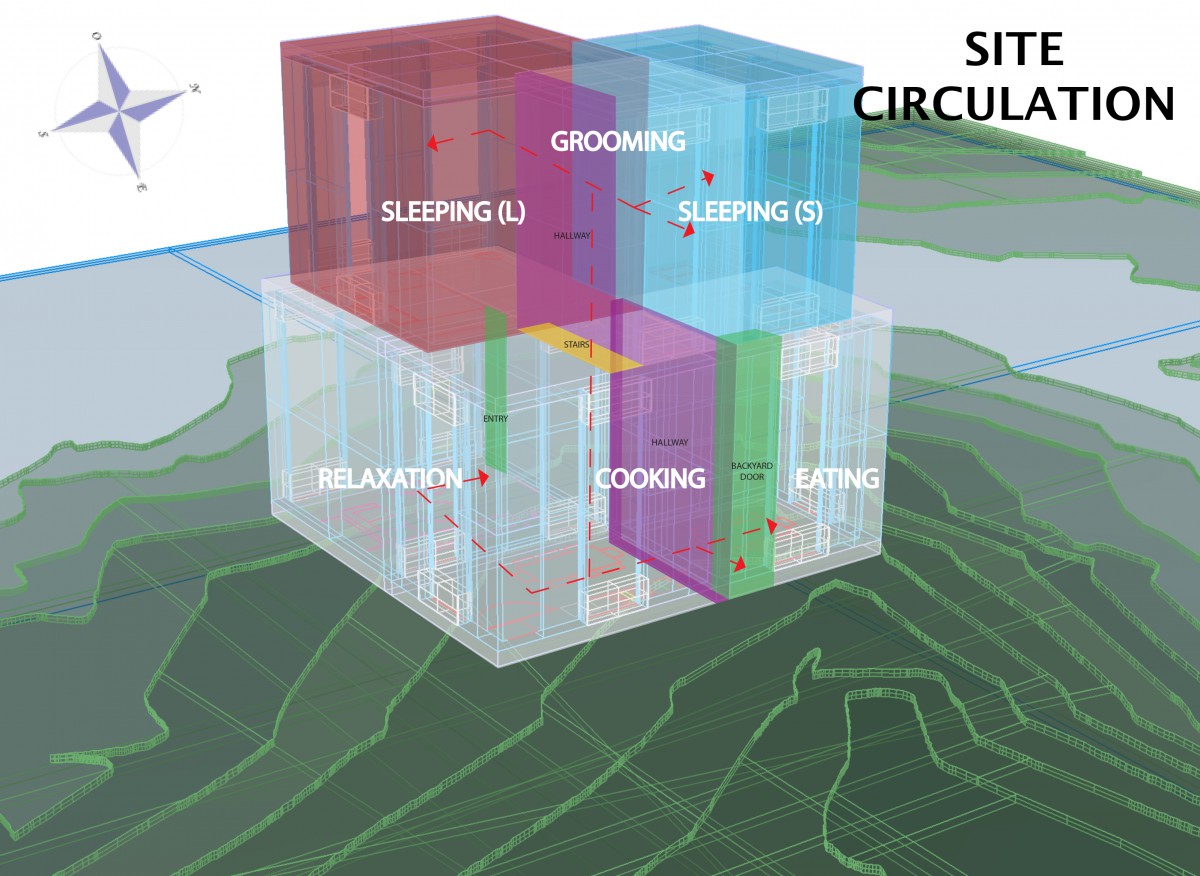
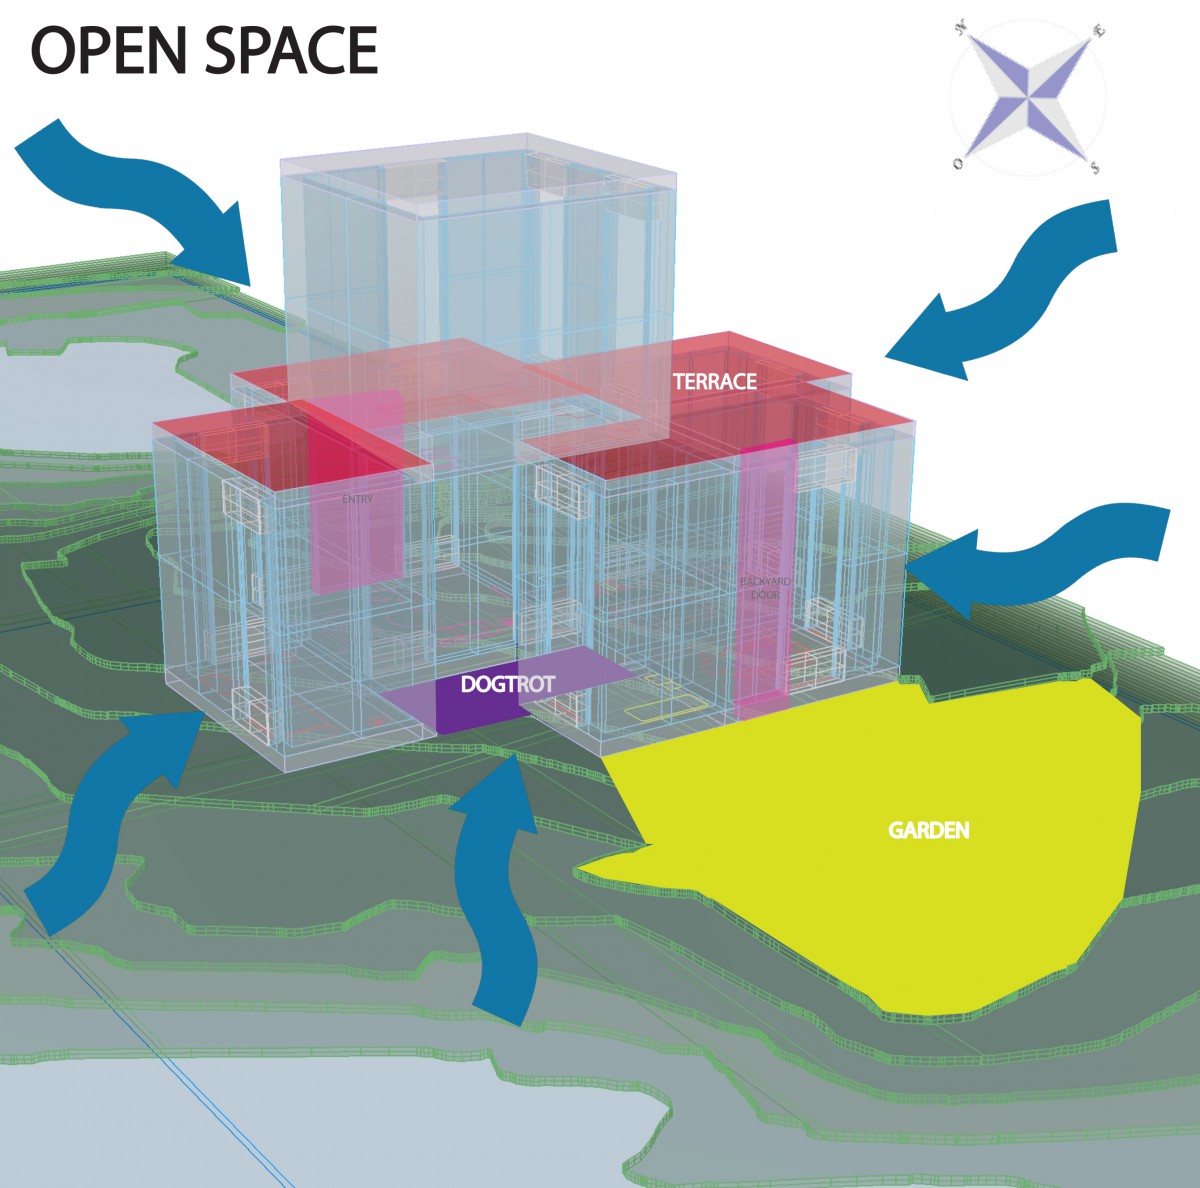
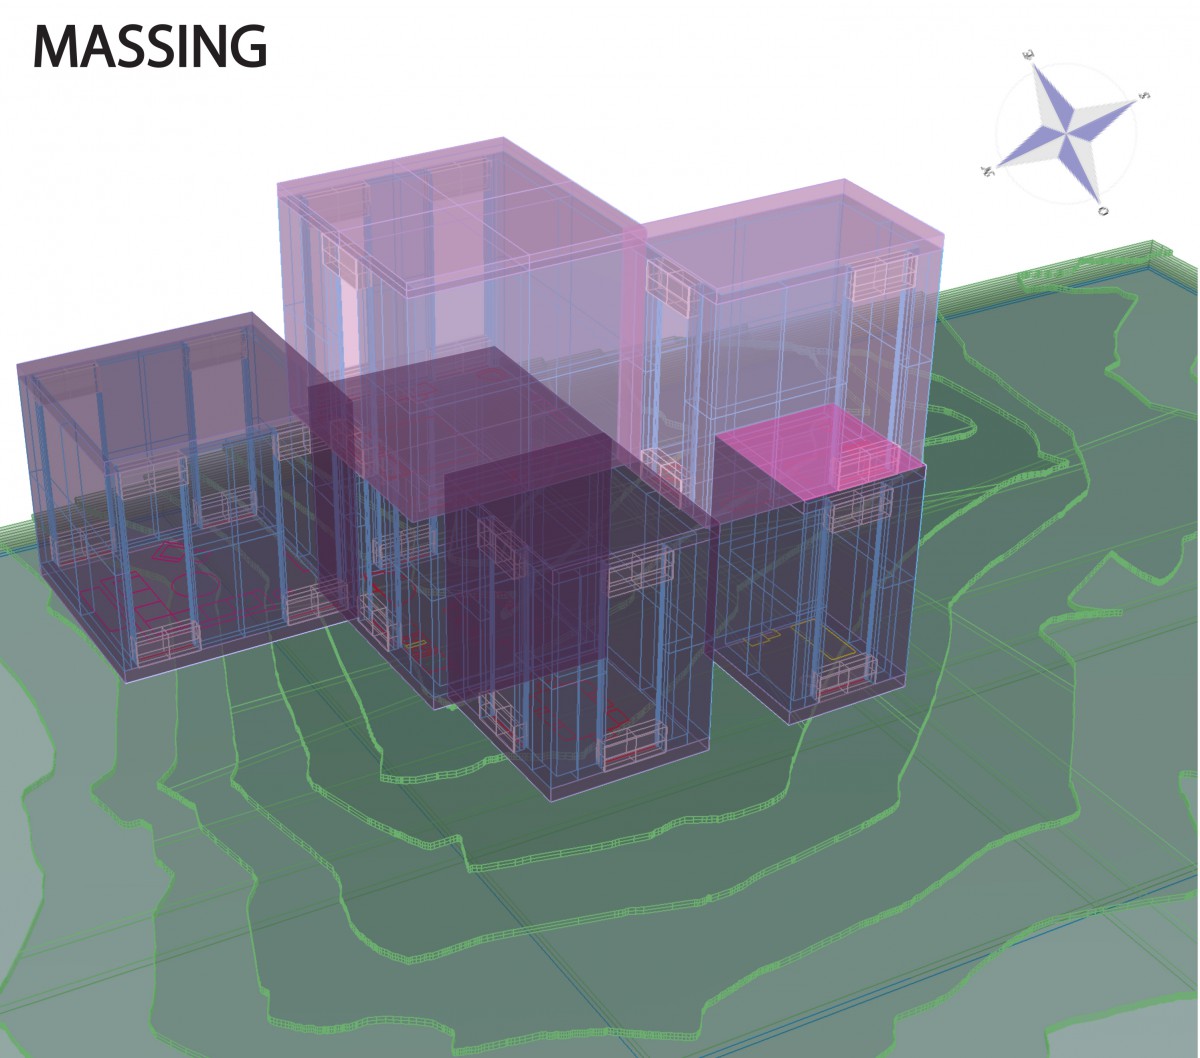
DWELLING IN THE WOODS
Assignment F: Reflection
The presentation I had given on Friday for Proj. 1, went good. I received a lot of feedback and comments based on how I had composed and specified each of my diagrams, dealing with all 5 different configurations. The one positive feedback I received mainly, dealt with the structure of design and format that I had applied on all 5 configurations. The viewers seemed to like how my interpretation of coming up with these house designs were carefully structured, how they were well stacked together, how they had a connection and tightness within the structure itself, how it had an aspect of a sculpture-like figure, and how it is being aligned together but also finding a way to applying and giving this open space surface for each house.
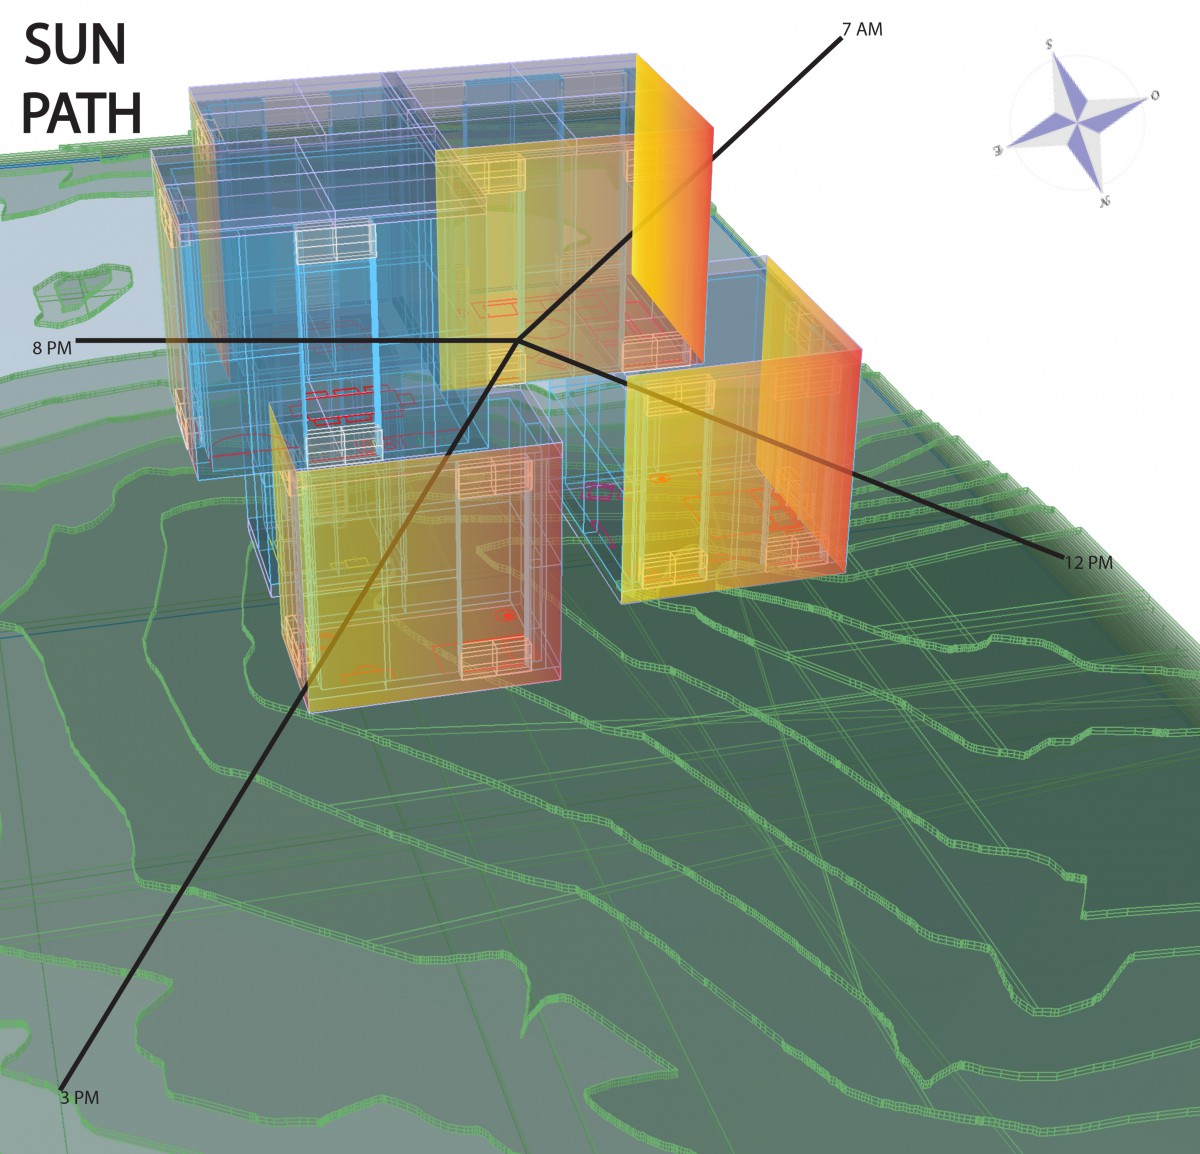
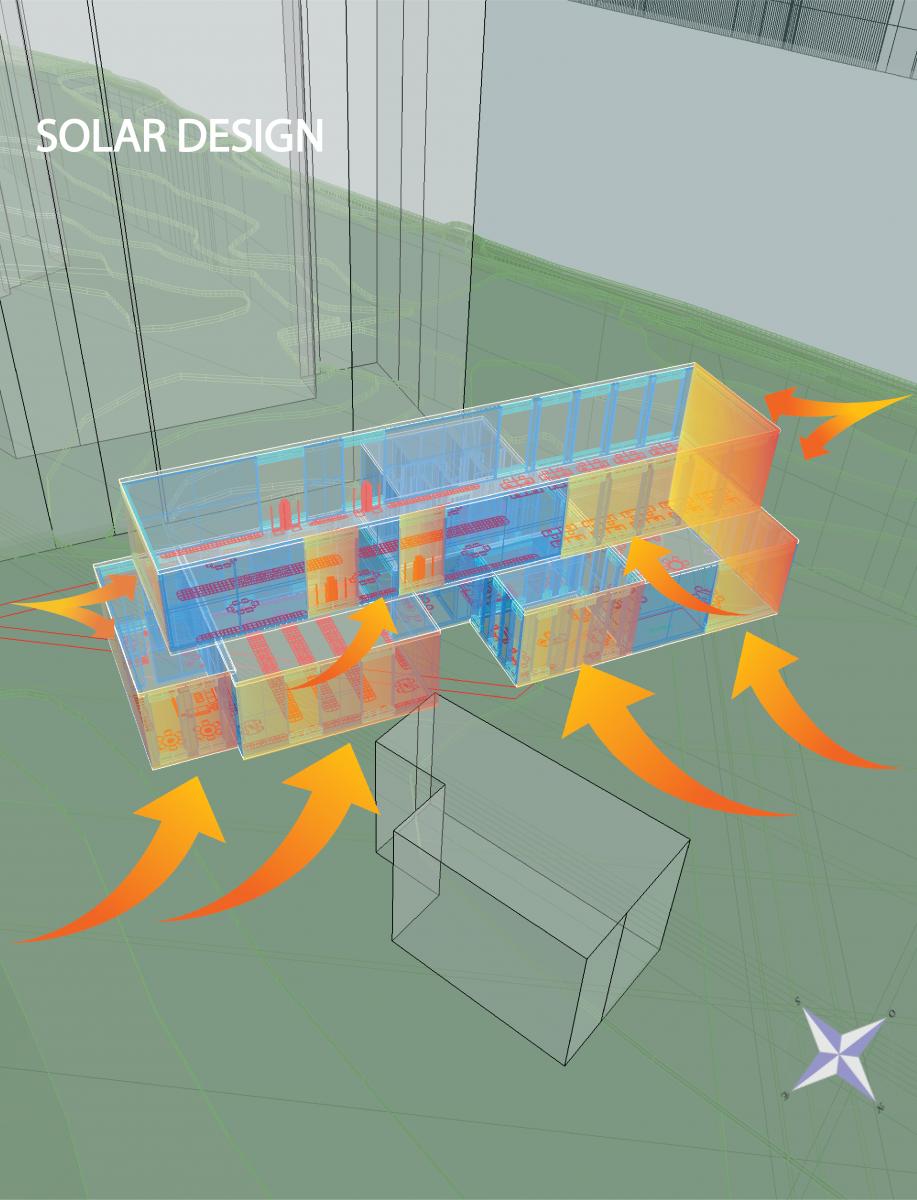
The other feedback that I received, which dealt with concern mostly was my diagram of the sun path. Mainly because of how I had diagrammed it, nobody could really see nor understand what I was trying to present because it wasn’t very clear and the image itself of my 3rd configuration that I had chosen, was blocked since I drew on top of it a sun path diagram representing how the sunlight was able to affect and show the exposure of the sun light within the time zone of morning, afternoon, and evening.
When receiving those feedbacks, I got to understand more clearly on how I can make my diagrams more approachable to the topic it wants to relate to, make it more understandable to the next level, like using different types of techniques to improve my diagrams and be able to benefit from it and also relate to what I actually want to talk about, that way way my viewers and myself will understand clearly what is I am presenting. Towards the end of my review, I decided to work with my sun path diagram. With fixing the previous mistakes I made towards this diagram, I will now be able to fix the previous mistake and make it be, its own unique diagram, using programmatic functions throughout the configure, that will be able to clearly indicate the path of the sun. This will allow me to have a way to better illustrate my representation of my design & help me understand the foundation that goes into this structure and applying a sun analysis representing the time zone within the location of one of my houses.
Assignment G: Refine Selected Parti


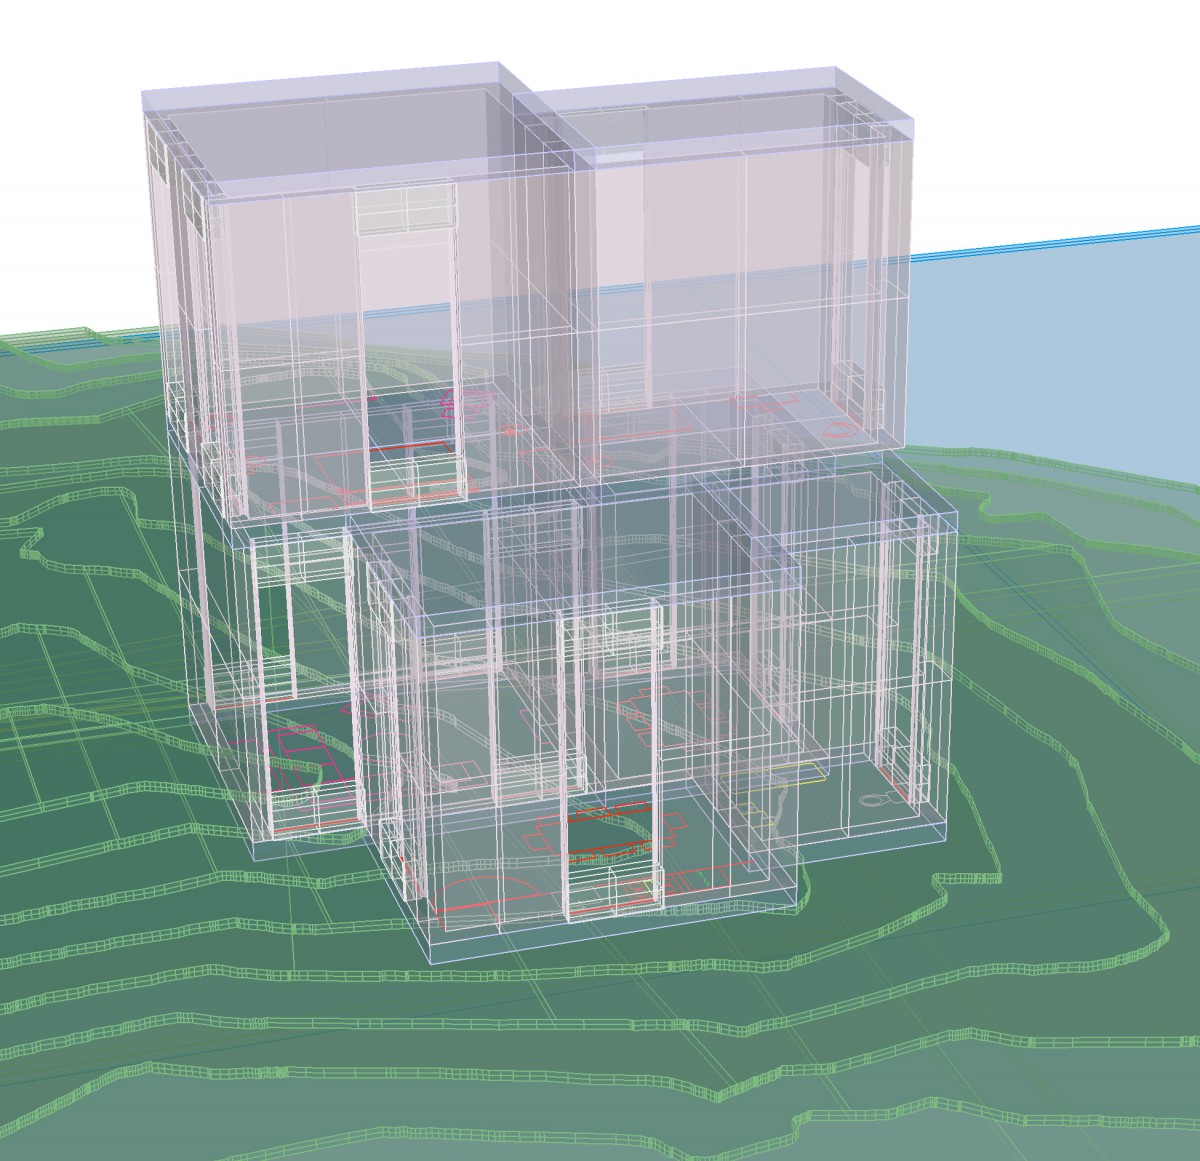
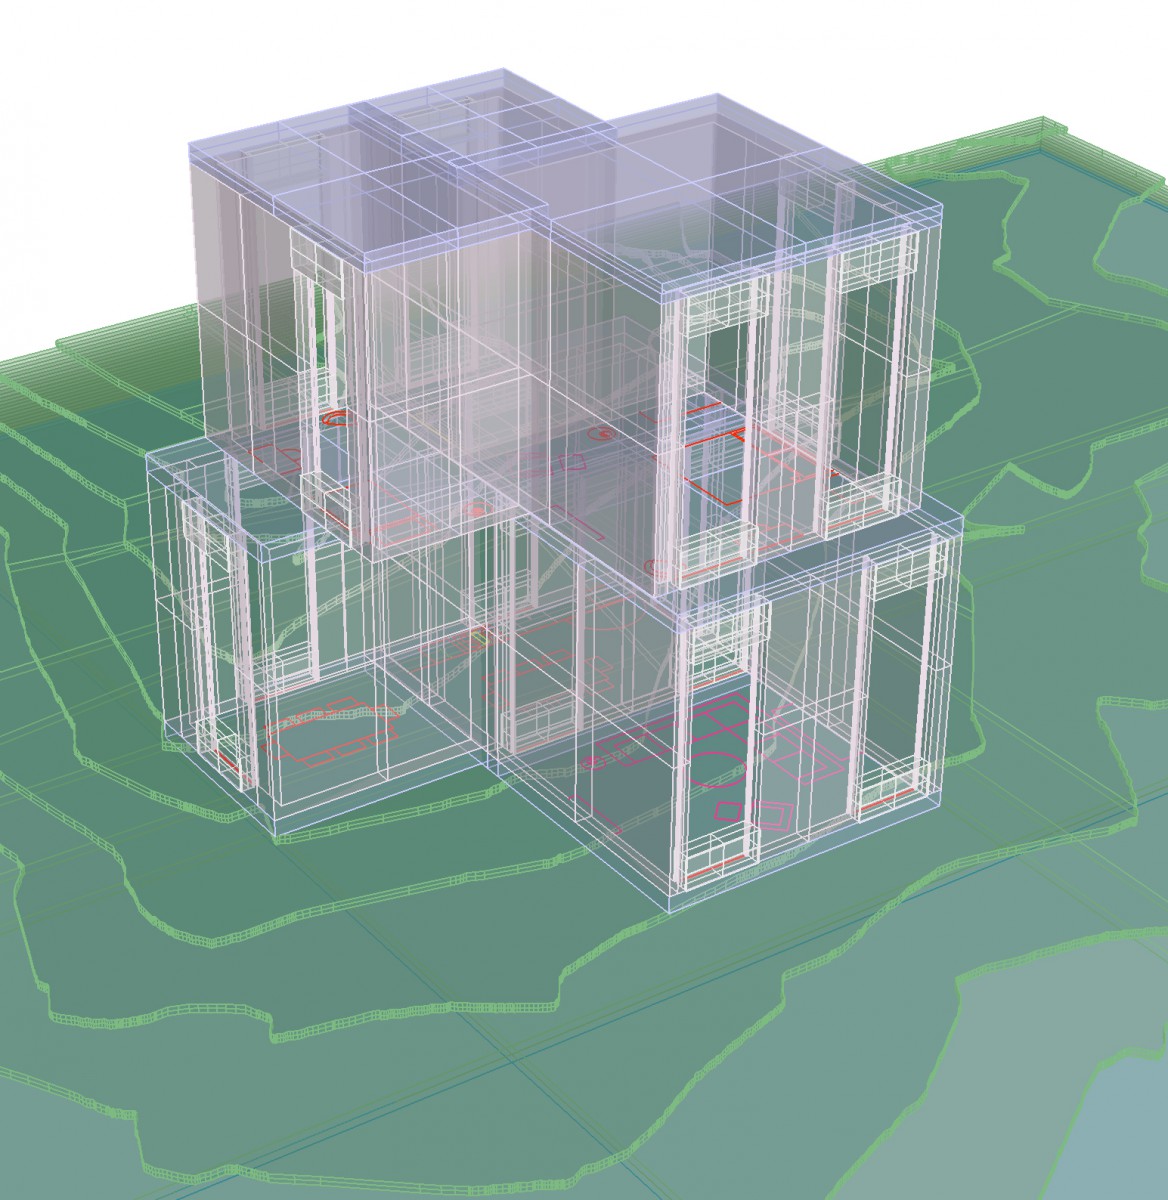
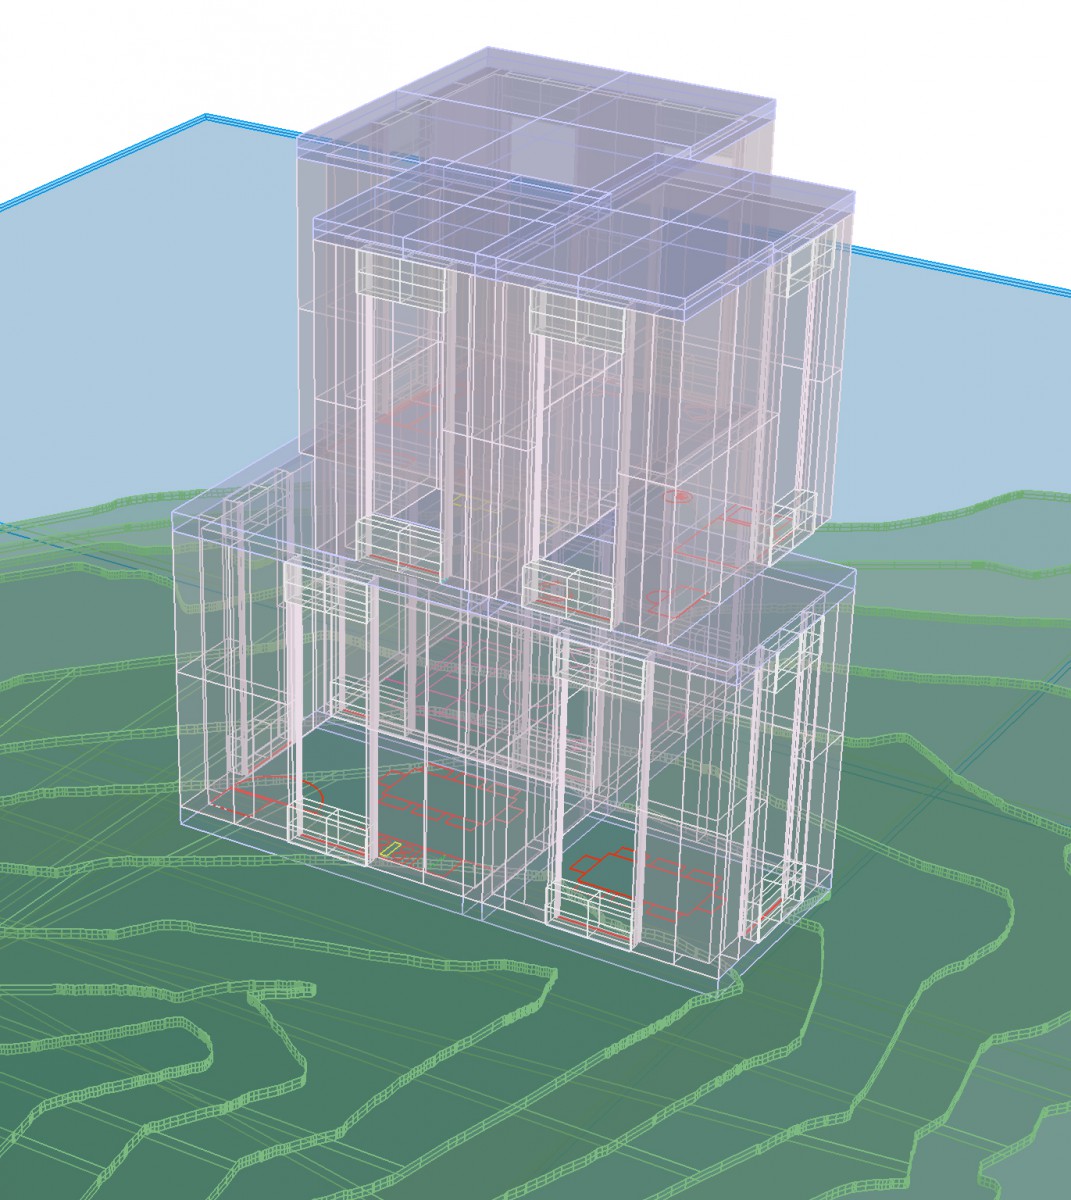
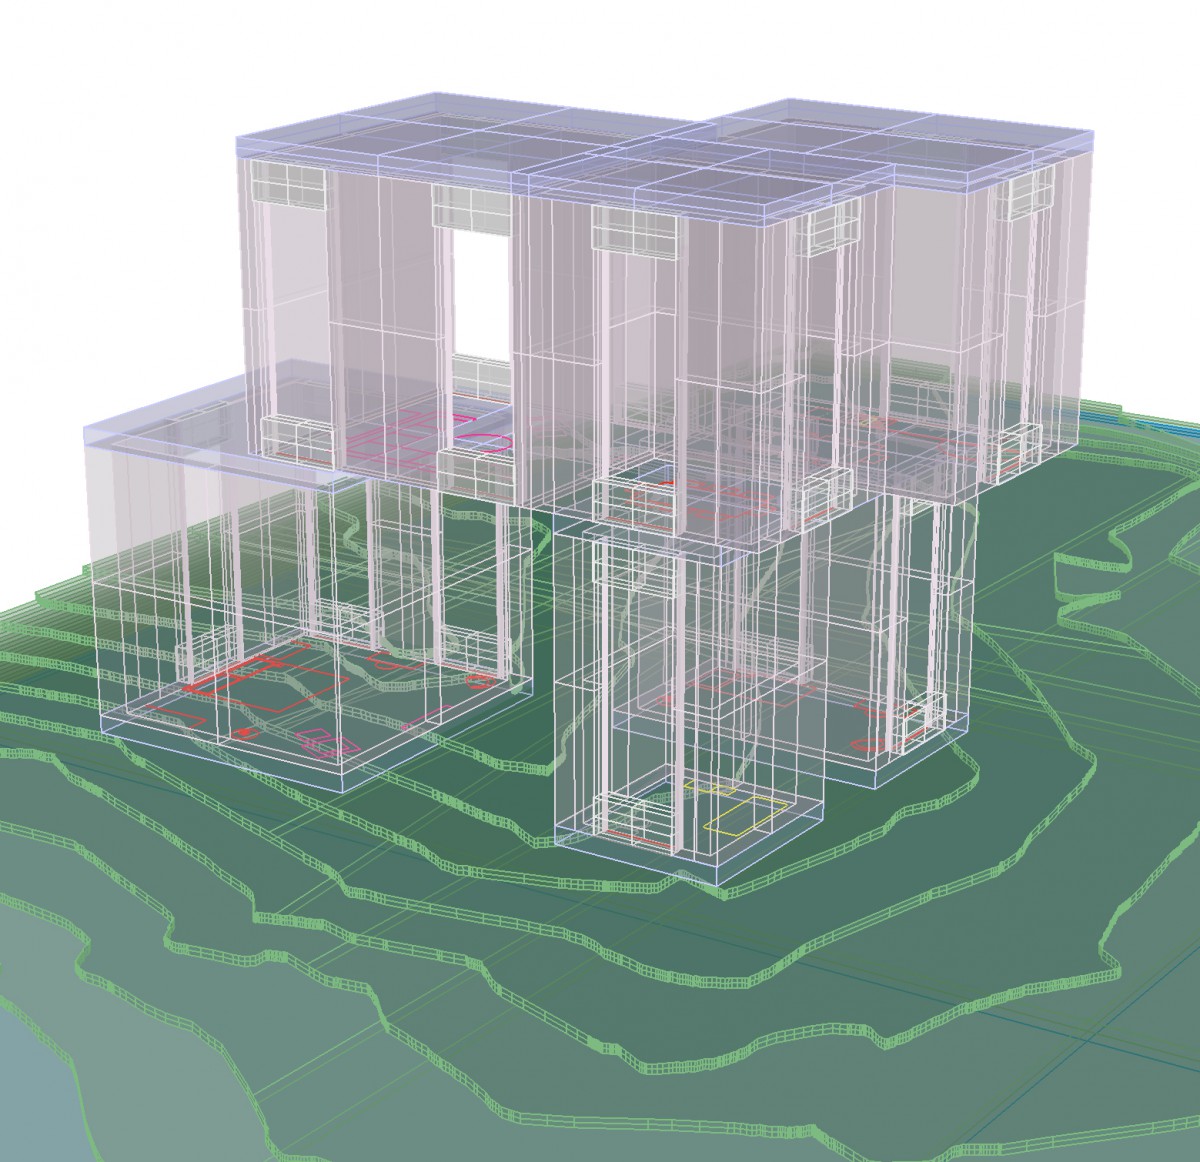
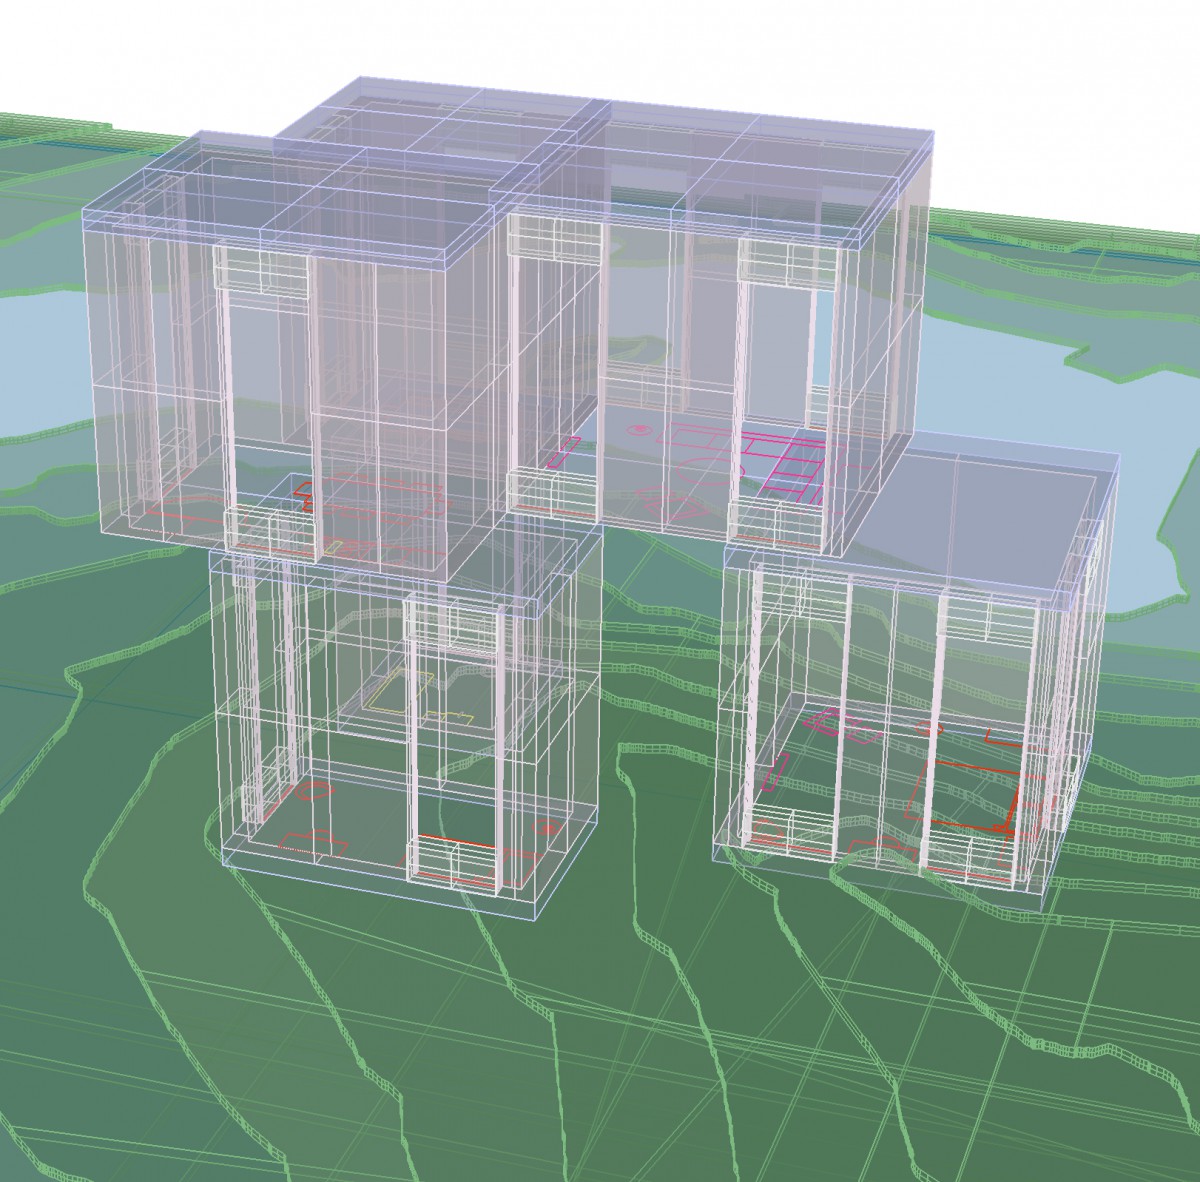
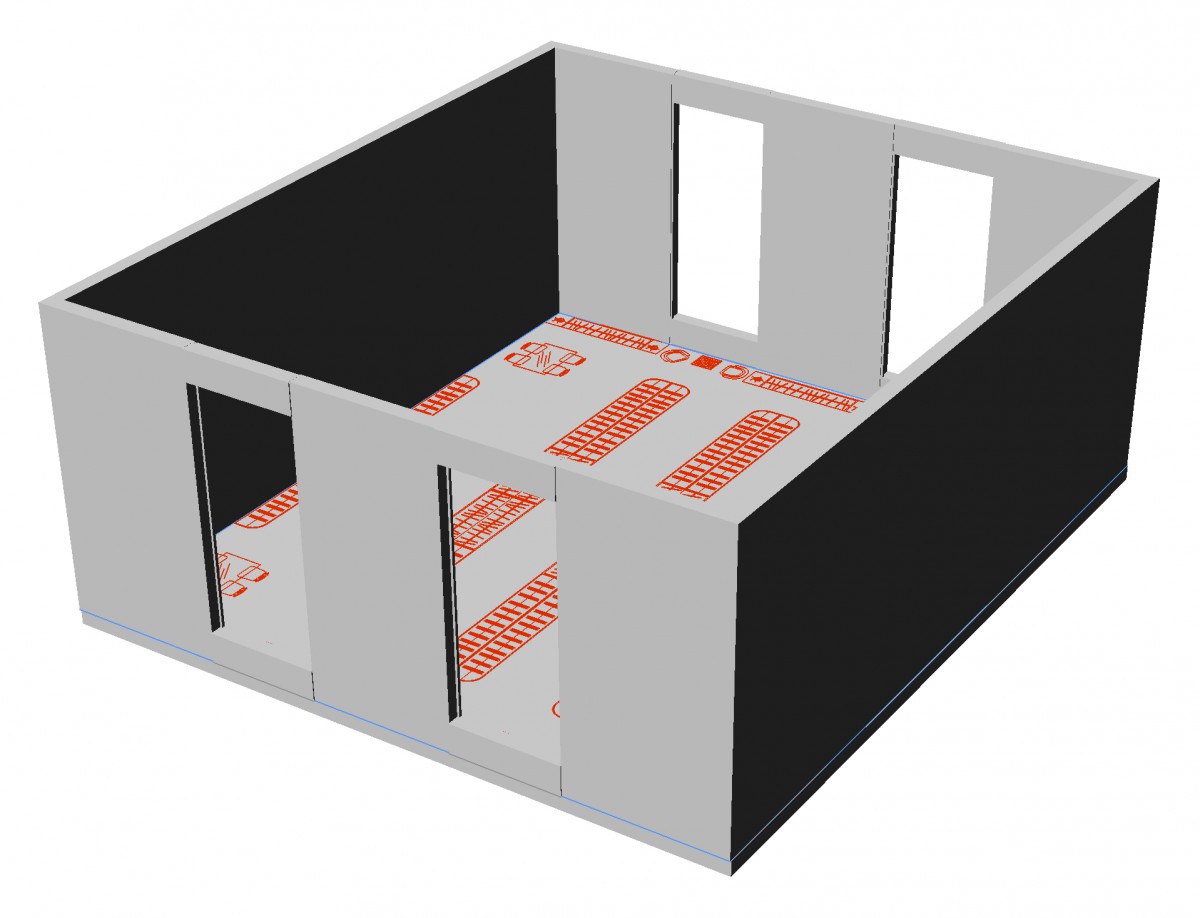
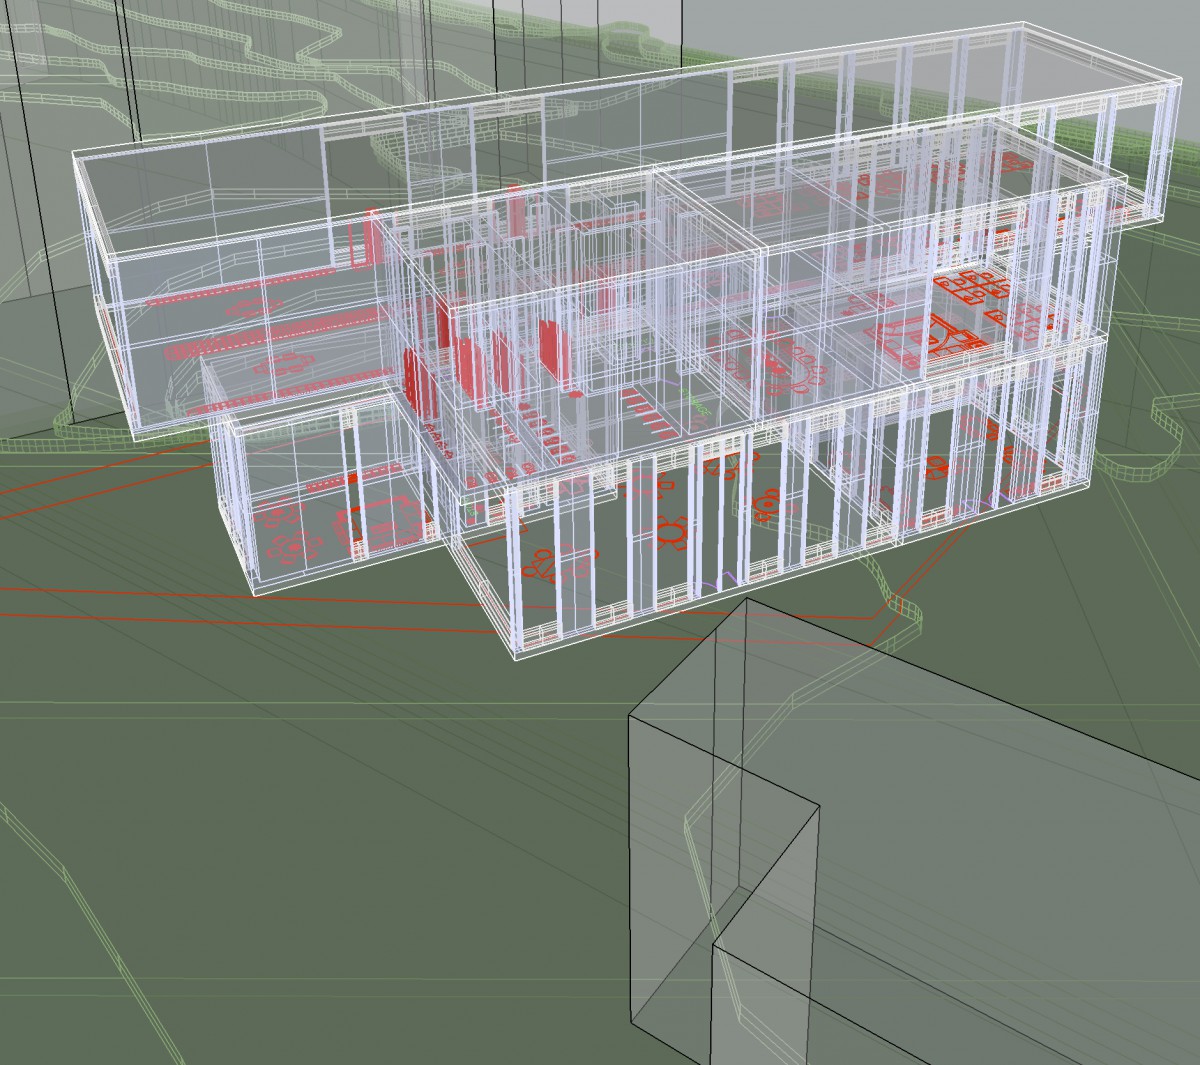
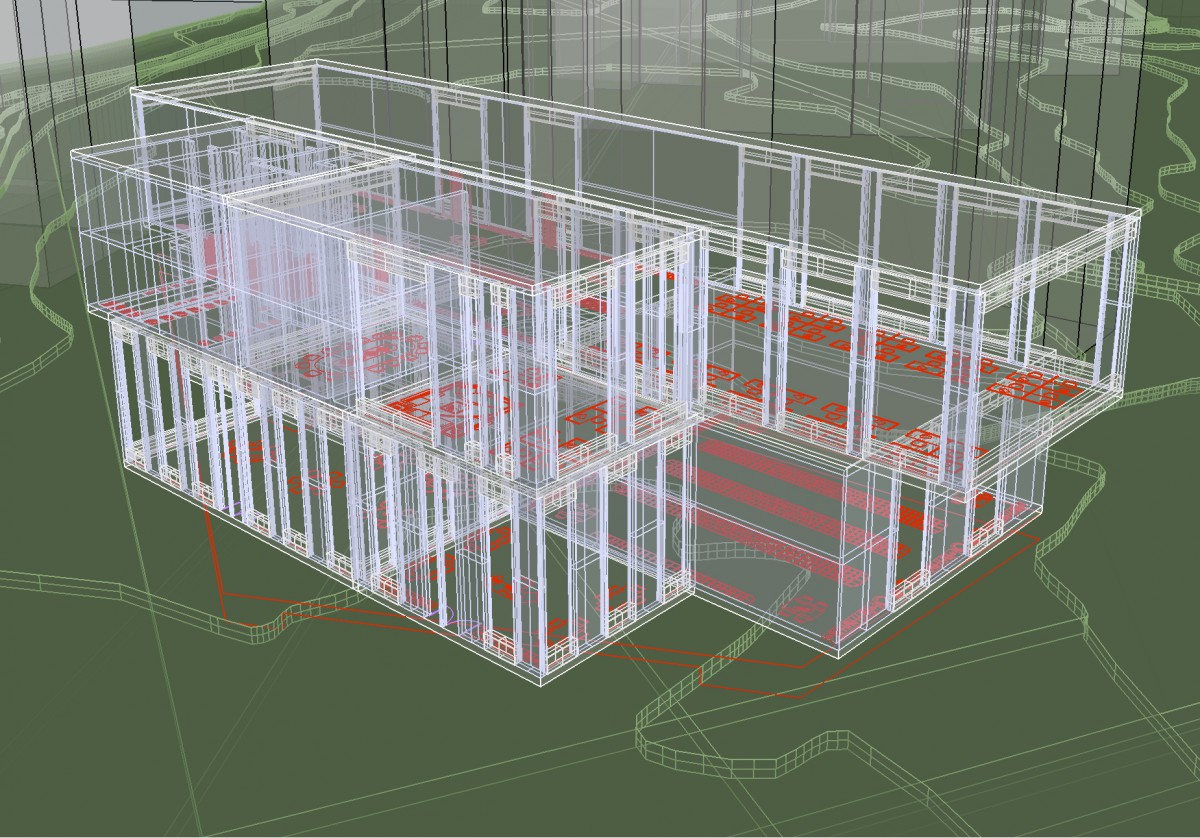
Assignment H: Digital Model Development


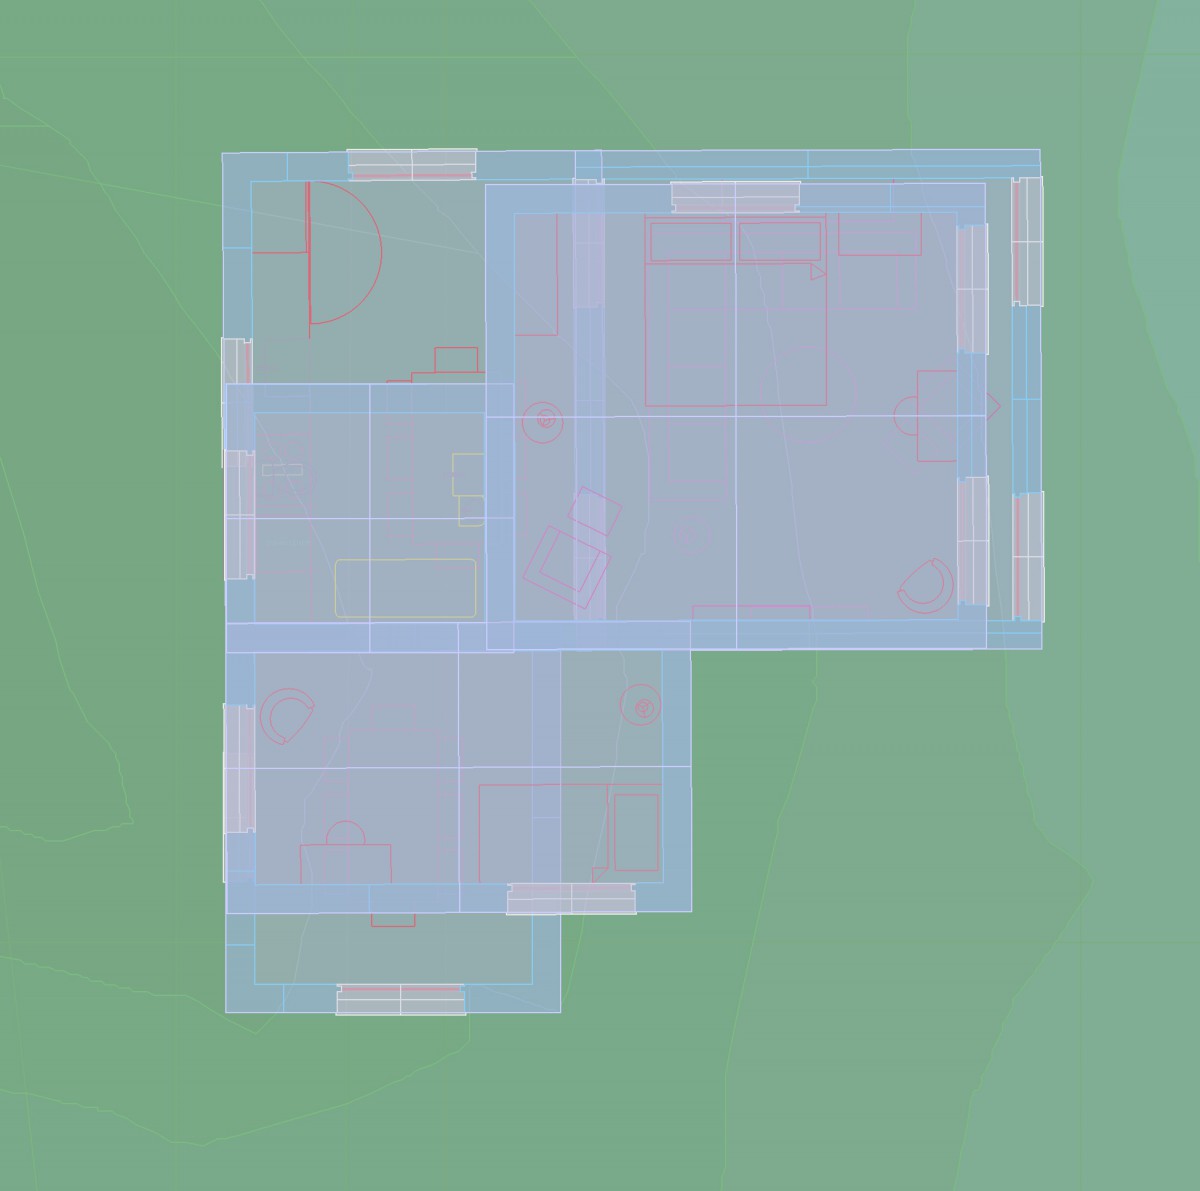
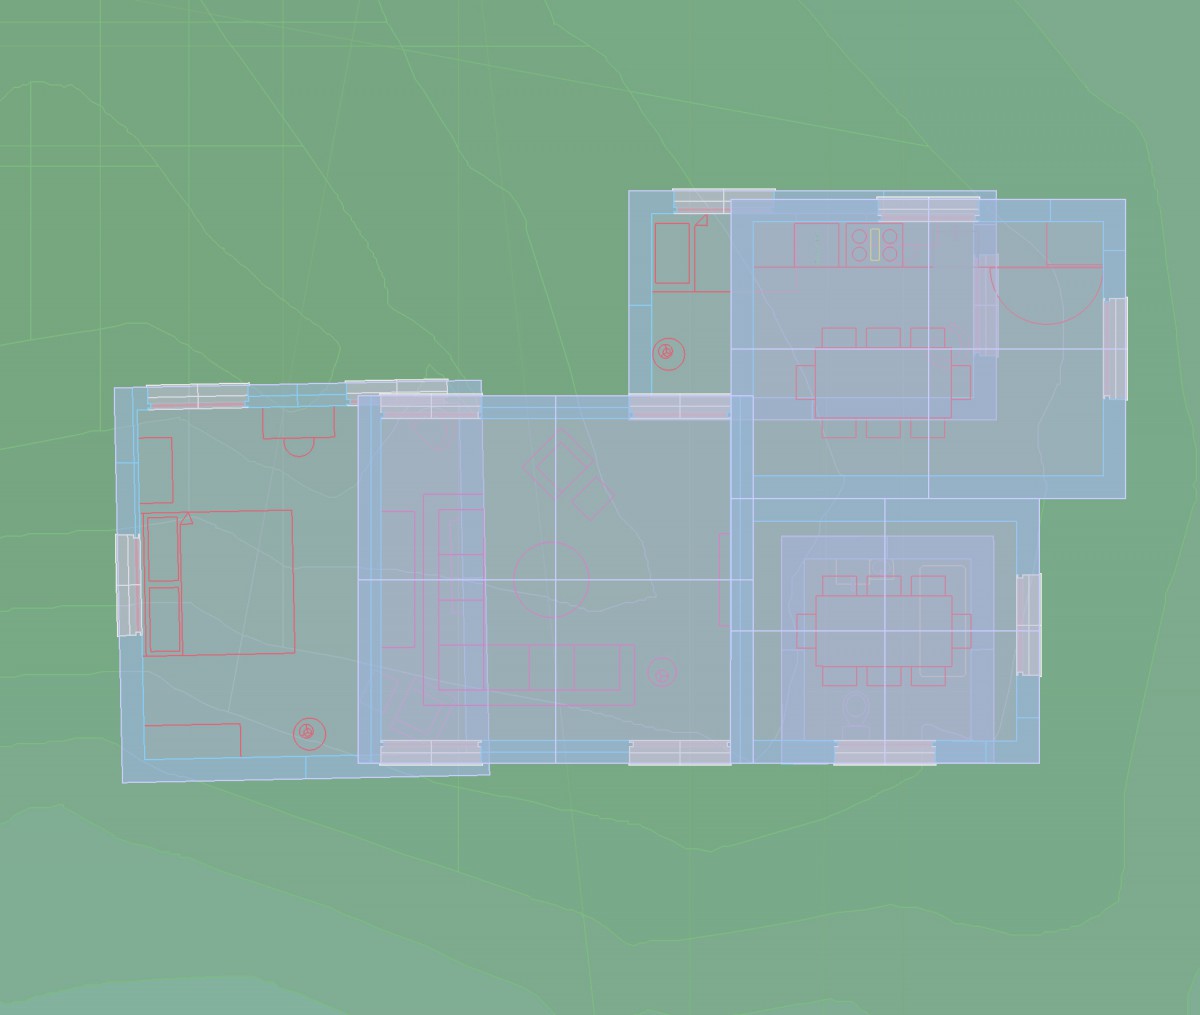
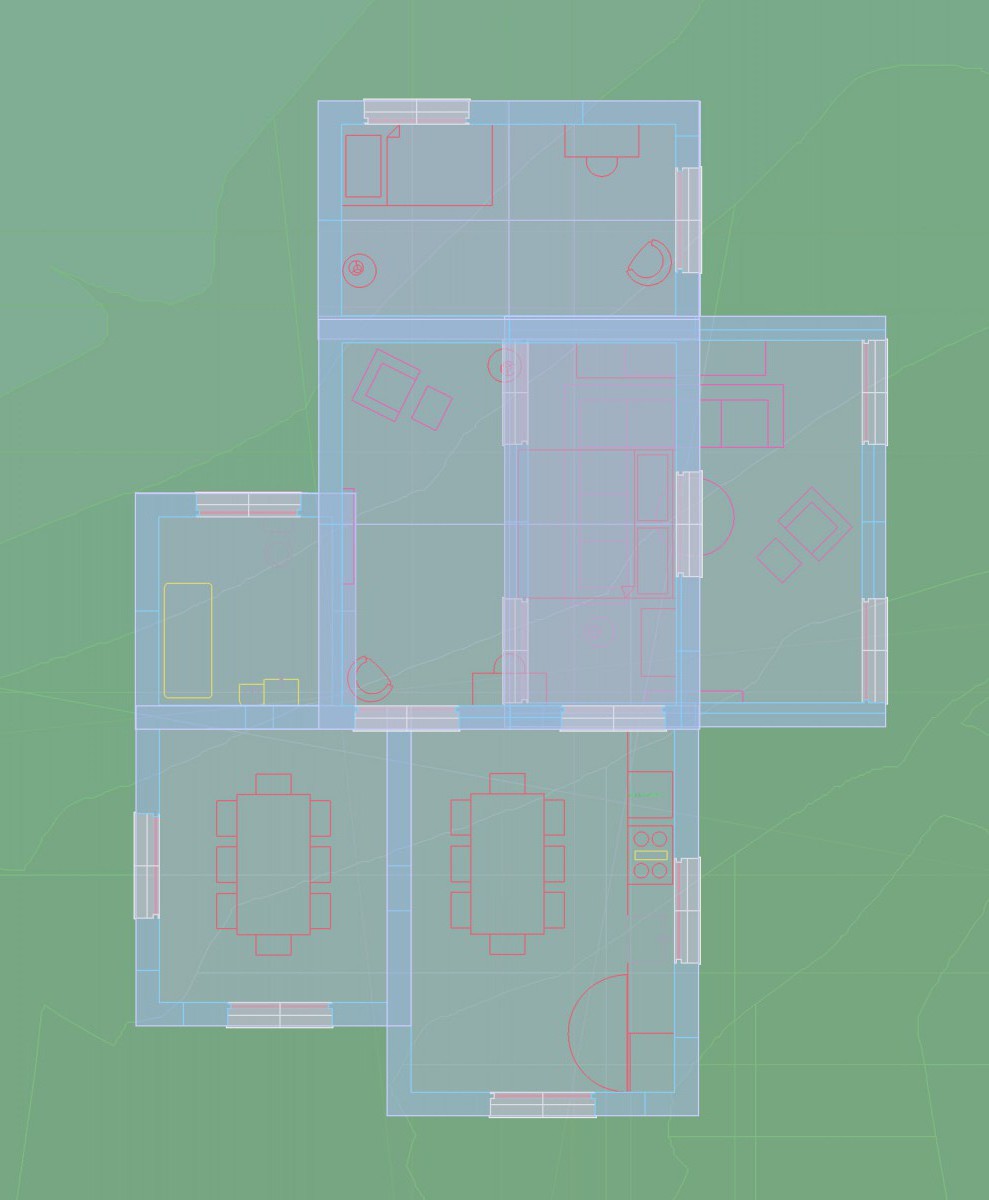
Assignment I: Plan Drawings
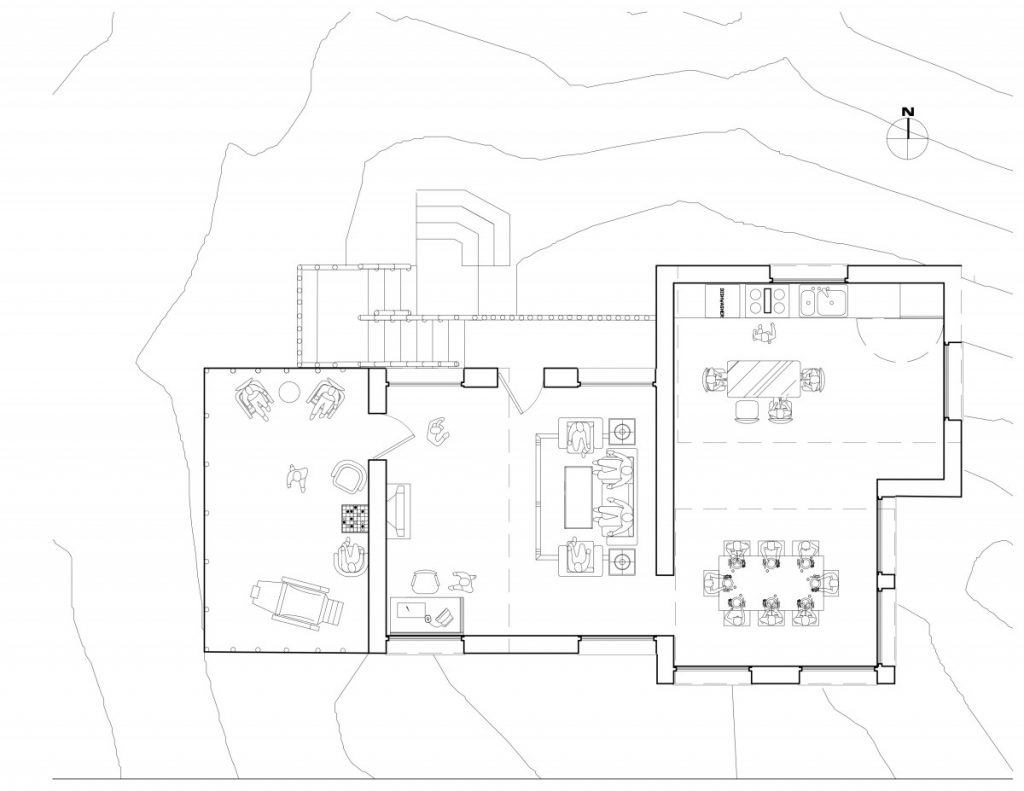
Ground Level Floor Plan
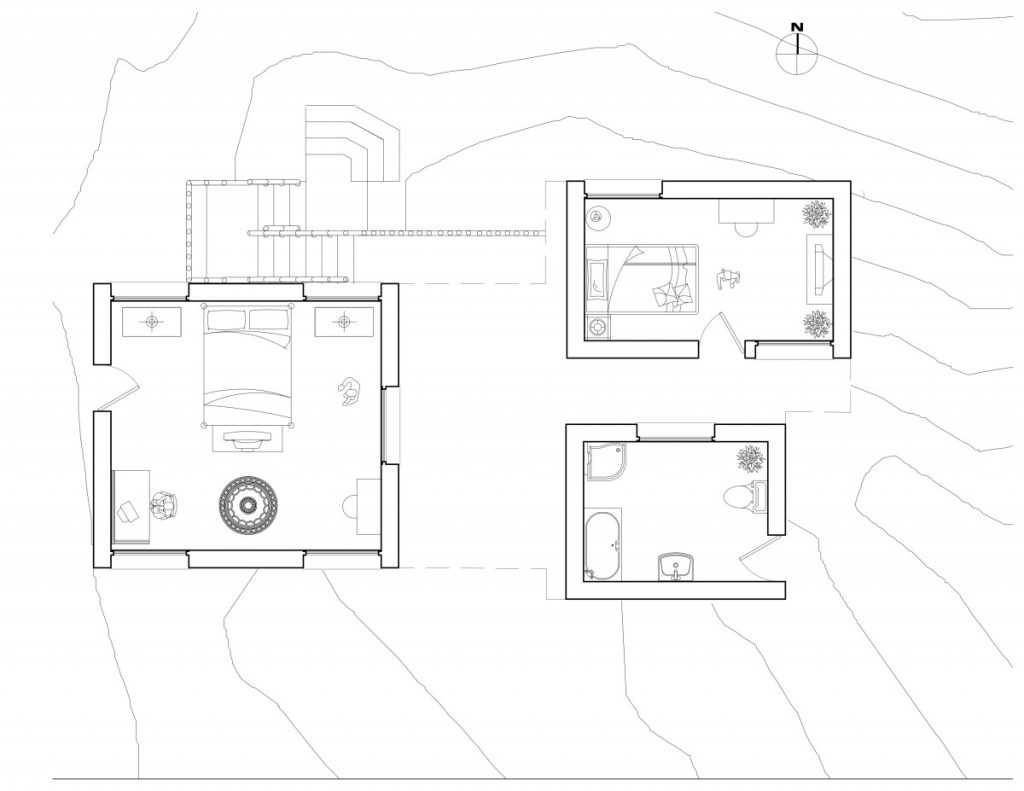
Second Upper Level Plan
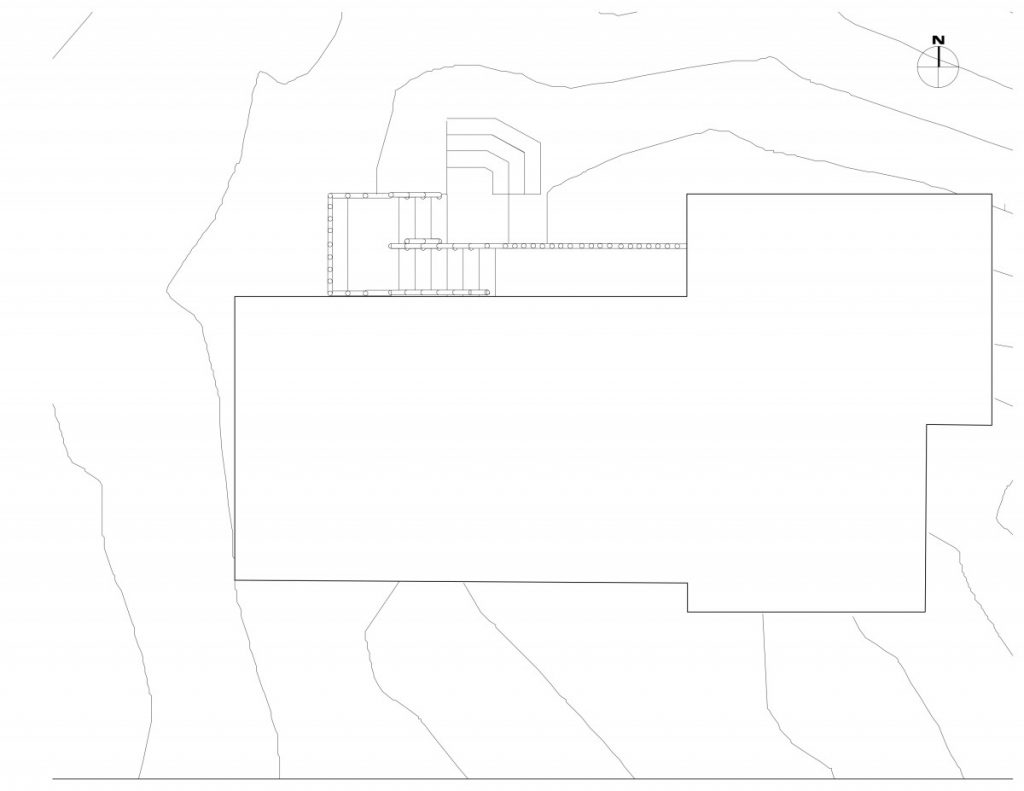
Roof Plan
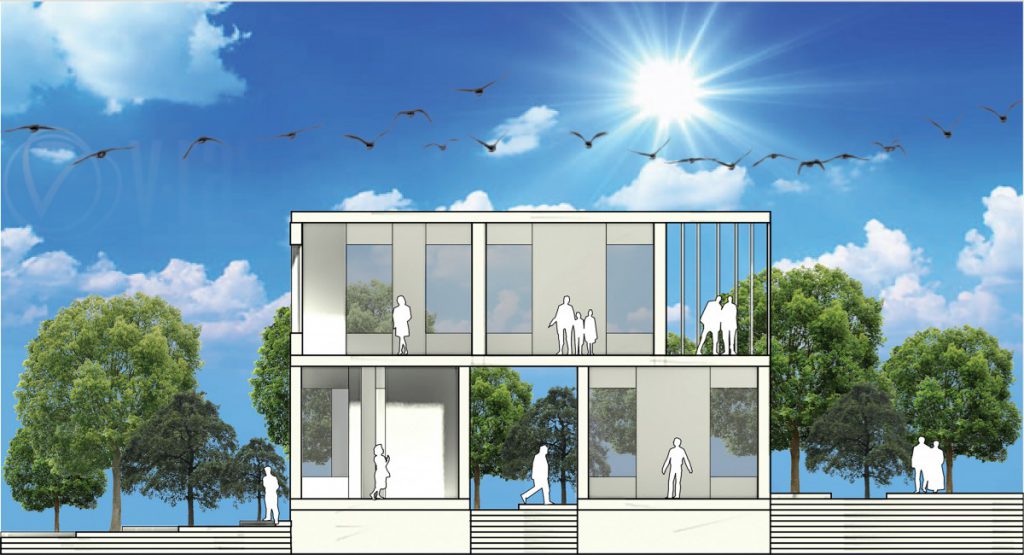
Assignment J: Site Section Drawing
Assignment K: Reflection
My presentation for Proj. 2, went okay, it did no go great as I hope it would have mainly because of how presented my work. Even though I manage to complete all assignments it still felt “incomplete” and it also felt like it lacked, it didn’t show a real progress to the work that I have done. Even though I did receive feedback and comments based on how I had composed and specified each of my diagrams, dealing with all 5 different configurations, diagrams specifying my house design, plan drawings, render photos & site section, to me it felt as if I have slacked off, it just looked bad, I didn’t like the way my presentation board looked, according to other students who had put a lot of work into it, and made it look very nice, and put time into it.
The one positive feedback I received from both my Prof. & the guest that they both really seemed to like the most, dealt with my floor plans. They liked the structure of design and format that I had applied. They seemed to like how my interpretation of coming up with this house design was formed, how it looked very artistic, showing different line weights, darkness-lightness, how they were well stacked together, how each of my room designs all had this connectivity to each other and how easy it was to understand the open space & movement going around the house itself. The only situation I had was with one of my floor plans, which was the underground level, since its just 3 separate room apart from each other, both the Prof. & the guest would just like for me to fix it up a bit and make sure to show a representation of where the upper level roof would go to represent the top floor with a lighter line weight.
The other feedback that I received, which dealt with a negative response, were my rendering photos & site section. Mainly because of how it looked, it was just a photo, there was no rendering to show, no skill of adaption of how I worked with the program, so because of that, it just felt like I slacked, didn’t put time or effort for that matter into my work, even though I still did the work, to me it felt unachievable, incomplete, & I was disappointed. So I have to make sure that from now on all my work be complete, understandable, presentable, approachable, and that even I can be glad of how much time I put in it and not just focus on making it look pretty.
When receiving these types of feedbacks, I got to understand much clearly how I can better make my projs. and diagrams more related to the topic it wants to relate to, make it more understandable, presentable and show the different types of techniques that are able to give off a better skill set in rendering.
With all of these comments that I have received, this will allow me to better benefit and illustrate my work for the next proj., and I believe now, it will better help me understand the foundation that goes into the work that I should and need to put in, and hopefully make it good and not screw it up.
Final Presentation Development
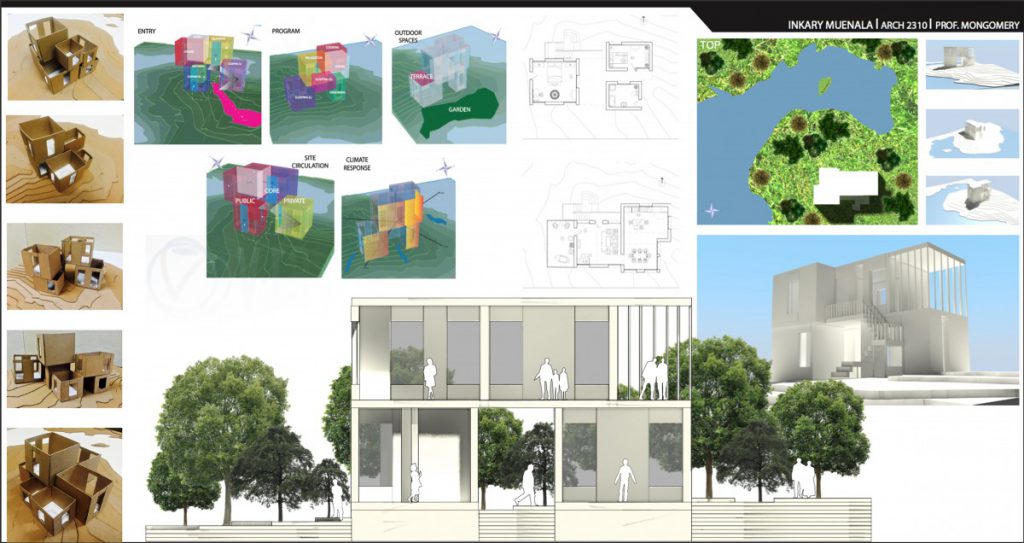
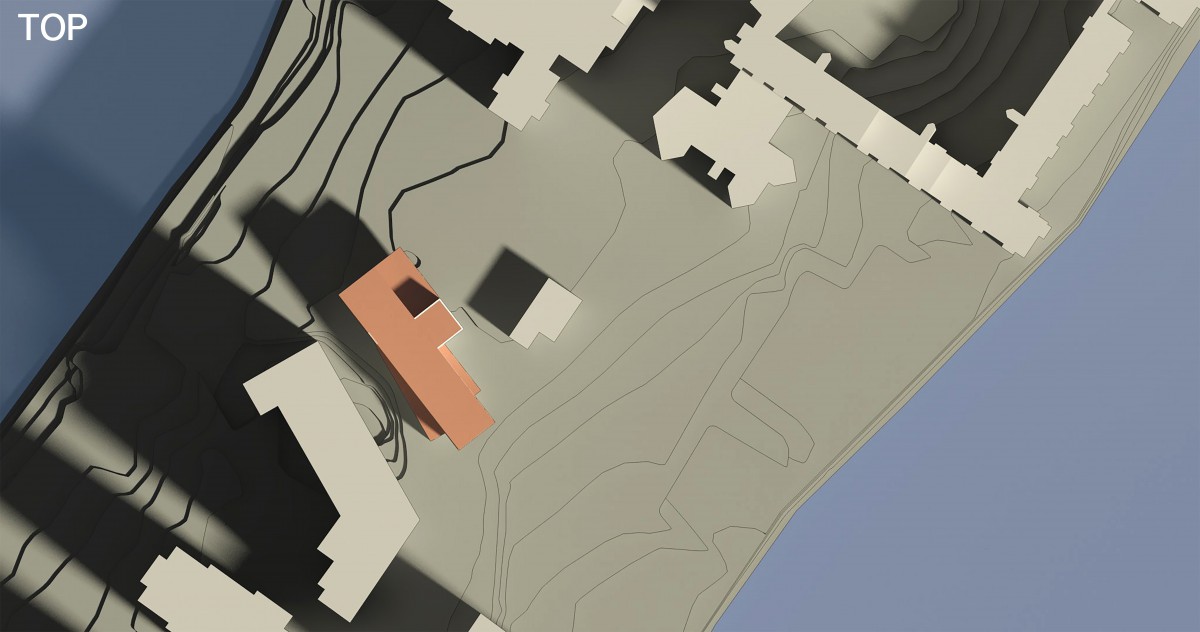
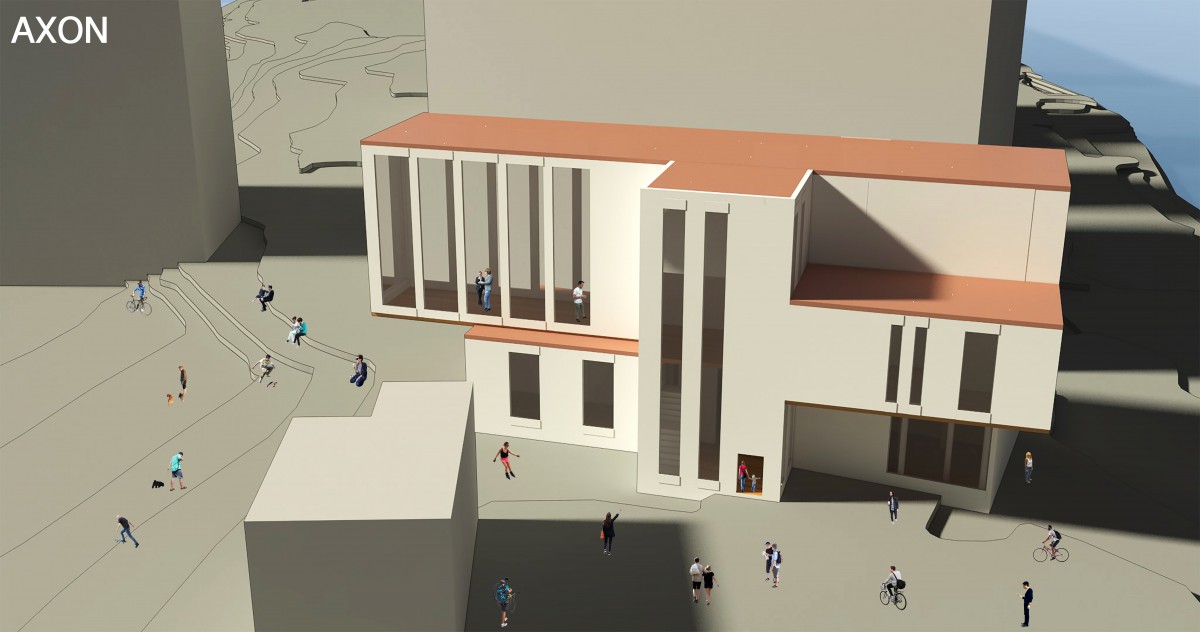
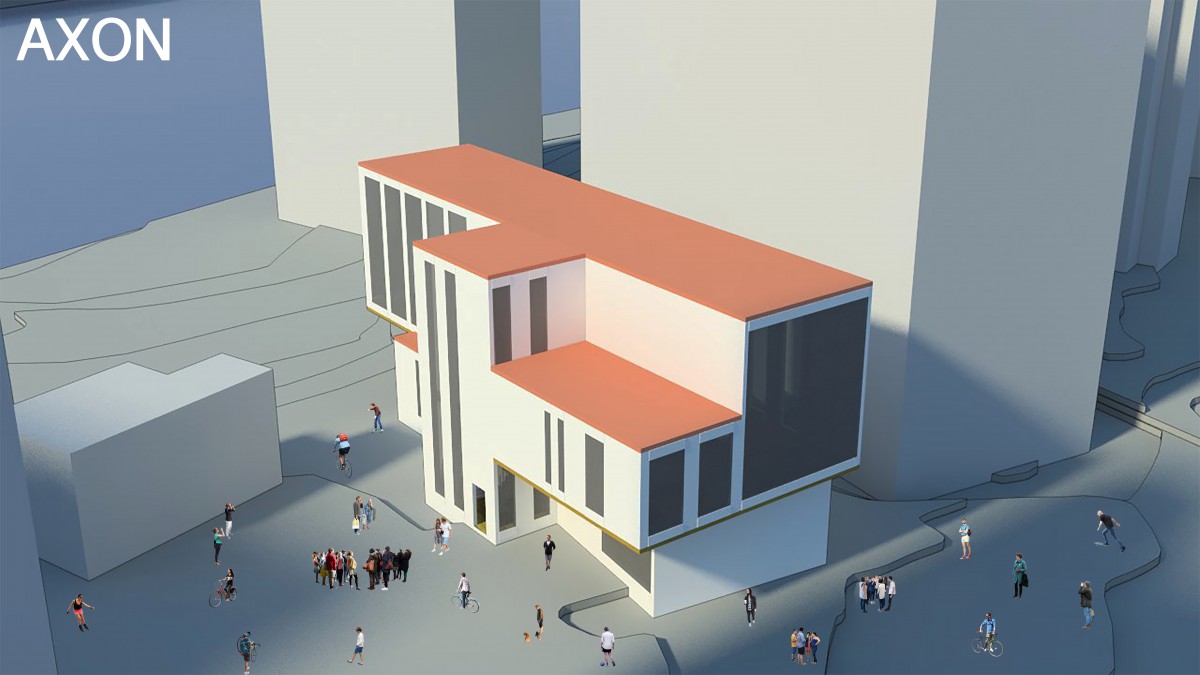
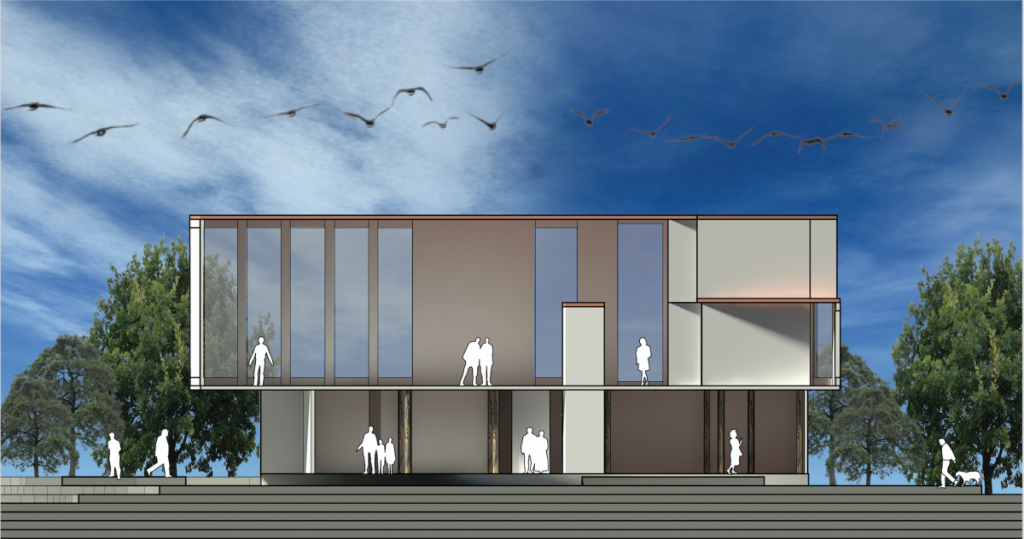
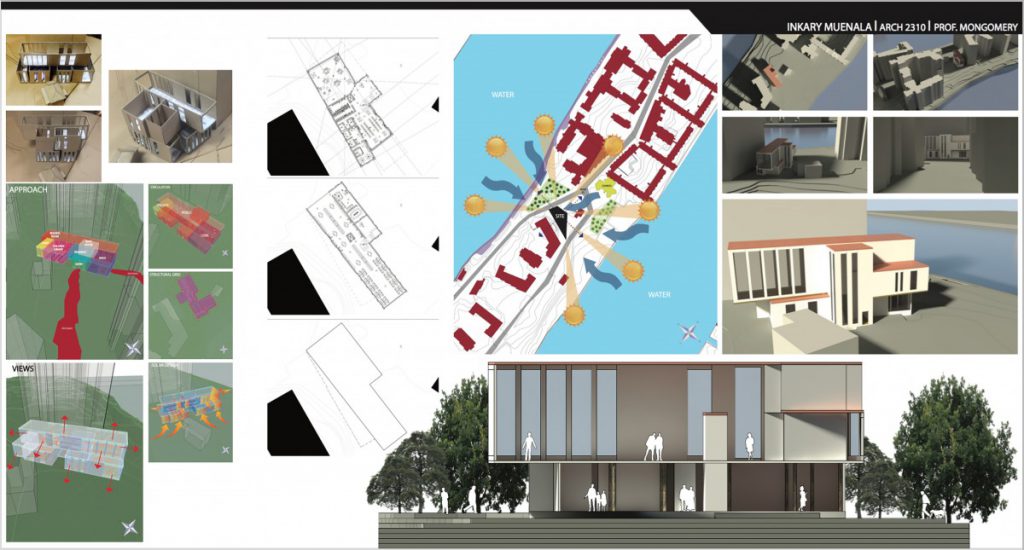
NEIGHBORHOOD LIBRARY
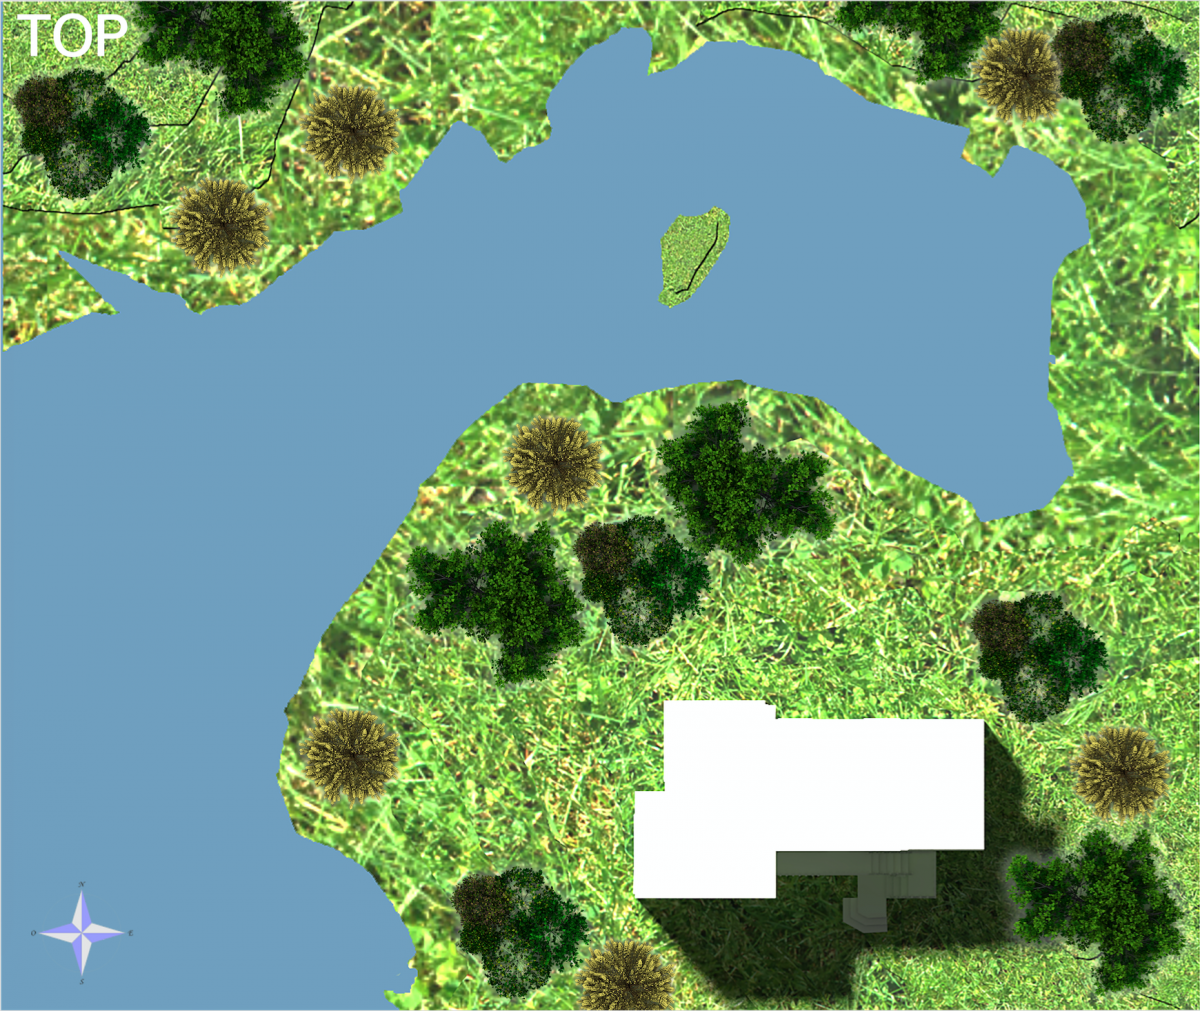
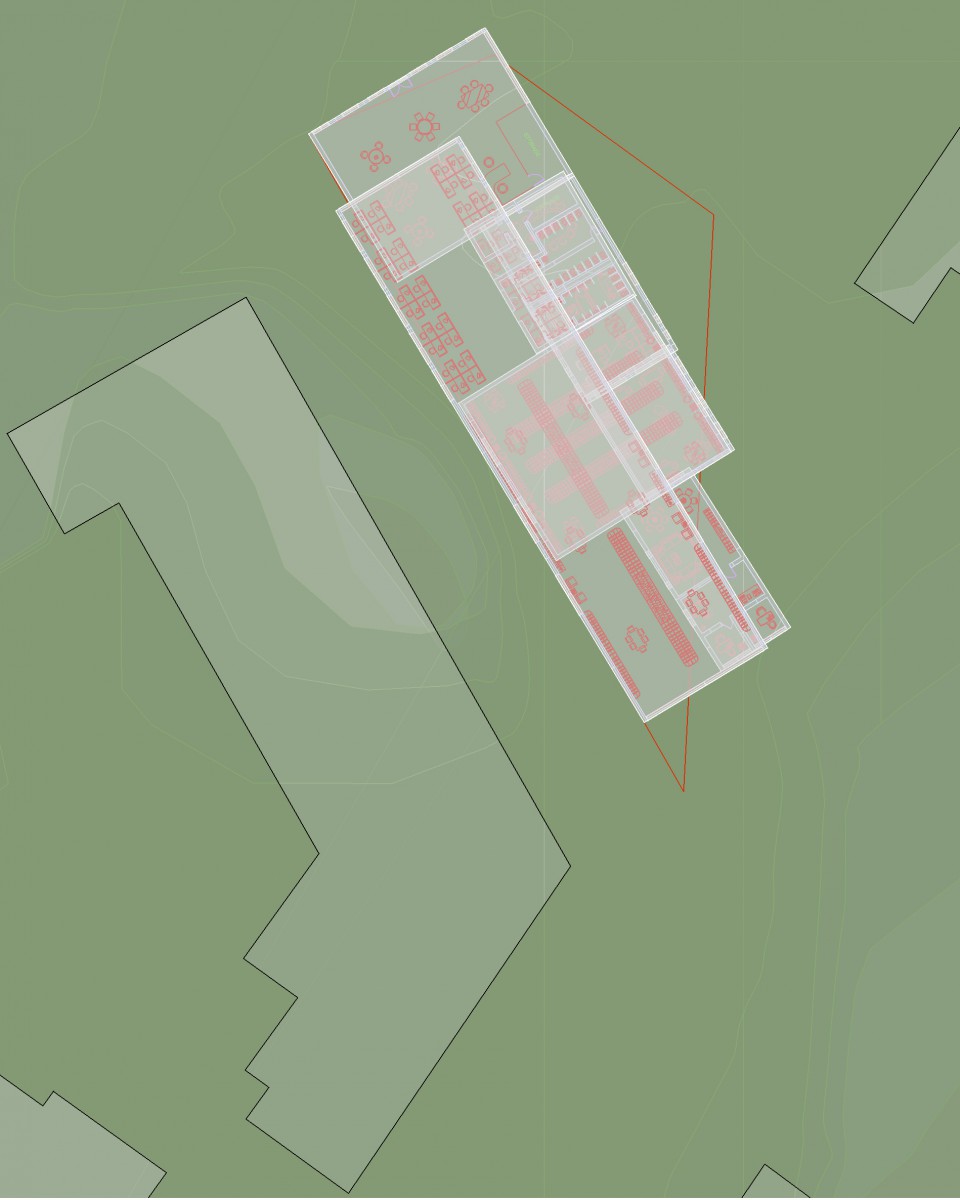
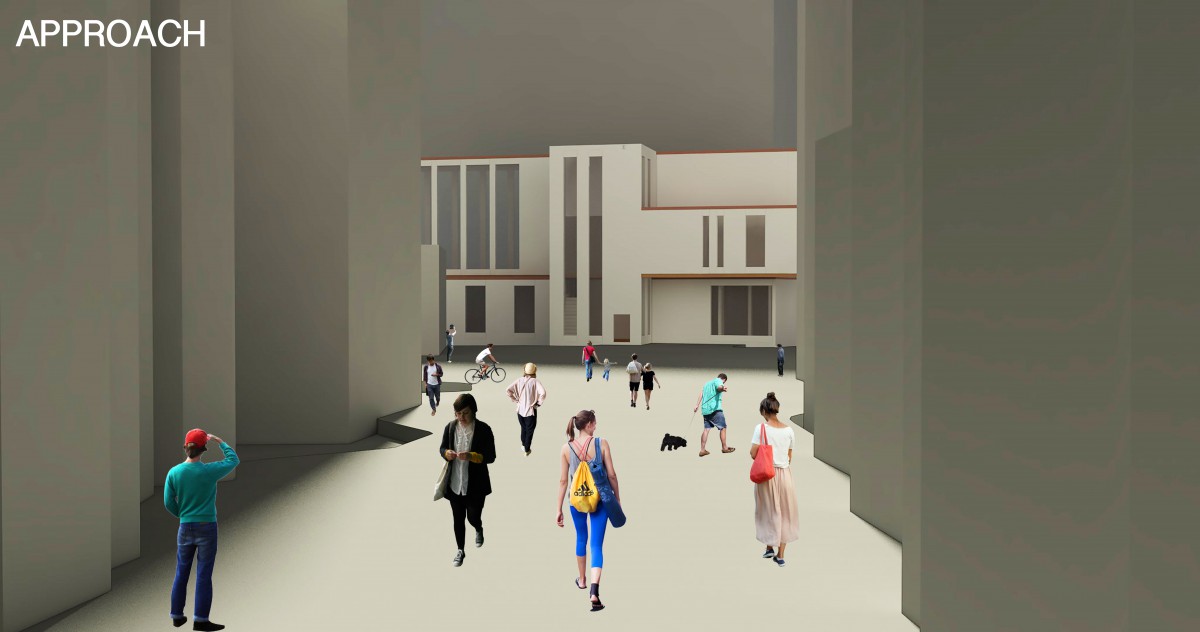
Assignment L: Site Analysis
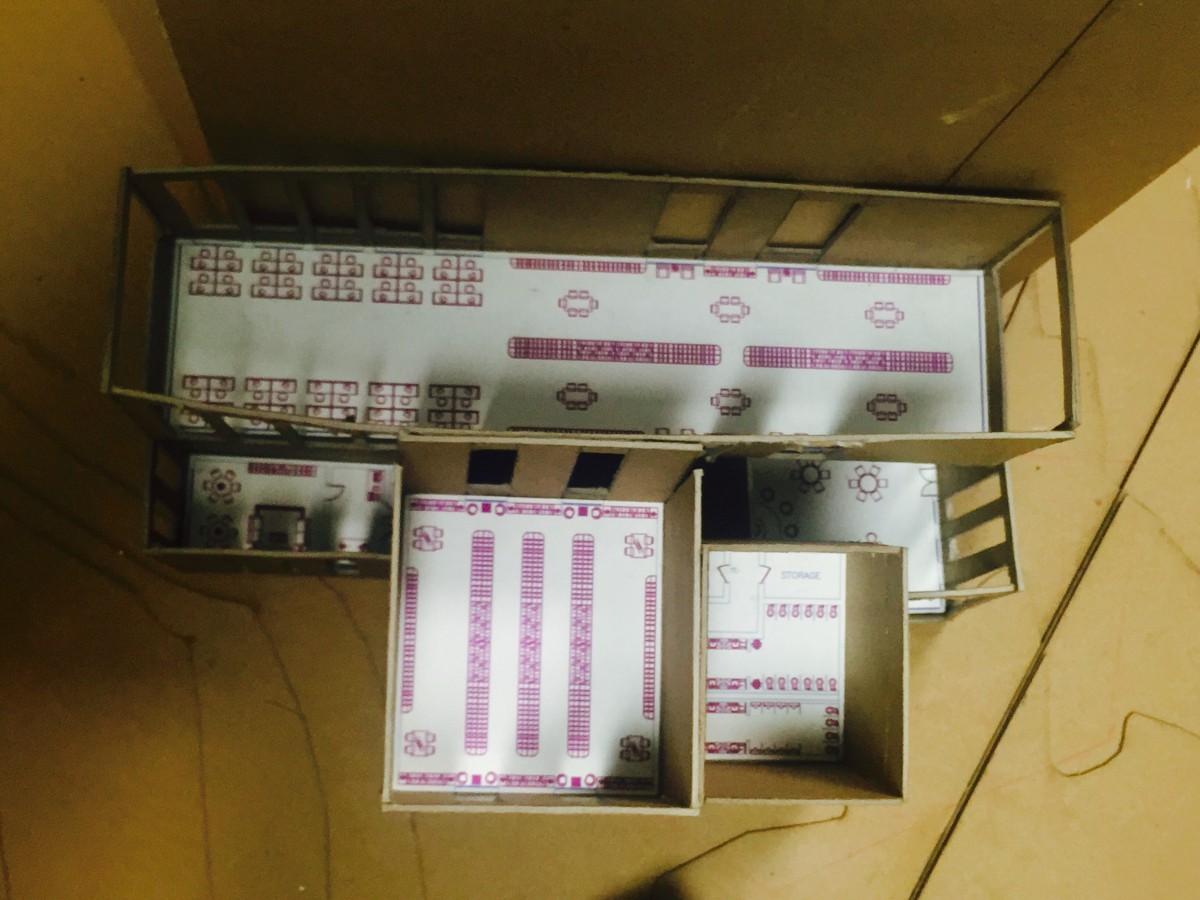
Assignment M: Library Program + Modules – Digital
Back House

The space of this Back House will have two separate entries, on the left side of its space, it will be a private access only for the janitor, which will include a Janitor’s closet and a storage room. Restrooms for both females & males on each side is located on the right side.
Children

Inside the children’s room, there are different types of space areas where one can go to, there is a book center, a quiet area, and an interactive area people can go to and play. The dimensions that is given for this required space will be able to require movement and relaxation to the people visiting.
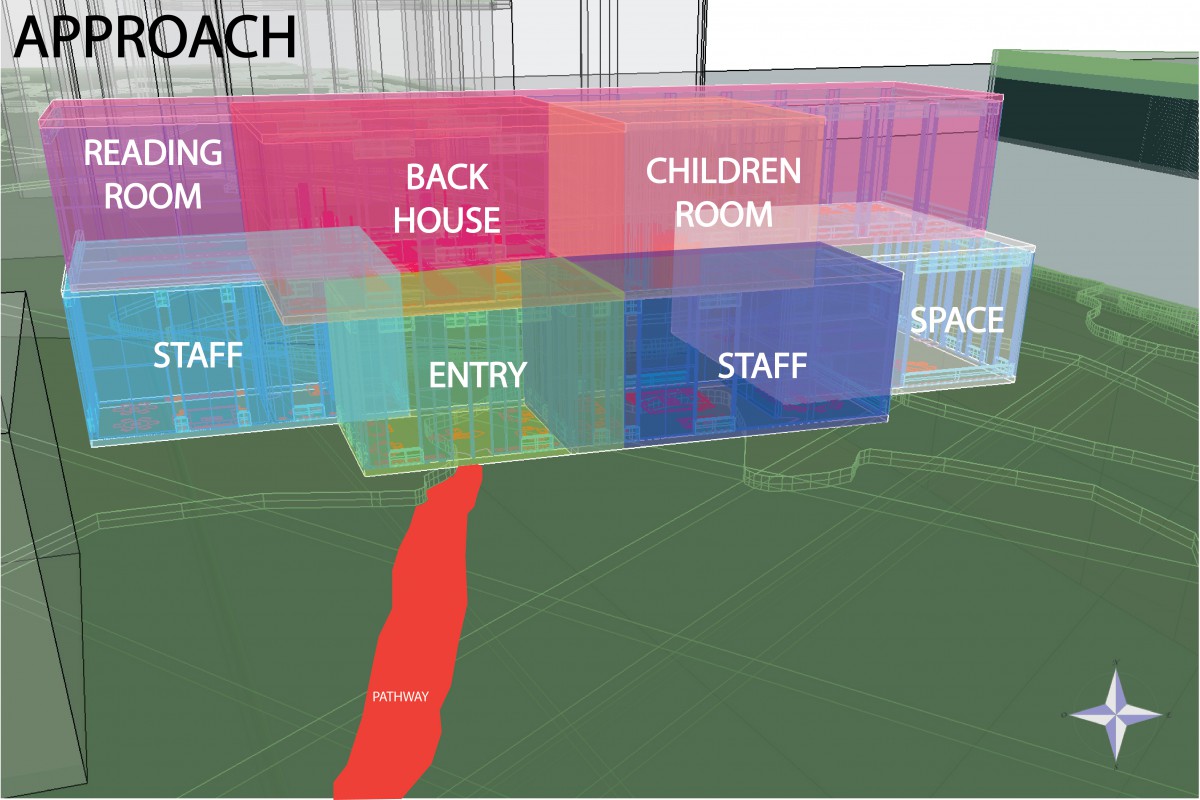
Entry

Inside the Entry space includes circulation and an information desk as soon as you enter, centered in the middle of the entry. The purpose for this space is for people to come in and be able to go to the section of the library rooms they wish to get to.
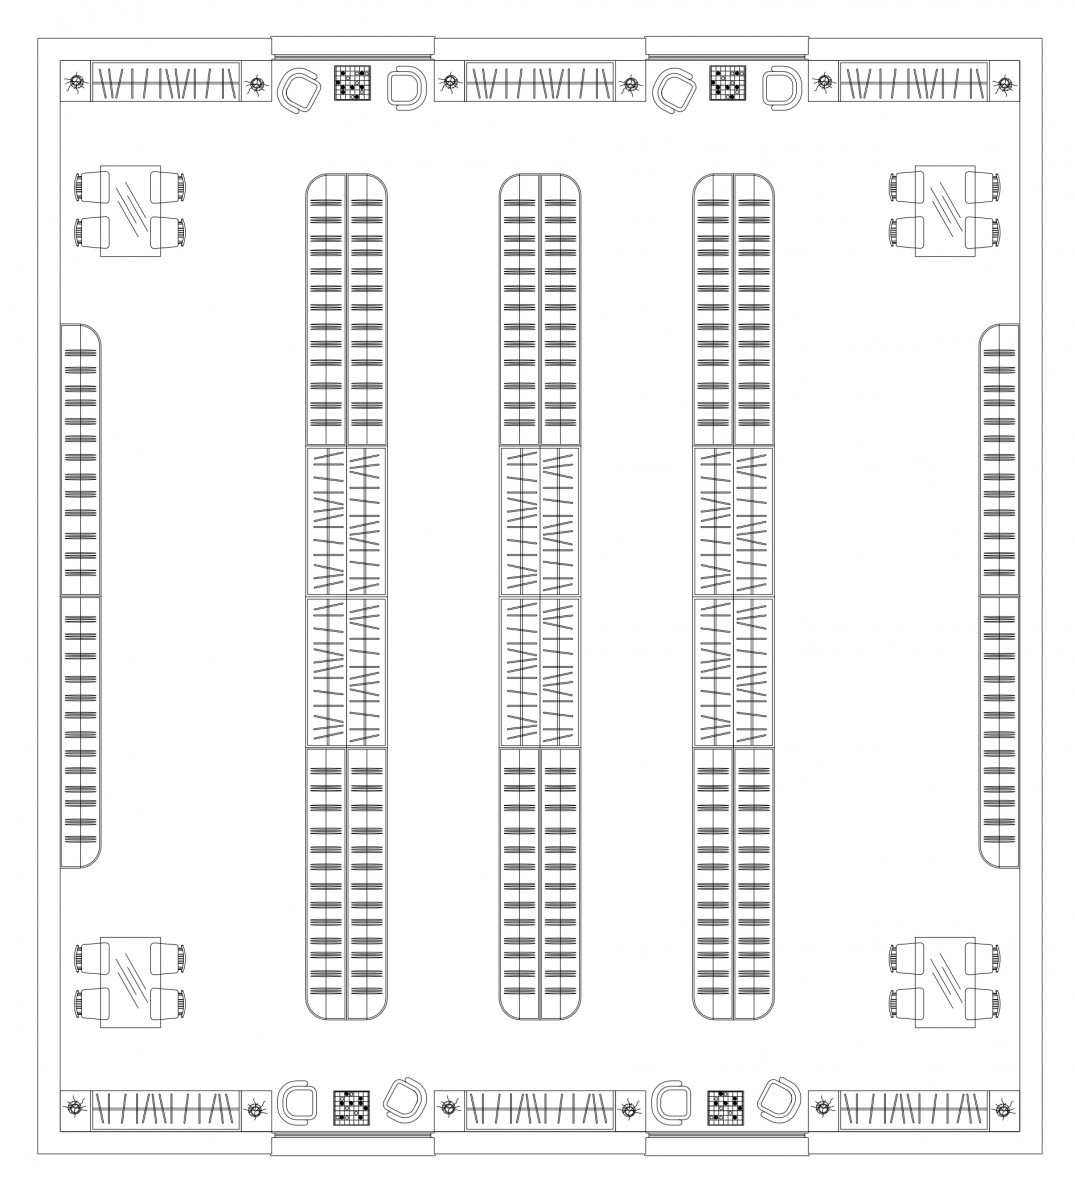
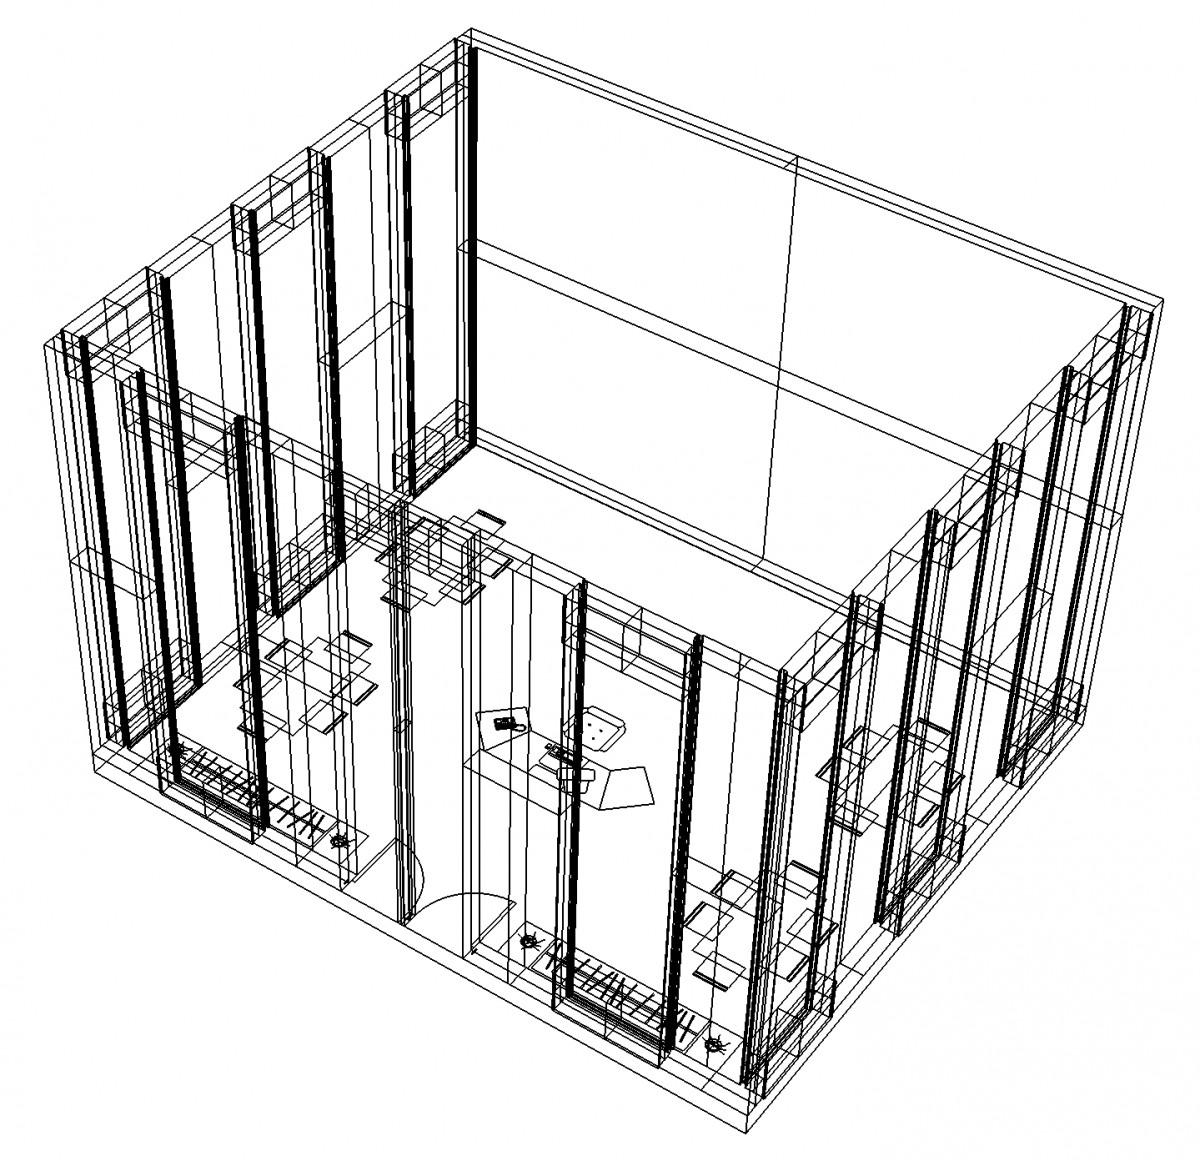
Reading
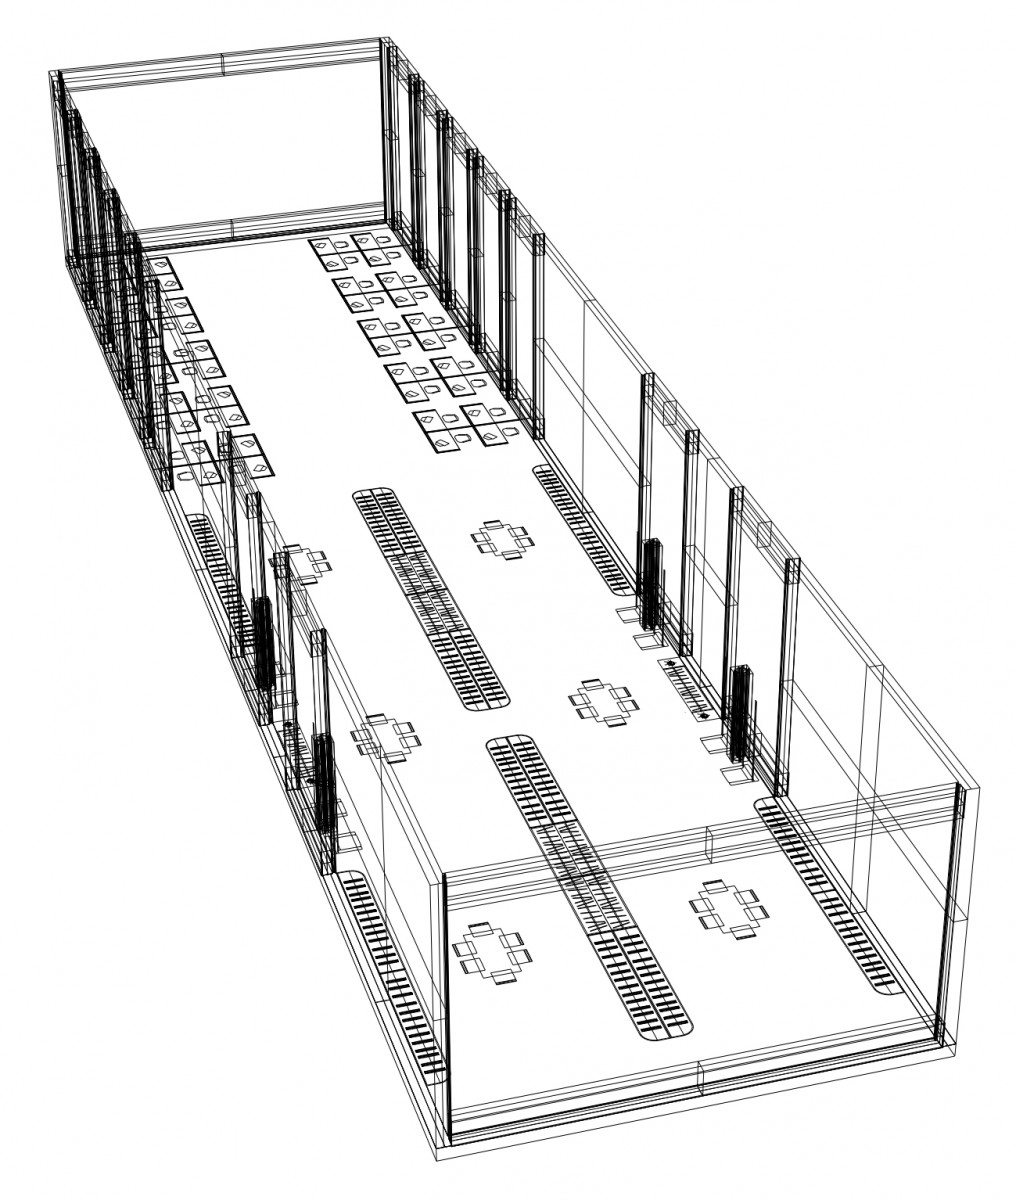
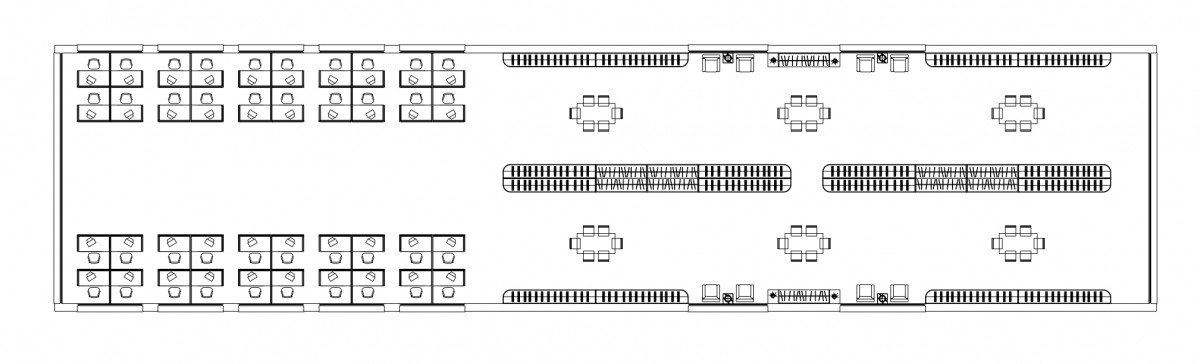
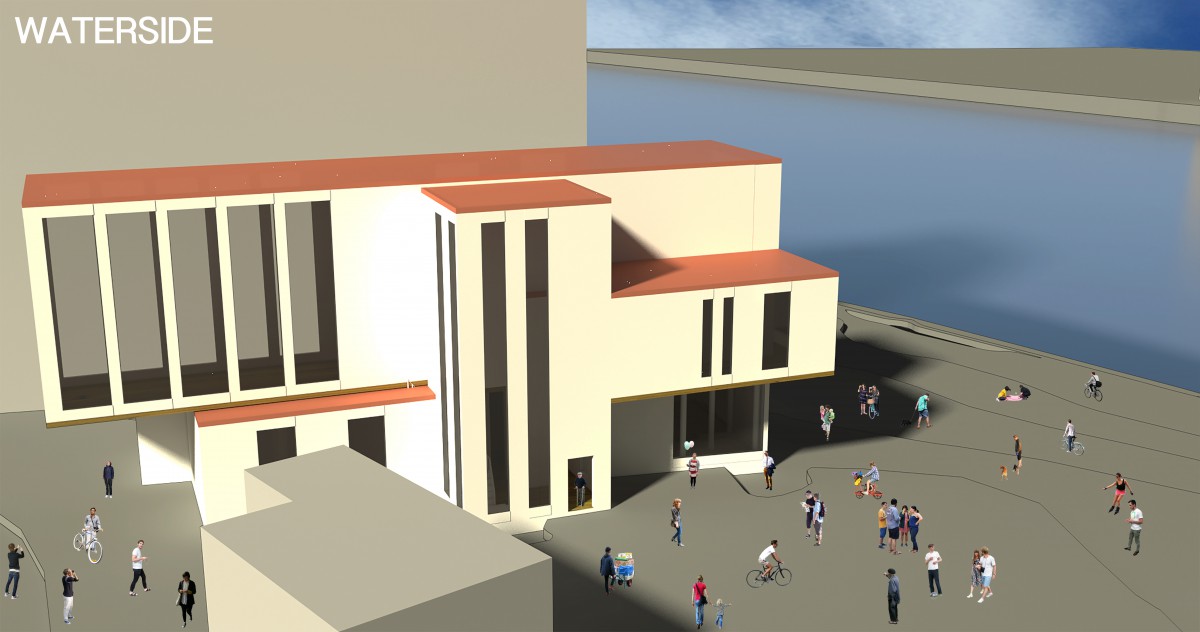
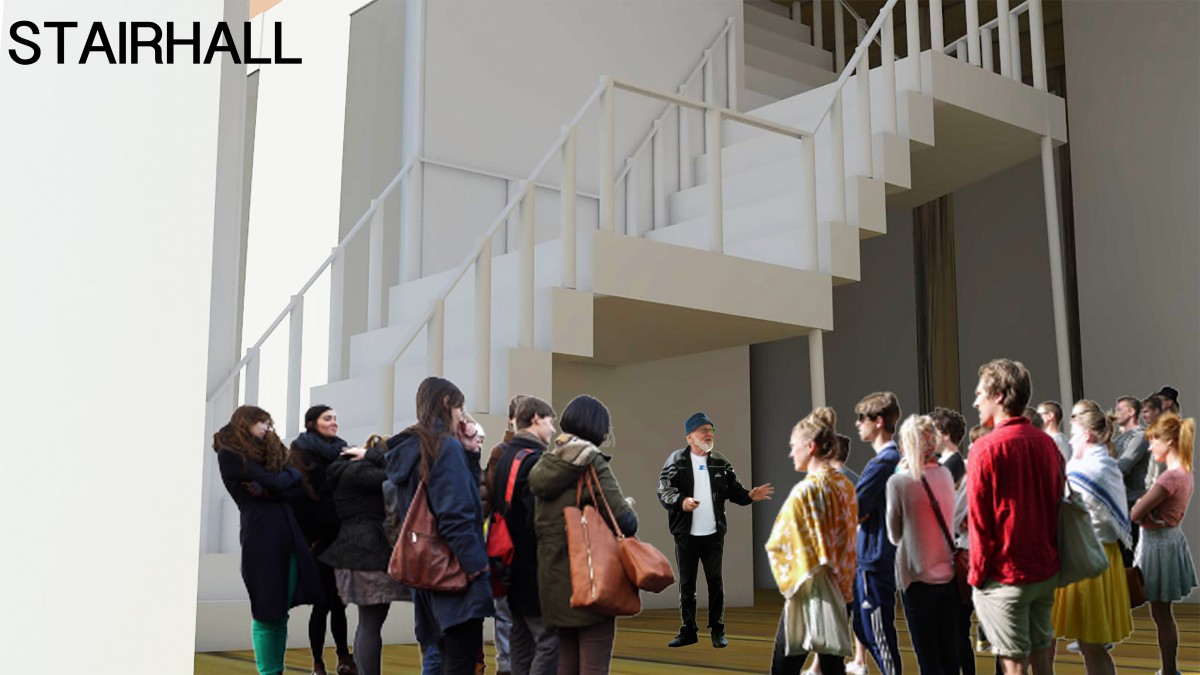
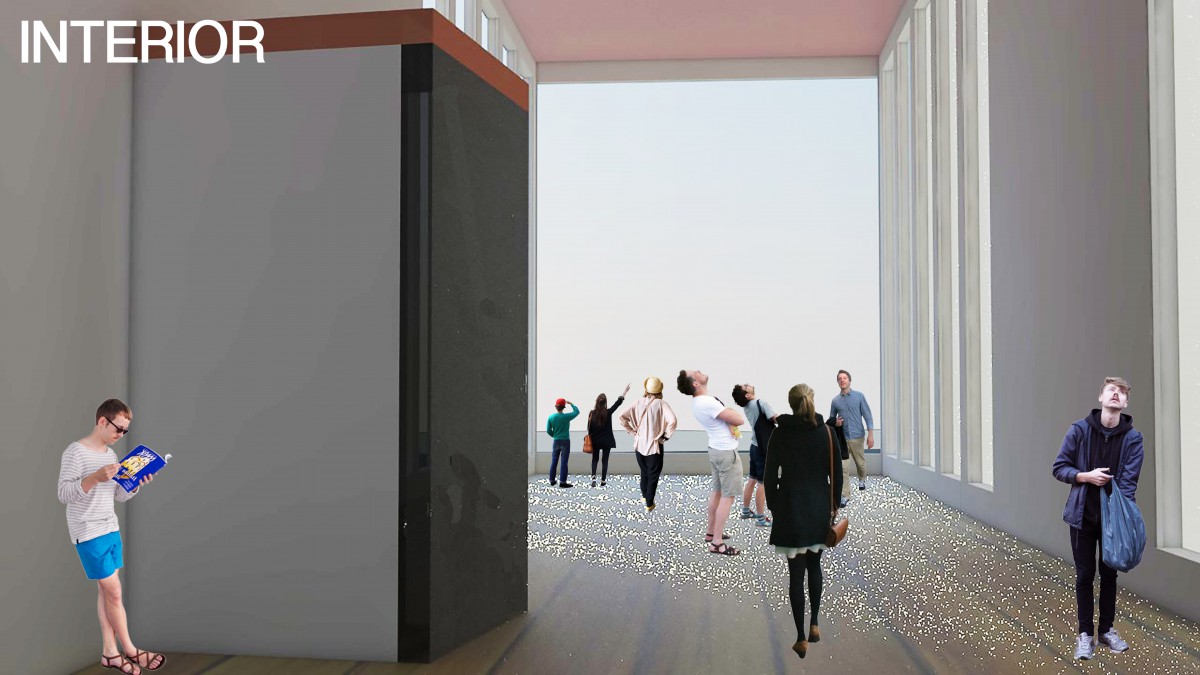
The Reading room will be the largest room for the development of the library. Inside this room, it will include a series of different windows, mainly 2 big ones, which will be completely wide open, so people can get a glance of the whole view and will be able to see the outside of each side of the rivers, and it will include this large circulation movement that will be involved into this specific room. The Reading room will include a variety of books, worktables & seatings, various computer stations, and soft seatings.
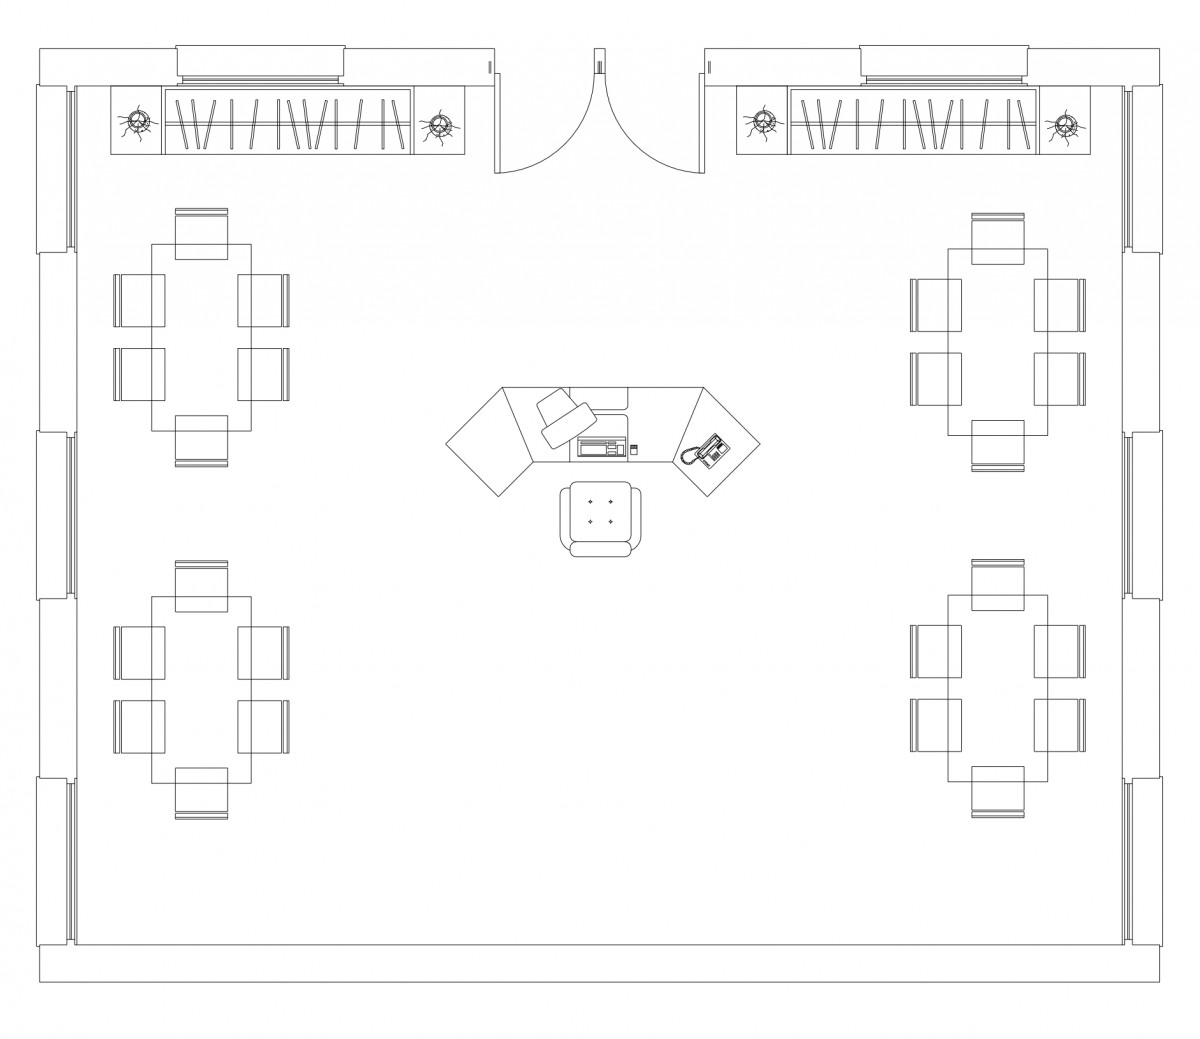
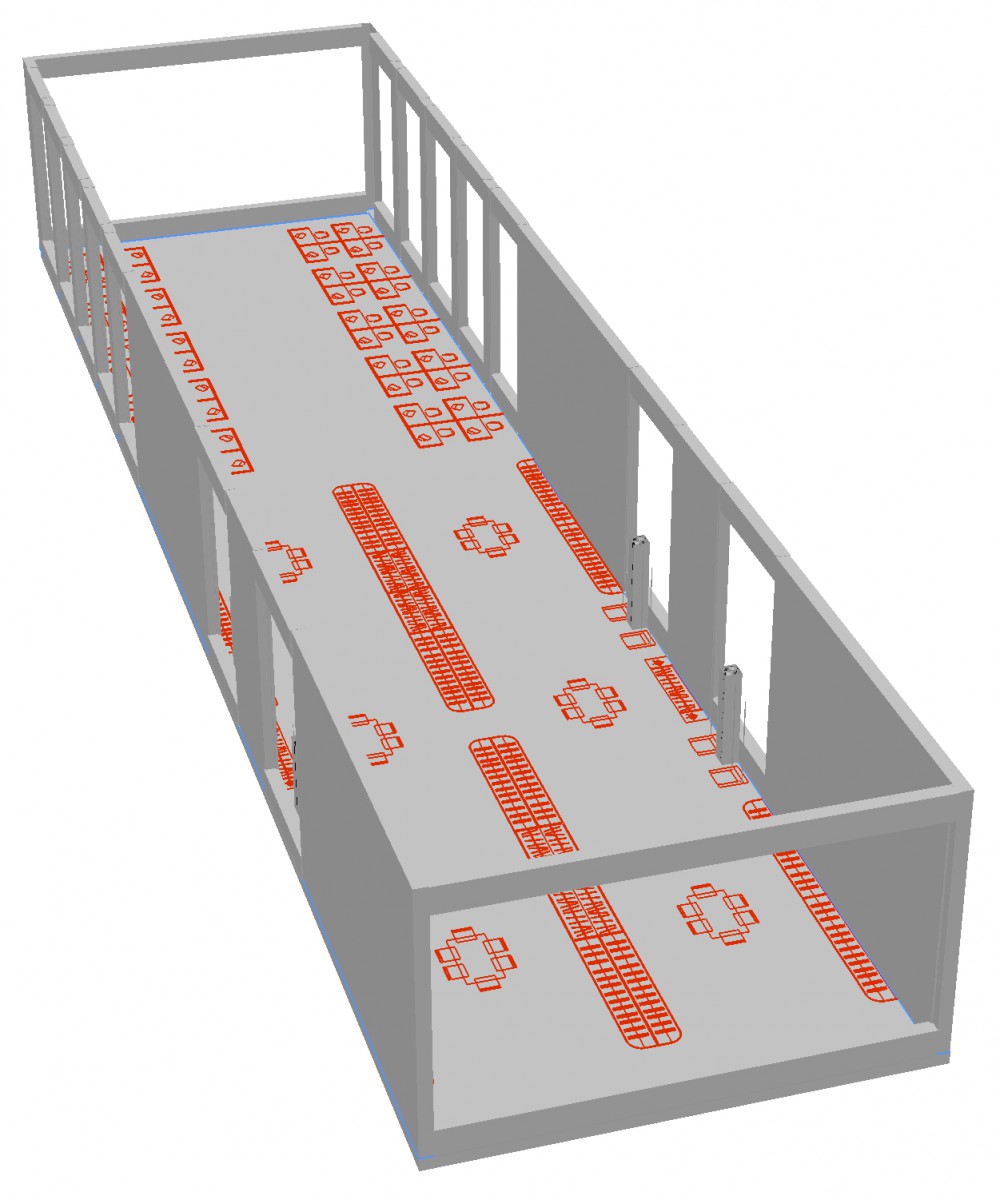
Research
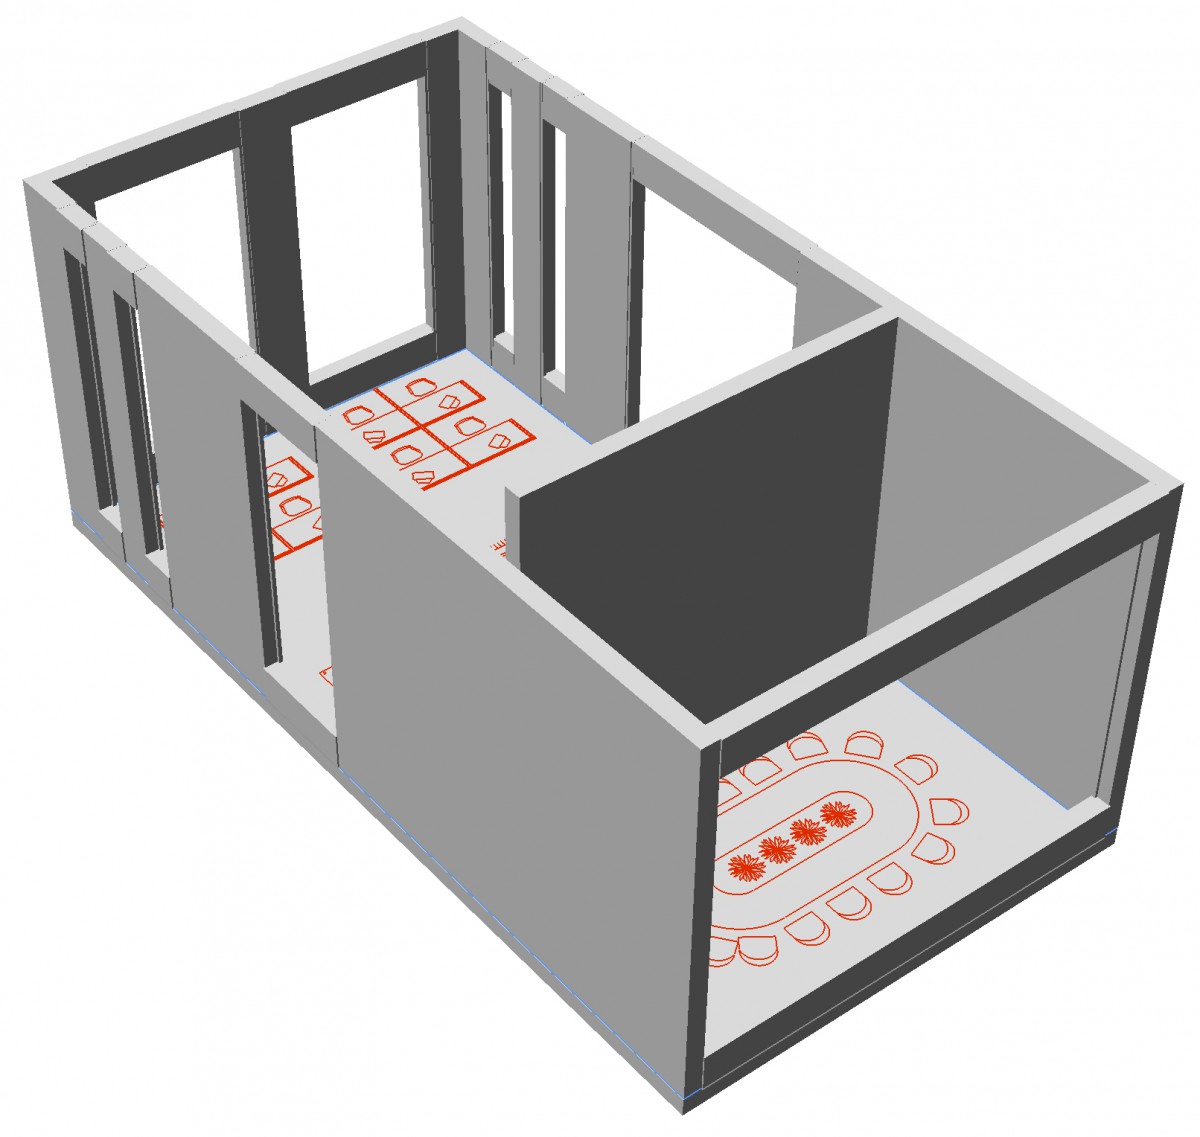
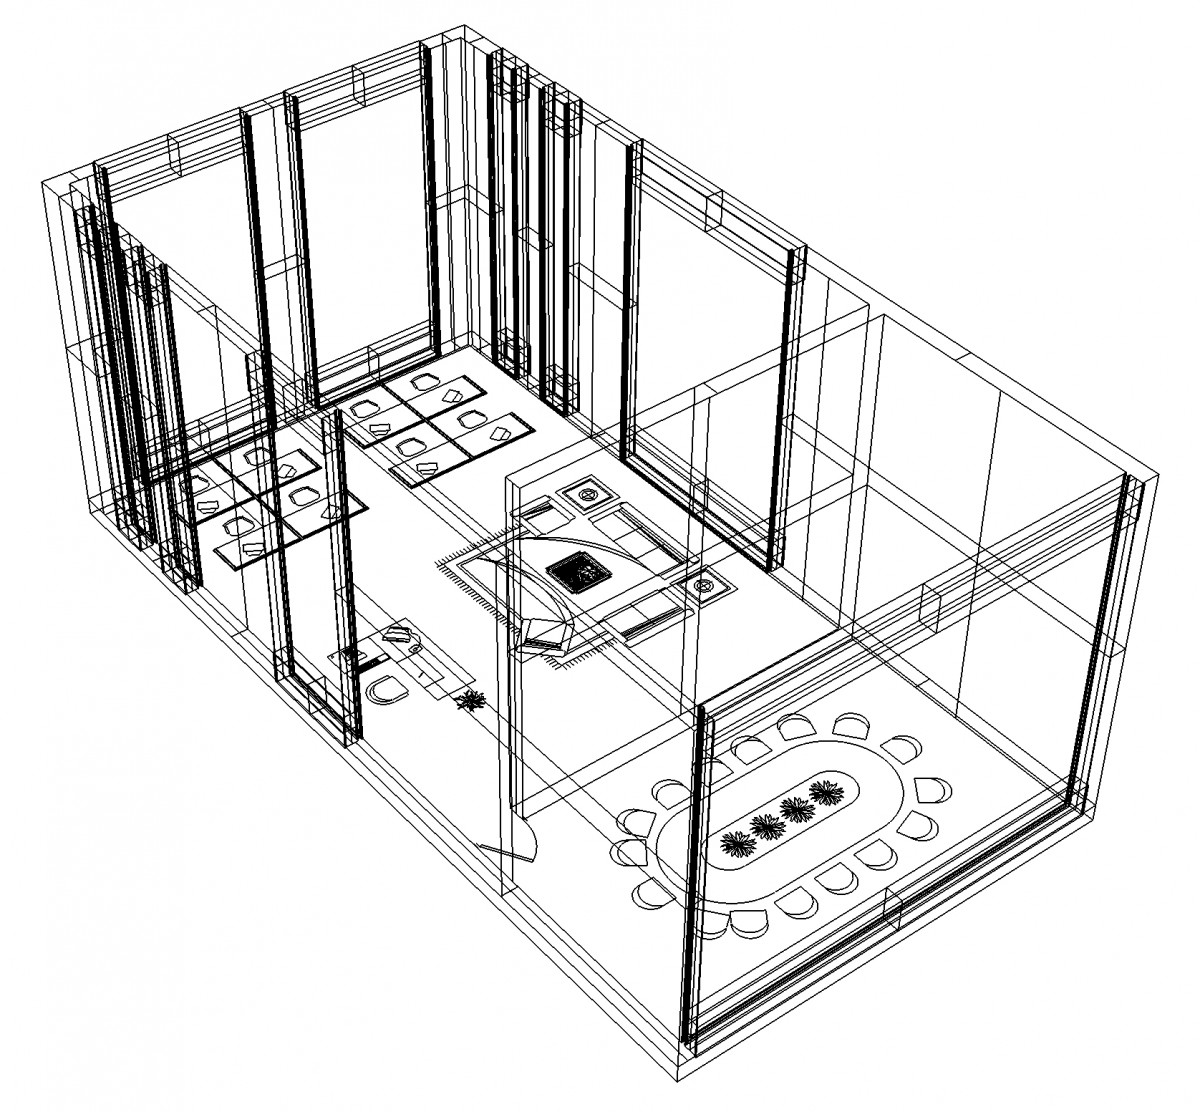
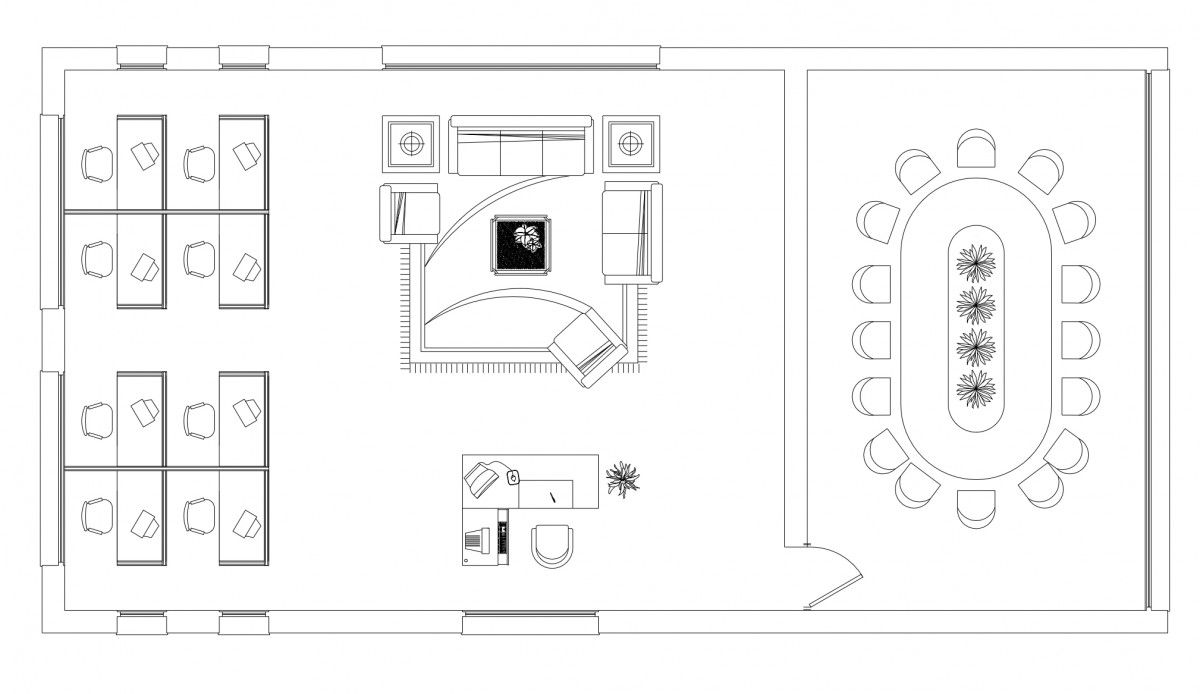
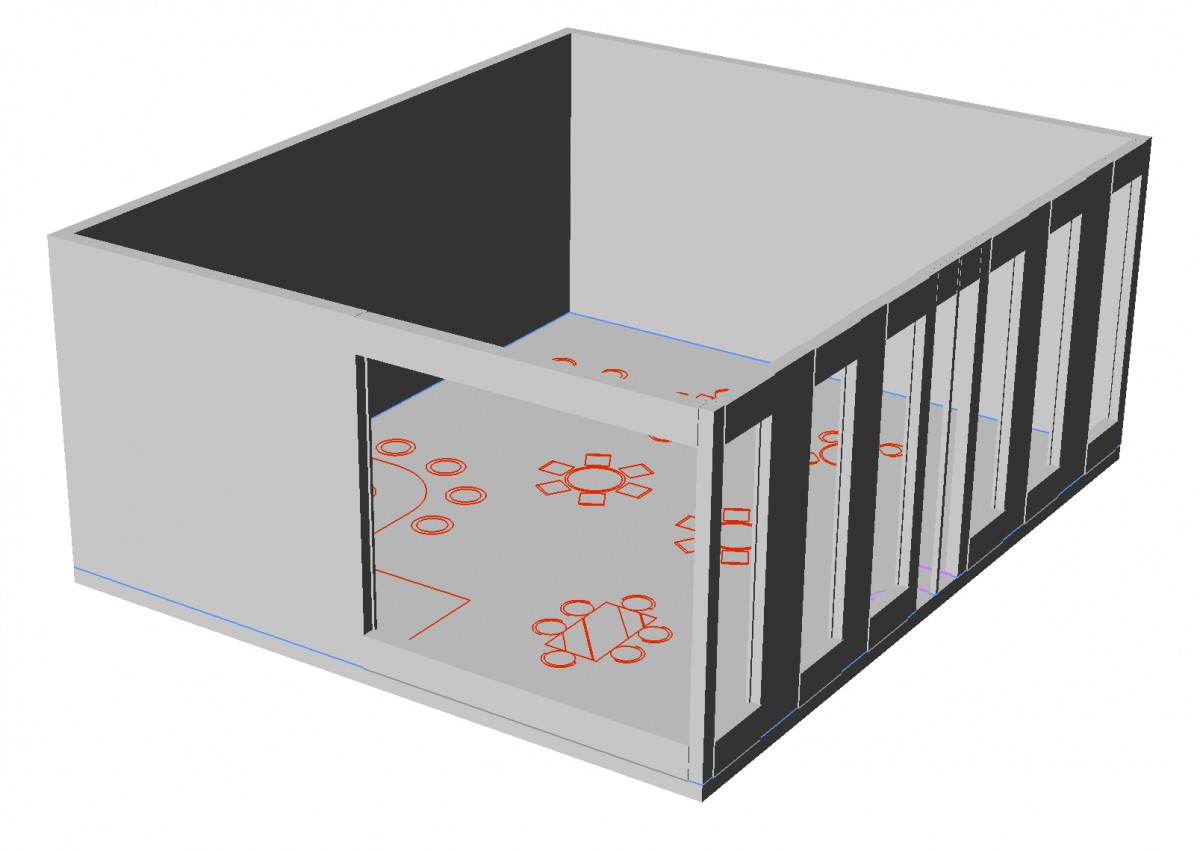
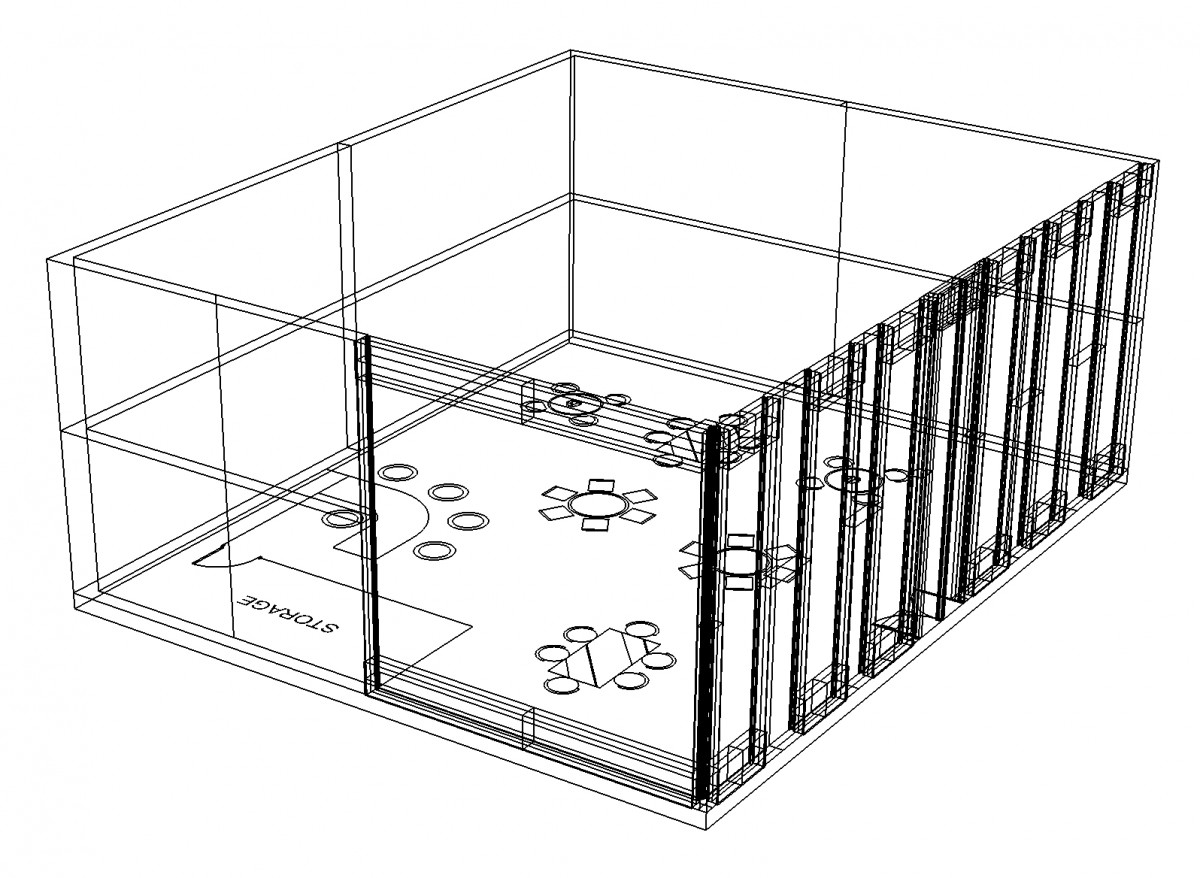
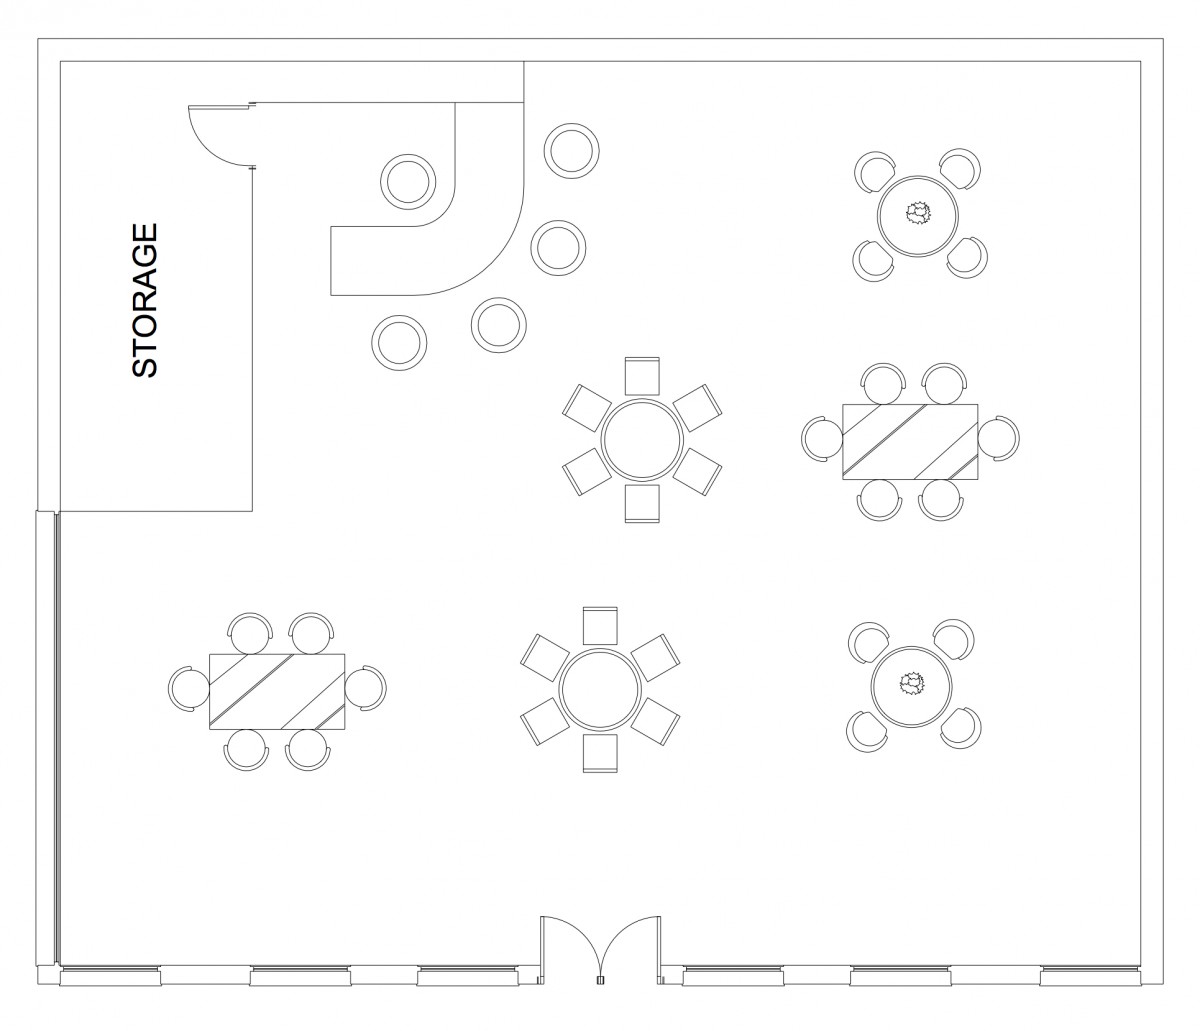
The research room will include reference desk, multiple computer workstations, soft seatings, and a private large conference room. The purpose of this space is to have people be able to go to spot they wish to go to. This space will be suitable for both students and staff/business members to do their work, weather it’s for private staff meetings or school works.
Space
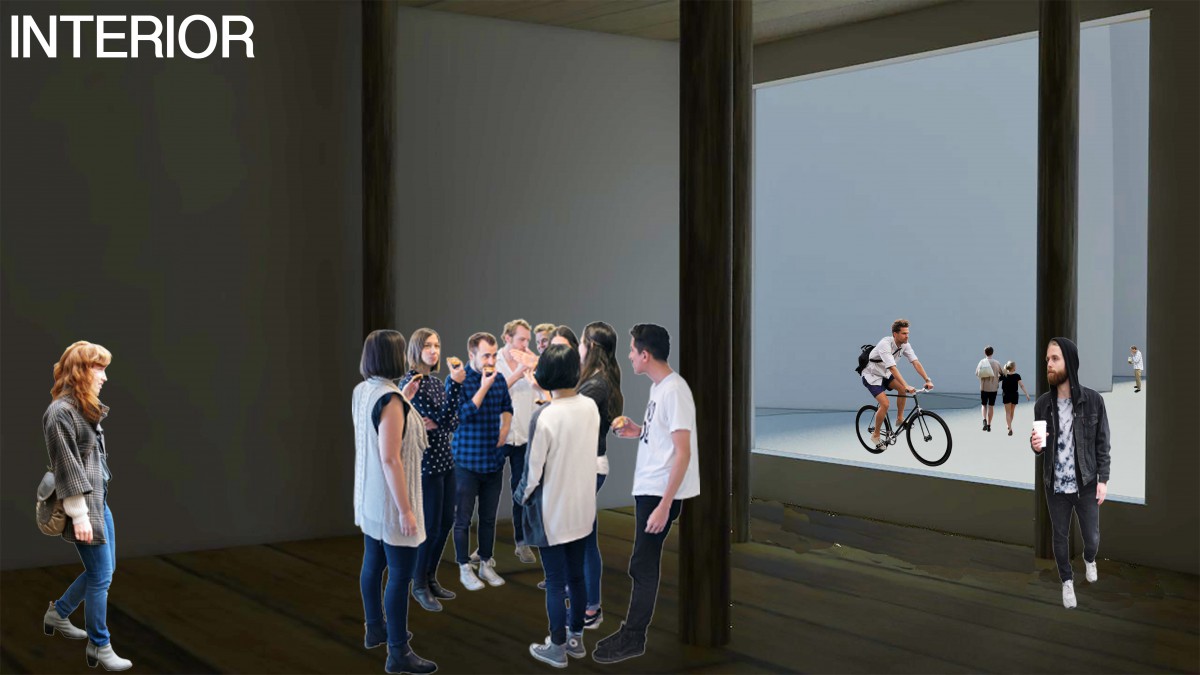
Within the Space room itself, this will include a Café which will be a separate entrance from the plaza, it will have some tables and a Café Storage. And it will have a contain glazing window to look out from.
Staff
This Staff room contains offices and a staff lounge/copy area. The lounge area will be a room where staff members can be in their own private environment, relax, eat, and rest. And the offices would be where the workers of the library can do their every day duties and have 1-on-1 private meetings in their own office.
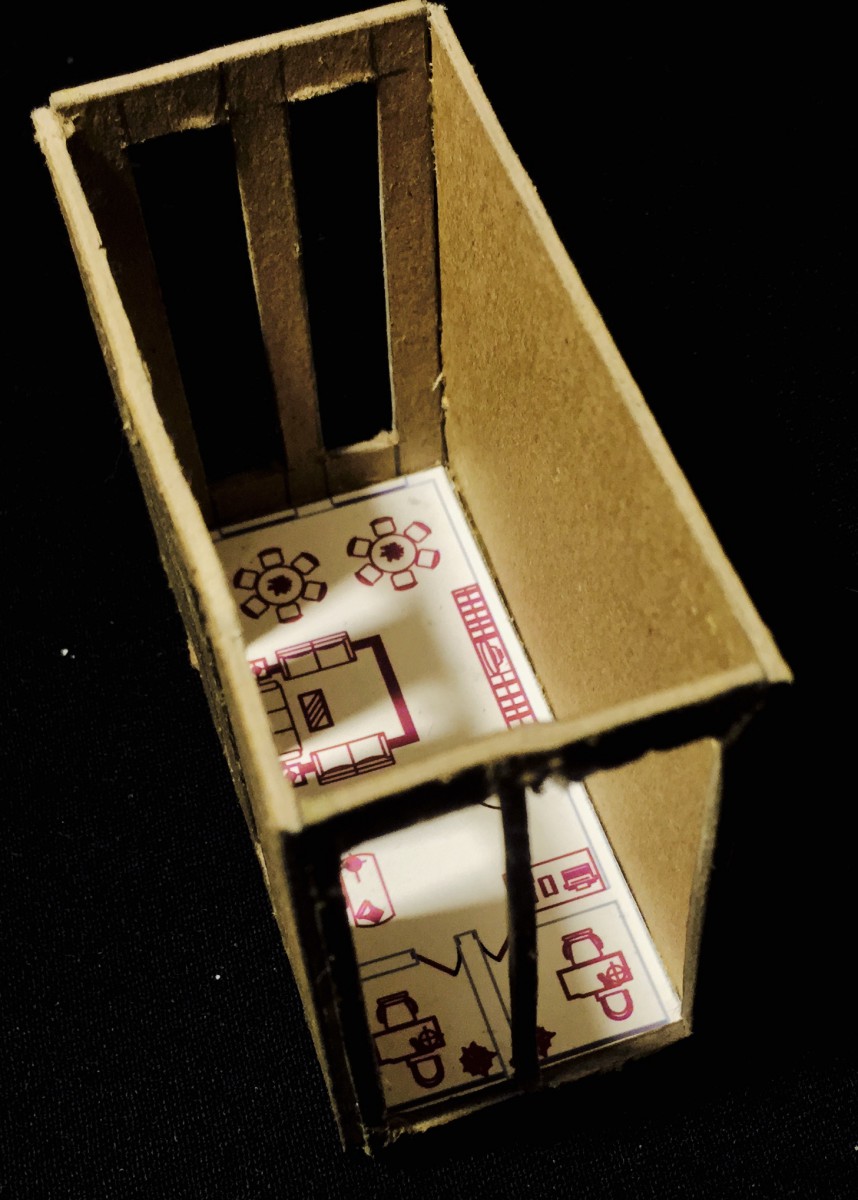
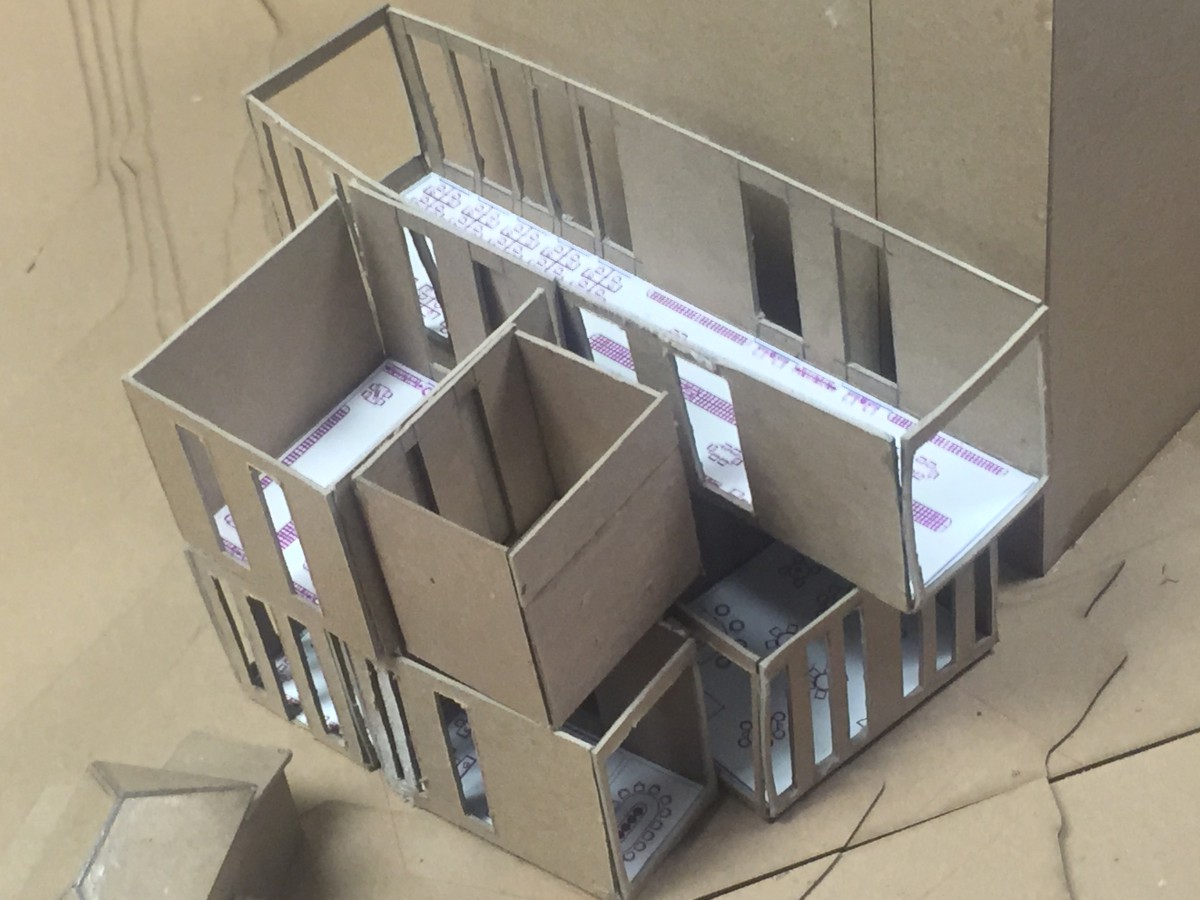
Assignment N: Library Program + Modules – Models
Back House
Children
Entry
Reading

Research
Space
Staff
Assignment O: Library Space Model and Views
Configuration #1

Configuration #2

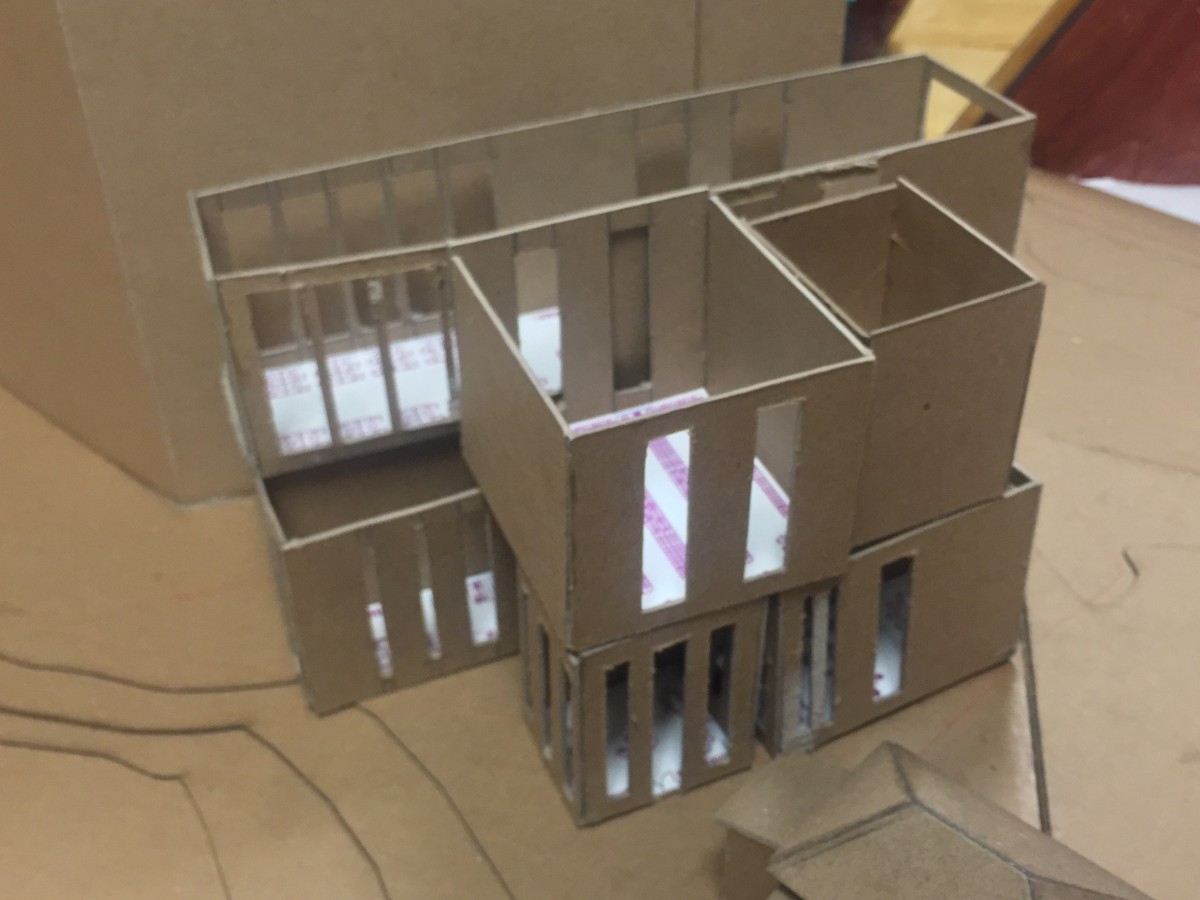
Configuration #3
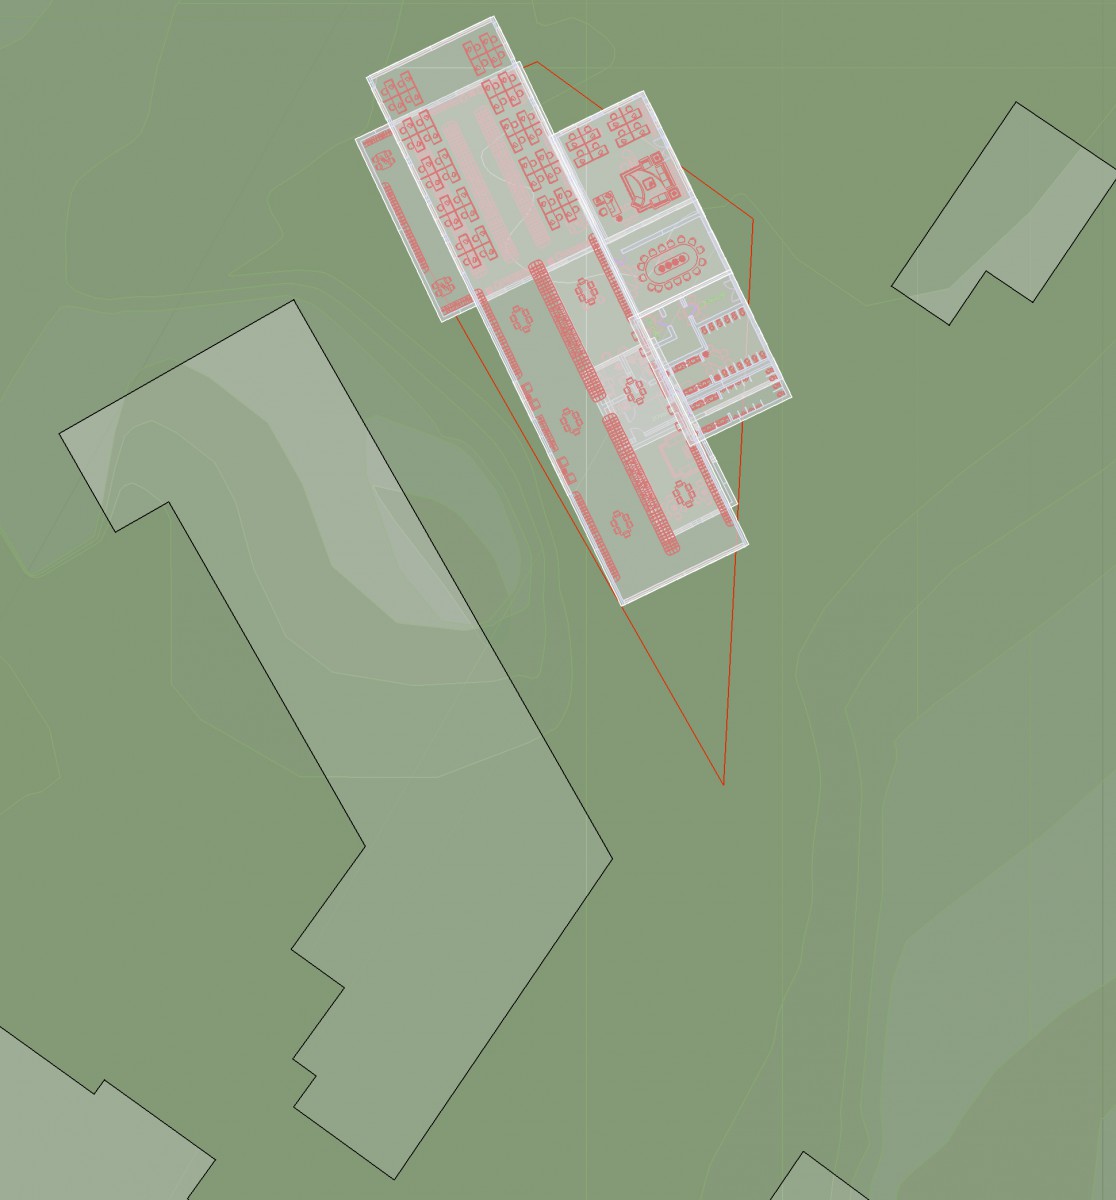
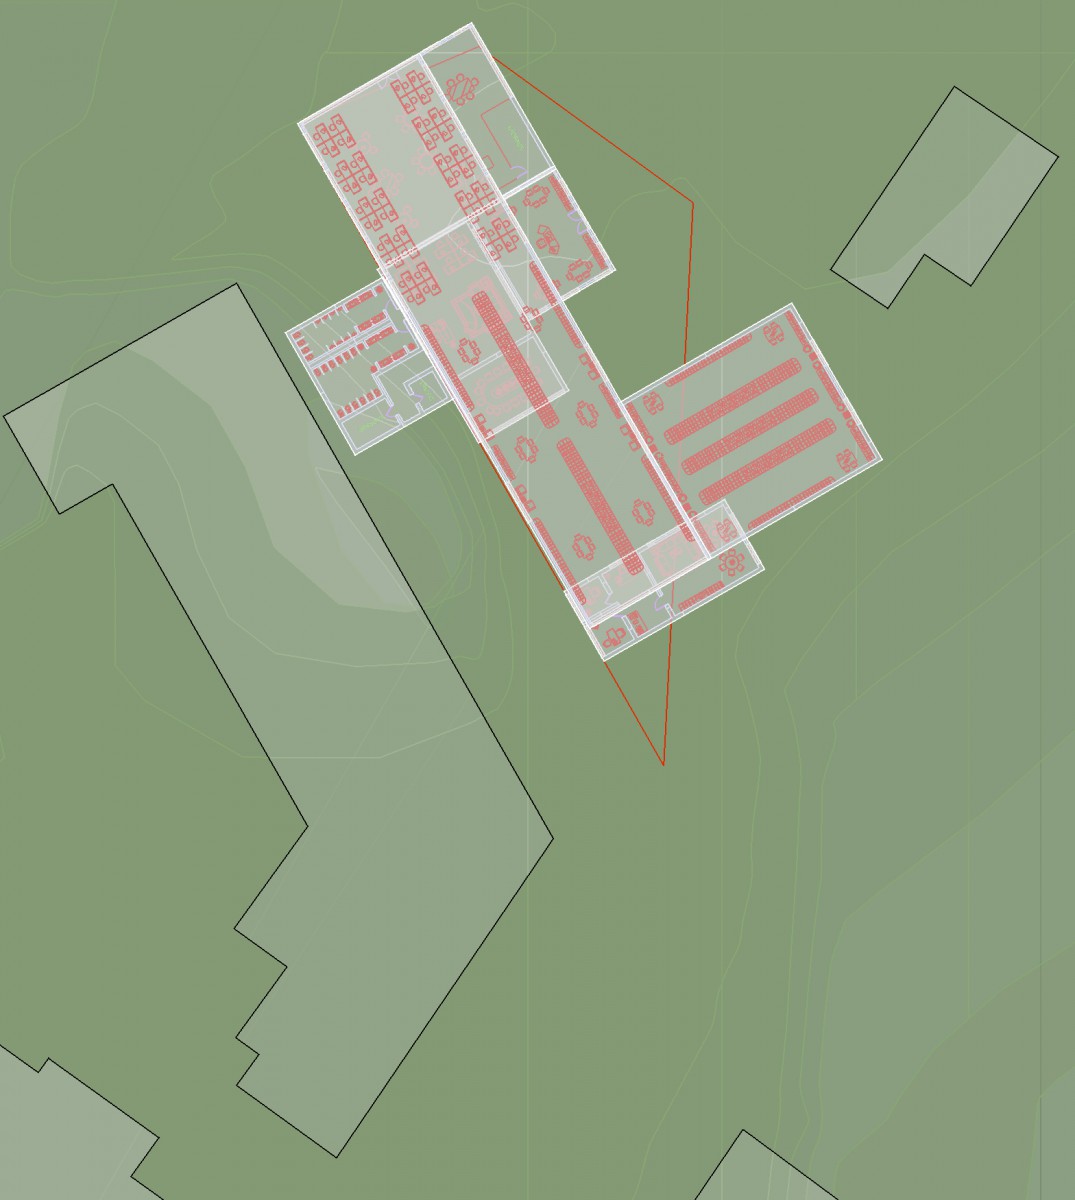
Assignment P: Parti Diagramming
Configuration #1

Configuration #2


Configuration #3
Assignment Q: Reflection
When developing all 3 types of configuration, I decided to go with the very first configuration, because of the way I had designed it. According to the Prof. he thought this configuration was the strongest one out of the others because this one had interesting views from left side, right side, they way each room was connected and how it gave a open space within the environment. The other reason is because of configuration has very clear classifications, the 2nd floor was originally just going to to be the reading room but instead decided to combine it with the research room. What really seemed to work was how the cafe space would include a big glaze window to look out the plaza and street and also have a separate entrance to the library so pedestrians can come in or out if they wish to visit the library or not. Also my reading room on each side will have big glaze windows that provide a big exposure of the river and park, also how this room is the biggest one and very open. And lastly rearranging and fixing some of the rooms in order for it to give it a more circulation instead of making it so tight.
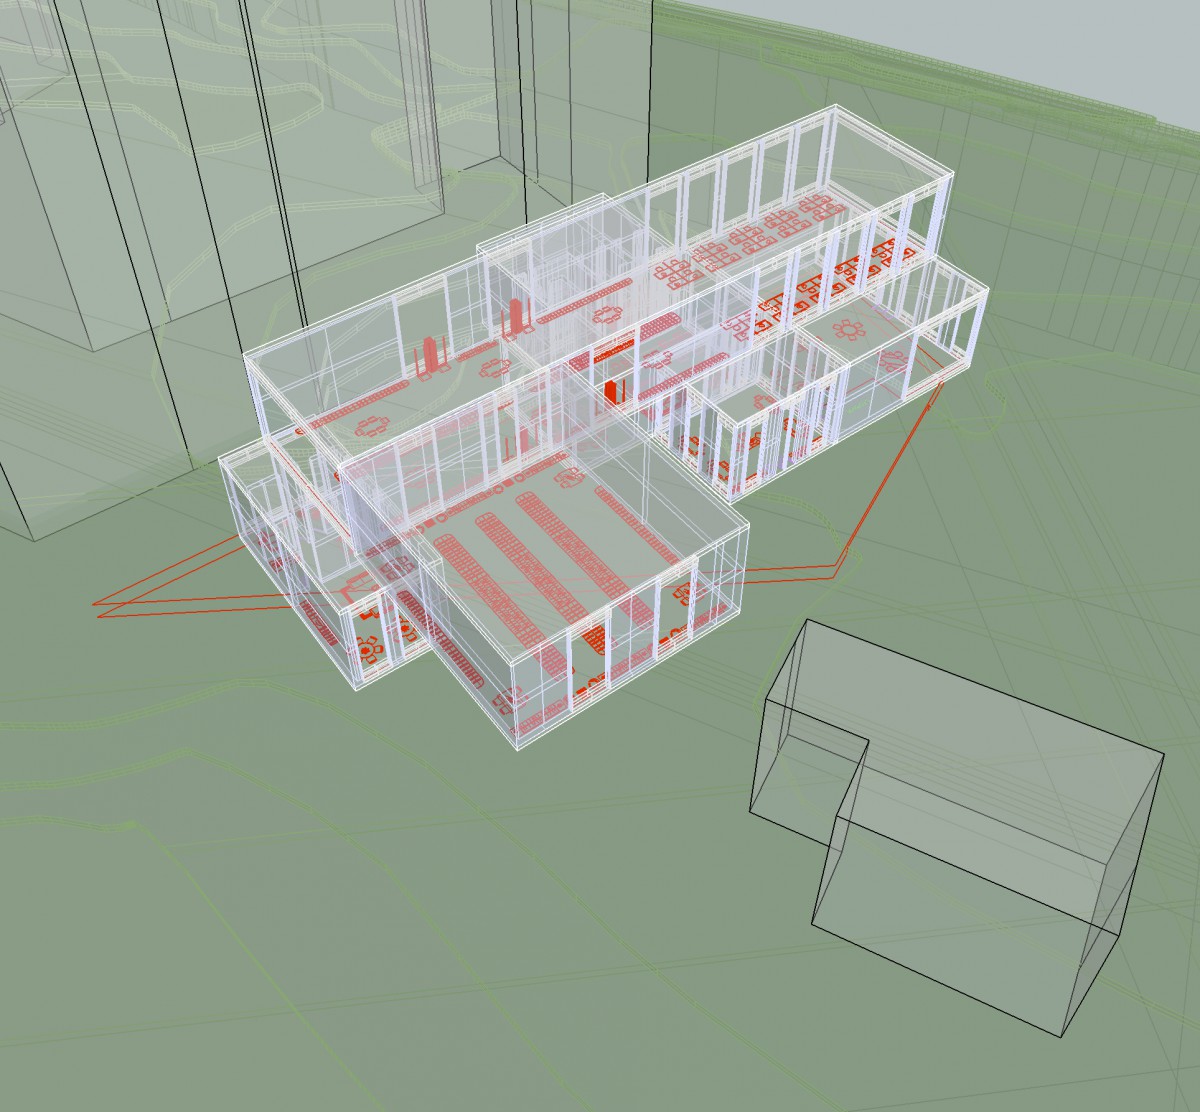
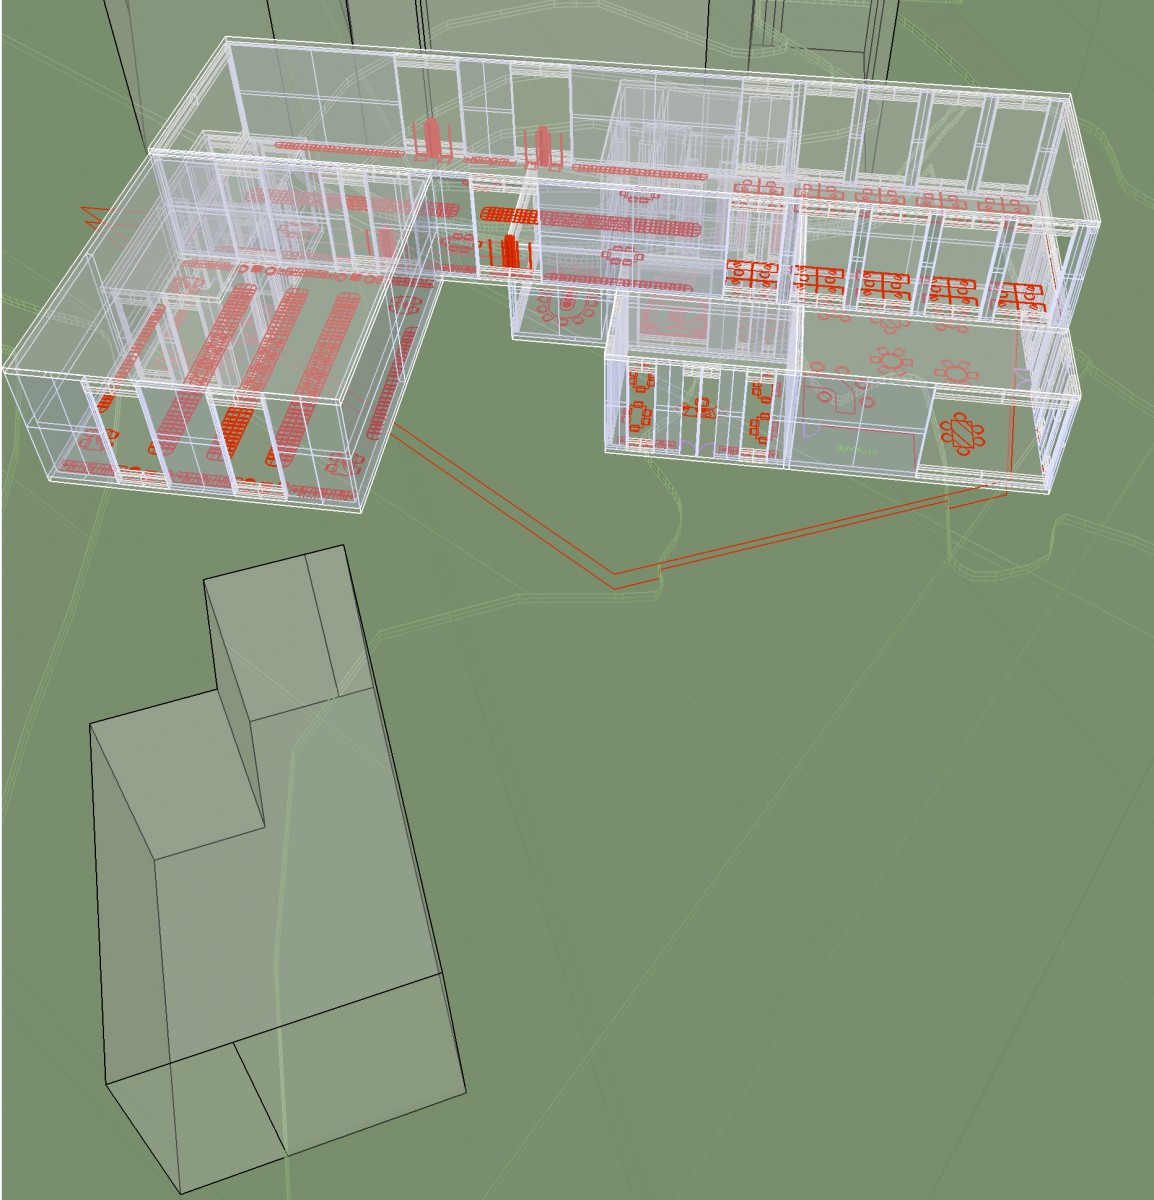
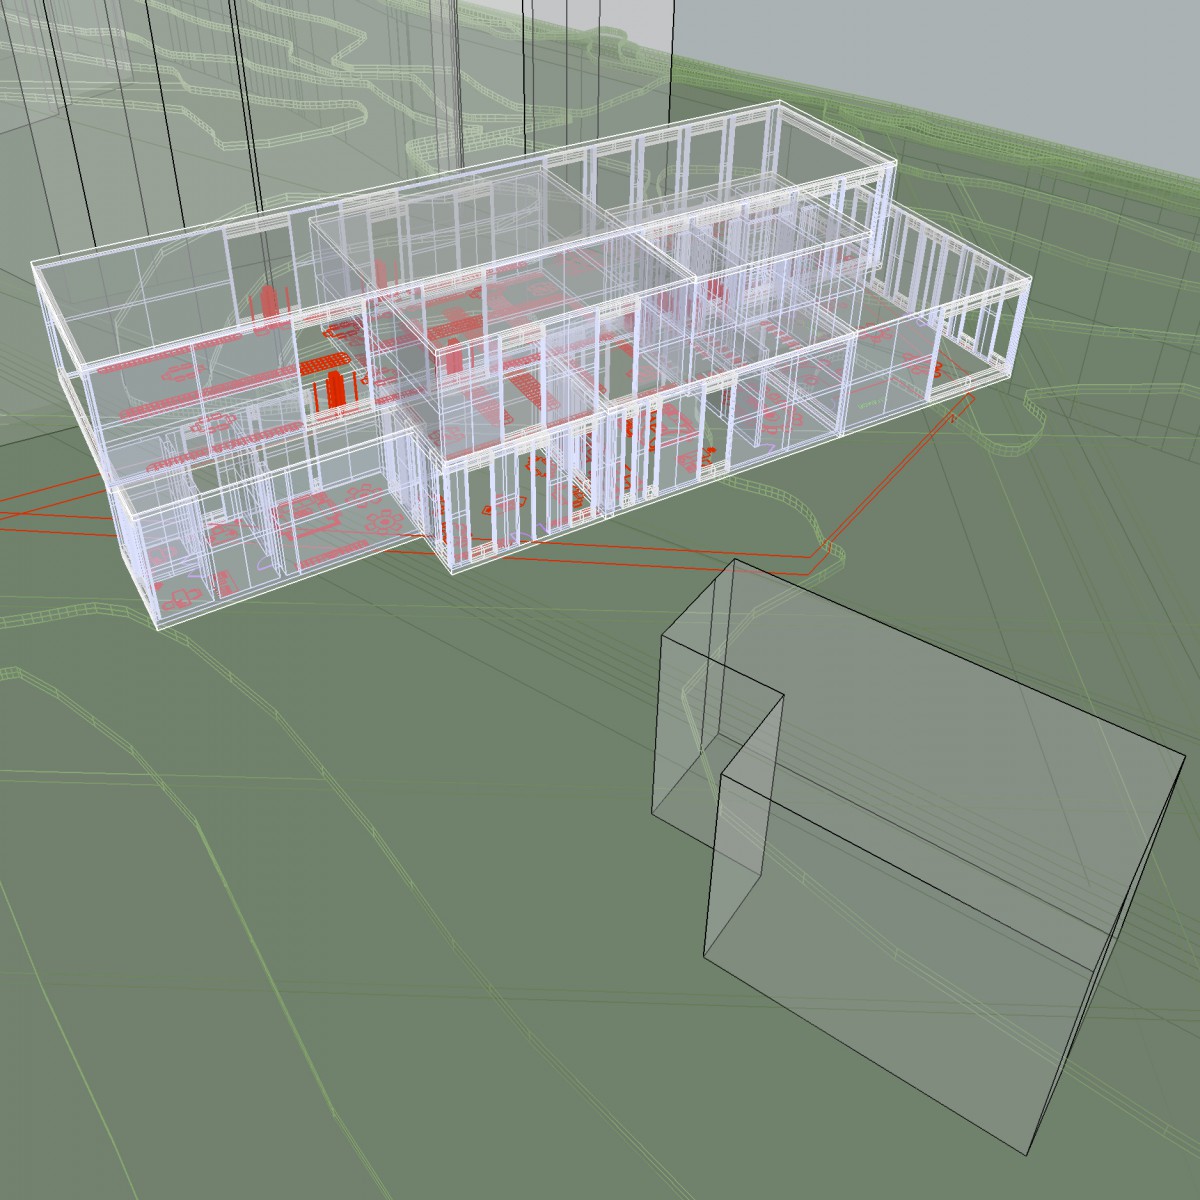
Assignment R: Digital Model Development

Assignment S: Plan Drawings
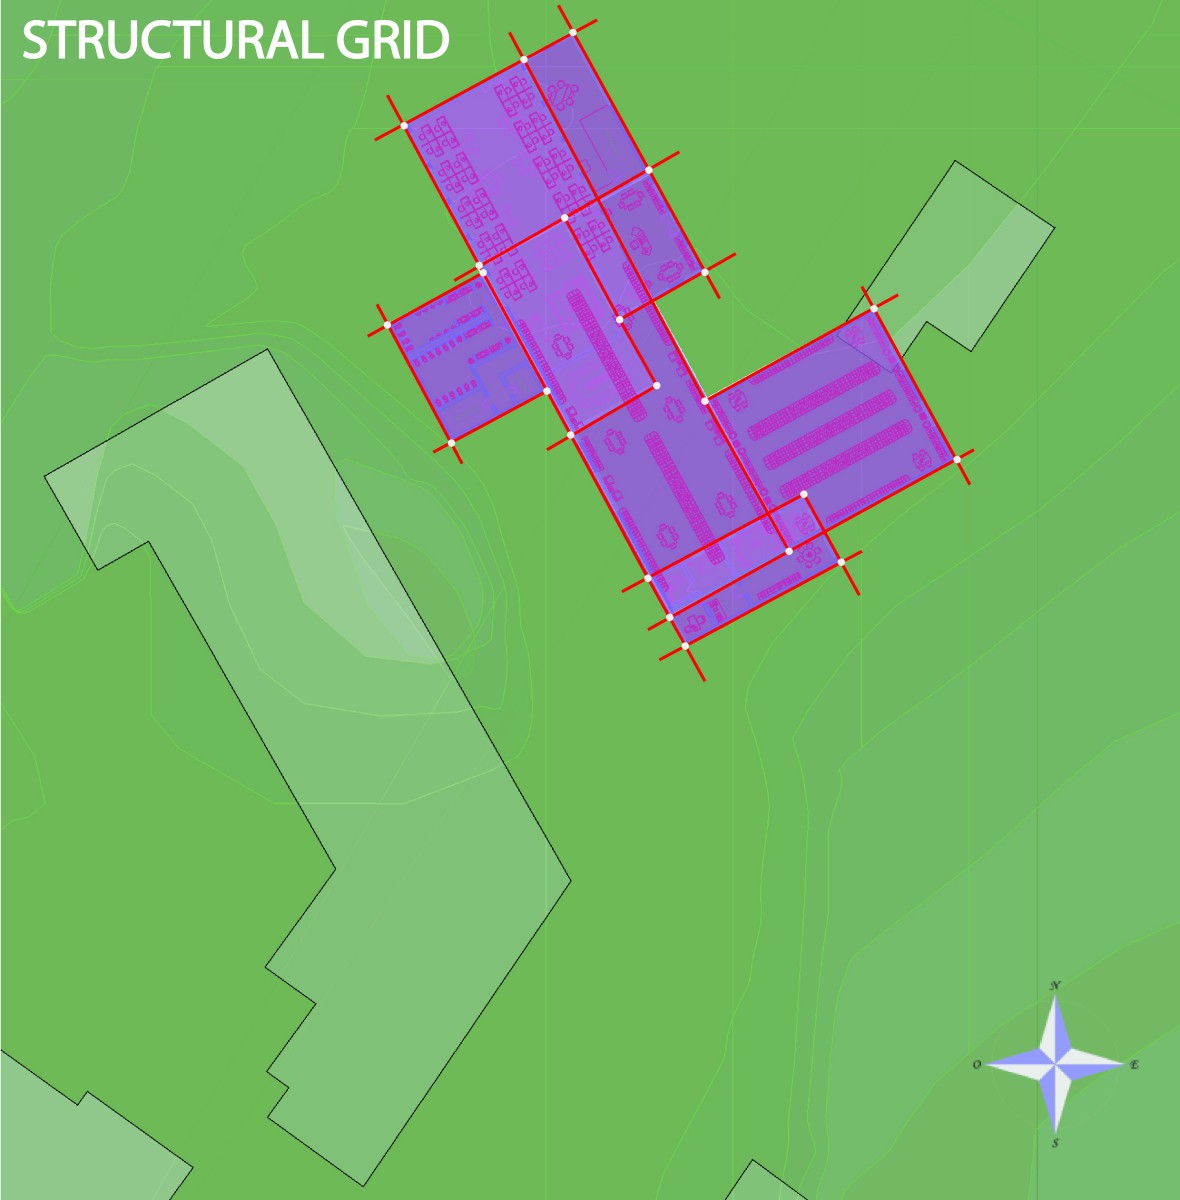
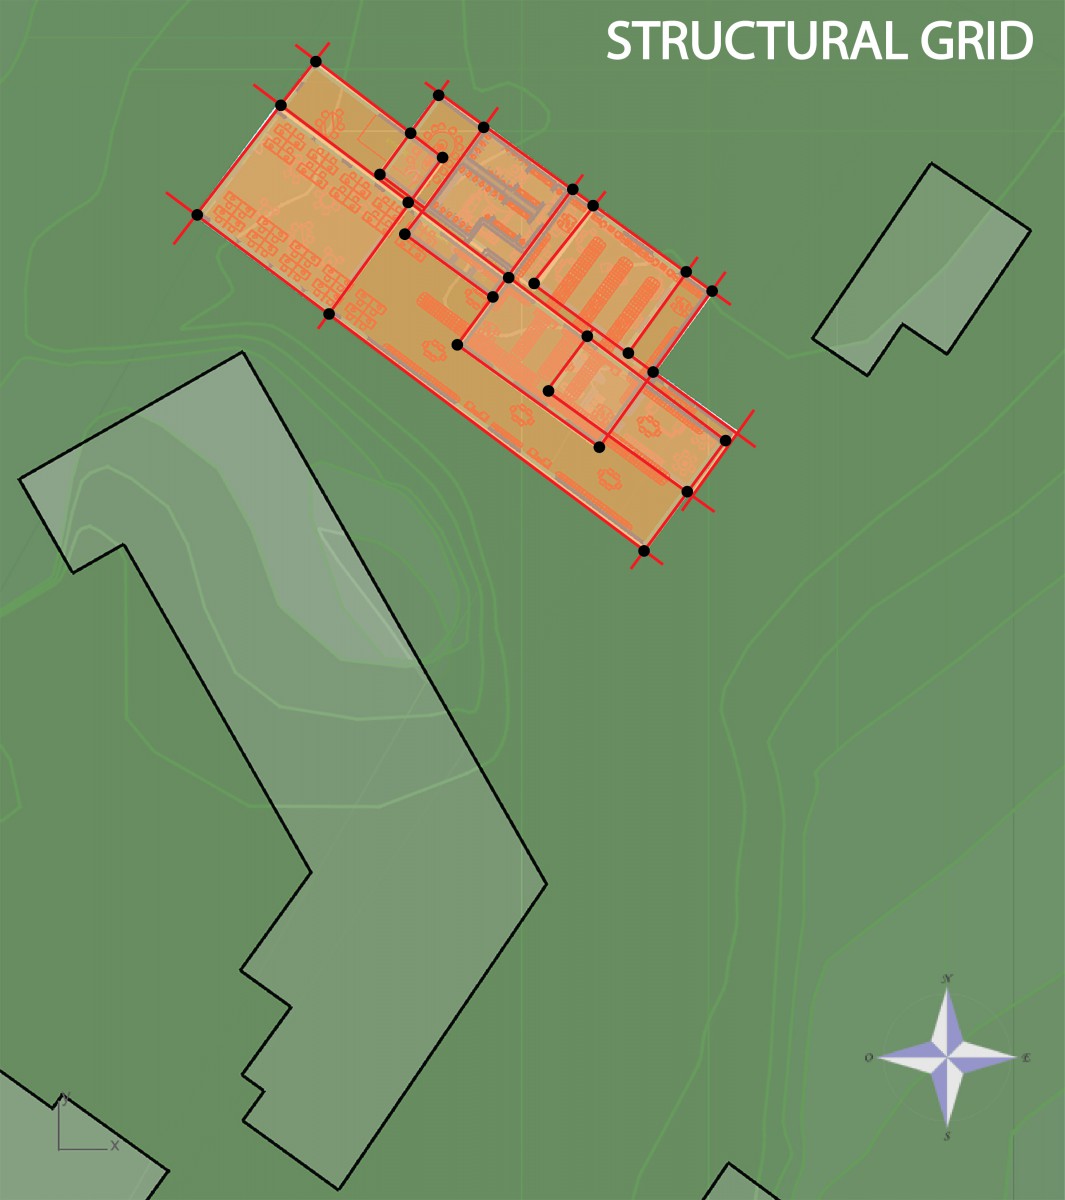
Grid Plan
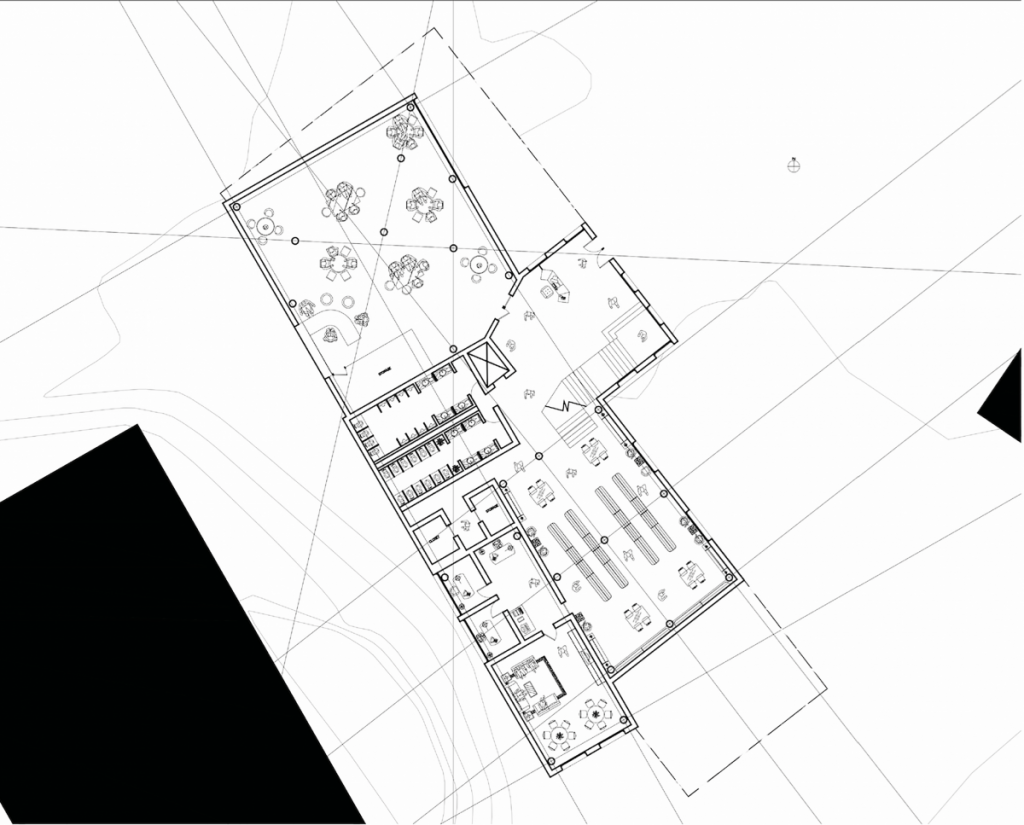
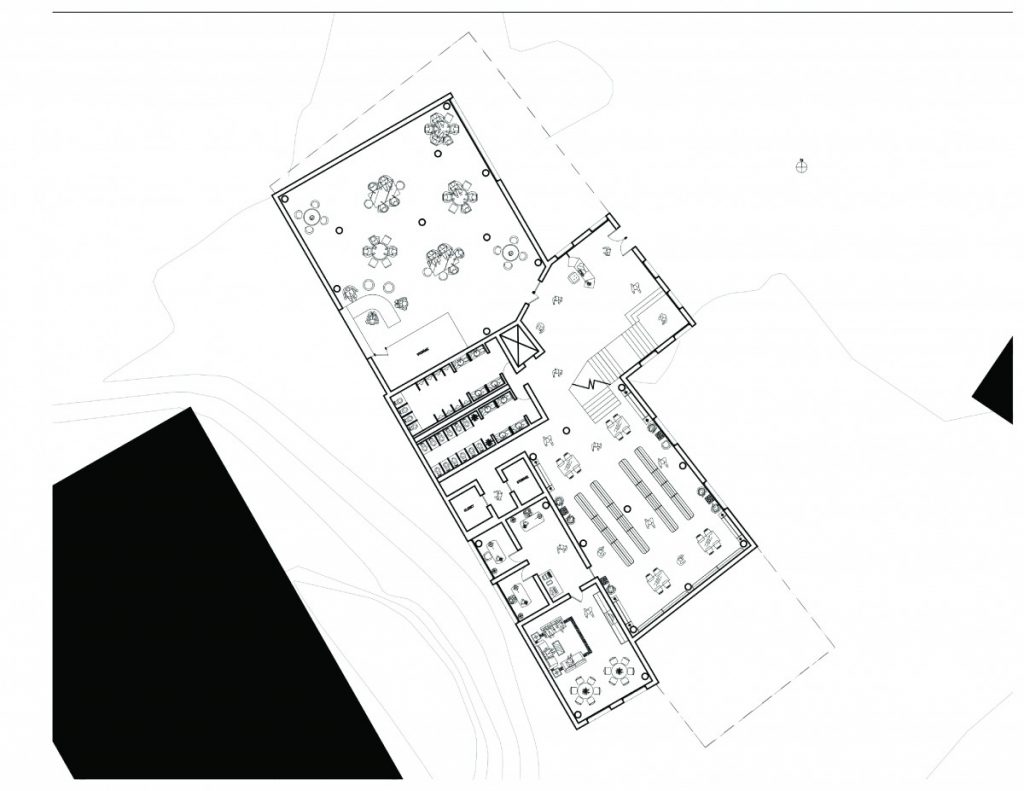
Ground Level Floor Plan
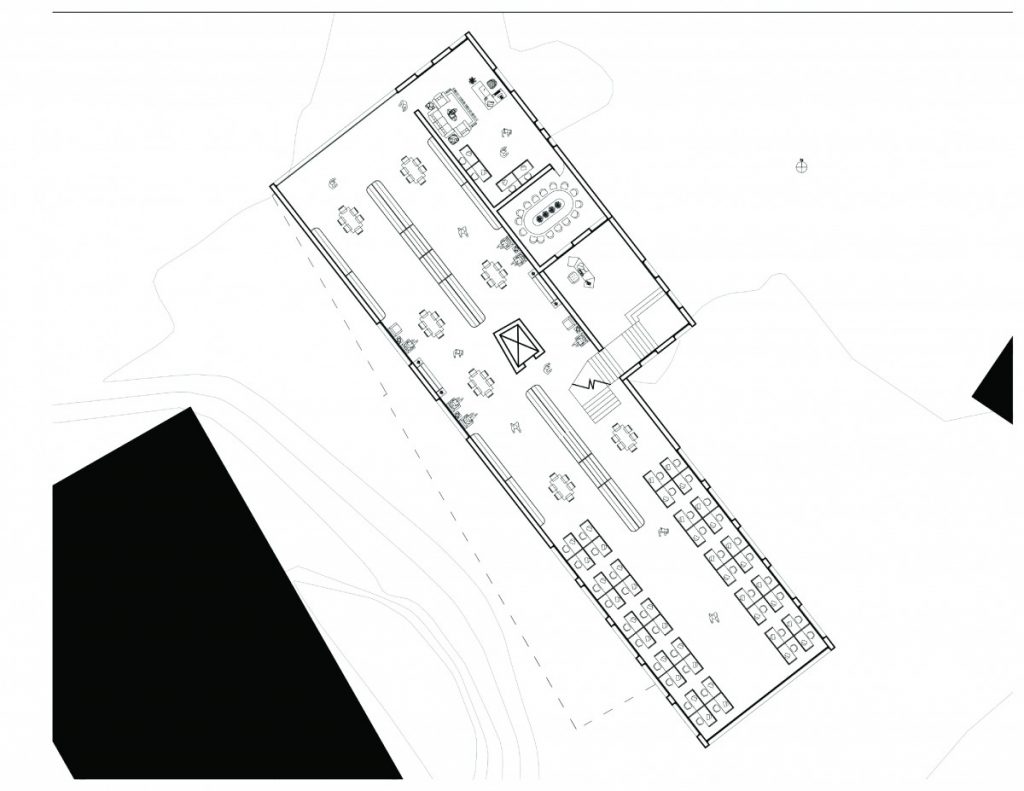
Second Upper Floor Plan
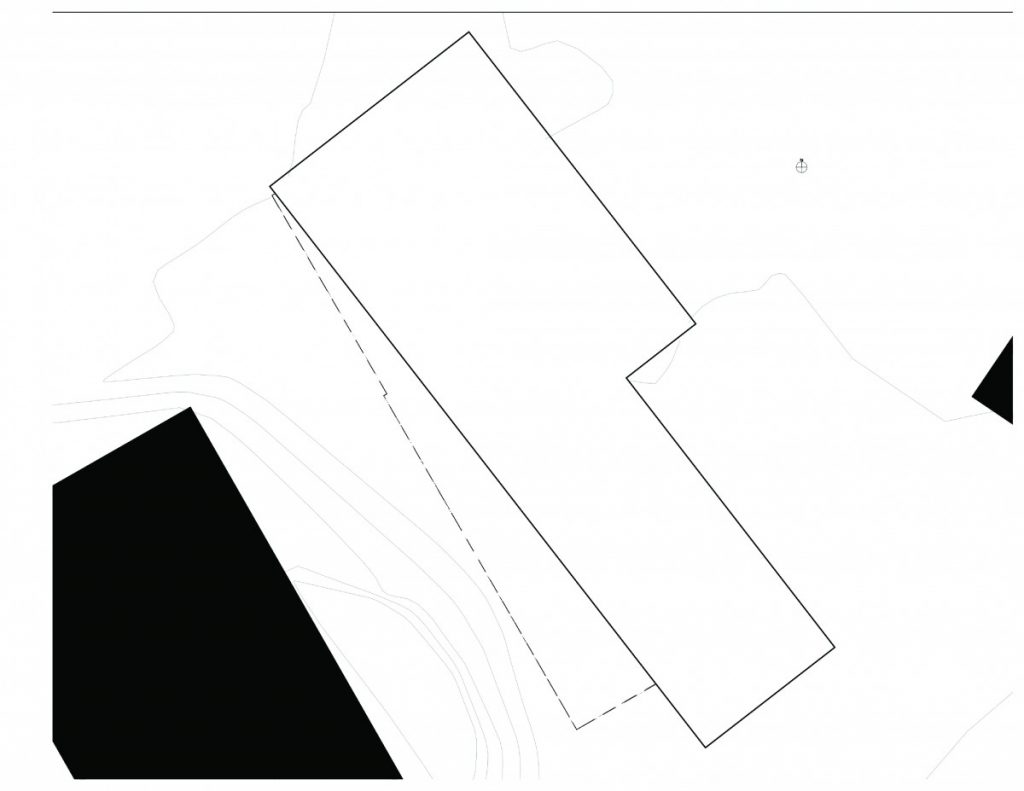
Roof Plan
Assignment T: Site Section Drawing
Assignment U: Final Presentation Development
Assignment V: Reflection
For Proj. 3, this particular assignment was a challenge. It was given to me in order to better understand and analyze this specific site. While visiting the site itself, I needed to be sure of how I’m going to be working with the space of the site in order for me to be able to refer to how big this design of a library will be.
The challenge that I face during this project was creating my structural grid. I understood that the reason for the structural grid was basically to be able to manipulate our own grid in such a way that can determine the spaces that are going around the structure itself. I understood a little clearer on why structural columns are actually very important and why they are an important part, mainly how the beams and how they connect and how they basically support each other. I understood the purpose of why creating a structural grid is needed, but when applying it to my own design, that’s where I felt that I got stuck, I didn’t necessarily know how to format it or lay it out in a way that would it make sense and relatable to the design itself.
The feedback I received was good, very helpful to my knowledge. It helped me better understand the little pin-point mistakes that I’ve made such as my floor plans & structural grid, as well as when it comes to apply walls, stairs, windows, beams, etc. in a correct formation that will be able to illustrate the design. It made me get a better understanding of how the spaces within my design shouldn’t just relate but also have this simple representation of how the inside design of this structure be formatted in the same way as the outside of the site, since the main key was to figure out how to build this project from scratch and using the tools & information applied to me within the site I got to visit.
During this presentation, I needed to make the necessary changes that need to be applied to my work. I needed to know how to correctly cut a section and should know how to render of my library. While doing this particular project, fixing it many times, I did get to learn about the structure development and how it’s used when it comes down to creating a building and it’s design.

