Hi everyone,
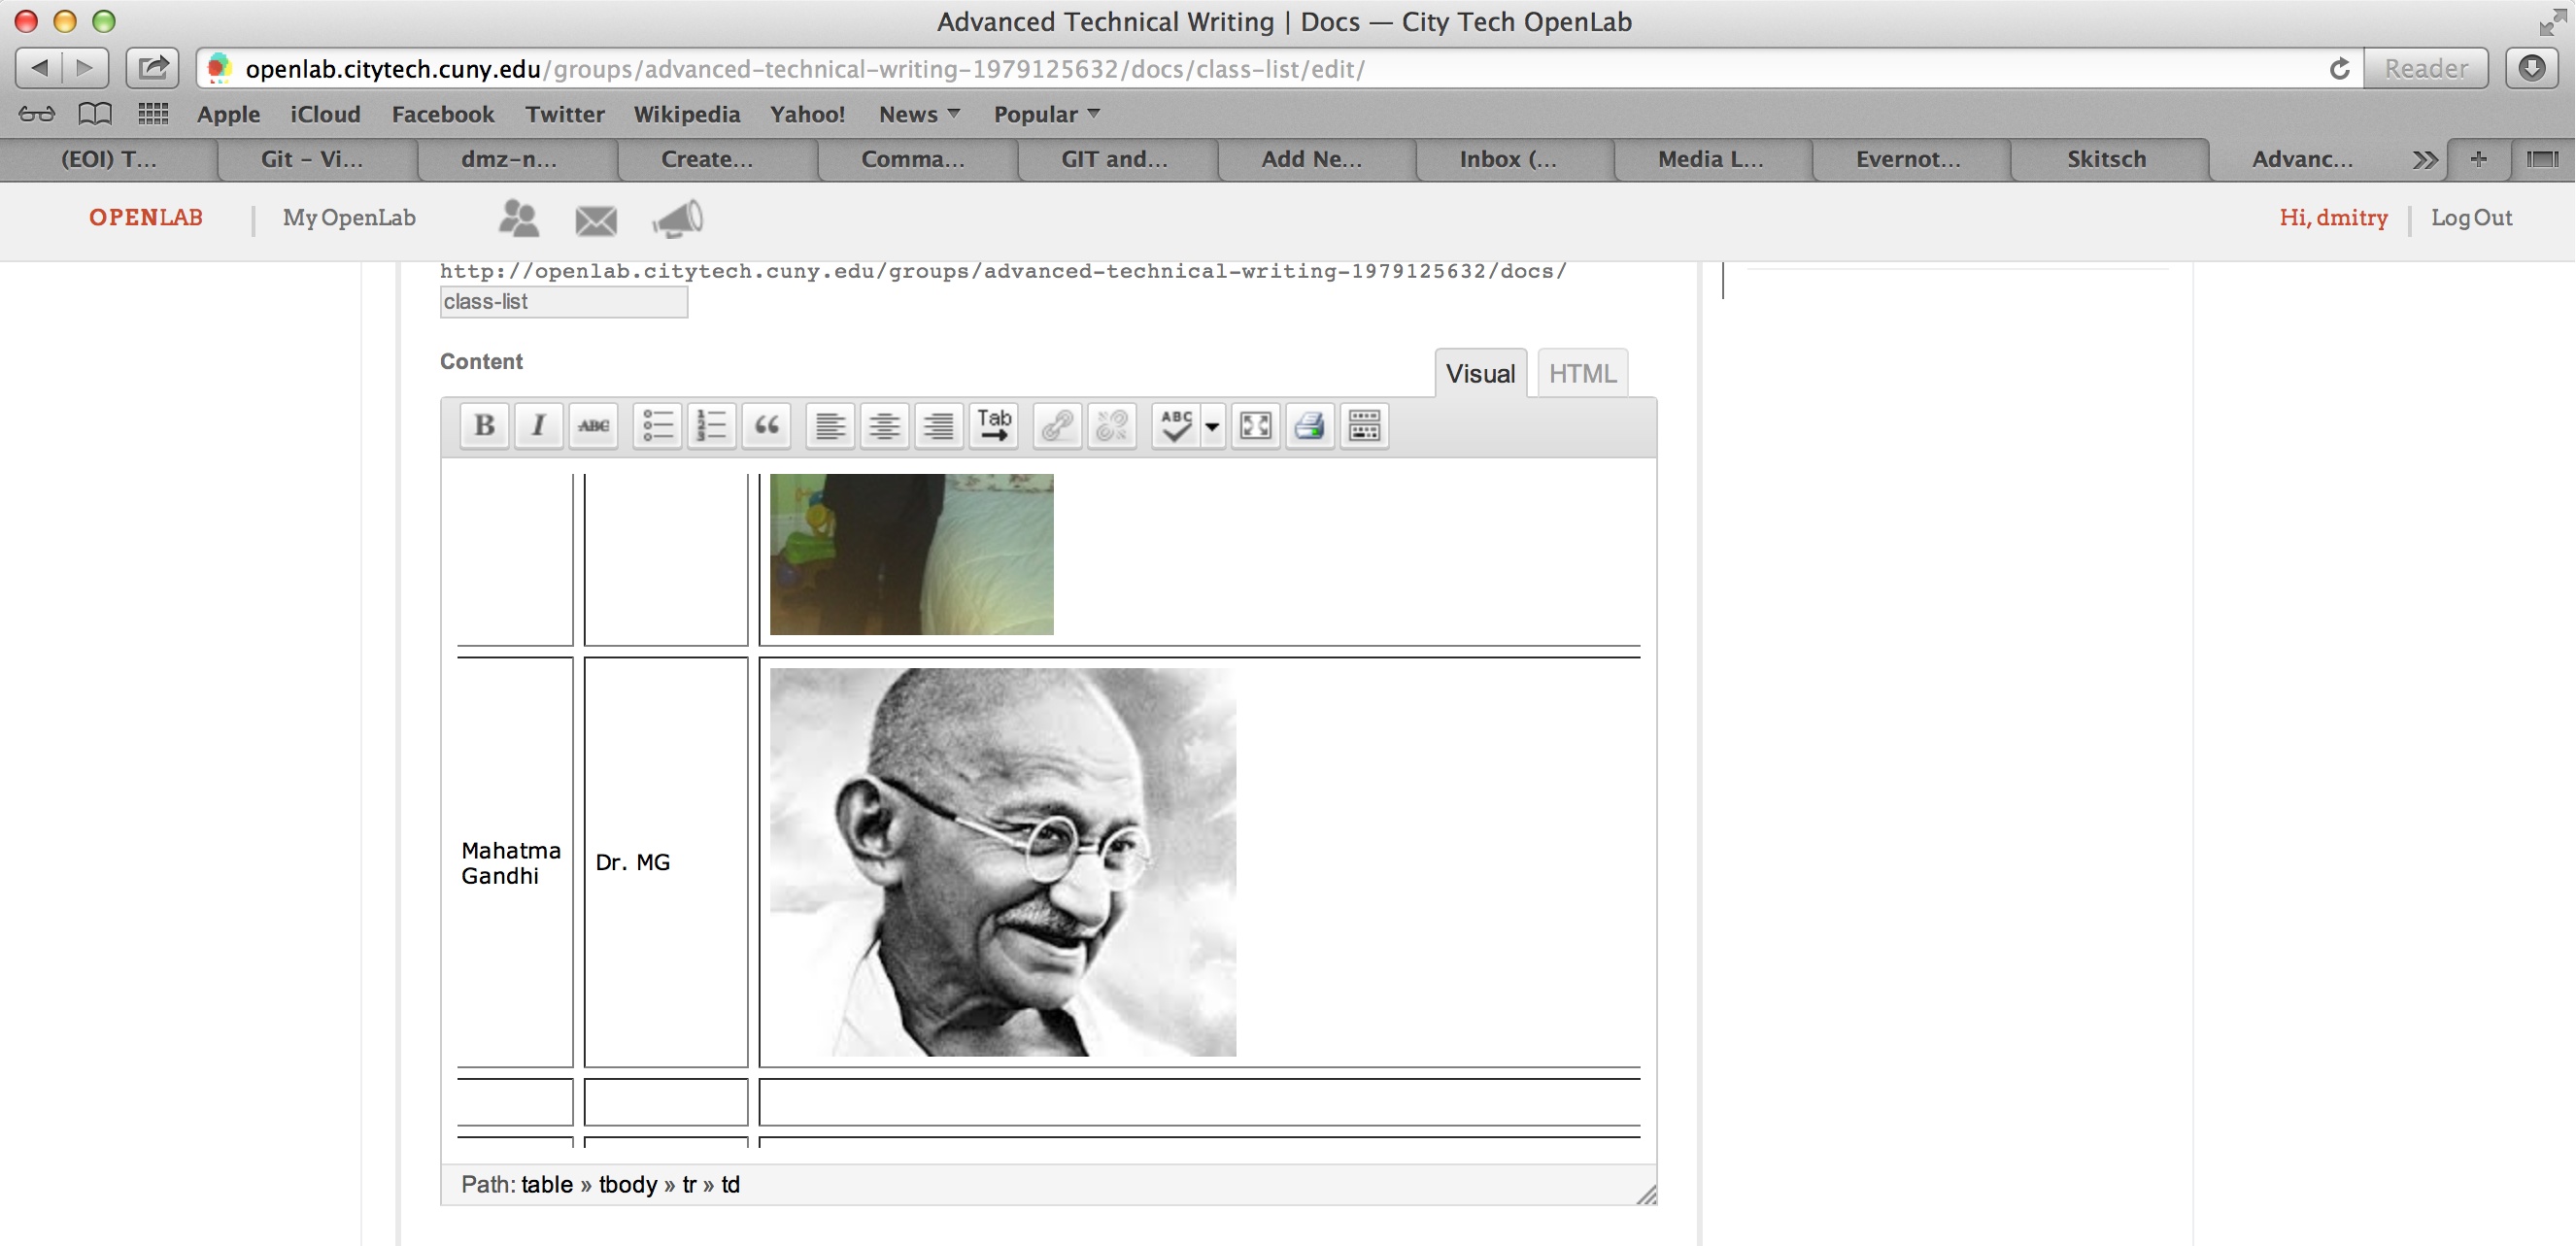
Hope you are having no trouble adding yourself to the class list created by Prof. Gold last week. In case you do, this post will walk you through this (perhaps somewhat cumbersome) process. Your record should include you name, OpenLab username and a photo. Let’s start by uploading your photo to the OpenLab media library from which it will be publicly accessible. You may chose a different file-hosting service, but we’ll stick with OpenLab. As an example, we’ll add Mahatma Gandhi to our class list – he is a good person to have around.
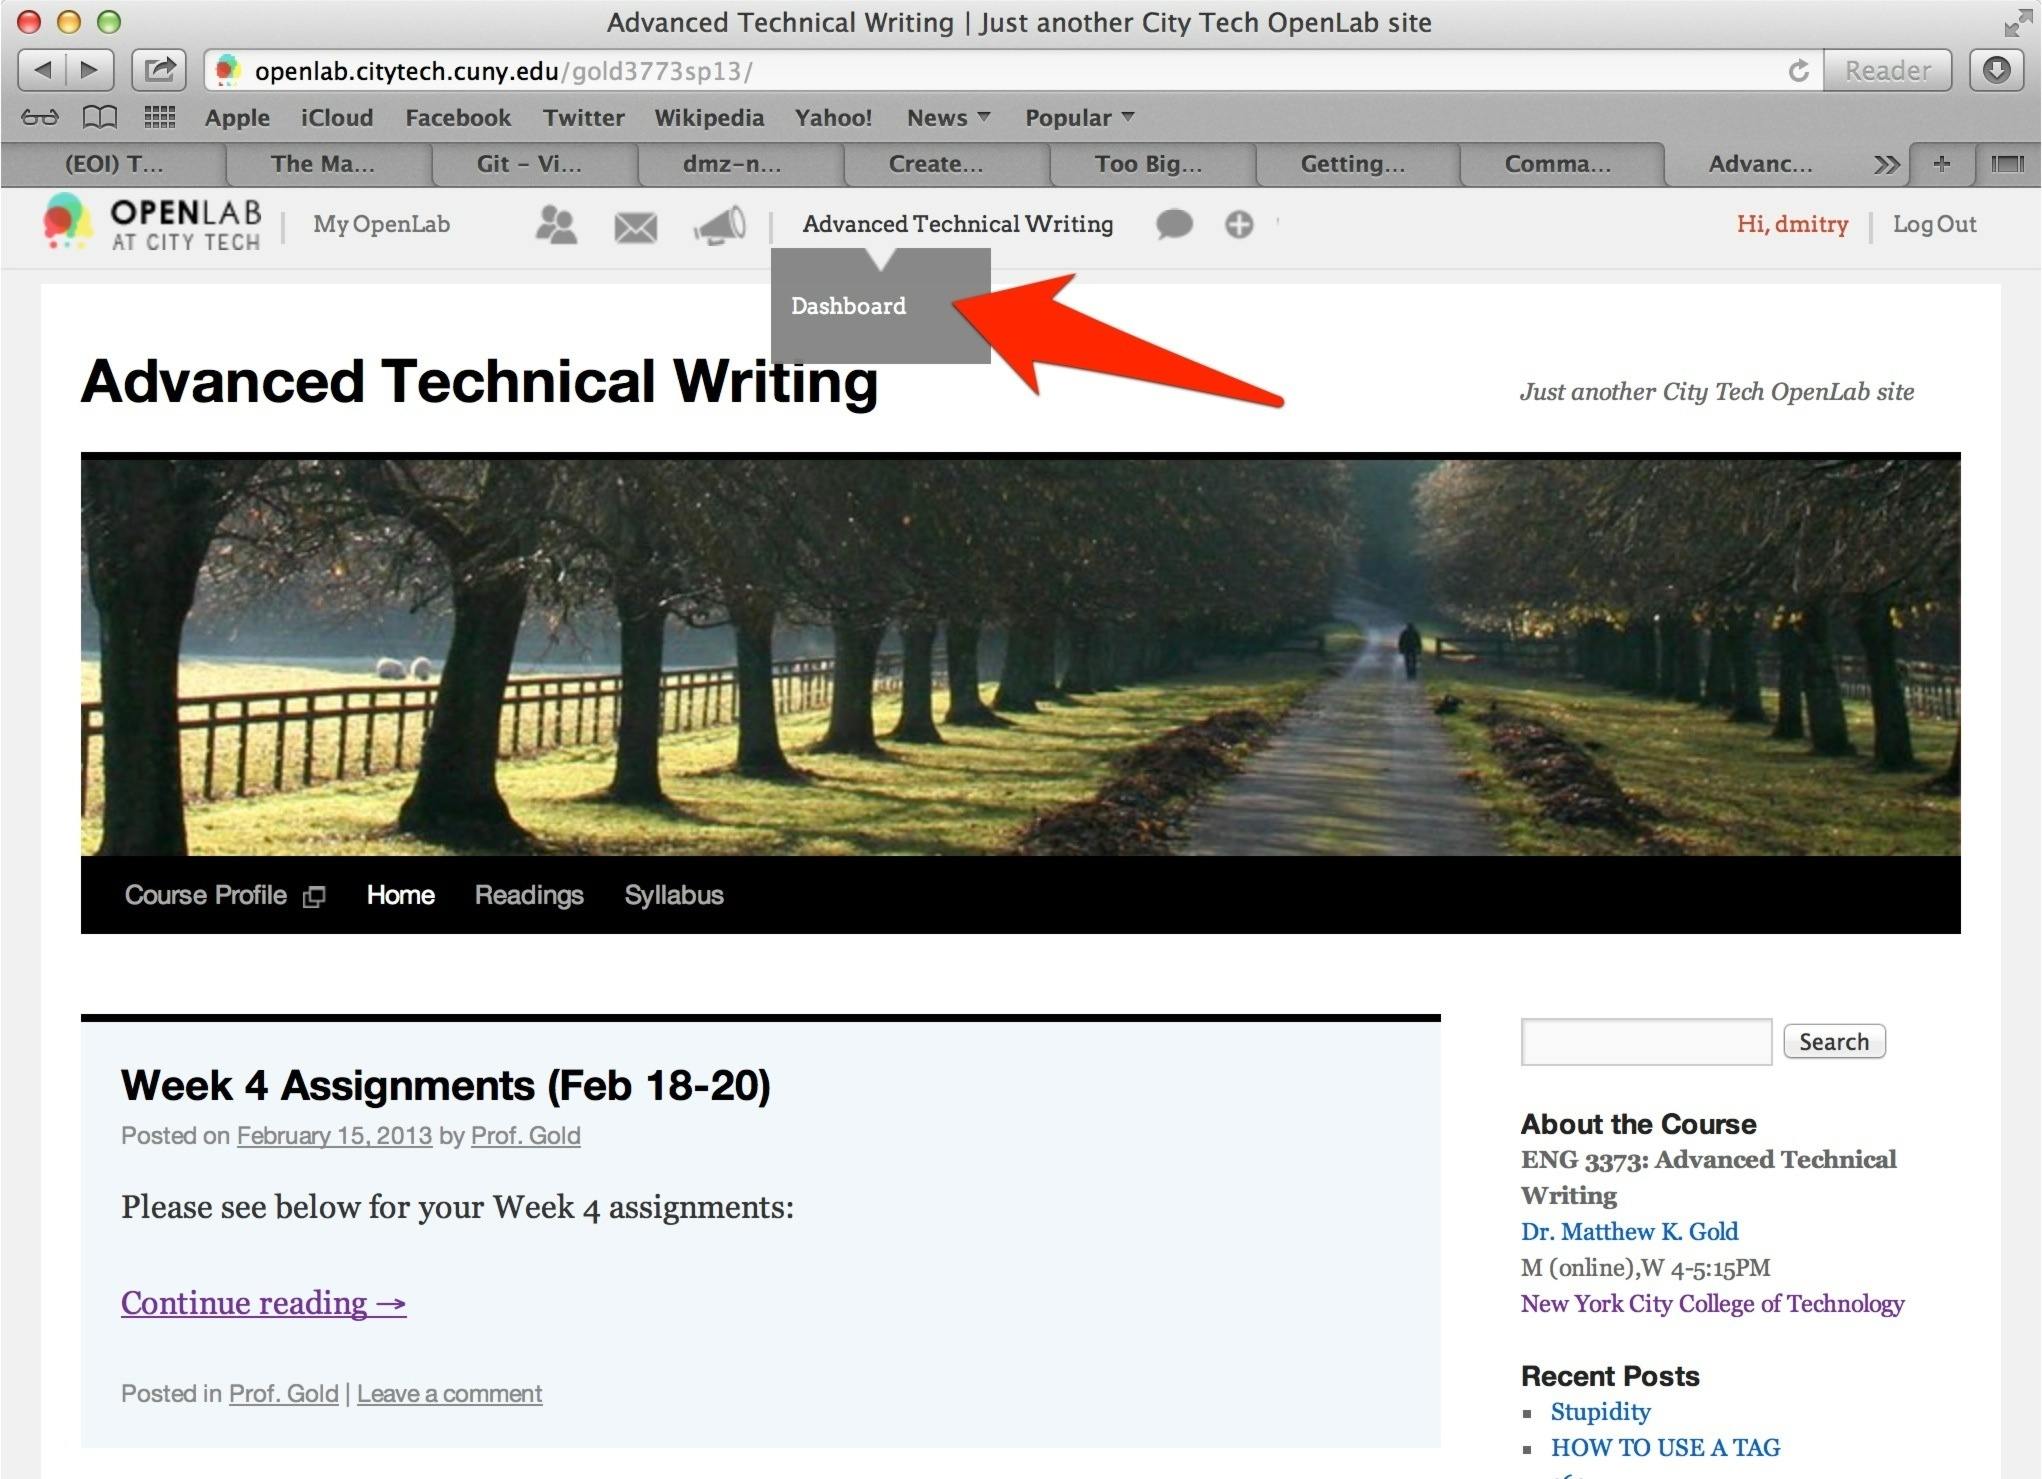
1. On the blog page select “Advanced Technical Writing”(name of the course) -> “Dashboard”
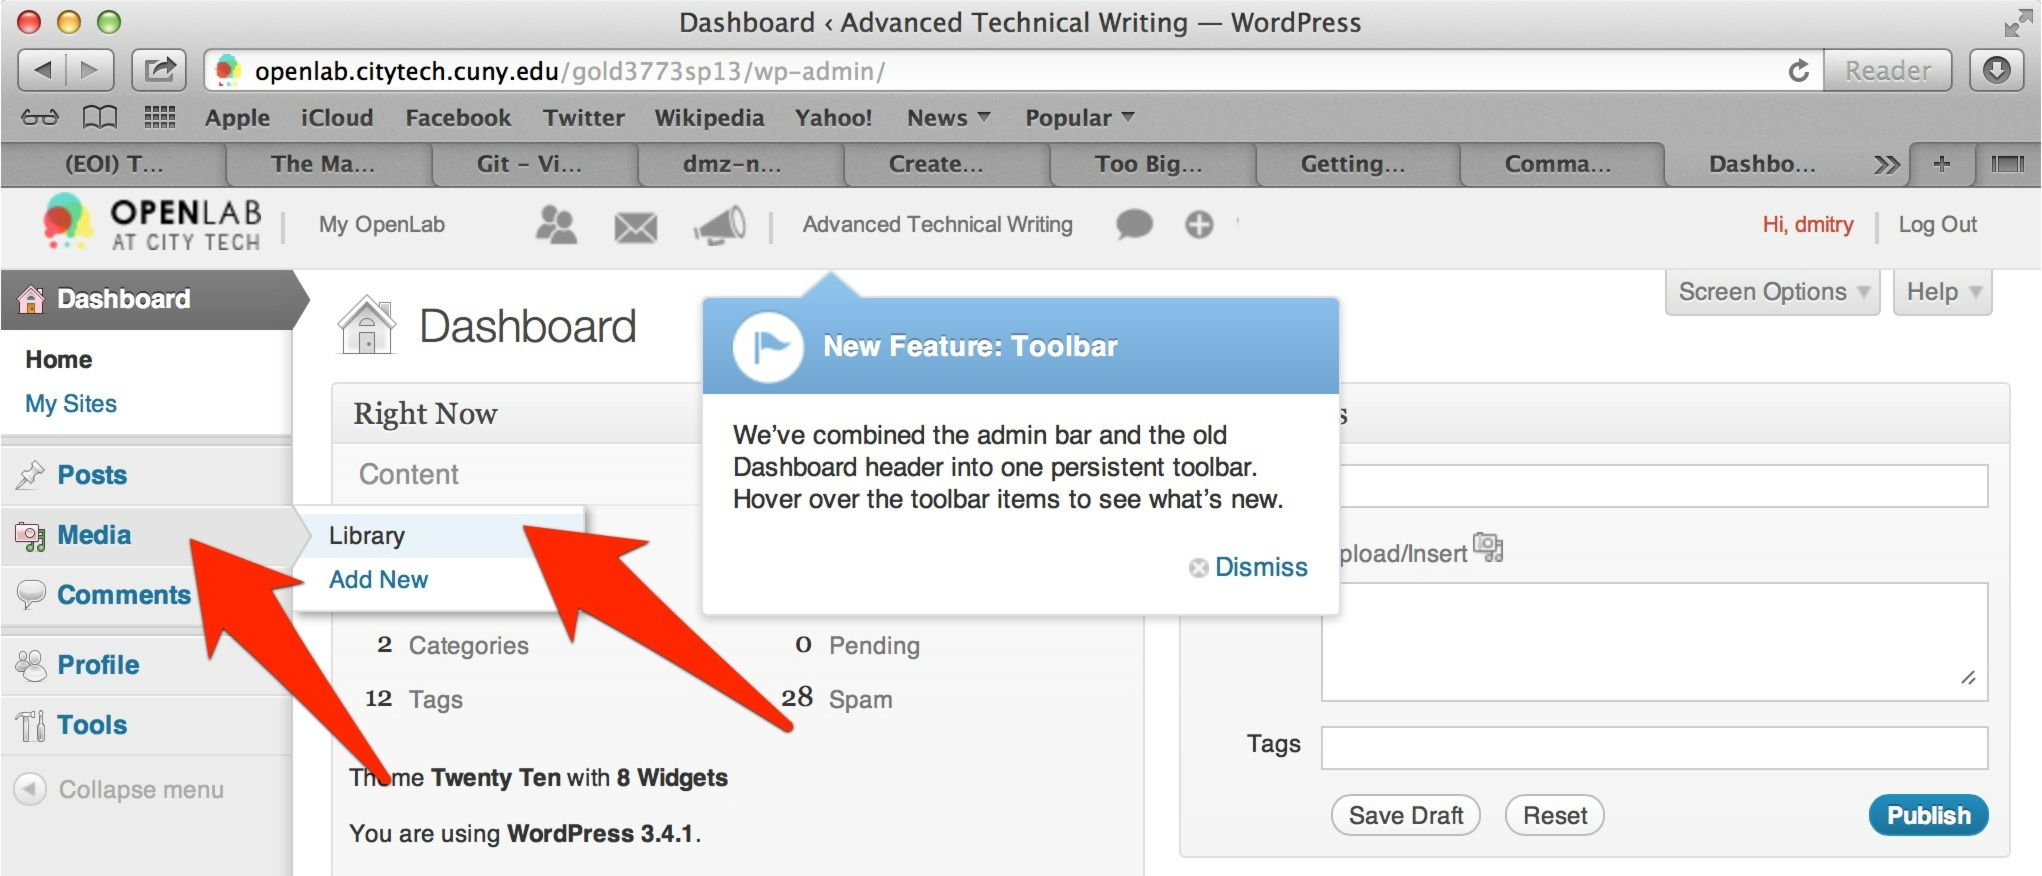
2. From the menu on the left select “Media” -> “Library”
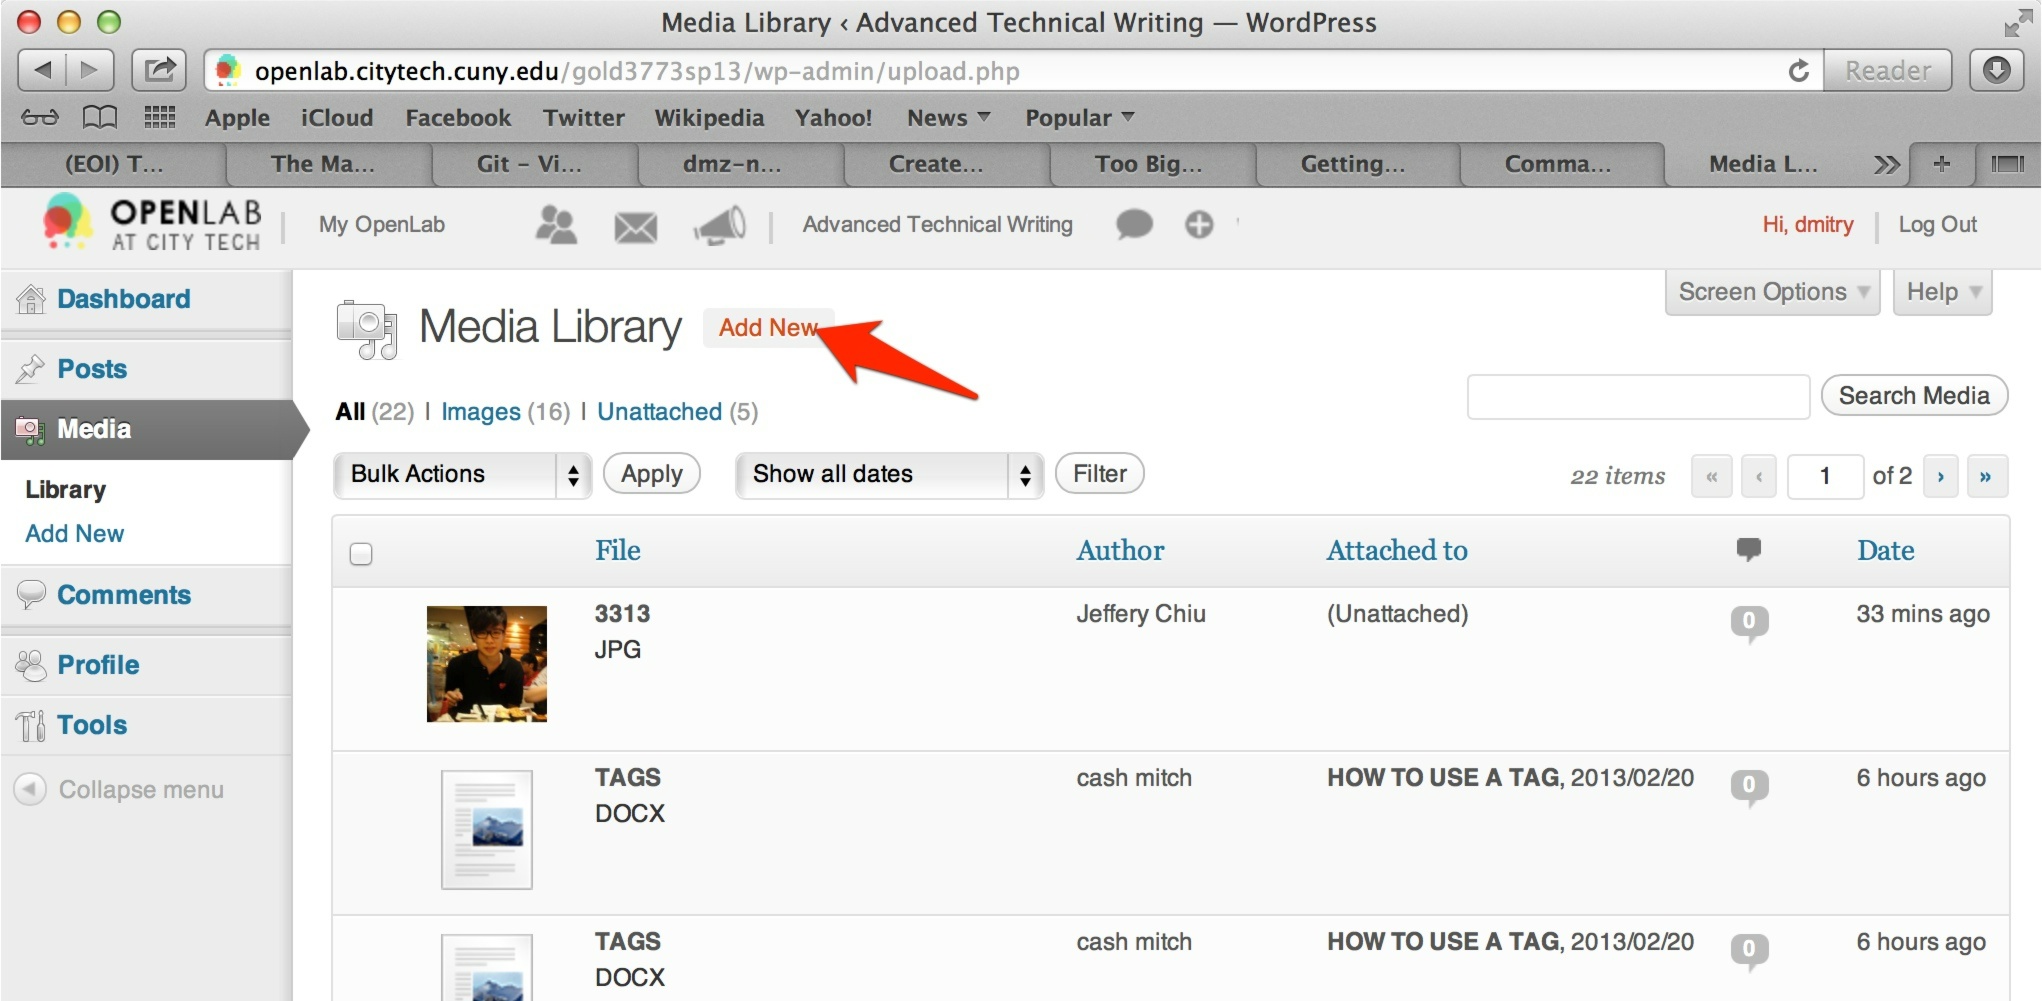
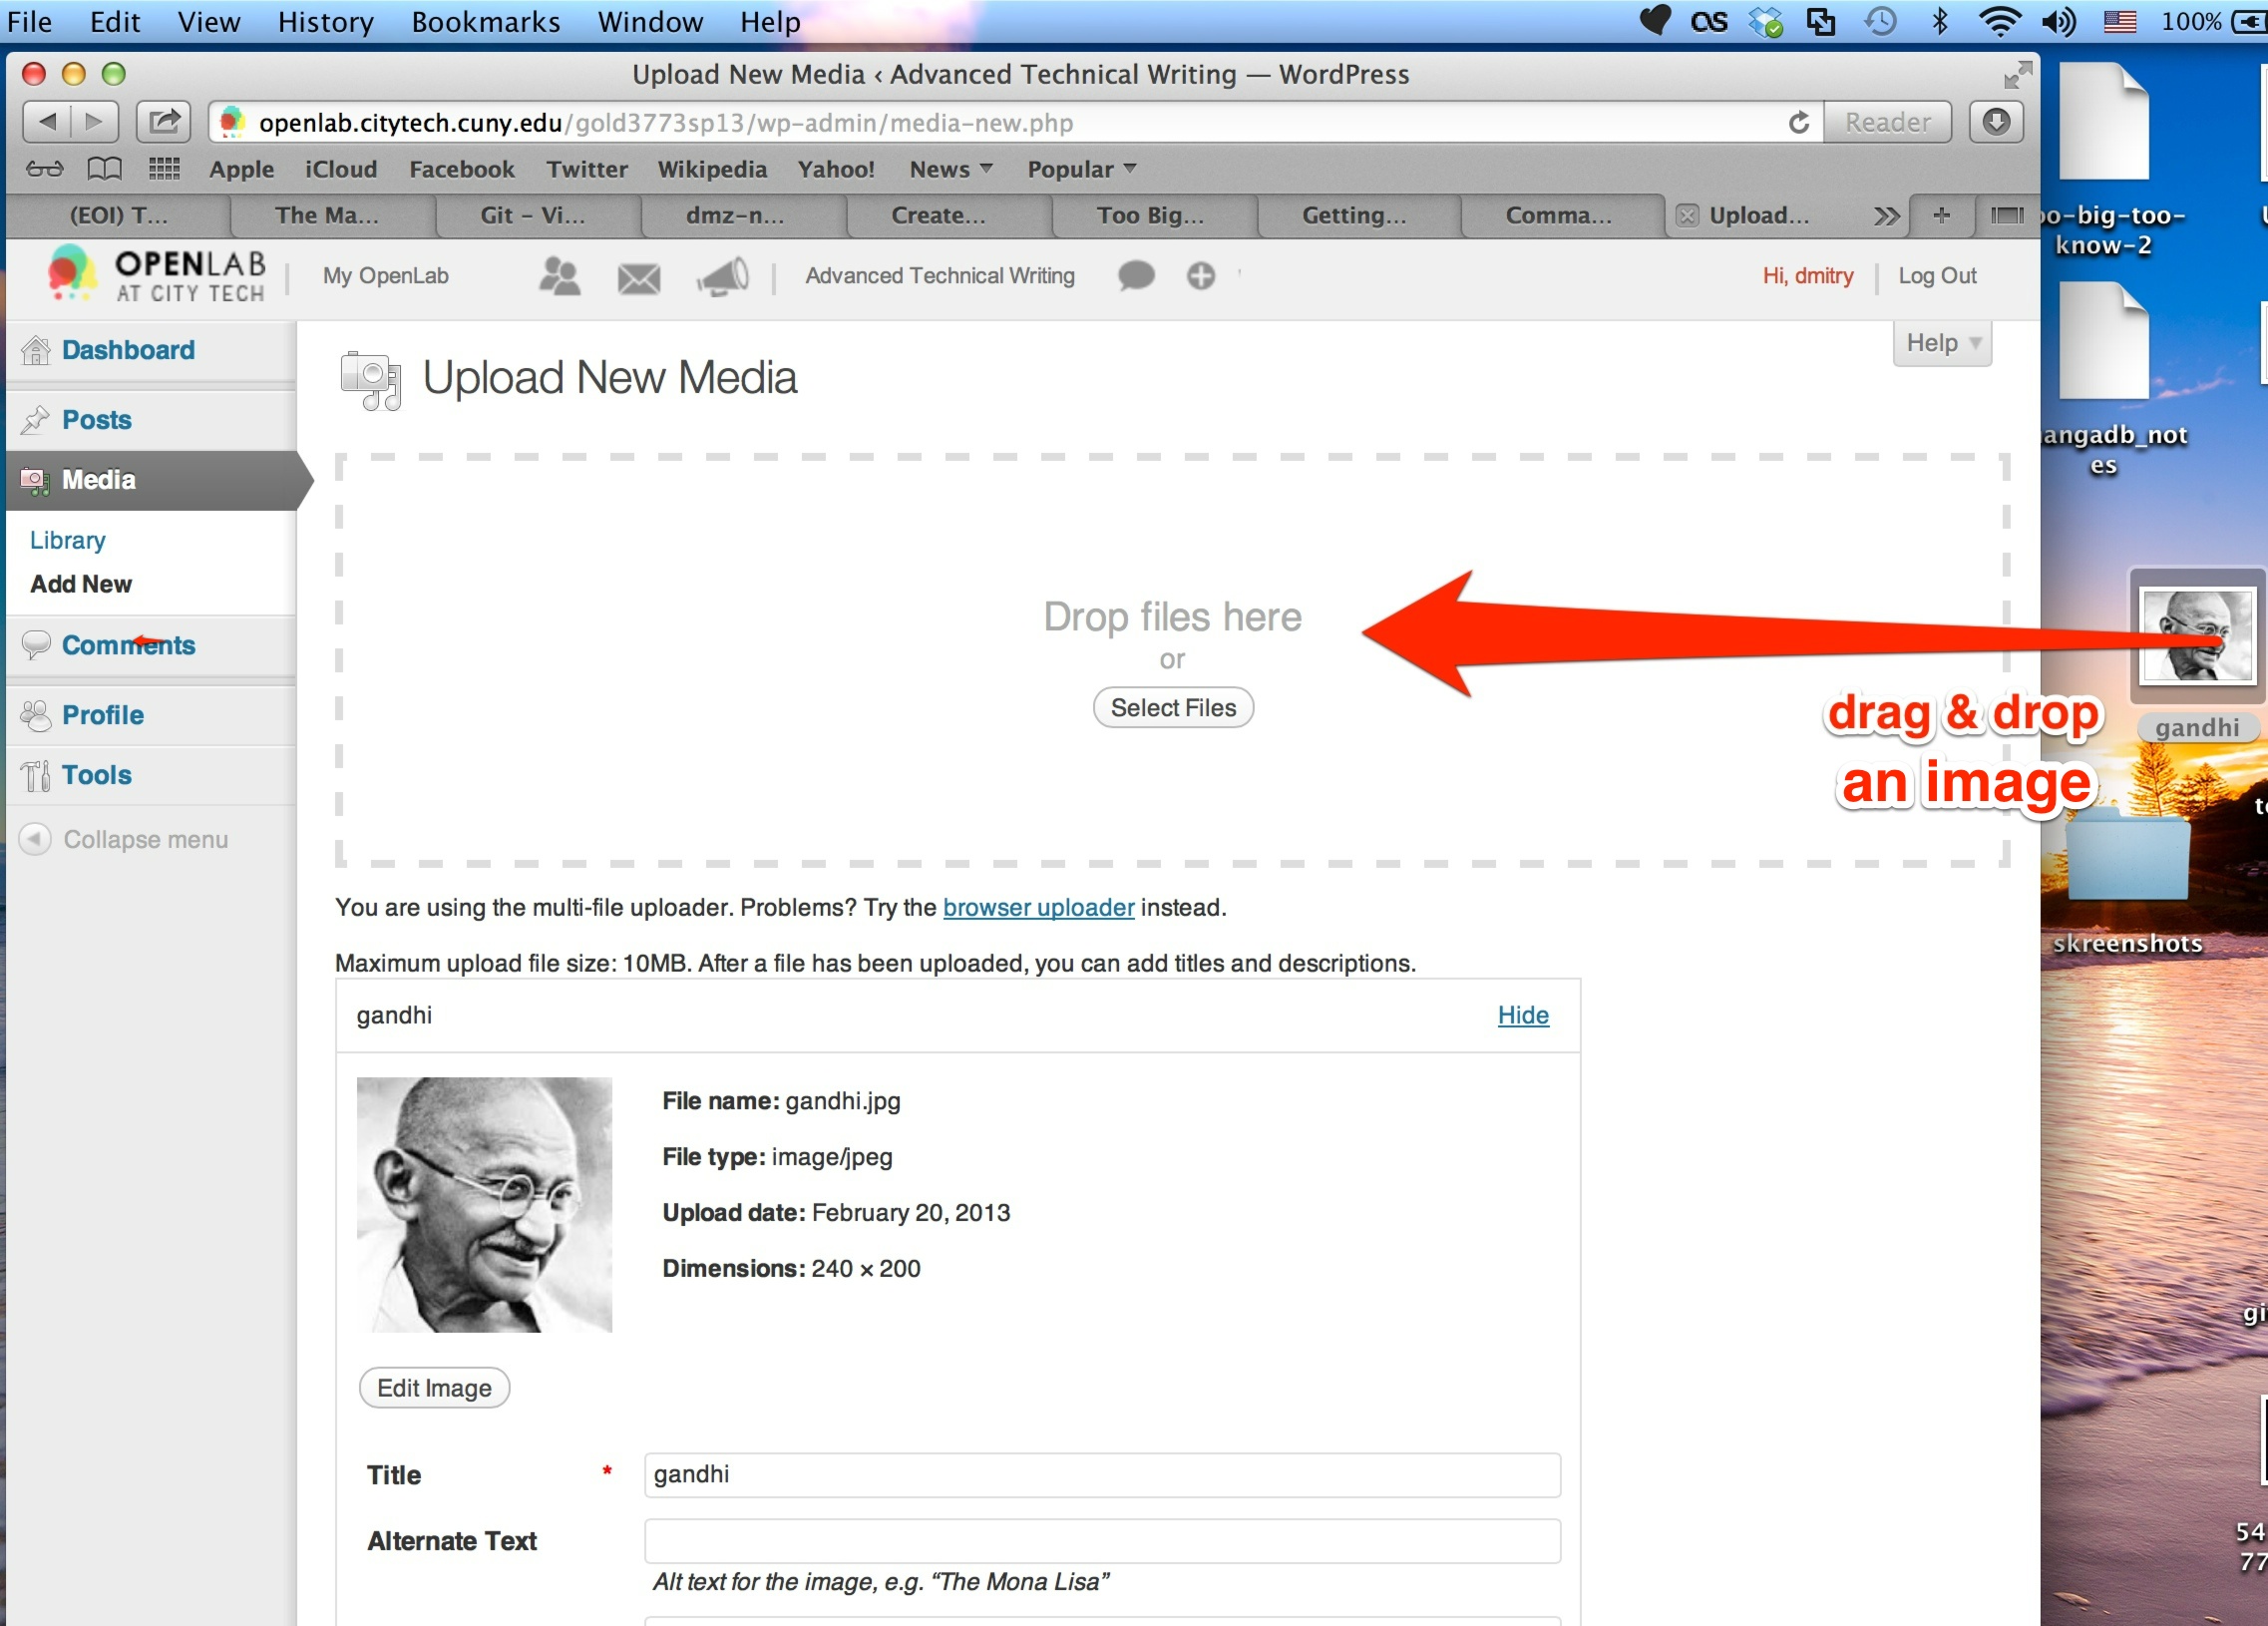
3. Add a new item to the library (a photo in this case)
4. Select a photo (or drag & drop one)
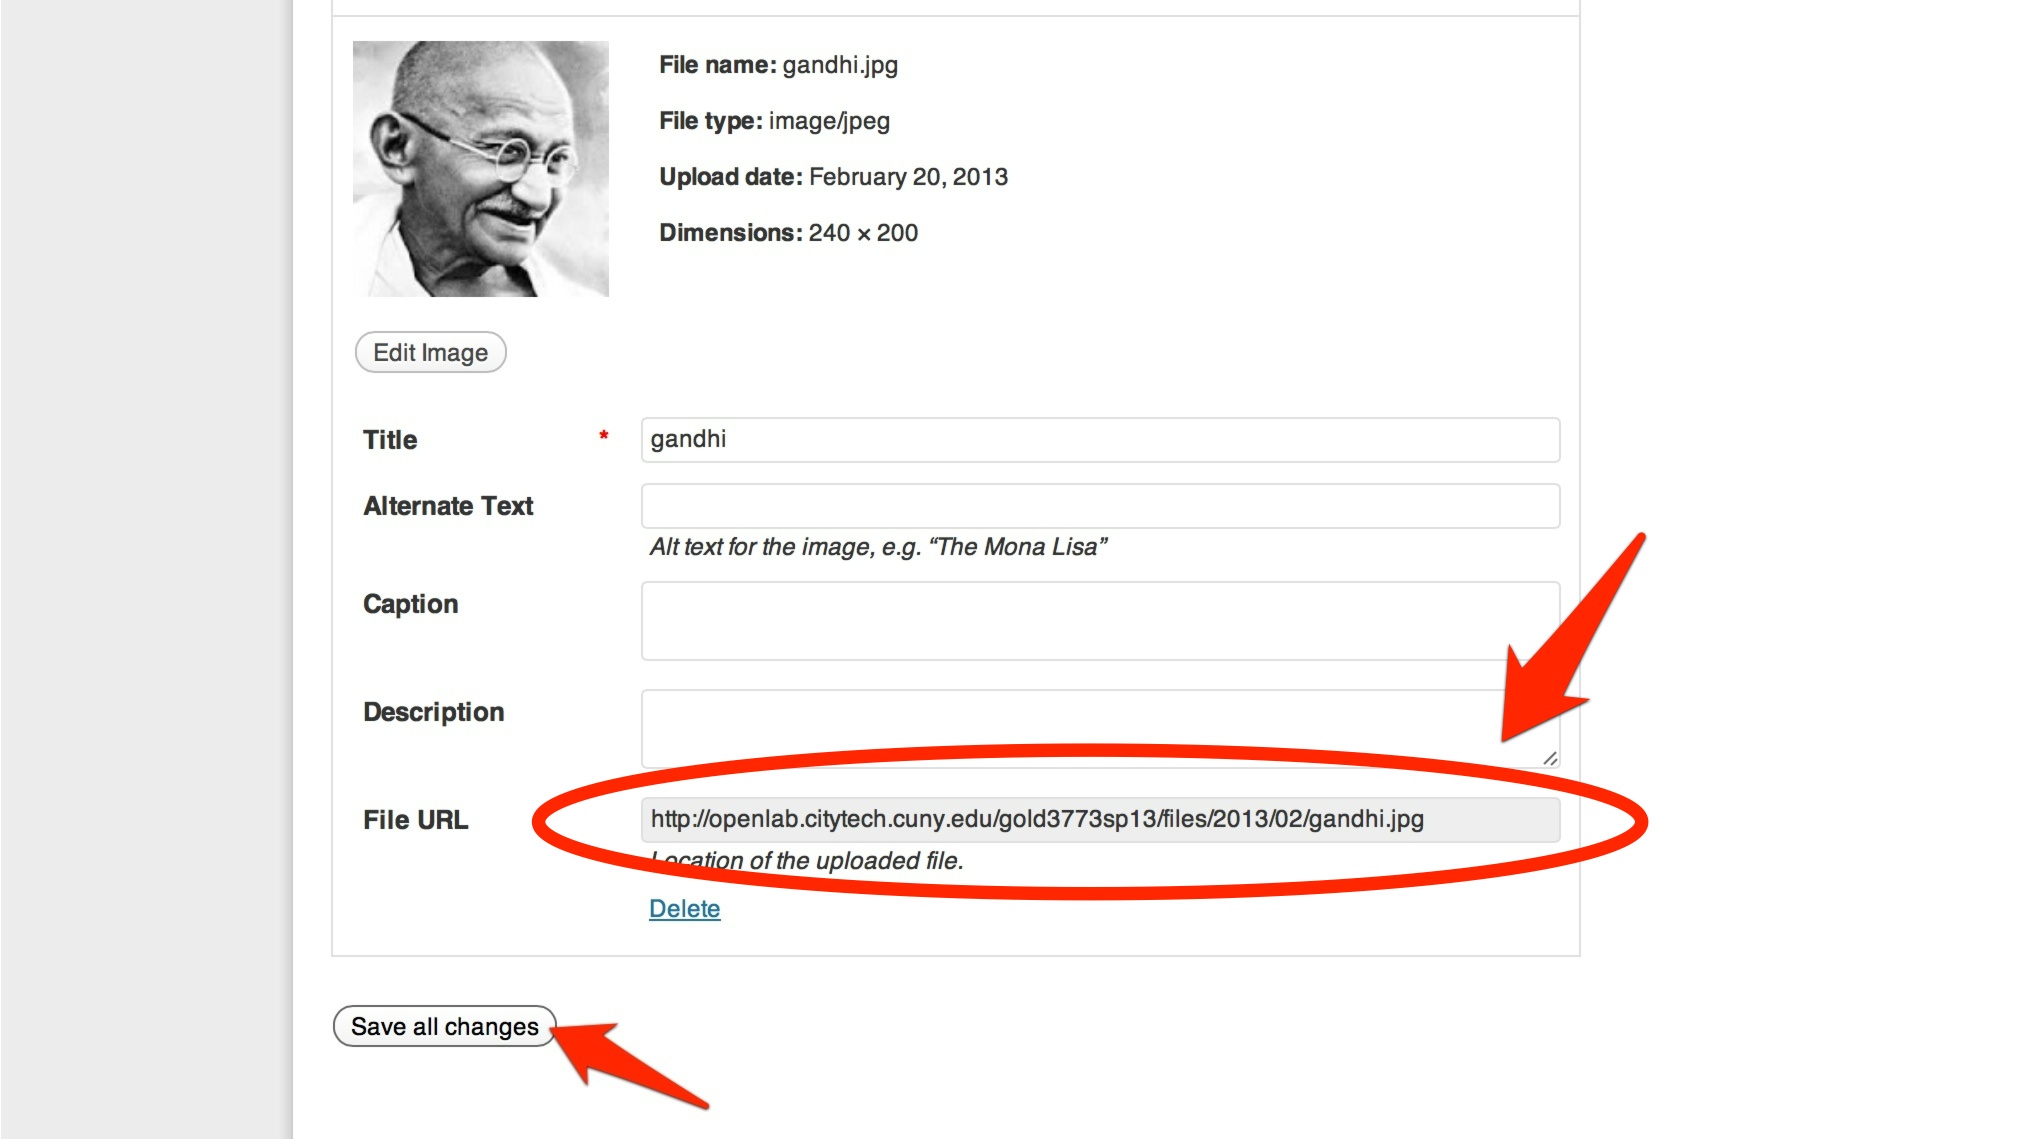
5. Copy the file’s url (you will need it later) and save your changes
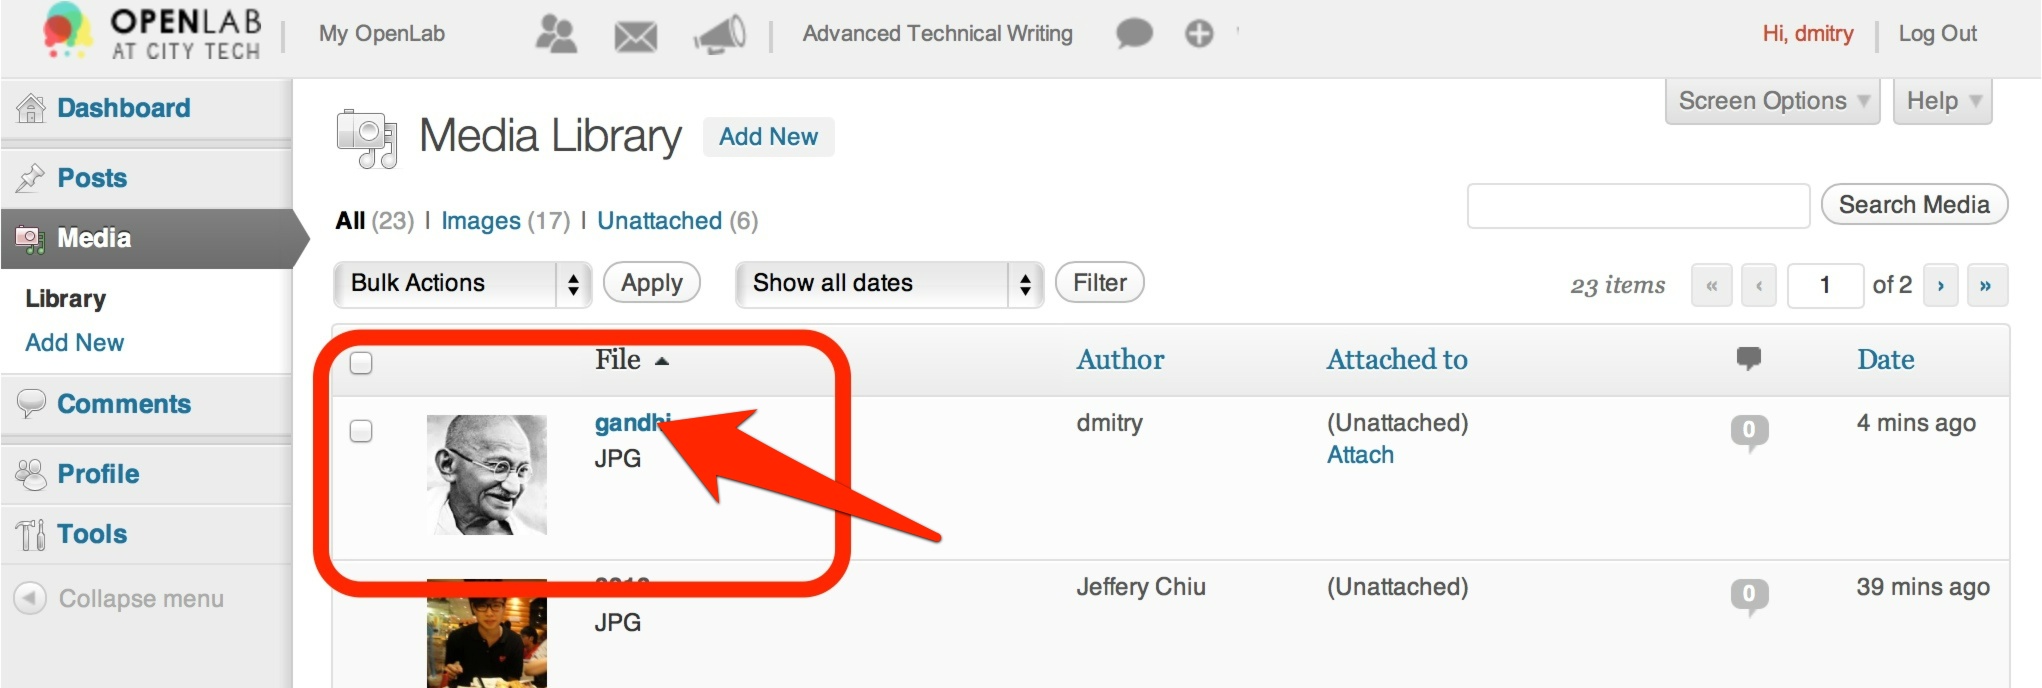
6. Make sure your photo’s been added (it should appear at the top of the table)
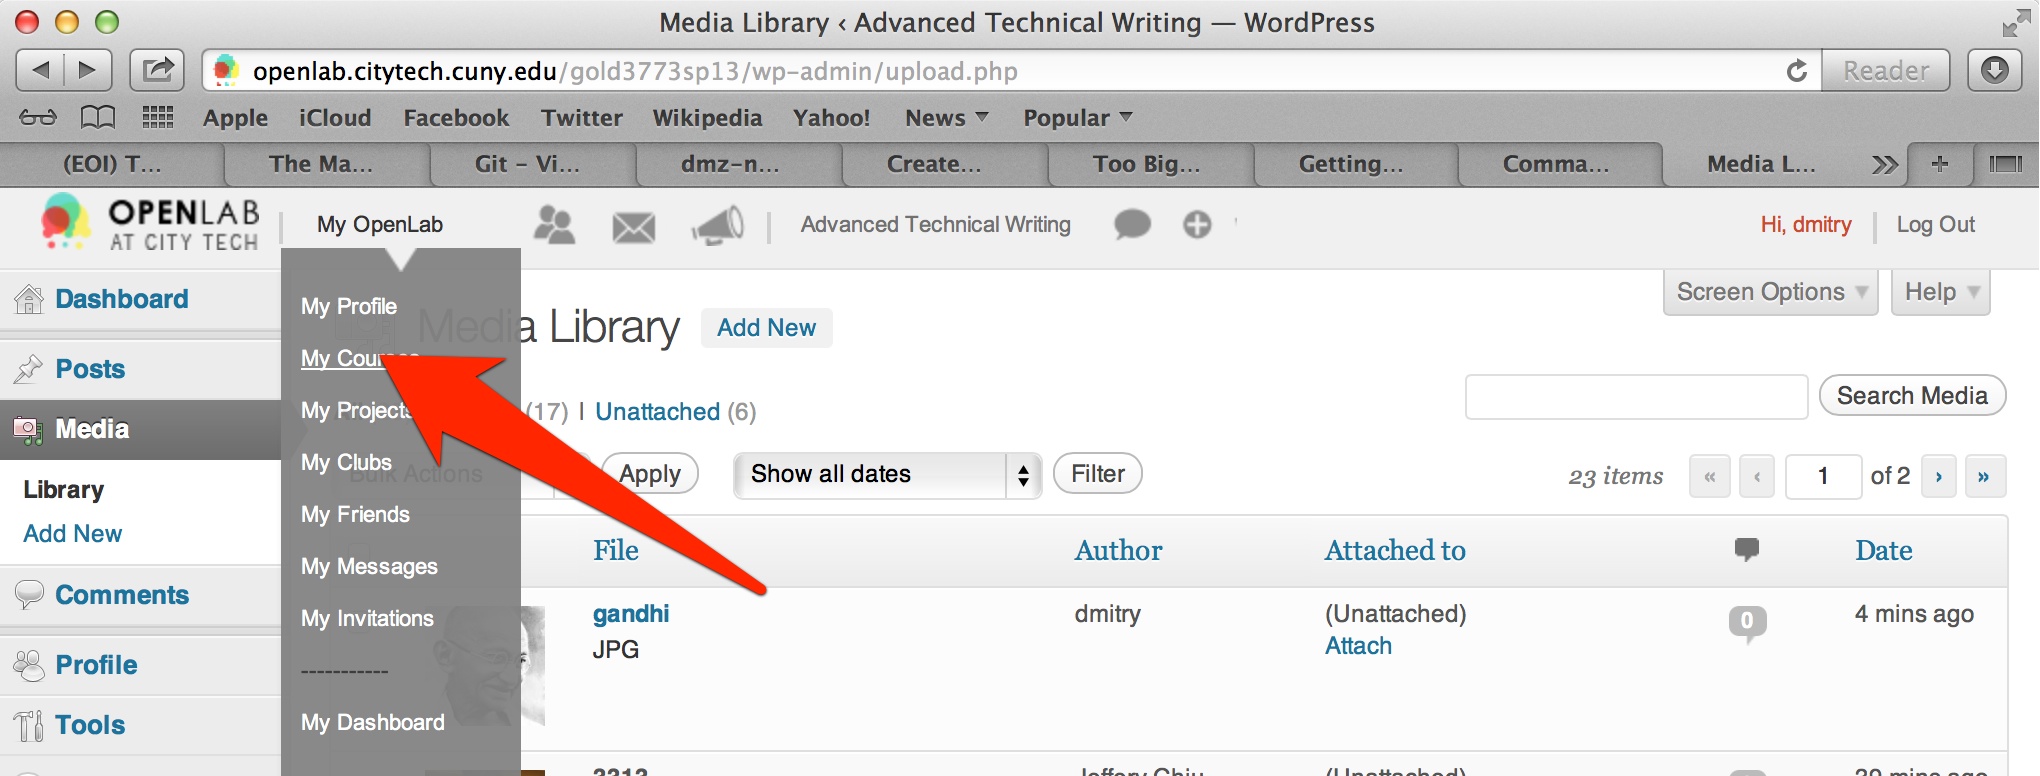
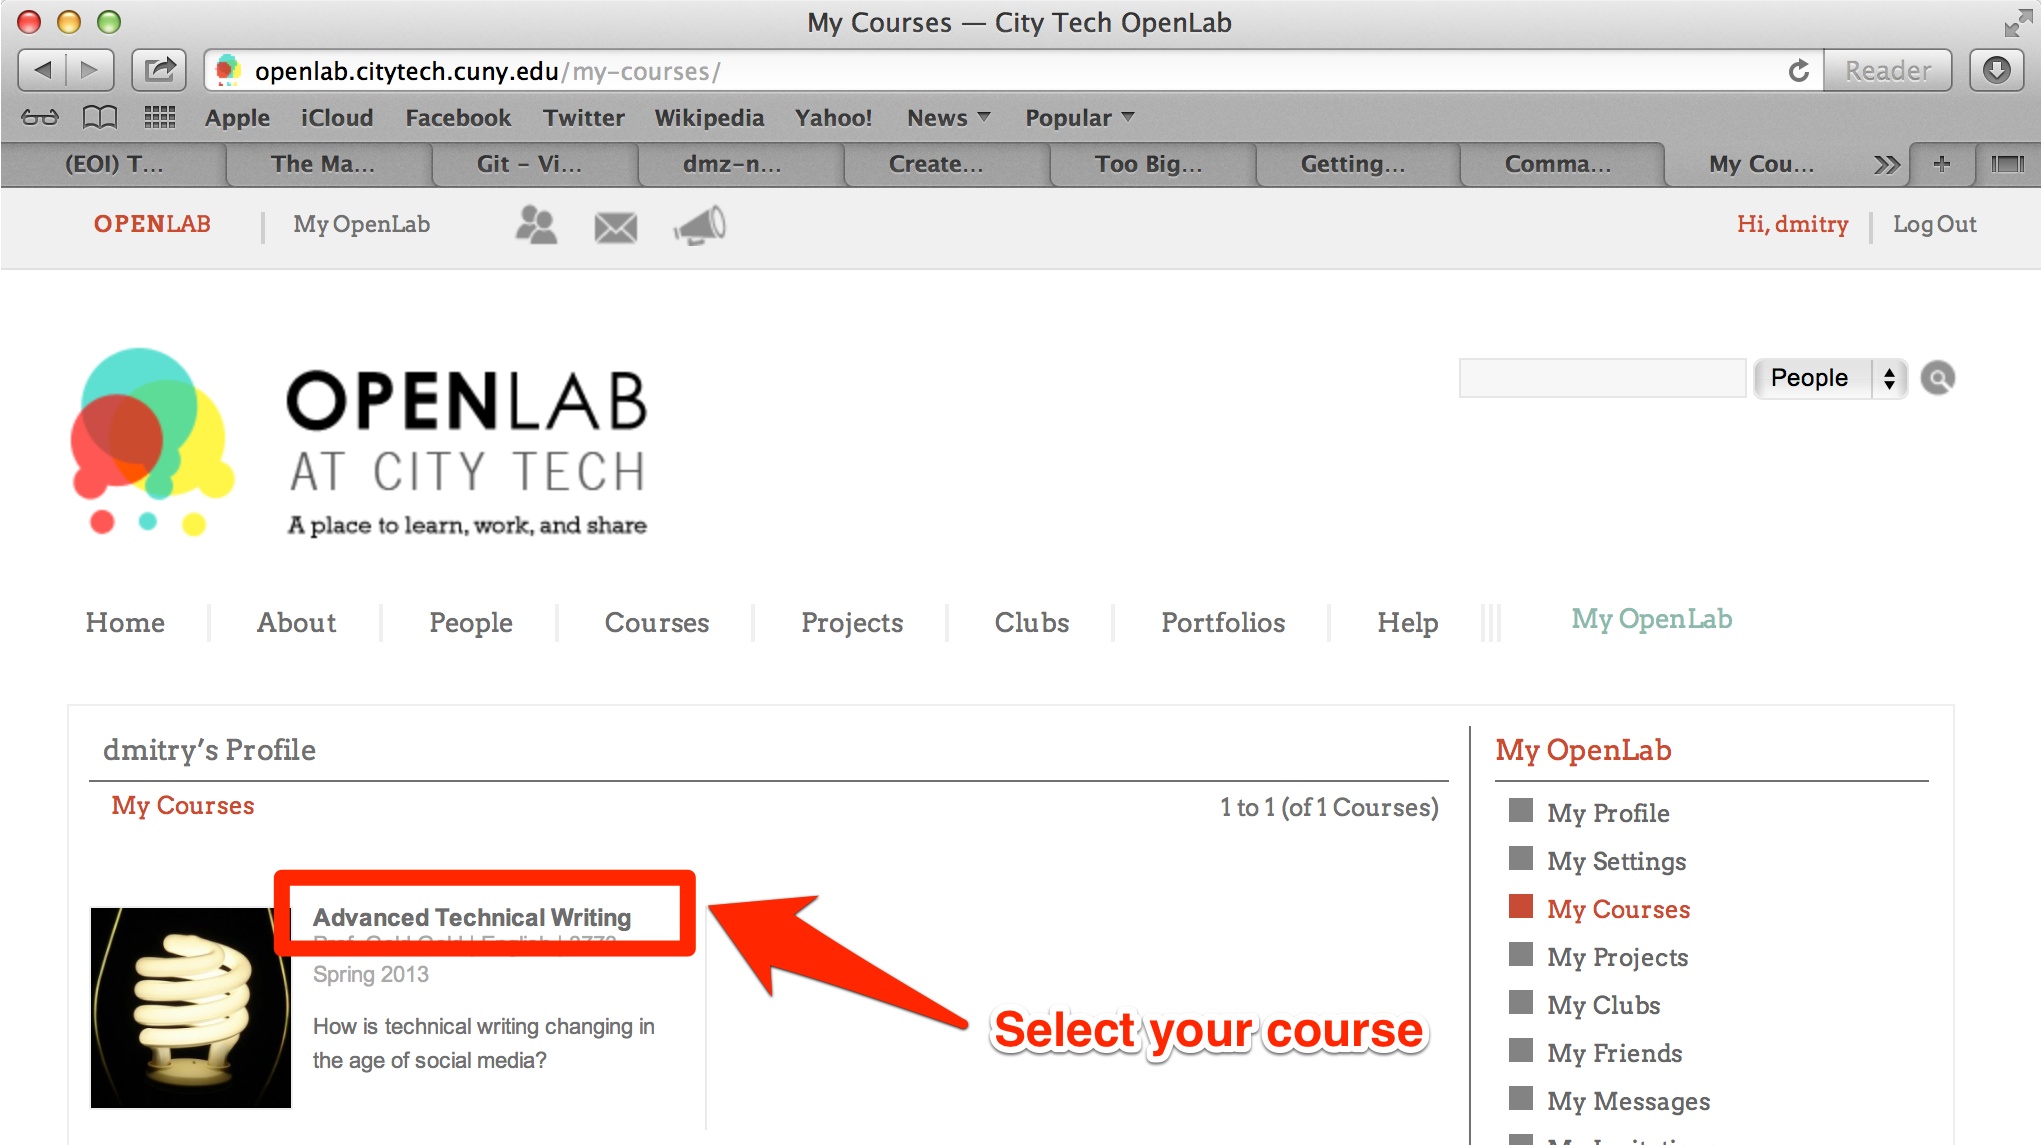
7. Now you’re ready to start editing the class list. Navigate to “My OpenLab” -> My courses
8. Select your course (Advanced Technical Writing in this case)
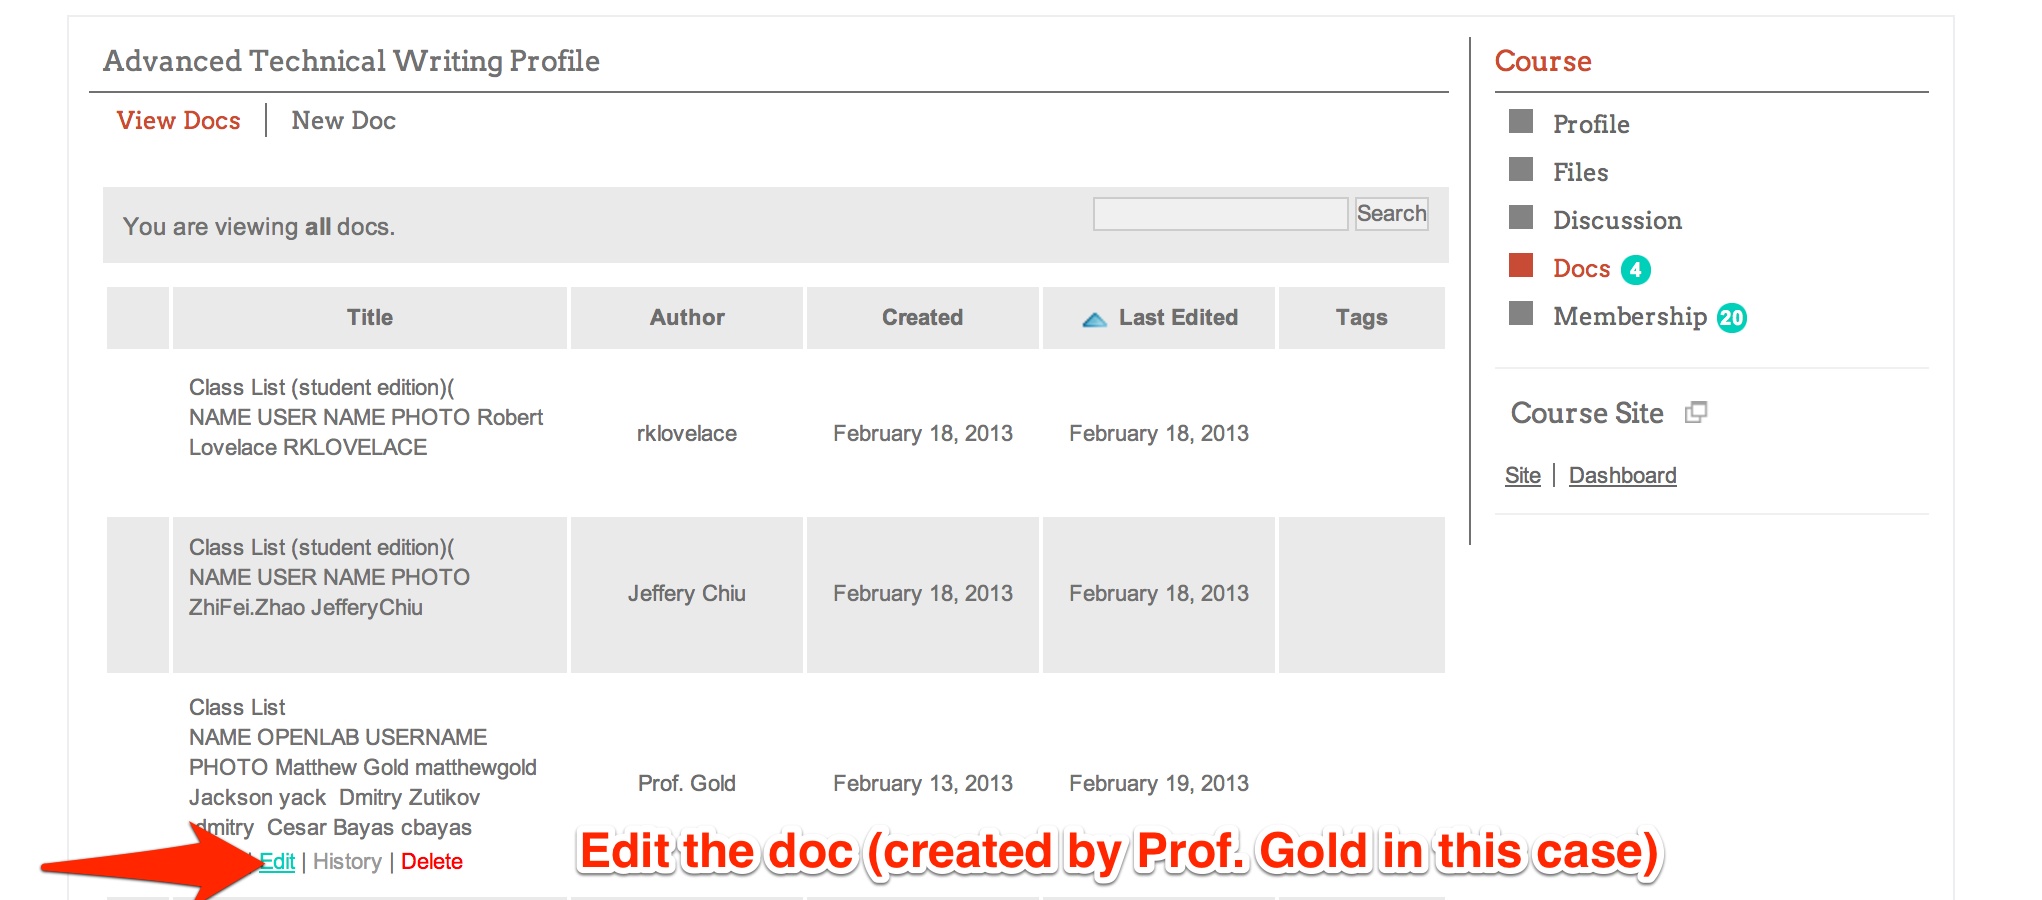
9. Proceed to “Docs”

10. Edit the class list
11. Scroll down to the first available row. Fill in you name and OpenLab username before proceeding to the HTML version of the list.
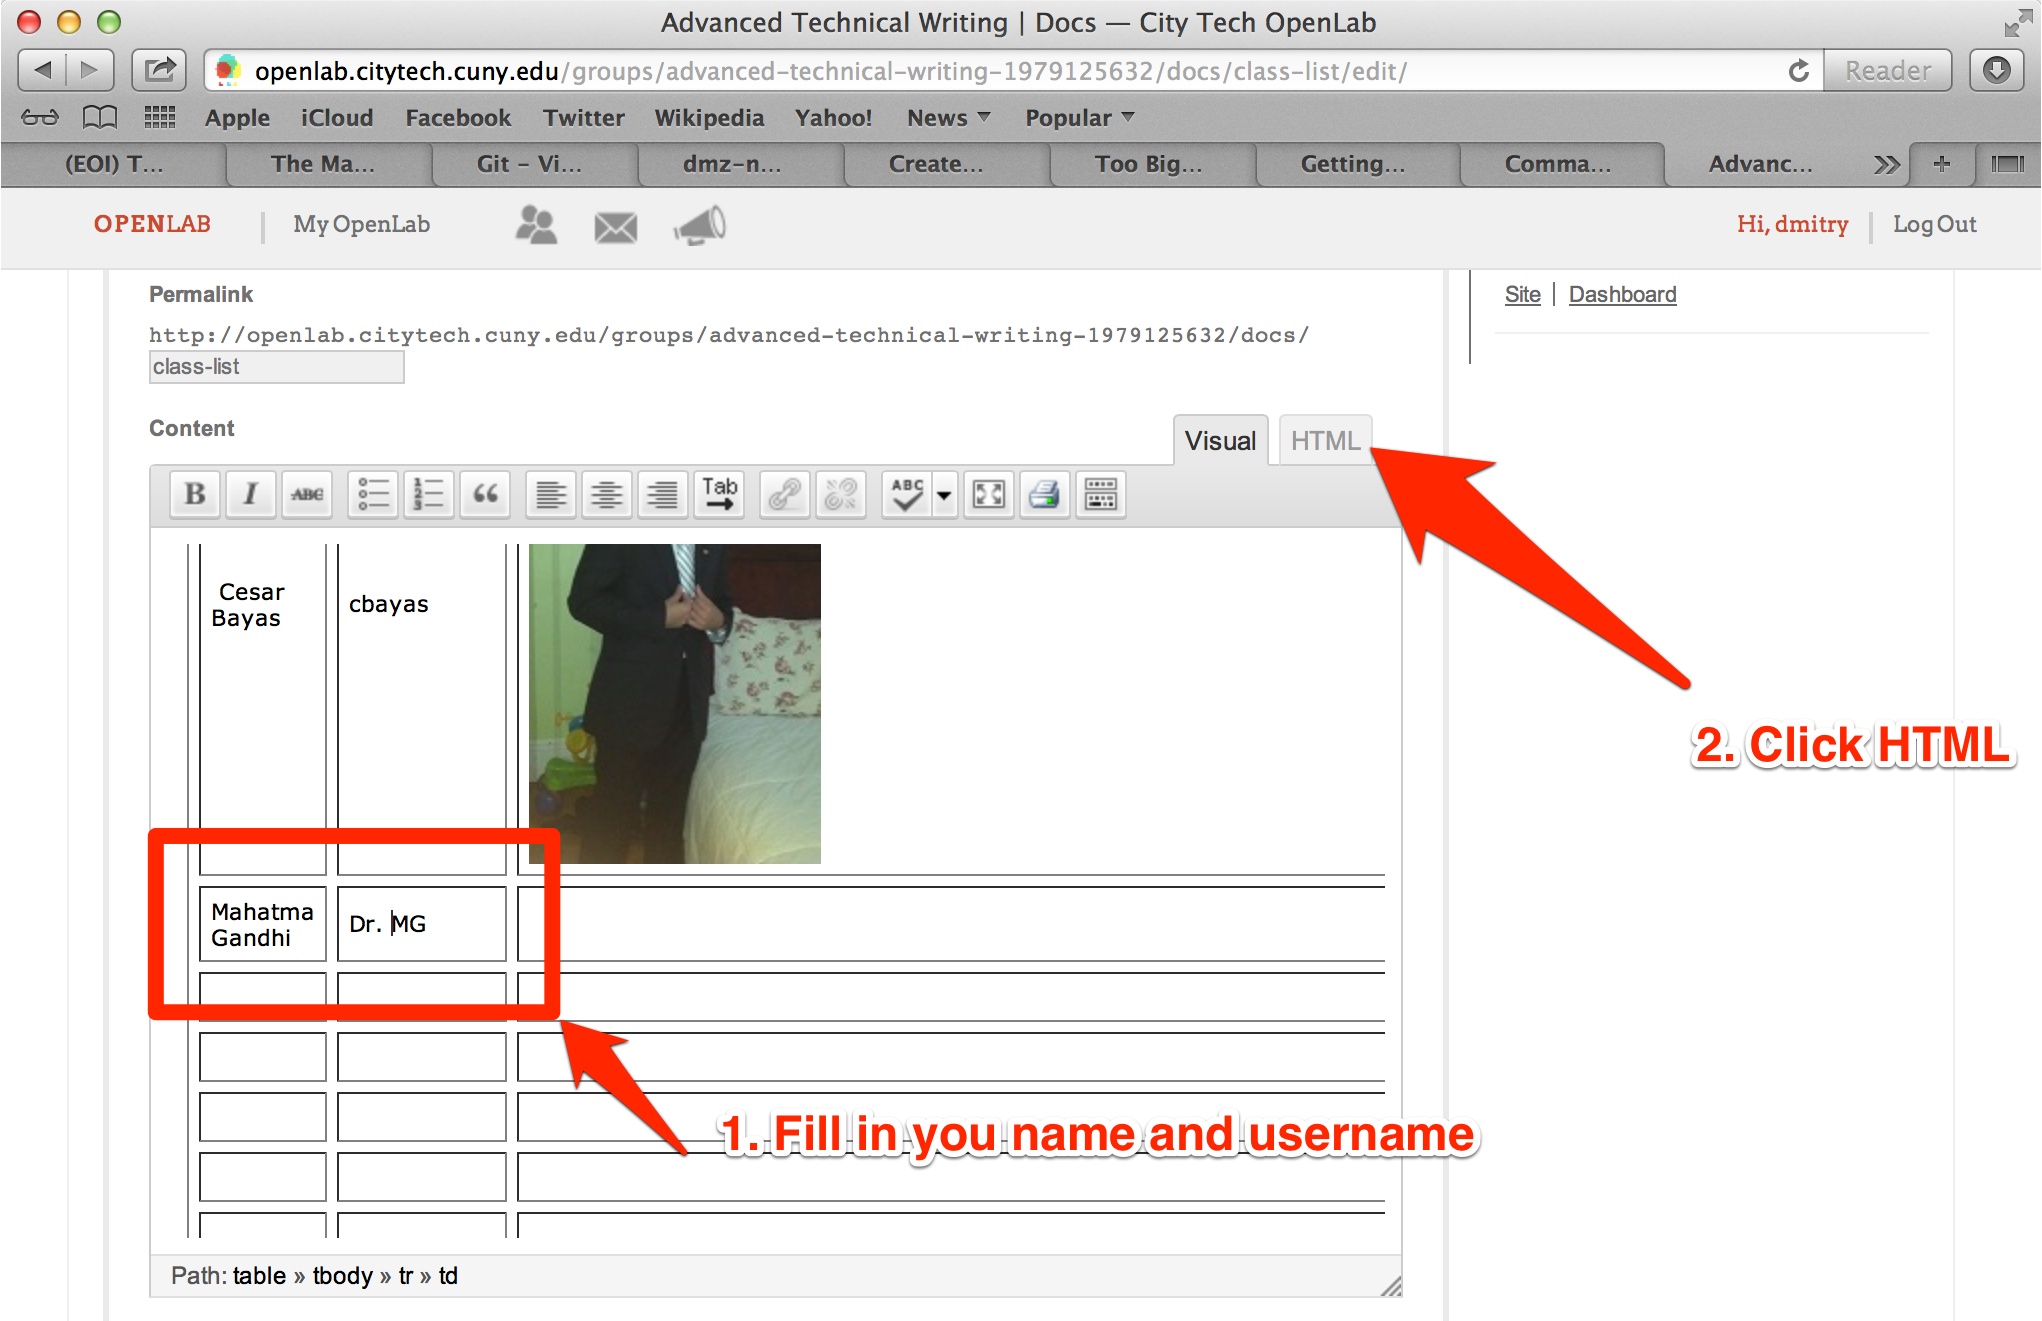
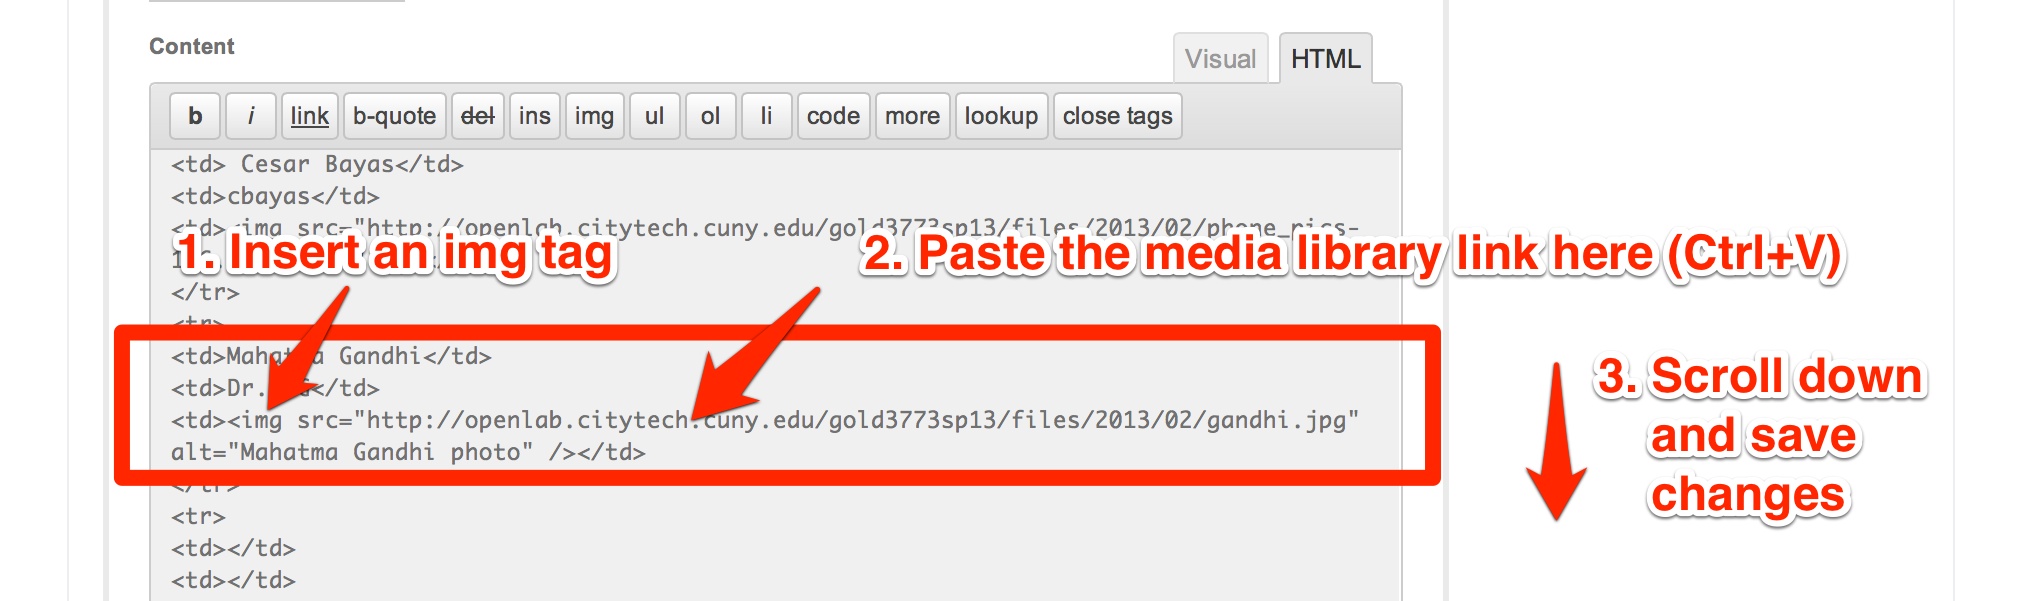
12. Scroll down in the document looking for you name inclosed in a pair of <td> tags

13. Insert an <img> tag and set the value of its src (source) attribute to you photo (the URL you have copied). Save the changes made.
14. You should see you record added to the class list. If you don’t, retrace your steps to make sure you’ve correctly followed all the instructions.
Good luck!

