In this project, I worked with John Willabus, Alexis Santiago and Mark Ikhiilov.
For this project, we built a VPN (Virtual Private Network) using a Raspberry Pi. Since the Raspberry Pi has a very low power consumption, it makes it a great VPN server. By using a VPN, you will be able to get secure access to your home network and use it for secure web browsing.
The following are the stuff needed tom build a VPN server:
- A free LogMeIn account. We will be using a LogMeIn Hamachi to create our VPN. Create a free account before you get started. If you have one already, use your current account. Hamachi will create a VPN for you, so you don’t have to mess with port forwarding on your router, getting a static IP address, or trying to bypass the firewall.
- Privoxy. We will be using this application along with Himachi to enable a secure web browsing.
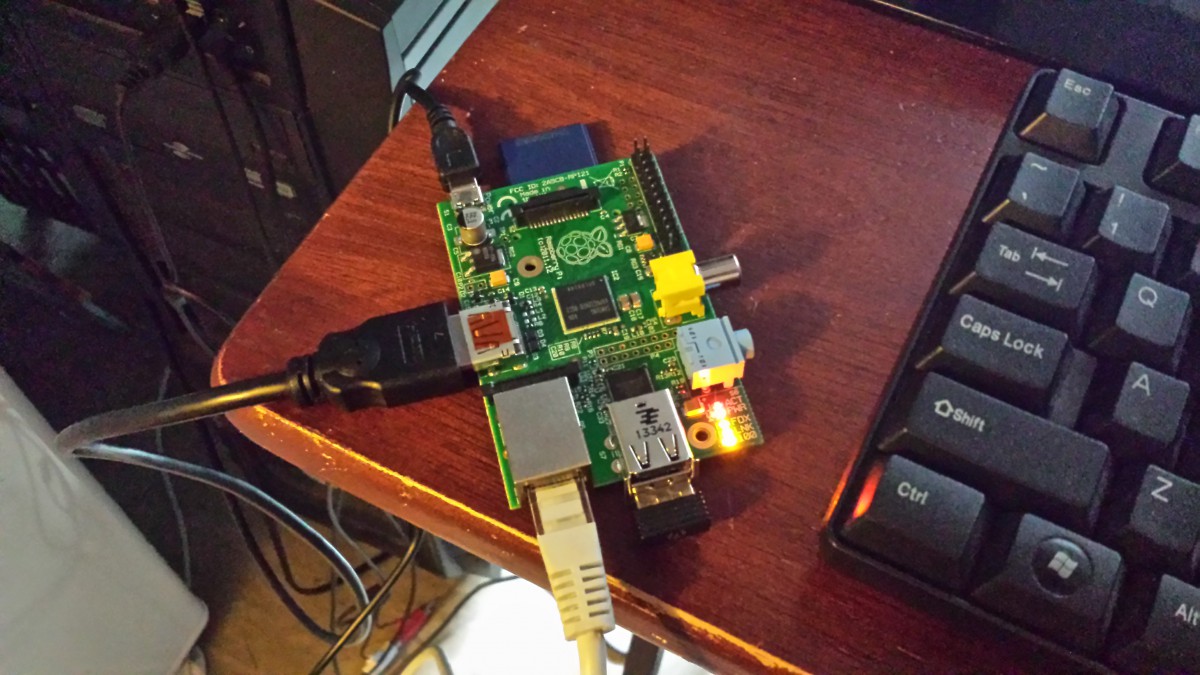
- A Raspberry Pi.
- HDMI cable
- An 8GB SD card or higher and a card reader.
- USB keyboard and mouse.
- An Ethernet Cable
- Micro USB power supply
Step One: Prepare Your SD Card
First things first, we need to prepare your SD card for the Raspberry Pi. This involves formatting it properly and putting Raspbian, the standard Raspberry Pi operating system, on it. The steps vary depending on whether or not you’re on a Mac, Linux, or Windows PC, so just follow the instructions for your operating system below.
Windows
- Download the latest version of Raspbian and unzip the .img file inside. (It’s almost 500MB so it may take a little while to download.)
- Download Win32DiskImager and unzip the application (.exe file) inside.
- Insert your SD card into your Windows PC using a card reader.
- Open Win32DiskImager.exe, the application you just downloaded, by double-clicking on it. If you’re running Windows 7 or 8, right click on it and choose “Run as Administrator” instead.
- If your SD card isn’t automatically detected by the application, click on the drop-down menu at the top right (labeled “Device”) and choose it from the list.
- In the image file section of the application, click the little folder icon and choose the Raspbian .img file you just downloaded.
- Click the Write button and wait for Win32DiskImager to do its thing. When it finishes, you can safely eject your SD card and insert it into your Raspberry Pi.
Step Two: Hook Up Your Raspberry Pi
Step Three: Configure Your Raspberry Pi
Once your Raspberry Pi boots for the first time you’ll need to configure a few things. You’ll know it’s ready for you when you see a Raspi-config window with a pretty big list of settings. You can mess with the others if you feel so inclined, but the only thing you really need to do is expand the file system so you can use up all the space on your SD card. To do so, follow these steps:
- Select expand_rootfs (the second option) and press enter.
- Confirm that you want to expand the file system and let Raspbian do its thing.
- When you’re returned to the configuration list, go all the way to the bottom and select the Finish option.
- It’ll ask you if you want to reboot. Choose yes.
Your Raspberry Pi will reboot and take a little longer this time because it needs to expand the file system. After a about a minute you’ll be asked to log in. You’ll need to use the default username and password:
Username: pi
Password: raspberry
Once you’ve logged in, you’ve got yourself a working Raspberry Pi.
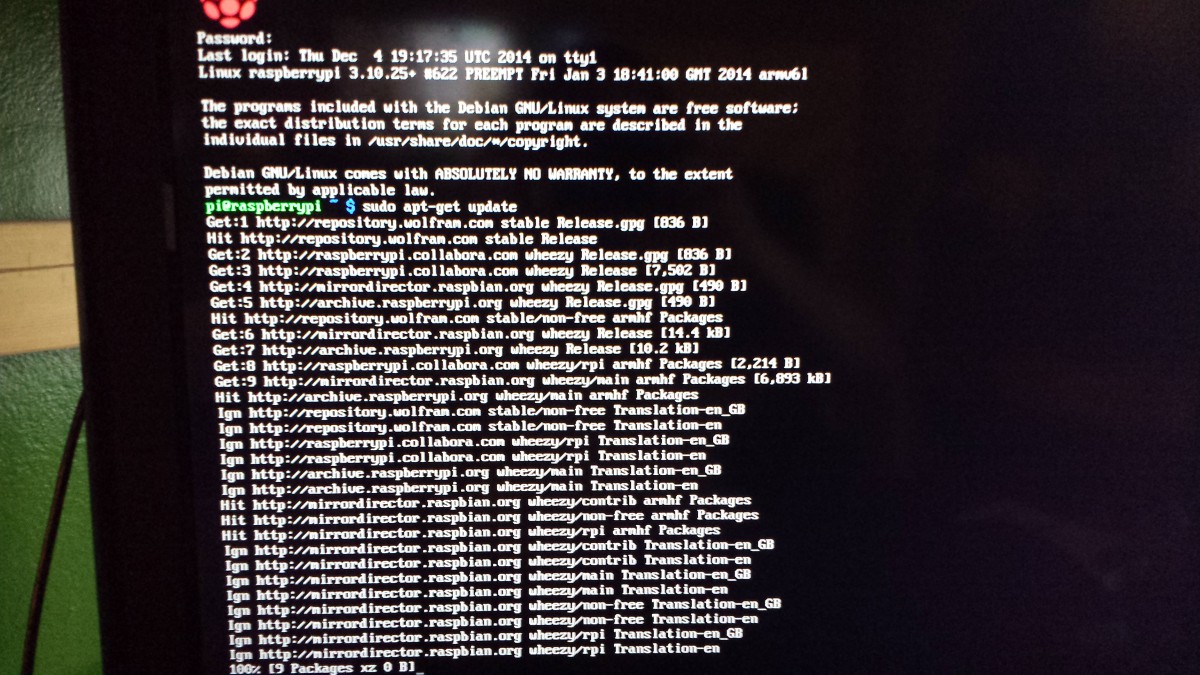
Step Four: Update the Raspberry Pi and Install Hamachi
Hamachi depends on a couple of packages that may not be present in your image, so we’re going to first update the packages and hopefully save you time troubleshooting common errors. First, grab the latest update:
sudo apt-get update
Then, install LSB (a requirement for Hamachi):
Be patient while it updates, and then you can download the latest Hamachi build for Linux:
If you get errors grabbing the Hamachi for Linux download, check the download page on LogMeIn to verify the version number (e.g., 2.1.0.86-1) and change it in the filename if necessary.
Next, install Hamachi by entering:
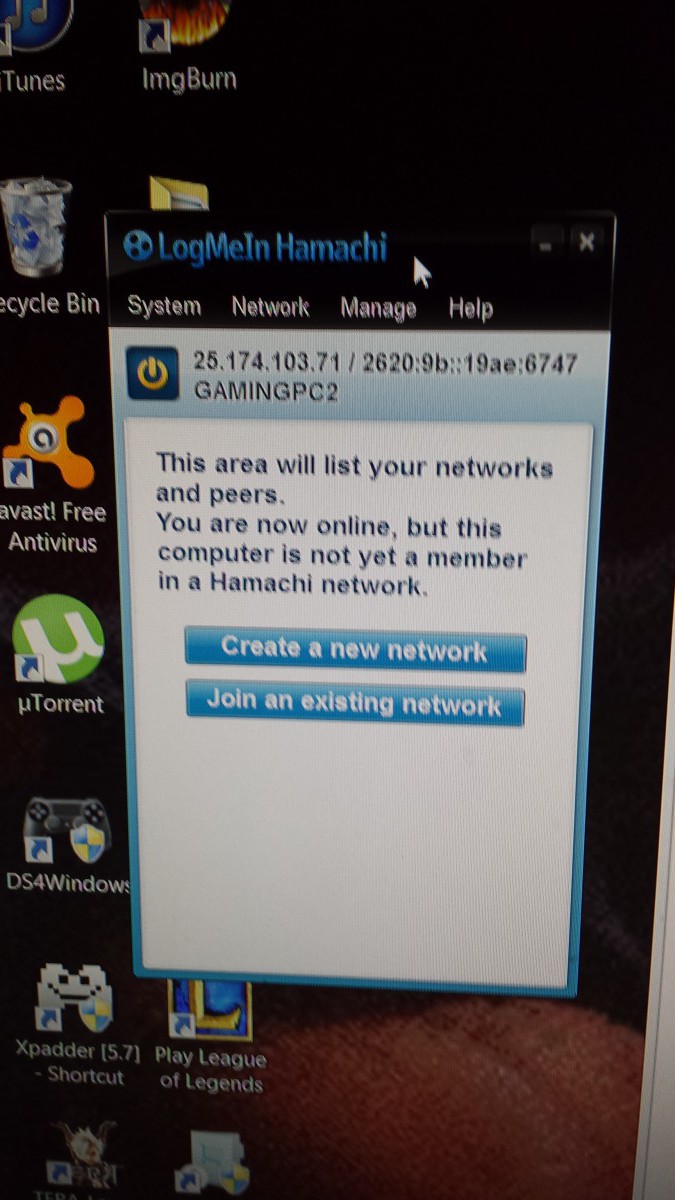
The last step for our VPN setup is to get Hamachi running on the Pi and on our client PCs.
On the Raspberry Pi, run the following to get the Pi connected to your LogMeIn account and create a new Hamachi network:
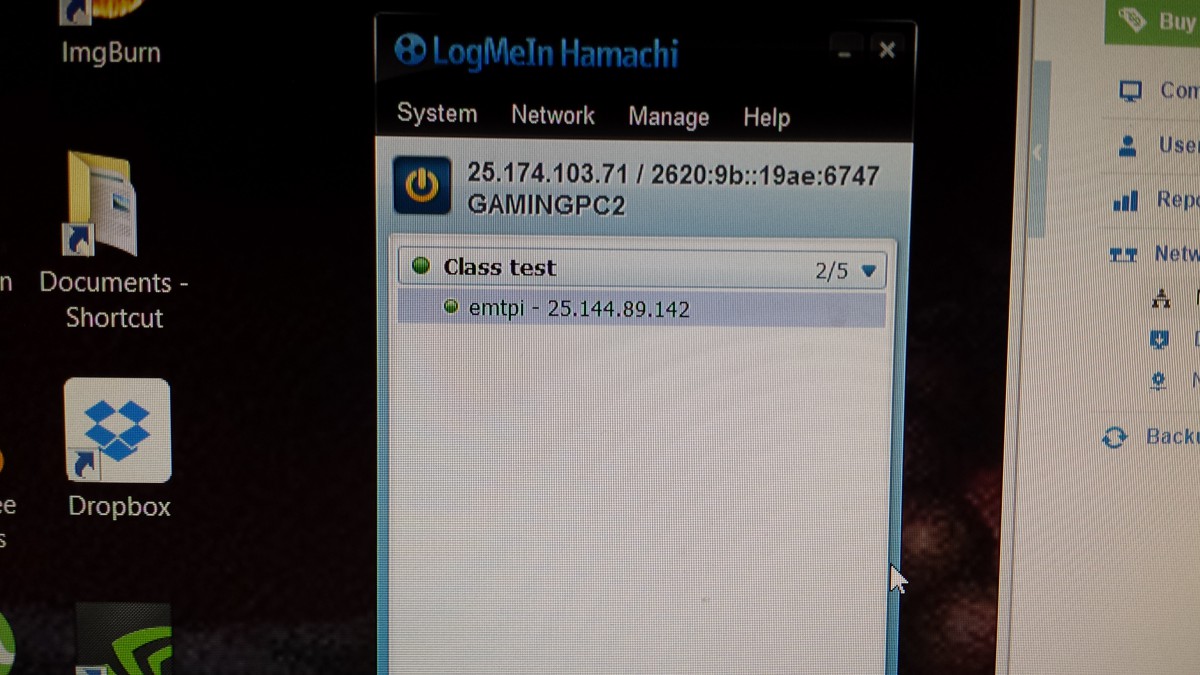
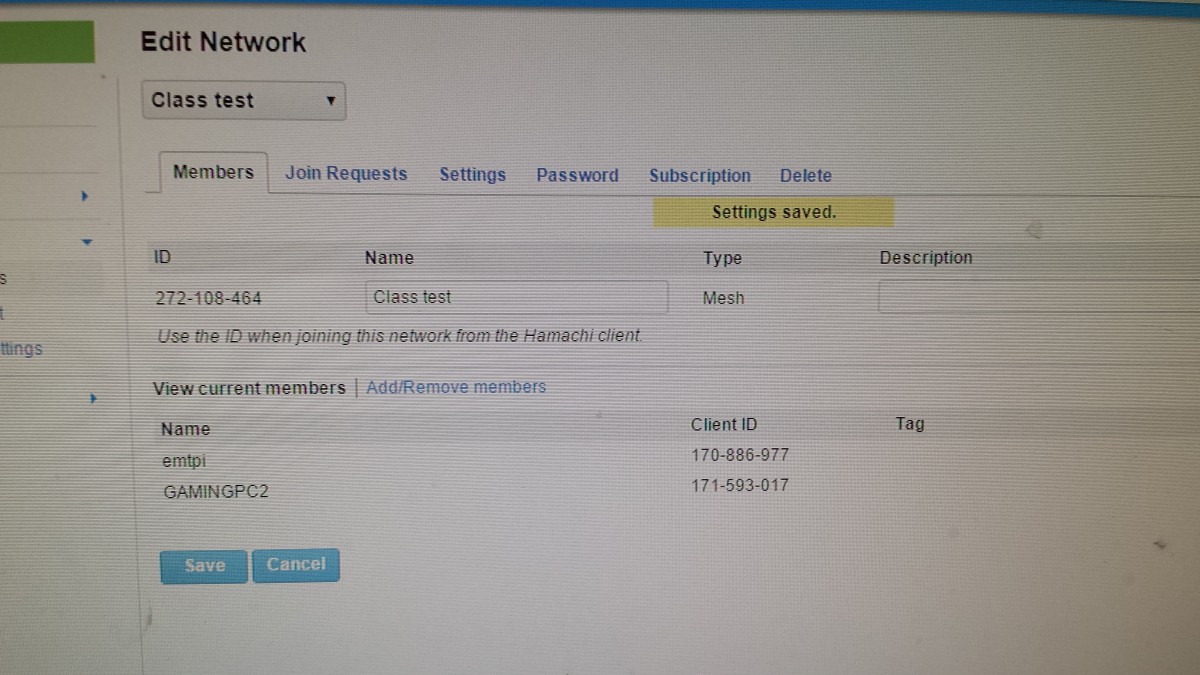
Now, on another machine, head over to LogMeIn and go to your “My Networks” section under networks. You’ll see that the Pi (whatever you nicknamed it) is trying to connect and create a new network. Grant the Pi permissions and write down the network ID (a 9-digit number) for that network.
Go back to the Raspberry Pi and enter:
Then enter your LogMeIn password (if requested). You might need to approve the join request on LogMeIn from the other machine. Once you do so, the Pi will be part of the new VPN served by Hamachi. At LogMeIn.com, look for the virtual IP address assigned to the Pi and write that down, because you’ll need it later.
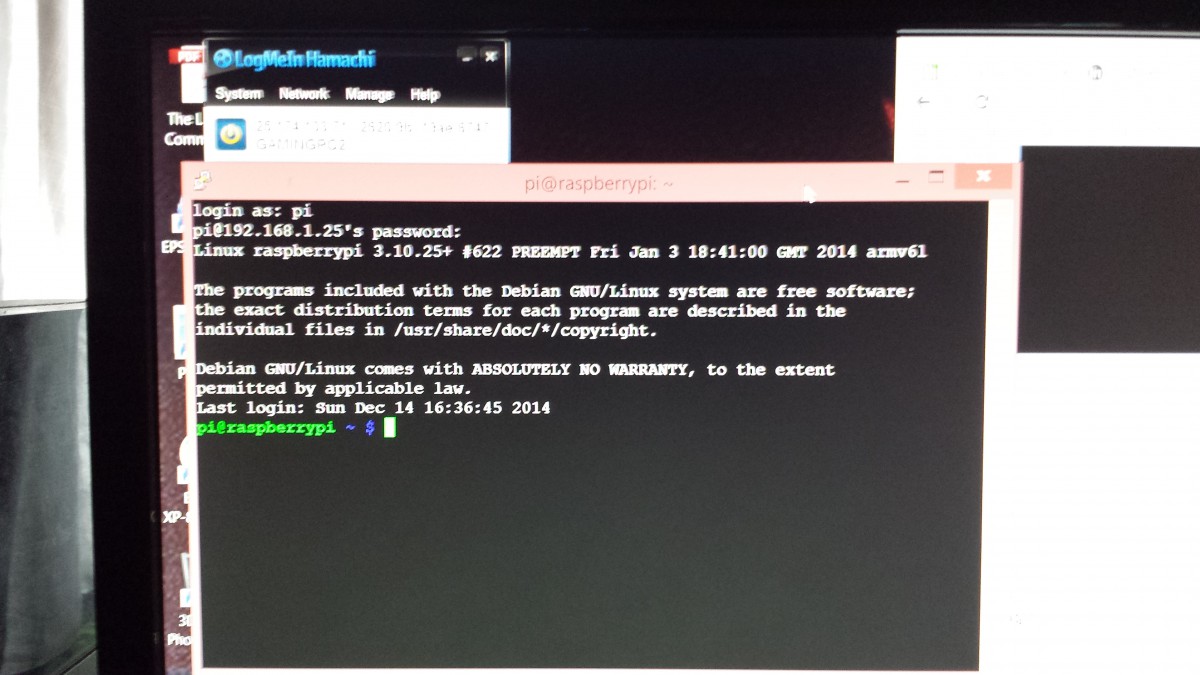
To be able to SSH into it and remotely control the Raspberry Pi, start the SSH server:
Almost done! For the Windows, Mac, or Linux computers you also want to connect to the VPN, you’ll need to install the Hamachi client from the download page.
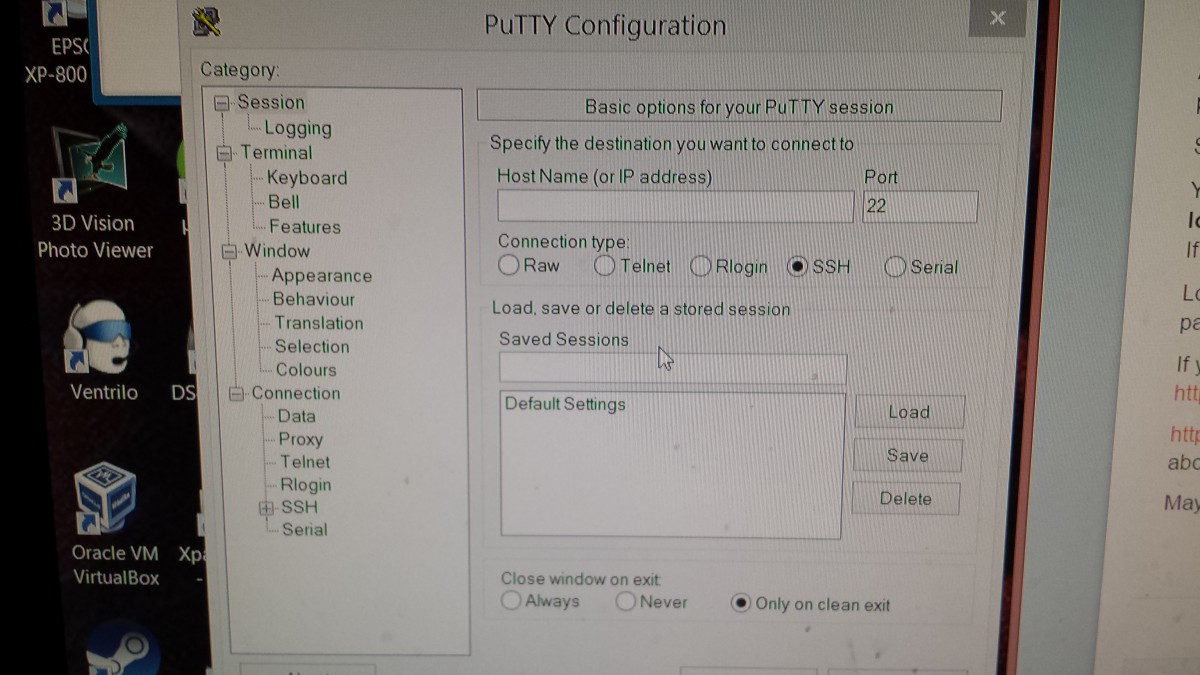
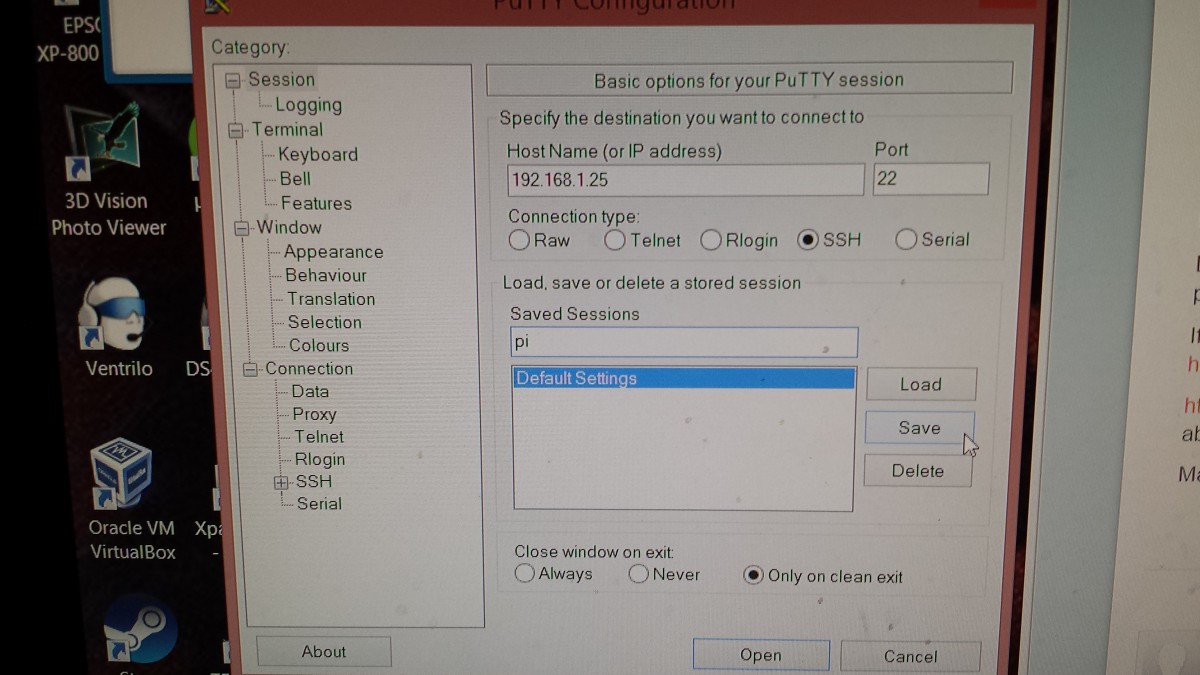
After you do so, you can join the new VPN (Network > Join) and SSH into the Raspberry Pi or access network files, etc. (In Windows, use a tool like Putty or in Mac/Linux use Terminal to SSH, using the Raspberry Pi’s IP address assigned by Hamachi in the server field).