
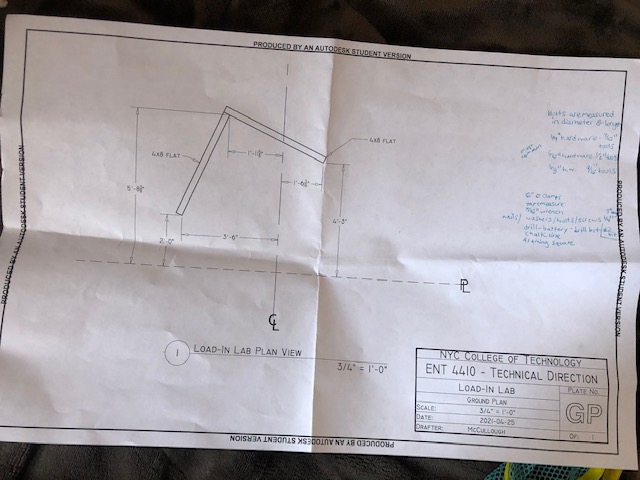
Load-in/strike Lab
For our load-in lab we worked in a group to perform a load-in according to a given plan. We were given a plan view to follow. First we created a tool list; this consisted of tape measures, 7/16” wrench, chalkline, framing sq., nails, washers, bolts, screws, drill, battery, drill bit, and 6” C clamps.
Our group had issues with the specifics of this tool list. Most of us were unaware of the measurements of our bolts and screws, when we had to be as specific as possible. I learned bolts are measured in diameter and length. The most common measurements are 7/16” tools for ¼” hardware, ½” tools for 5/16” hardware, 9/16” tools for ⅛” hardware. We also had slight communication issues, which resulted in less utilization of our lab time. We would have finished this lab faster if we had a better plan.
Then we had to identify the Centerline and plasterline using our tape measure and chalk line. We were shown some techniques for how to find the middle point of a line, lining up 2 tape measures next to each other from different sides and seeing what measurement they meet. We learned how to use the special right triangle to determine if our lines were straight.
Next we needed to bring in our flats and determine their placement. Using the CL and PL as a guide we used tape measures and the plan to figure out where along the line they were placed. Once placement was determined flats were drilled in the floor, C clamps held them together as bolts and washers were placed. This was good practice, and more so that the flats were placed at an angle instead of in a straight line.

