We’re really working our way through a challenging semester! I hope that you are all doing well and hanging in there. Stop by office hours on Wed., Oct 28 from 3:00-5:00pm with your questions about the class. You can find me on Google Hangouts here. [link removed after office hours]
Howdy, all! We’re already at Week 9! The end of the semester is quickly approaching, but we still have important work to do. If you have questions about the class, please visit my office hours from 3:00pm-5:00pm on Google Hangouts here [link removed after office hours].
If you can’t visit office hours, please send me an email with a request for another meeting time and let me know your availability for the next week so that I can find a time that matches both of our schedules.
Individual: 1500-2000-Word Instructional or Training Manual, 15% Individually, you will write a 1500-2000-word instructional or training manual that demonstrates: 1. ability to explain a task/process in clear, concise language. selection and definition of appropriate terminology and concepts. 3. awareness of the intended user/audience. 4. knowledge of instructional manual format. All diagrams, illustrations, or photos must be created by the student and integrated into his or her manual. Any outside sources cited should be documented according to APA format.
Since we modified the schedule and pushed things back a week, this project will now be due by the end of Week 11 (Nov 4-Nov 11). Originally, this was due during Week 10 according to the syllabus.
Instructional or Training Manual
For our purposes, we will say instructional manuals are external facing, meaning they are meant for end users, customers, or clients.
Training manuals are internal facing documents, meaning they are meant for employees, contractors, and colleagues.
You choose your audience (internal or external).
Its word count should be 1500-2000 words.
Combine words with pictures, illustrations (drawings), and/or screenshots. Any images that you use must be created by you or taken by you.
Clearly define the purpose of your manual. What does it teach? What does it help a person do? What task or tasks does it help someone complete in a straightforward and easy manner?
Telling versus showing. Always aim for showing, but provide the telling as context, clarification, and additional information.
Use the body of your document for writing, steps, etc. Don’t be afraid to include text boxes and end notes.
Provide a cover sheet, table of contents, introduction/purpose, and glossary of important terms. It can be as few or as many pages as needed.
Be consistent with your explanations and learn from similar kinds of manuals about what terms you should be using to explain how to do something (e.g., tapping, pressing, clicking, holding, dragging, typing, etc.).
Let’s look at some examples (using Google, enter terms including “instructions,” “user manual or guide,” and “filetype:pdf” modifier to find others).
Find your own examples for ideas and inspiration. The reading for
this section of the class has to do with your own research into what
instruction manuals look like.
Think about what you know enough about that you can teach it to
someone else and it is something that you want to include in your
professional portfolio.
Of course, choose a task or process that you have realistic access to the hardware, software, etc. that you will need for creating your instruction manual.
As you write and revise your instructions, you will want to test them with the intended audience to ensure that they are correct and easy to understand. Obtaining user feedback ensures that your instructions work, but if they don’t, you can use feedback to revise your instructions accordingly.
Look at this week’s weekly writing assignment to begin the brainstorming and initial research for your instruction manual.
Now that you’ve had an extra week to catch up on the Expanded Definition project and perform peer review, this week I will show you how to submit your final draft to our OpenLab Course Site, which you should do before next Wednesday’s lecture (Oct. 21).
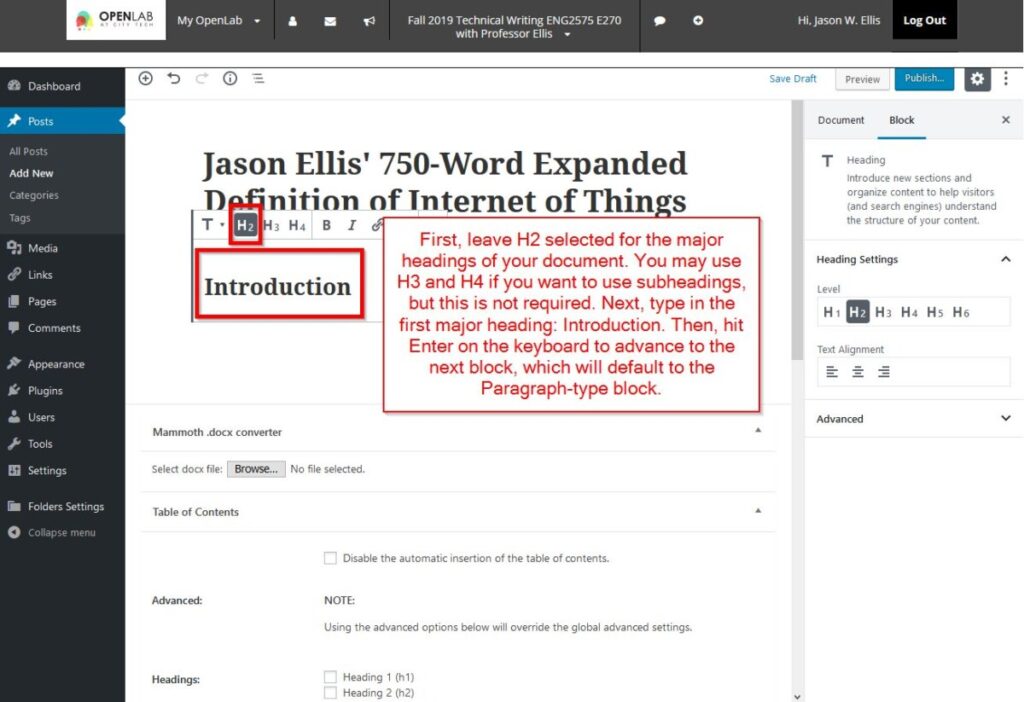
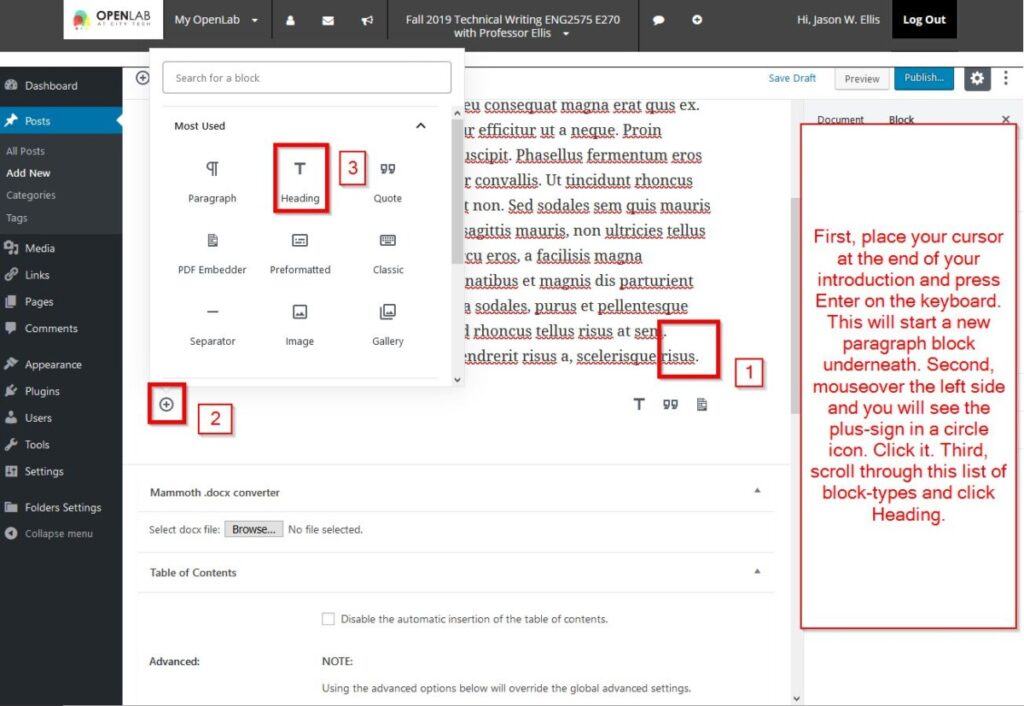
As noted previously, your document should resemble this model with headings for each section. Please remember that the bracketed information should not appear in your final document–it’s only for explanation from me to you.
Your Name's Expanded Definition of YOUR TERM

TO: Prof. Jason Ellis
FROM: Your Name
DATE: Due Date
SUBJECT: Expanded Definition of YOUR TERM

Introduction [Heading Level 2]
What is the purpose of this document? What term are you defining? How are you discussing the way it is defined and the way it is used in context? Describe a road map for what follows (definitions and context). This content should be published as paragraphs, unlike the heading for this section, which is a level 2 heading.

Definitions [Heading Level 2]
Quote several definitions of the term that you selected. Provide quotes and parenthetical citations for each definition, and include your sources in the References section at the end of the document. Each definition that you include deserves discussion in your words about what it means and how it relates to the other definitions that you include. Consider how they are alike, how are they different, who might use one versus another, etc.

Context [Heading Level 2]
Quote several sentences from a variety of sources that use the term in context. A range of sources would provide the best source material for your discussion of how the term is used in these contexts. For example, a quote from an academic journal or two, a quote from a newspaper or magazine, a quote from a blog, and a quote from social media would give you a range of uses that might have different audiences. For each quote, you should devote at least as much space as the quote discussing what it means in that context and how it relates to the other quotes in context. Each quote should be in quotes, have a parenthetical citation, and a bibliographic entry in your references at the end of your document.

Working Definition [Heading Level 2]
Based on the definitions that you quoted and discussed, and the contextual uses of the term that you quoted and discussed, write a working definition of the term that's relevant to your career field or major, which you will need to identify (this is the specific context for your working definition).

References [Heading Level 2]
Order your APA-formatted bibliographic references by the author's last name, alphabetically. In your posted version, they do not need a hanging indent. And, they should not be in a bulleted list.
To turn in your work, you will create a new post on our OpenLab site as you did for the 500-Word Summary project. The steps below should get you started.
If you have questions about posting, please email me at jellis at citytech.cuny.edu.
I hope that everyone is hanging in there and will use this week to catch up on their work. If you’re not sure what I’m talking about, remember to watch this week’s short lecture.
Office hours are Wednesday, Oct. 7 from 3:00pm-5:00pm on Google Hangouts here [link removed after office hours]. Stop by with your questions about anything relating to the class. If you can’t make it, remember to email me about your availability to jellis at citytech.cuny.edu.
I’ll be on Google Hangouts from 3:00pm-5:00pm today to discuss anything relating to the class. [link removed after office hours]
Remember to email me (jellis at citytech.cuny.edu) with your availability over the next week if you would like to talk but can’t make it to my regularly scheduled office hours.
Refer to this week’s lecture for more details on how to post your 500-Word Summary project to our OpenLab Course Site.
Below, I am including some screenshots to guide you through the process of creating a post for your 500-Word Summary.
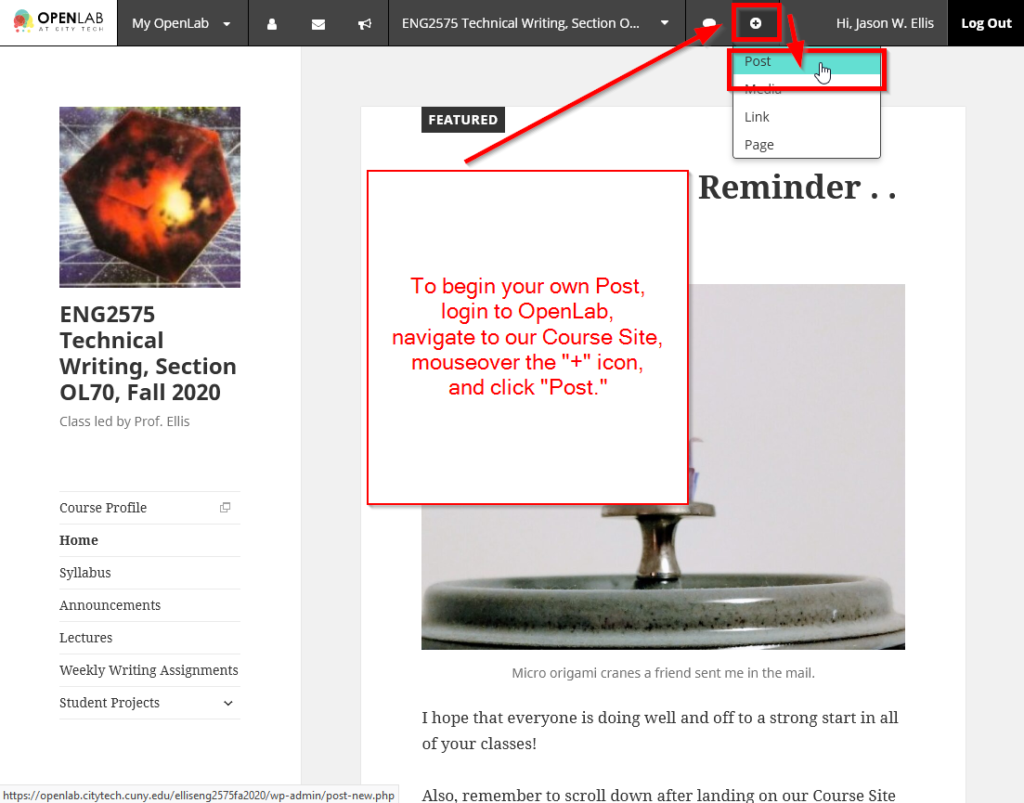
To begin your own Post, login to OpenLab, navigate to our Course Site, mouseover the “+” icon, and click “Post.”
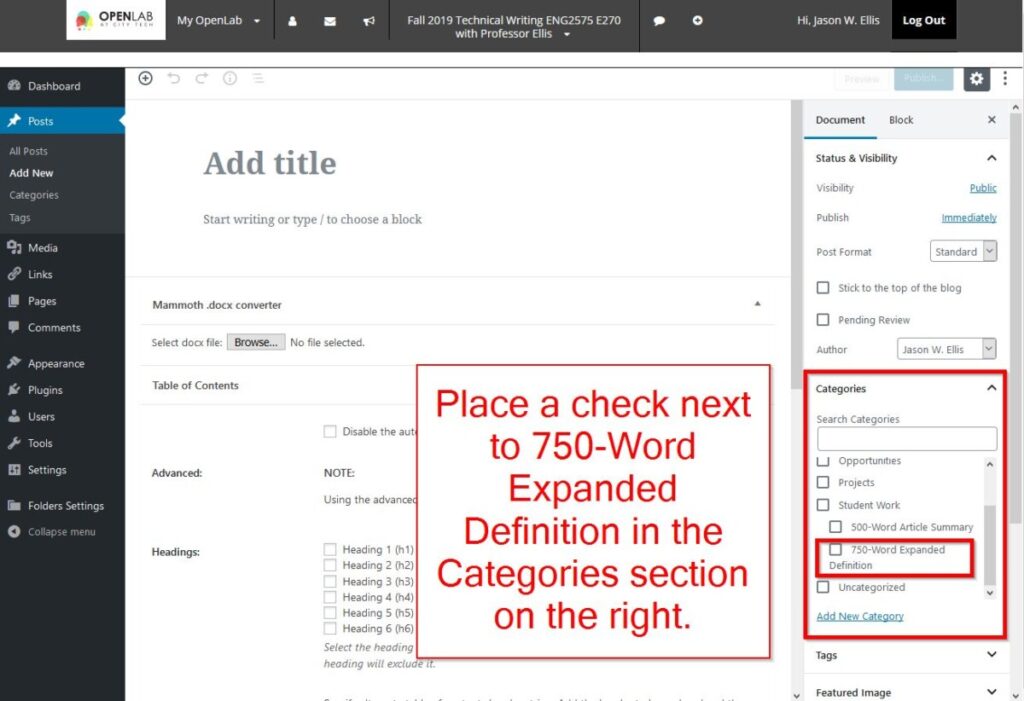
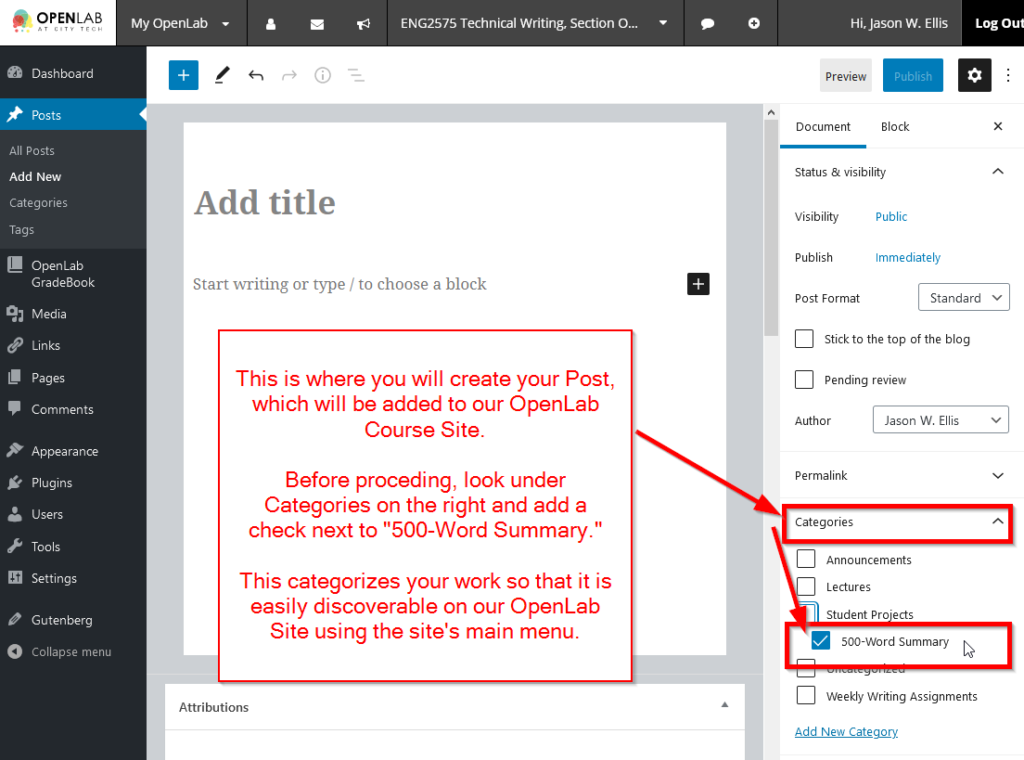
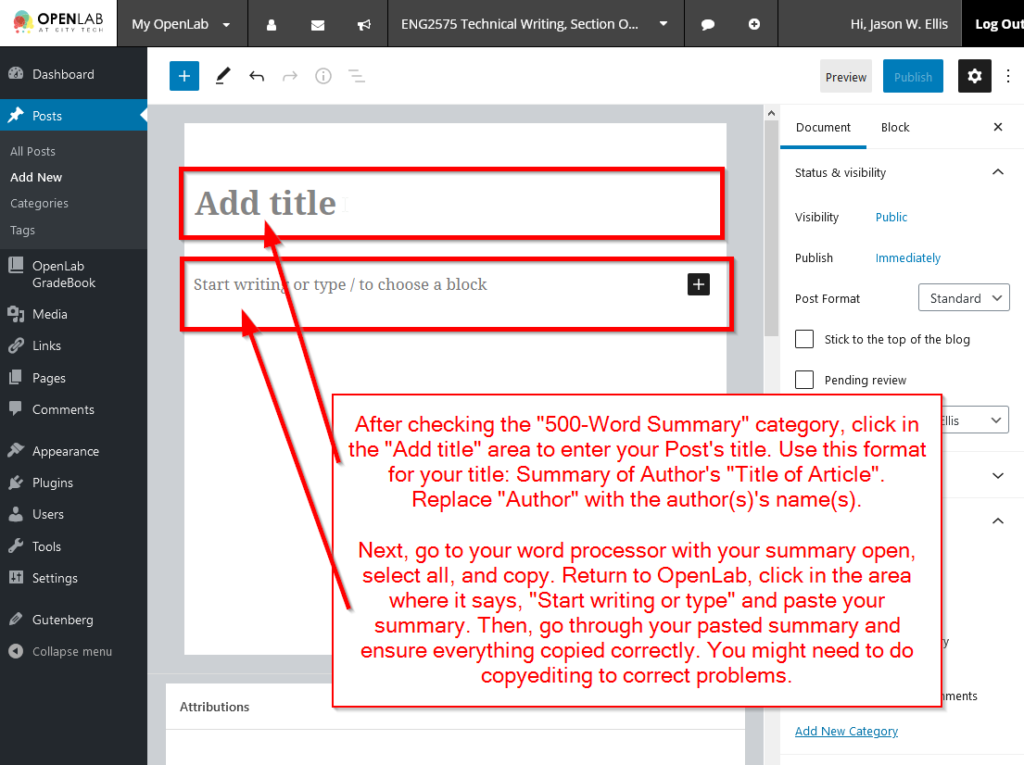
Before typing anything, look under Categories on the right and add a check next to “500-Word Summary.”
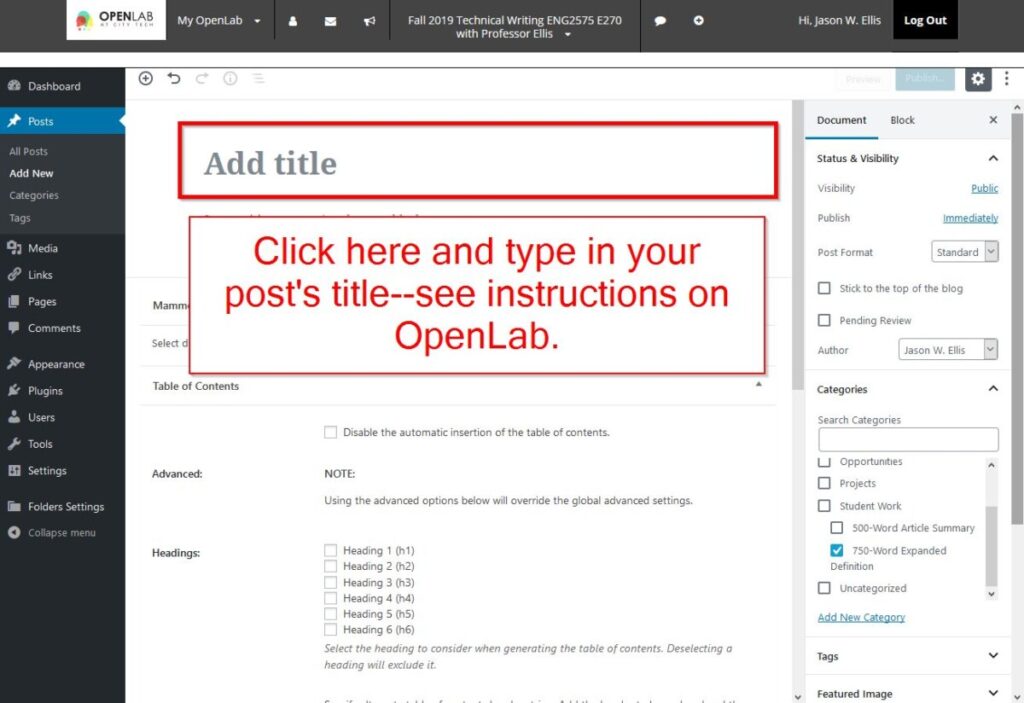
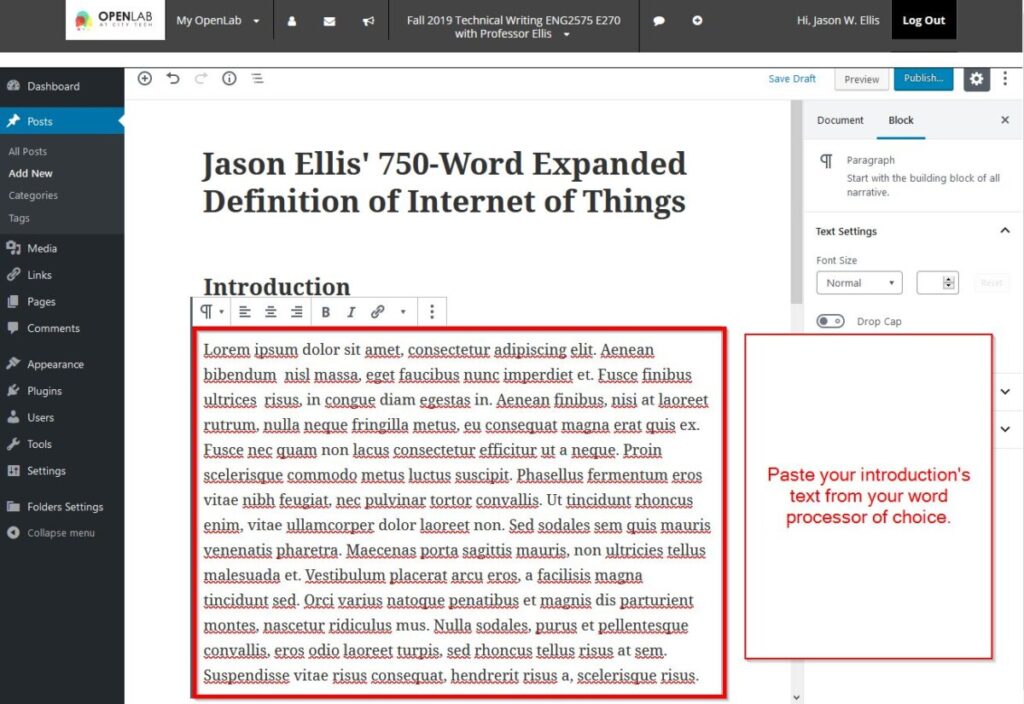
Click in the “Add Title” section to enter your title (e.g., Summary of Lin’s “3D Layering of Integrated Circuits”). Then, click in the “Start Writing” area and copy-and-paste your 500-Word Summary memo from your word processor into this area.
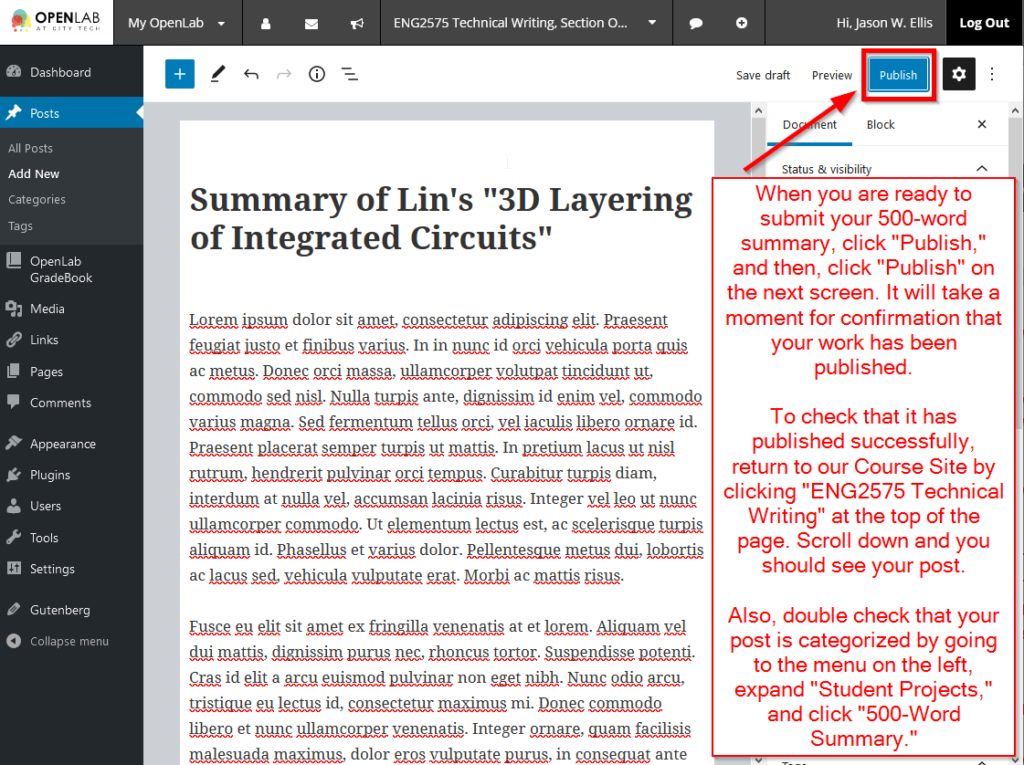
After copyediting your work to ensure everything is as you want it to be, click on “Publish” and then click “Publish” on the next screen. Verify that your post is live on the site by clicking on “ENG2575 Technical Writing” at the top center to return to our Course Site.