Contents
Overview
3-D or Animation Project explores design on another dimension, either space or time. Using your hand-lettered type project as a start point, you will create either a three-dimensional version of your typographic piece, or a kinetic type piece, depending on your instructor’s preference.
Learning Outcomes
Type on a Cube
For the next three weeks or so, type is now going to be designed across the third dimension in Type On A Box.
Typography will extend around corners and over the top, sides (and bottom?) of the six sides of the cube.
Read the following entrees:
This is a lot to read, but at least skim it. http://www.eyemagazine.com/blog/post/dimensional-typography http://www.josephdigioia.com/index.php?/student-work/typographic-cubes/ https://www.behance.net/gallery/5159465/Typography-Cube
There are various approaches:
a) Treat each side individually, but lead the eye to a specific path
b) Break the corners by bringing elements around the three sides
c) Change the sides themselves so the eye keeps away from the corners
Instructions
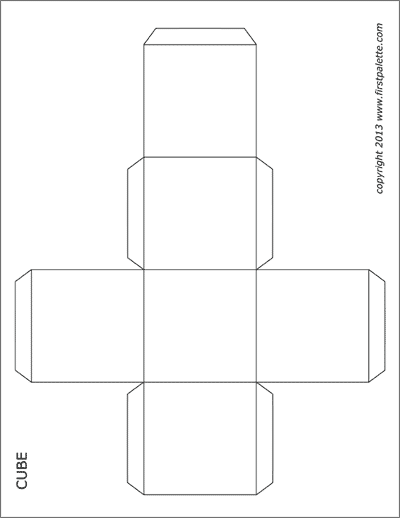
• See the template, attached. Print at least three of these. If you don’t have a printer, please refer to the video on how to draw one from scratch.
https://openlab.citytech.cuny.edu/comd1200-ol52-fa2020/files/2020/10/cube1_template.png
• Choose one of your three finished ligatures to put on three dimensions
• Figure out where you want the box to open or close, how you want the ligature to turn over the edges and corners. Alter the flaps if you need to.
Alternately, go to the internet and select a different cube configuration. You’ll notice that the box folds in various ways to achieve a six-sided box. Decide how your design will fit over the sides.
• Make pencil or marker sketches of six cube boxes on the templates you printed. Cut them out, fold them and bring them to class. Bring your glue stick.
Do NOT use the computer.
Then:
Cutting them out with your knife and assembling them.
• Make a light score on the edges
• Fold the flaps. Refine if needed. Open them back up and store them flat in a book, bring them to class
• If you want, tack them together to see if they hold together. If you scored and folded them correctly, the box should stand straight and closed.
Due Date(s)
- This is a quick project. Critique will be announced with directions to attend.
- ALL MUST ATTEND WITH FINISHED BUILT CUBES.
Resources
- See links above, under Learning Outcomes for samples.
- Links in LESSON PLANS give step-by-step instructions for making your own template from scratch, copying your ligature from the computer, transferring it to board, and assembling the cube, all without the need of special art supplies or a printer.


Recent Comments