Class Info
- Class Date: Thurs. Sept. 3
- Class Time: 8:30AM-10:00AM
- Class Meeting Zoom https://zoom.us/j/6459468086
Meeting ID: 645 946 8086
Topic
Main Classification of Typefaces
Quick Reference: Classification of Type
Objectives
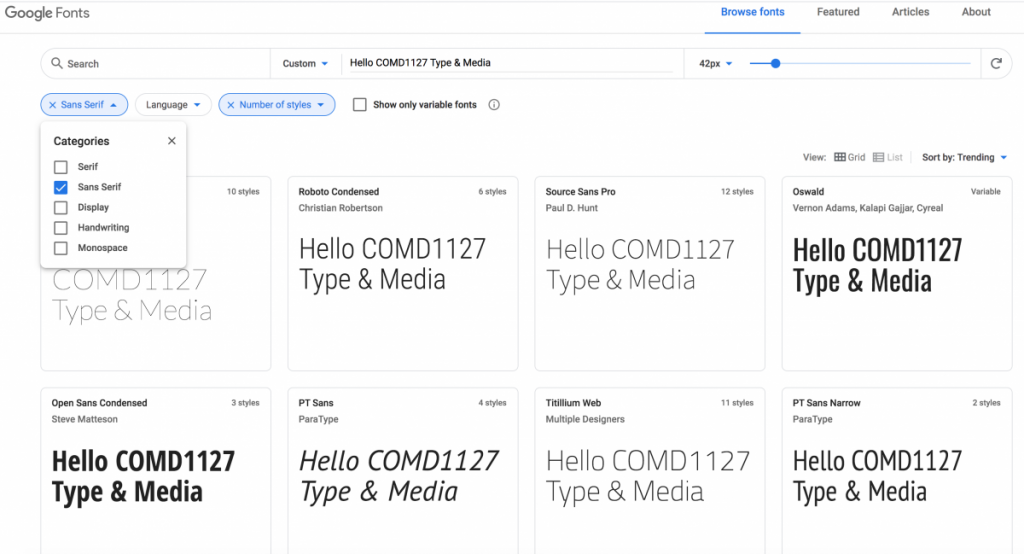
- Learn about and identify the main classifications of type: Serif, Sans Serif, Scripts and Display
- How to access a variety of typefaces for use across media (Your computer, other sources such as Google Fonts, Adobe Fonts)
- Discuss evolving trends in typography such as variable fonts and typography is space.
Activities

- Design/Graphic Activity
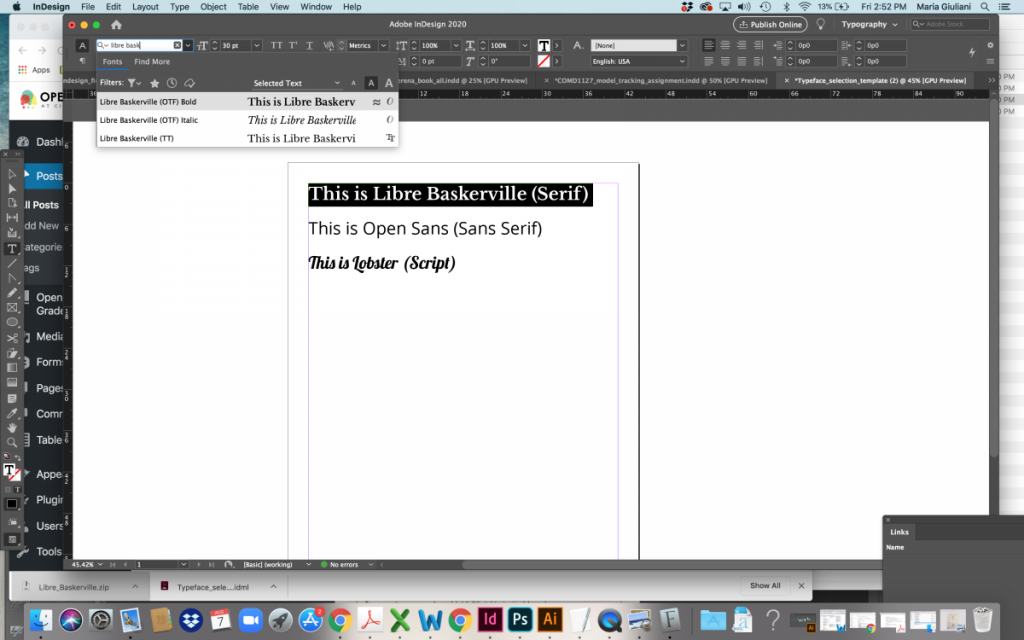
Select 3 typefaces from Adobe or Google Fonts (One Serif / One Sans Serif / One Script (or Handwriting) Download them and install them, then.- Go to InDesign and create an 11×17 page (default settings ok)
- Create a text Box and write in the name of your three typefaces
- Highlight the text and Increase the pt size to 30 pts
- With text still highlighted, apply the actual typeface to each of the names
To-Do for Next Class
Deadlines are for work to be upload by 11:30PM day before class
- Complete Activity started in class, and
upload into the media library a jpg of your page
named “Lastname First name Typeface_google” - Talk Activity – Found Alphabet
- Type-Book-1
Print out and trace the below PDF
Upload an image into the Media libray pay attention make file 72.dpi
Name Images “Lastname First name Typebook 1a”
How to create an image for web usage
https://helpx.adobe.com/photoshop-elements/using/optimizing-images-jpeg-format.html
Optimize a JPEG
JPEG is the standard format for compressing photographs.
- Open an image and choose File > Save For Web.
- Choose JPEG from the optimization format menu.
- Specify the compression level:Choose quality option medium from the pop‑up menu under the optimization format menu. The higher the Quality setting, the more detail is preserved in the optimized image, but the larger the file size.
- View the optimized image at several quality settings to determine the best balance between quality and file size.
- Select Progressive to display the image progressively in a web browser; that is, to display it first at a low resolution, and then at progressively higher resolutions as downloading proceeds.
- To save your optimized image, click OK. In the Save Optimized As dialog box, type a filename, and click Save.
From your mobile device
“Image Size” app Google Play
https://play.google.com/store/apps/details?id=de.vsmedia.imagesize&hl=en_US
“Image Size” IOS App Storr
https://apps.apple.com/us/app/image-size/id670766542
How to add images to OpenLab
Resize Images in OpenLab
Most digital cameras and phones are likely to be set to take images that are vastly larger than a user of a computer screen is likely to need
https://openlab.citytech.cuny.edu/openroad/image-resizing/
Assignments are always due the day before next class by 11:30pm, and must be posted to OpenLab or uploaded as instructed

