Class Info
- Class Date: Tues. Oct. 27
- Class Time: 8:30AM-10:00AM
- Class Meeting Zoom https://zoom.us/j/6459468086
Meeting ID: 645 946 8086
Topic
Project 2 Part 2 Intro Expressive Lettering
Choose your favorite food or a favorite pastime such as listening to music, watching videos, playing a sport, etc.
• General Specs:
◦ Create a one of a kind representation (with letters) of your favorite pastime or favorite food
◦ Work area: 1980 x 1080 pixels (horizontal/rectangular)
◦ Cannot use an existing typeface.
◦ Sketch, research and write your ideas FIRST
◦ Use pencil when sketching, but keep in mind that for the next steps experimental use of material and technique ok: paper/collage, paints, photography, etc. Technique and application is up to you.
Objectives
• Understand the difference between lettering and creative typography with a typeface.
• Understand lettering as it applies to branding, packaging, logotype designs and others areas.
• Explore typographical experimentation.
Objectives
Students develop individual styles.
Activities
Type Challenge – 3D build your word
Type Challenge – Expressive Lettering
To-Do After Class
- Project 2 Part 2 Expressive Lettering (NO TYPEFACES)
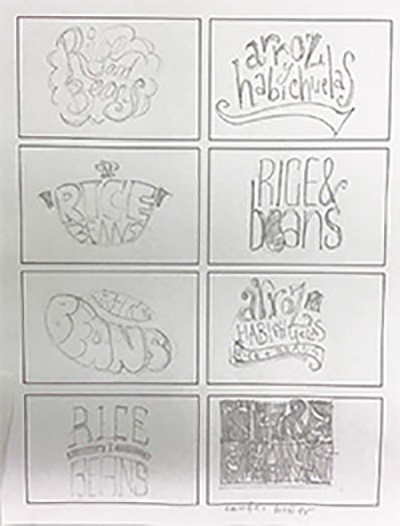
- Sketch at least 6 different solutions.
Please refer to the following PDF with assignment details.- This PDF includes a template that you can follow to sketch to proportionally correct size.
- Example: Vary your ideas and styles when sketching:
- Based on sketches and ideas, students determine what is the best way to continue with their lettering project:
- Is it best to take photographs of objects?
- Use traditional material (paint, draw, etc) or work digitally (with application)?
- Once you know which way you are working, then determine process to follow:
- Capture image (via camera, scanner/ phone/ app/ copier)
- Bring image into Illustrator/Photoshop/other apps. This depends on your solution, for example:
- Trace or use pen tool in Illustrator
- Clean or adjust colors in Photoshop
- If working by hand: Use tracing paper and pencils, then marker to clean image.
- Capture image again and repeat steps if necessary
- Careful with spelling (you are essentially drawing so there is no automatic spell check!) and keep work editable if corrections needs to be made
This PDF shows an analysis what tools might work best within Illustrator
For this example we experimented with paper, glue and actual sprinkles to create the letters, The image needs to be cleaned in Photoshop

Home work 2.
NOT FOR NEXT CLASS
Project 2 – Part 1,2 – FINAL Deliverables
- A post on OpenLab named
- last Name_firstname Project 2 final
- give categories, Project 2, Student Post
- Create Indesign page in fomat below placed your finals into file.
- export as Both JPG and one multipage PDFPDF named last Name_firstname Project 2 final
- insert into your post
Continue lettering project as per individual styles and approaches.
- Make all corrections and edits
- Start preparing for final presentation. Assignment is due class 20.
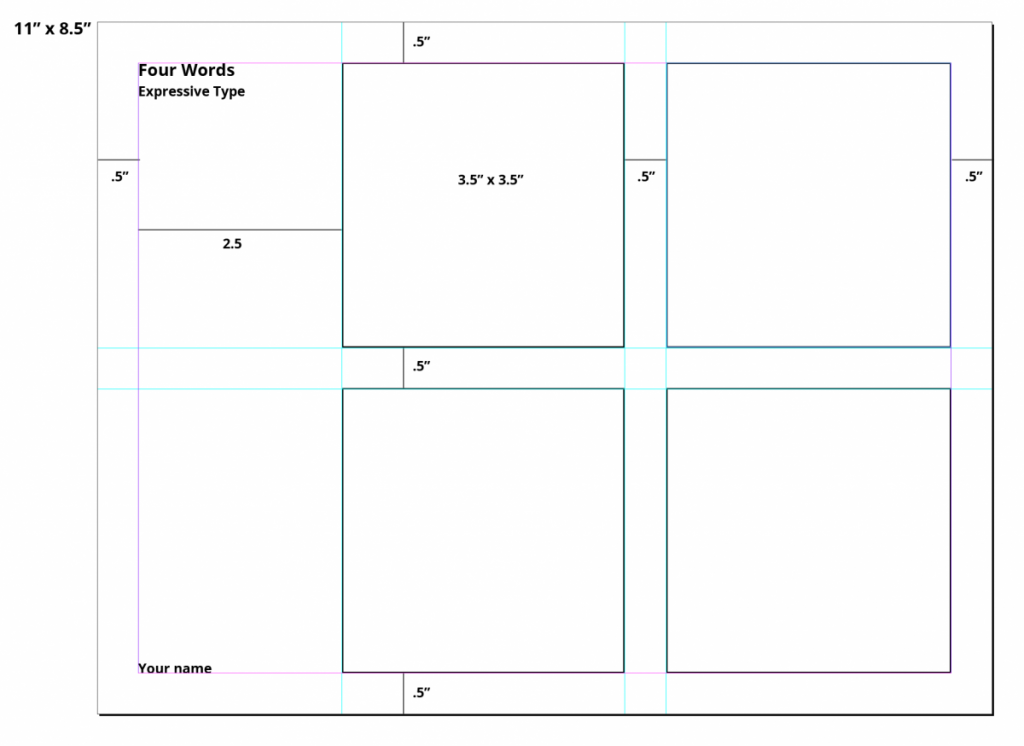
- 8.5 x 11 InDesign Document
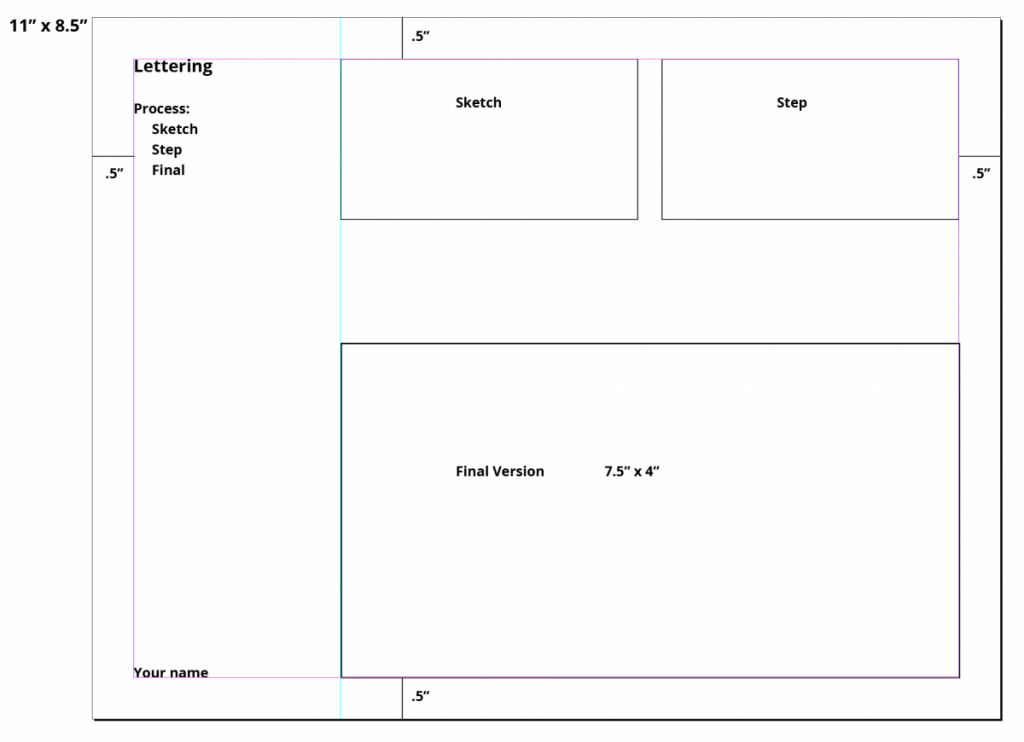
- .5 margins all around (see below for additional measurements
- final versions of the four words (expressive type assignment)
- final version of the lettering assignment with images of process (sketch and process)

