Building blocks: posts, pages, widgets, and plugins
The four basic “building blocks” for your site are the following: posts, pages, widgets, and plugins. To add content to your site, you can use posts or pages. To add functions to your site, you can use widgets and plugins. In this section, you will find brief explanations of these building blocks as well as helpful tips for how to best use them on your site.
1. What is a post? When you want to write content for your site, you have the option of creating both posts and pages. Posts will be appear on the “Home” page of your site in chronological order, with the newest post appearing at the top of the page. By default, your most recent posts are the first thing that a viewer will see when visiting your site. They are a good place to post new information or announcements about your course, project, or club. They are also a good place to publish new discussion questions, reading responses, blog entries—or any information that will be less relevant to your viewers as your course, project, or club progresses. Remember that posts are displayed chronologically, so any content posted will be pushed down the screen by new content. If you would like certain content to remain static so that your viewers will always see it when they visit your site, then you might want to create that content as a Page (e.g., a course syllabus, a project description, or a club mission statement).
2. What is a page? Pages can have the same content as posts, but they are not published chronologically and the content on a page remains static (i.e., it doesn’t change). Your posts will appear chronologically on your “Home” page and your pages will appear as links on your “Home” page. These links will usually appear in the header menu on your site and/or in the right-side menu on your site. To view a page, viewers will need to click the link for the respective page.
3. What is a widget? A widget is a tool that adds different functions to your site. To view widgets currently available for your site, go to your site Dashboard and click Appearance > Widgets in the left-hand menu. To add a widget to your site, drag-and-drop the selected widget from the “Available Widget” area in the center of the screen to one of the “Widget Areas” in the right-hand menu. Learn more about adding widgets to your site.

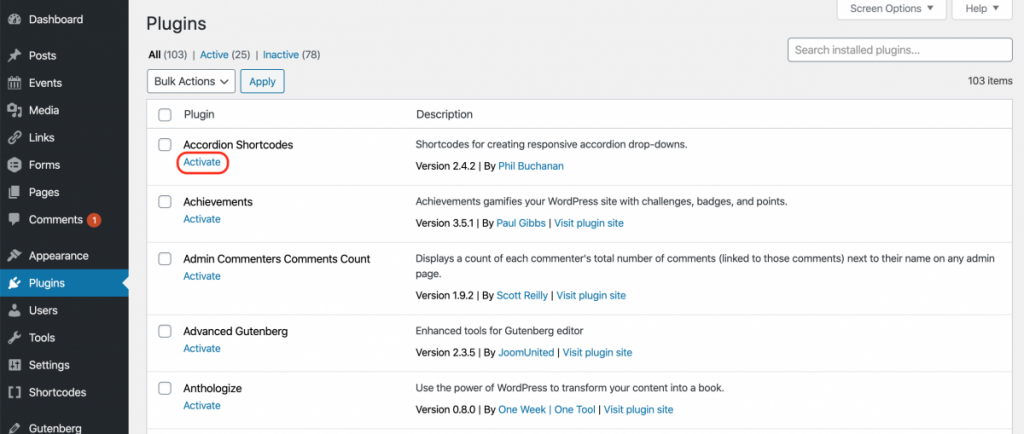
4. What is a plugin? A plugin is another tool that adds custom features and functions to your site (e.g., integrating Twitter feeds on your site). To view the available plugins for your site, go to your site Dashboard and click Plugins > Installed Plugins on the left-hand menu. To use an available plugin, click Activate from underneath your selected plugin. Activated plugins will usually appear at the bottom of the left-hand menu or as an item in the Settings section of the left-hand menu. To edit the settings of an activated plugin, click the appropriate plugin title. Learn more about adding plugins to your site.
Help information courtesy of Qwriting.org at Queens College.


