Day 5 – Class Notes

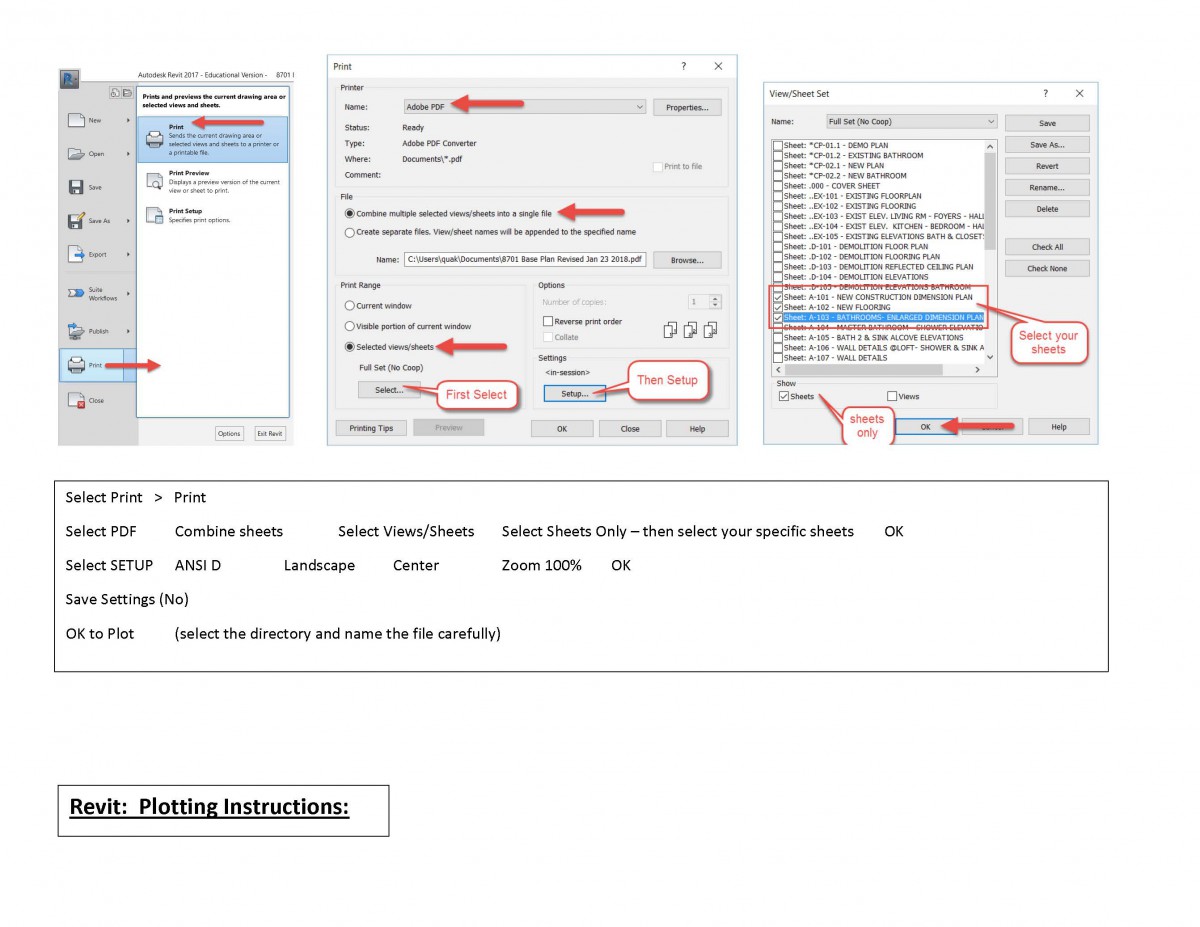
Plotters and Printers were offline – so we were unable to do our pinup review.

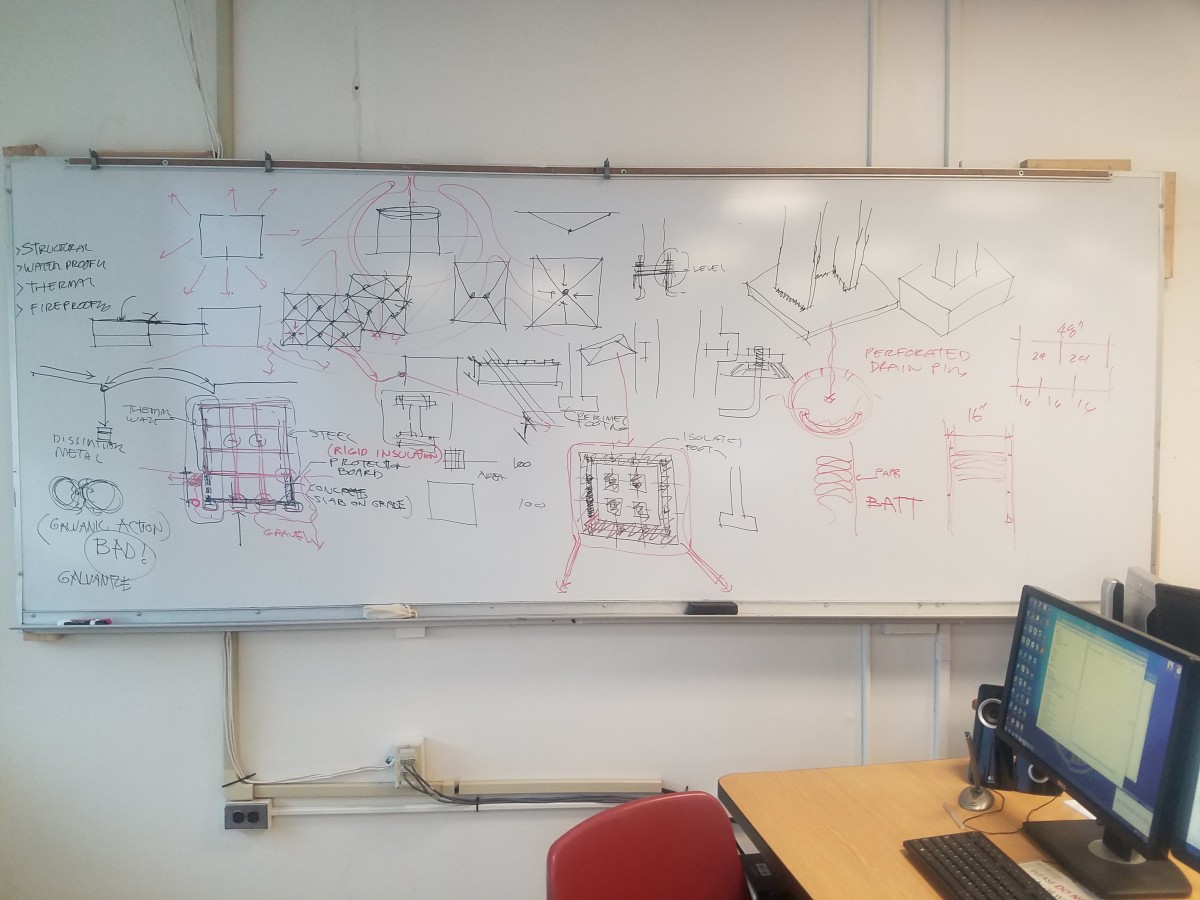
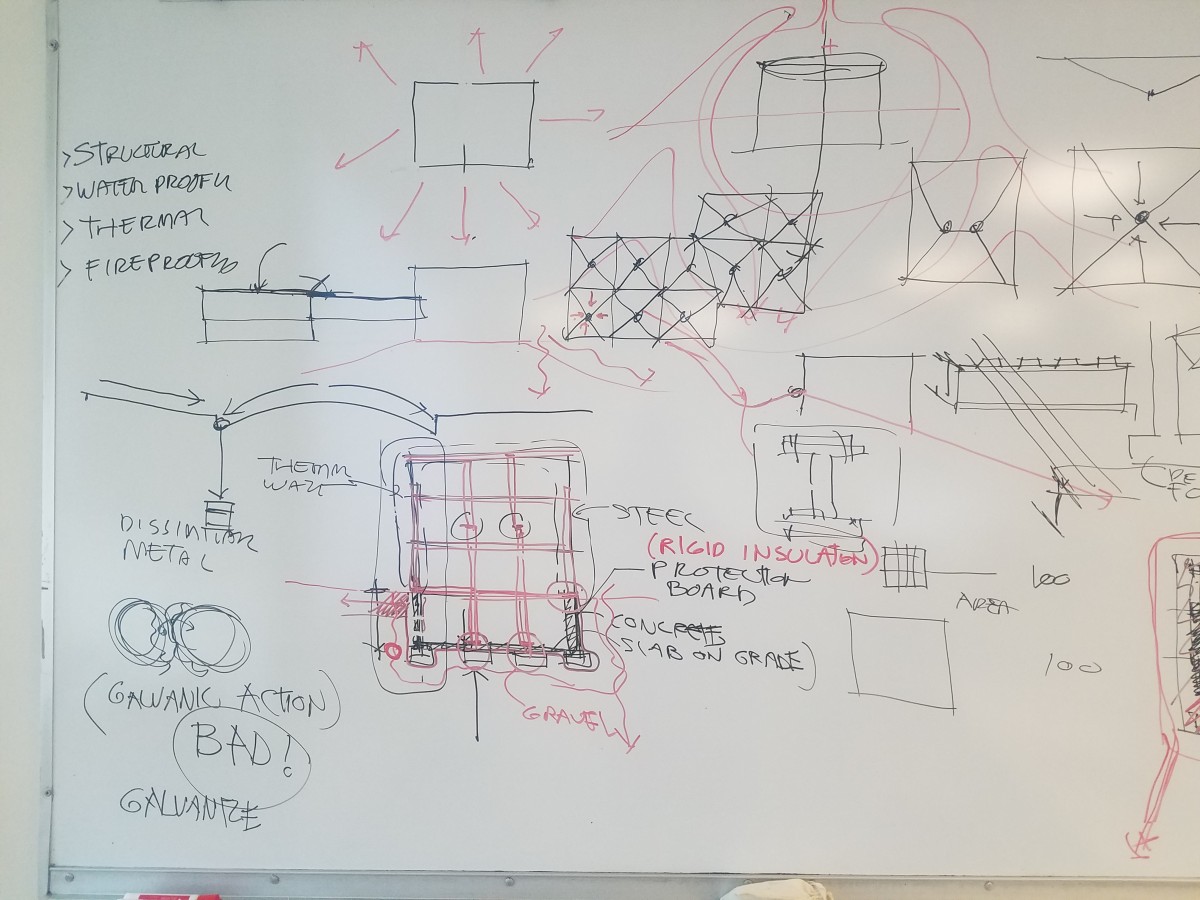
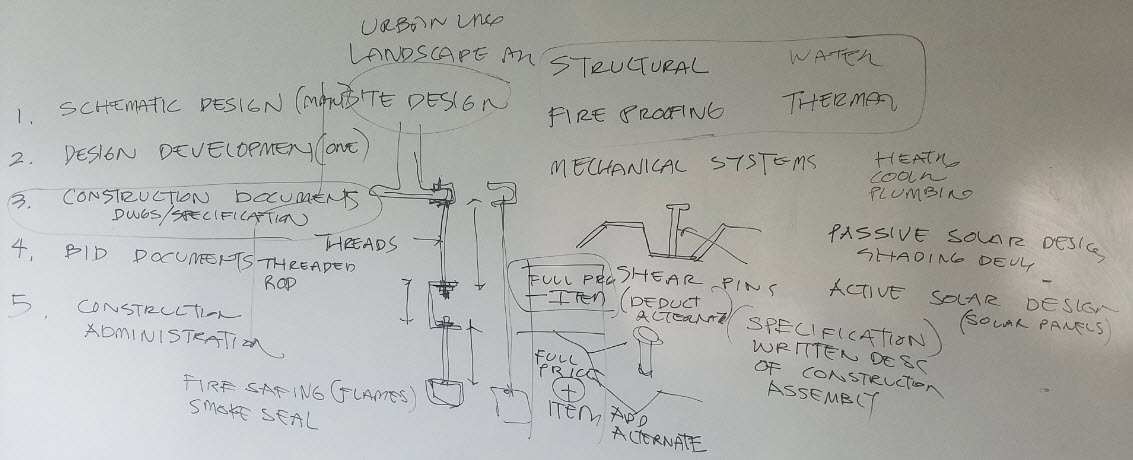
Discussed steel building from the ground up.

  • The ground and how to grade a site
  • Building a concrete foundation
    • Waterproofing strategies
    • Structural Strategies
    • Thermal Strategies
  • Steel superstructure
    • Column & Column transitions to footings
    • Steel Beams and connections
    • Roof Strategies
      • Roof Drain locations
      • Sloped to drain
      • Insulation Strategies
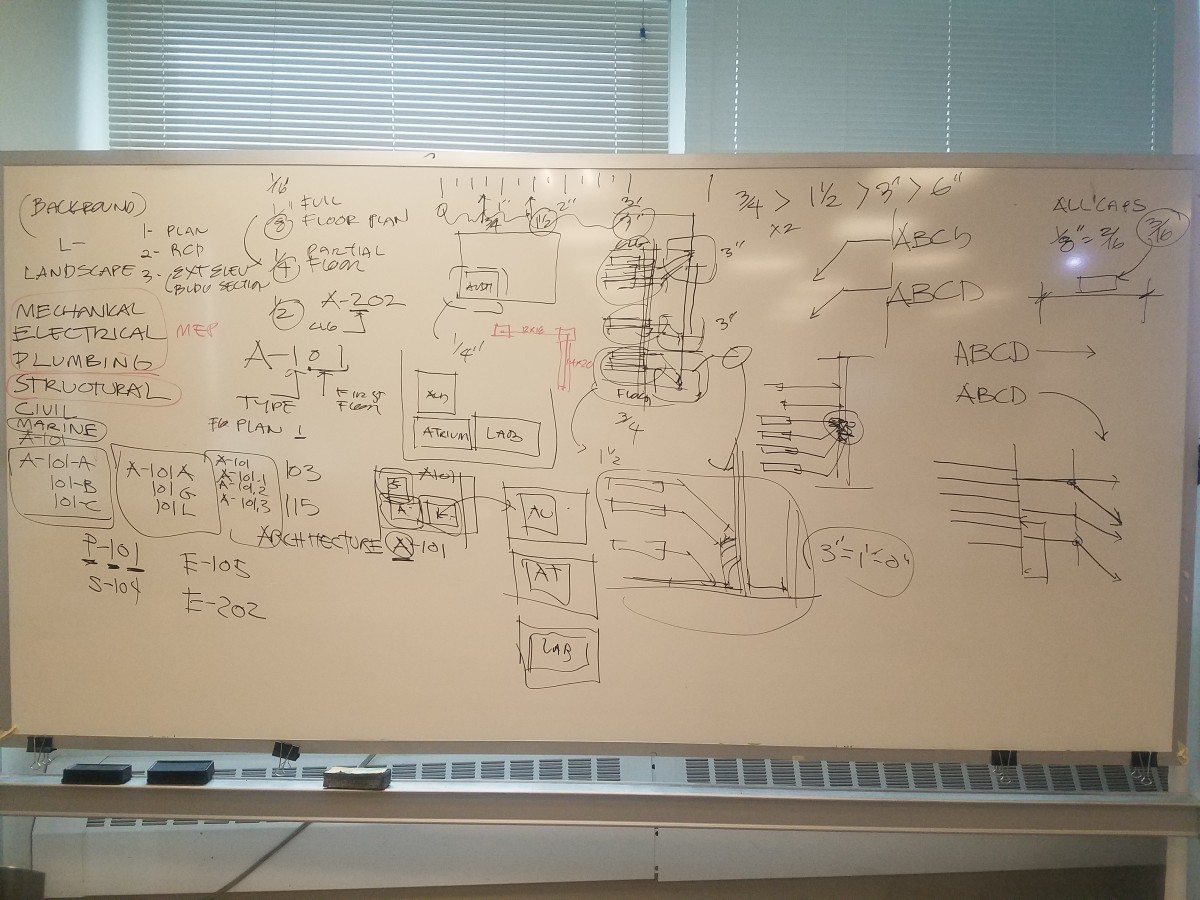
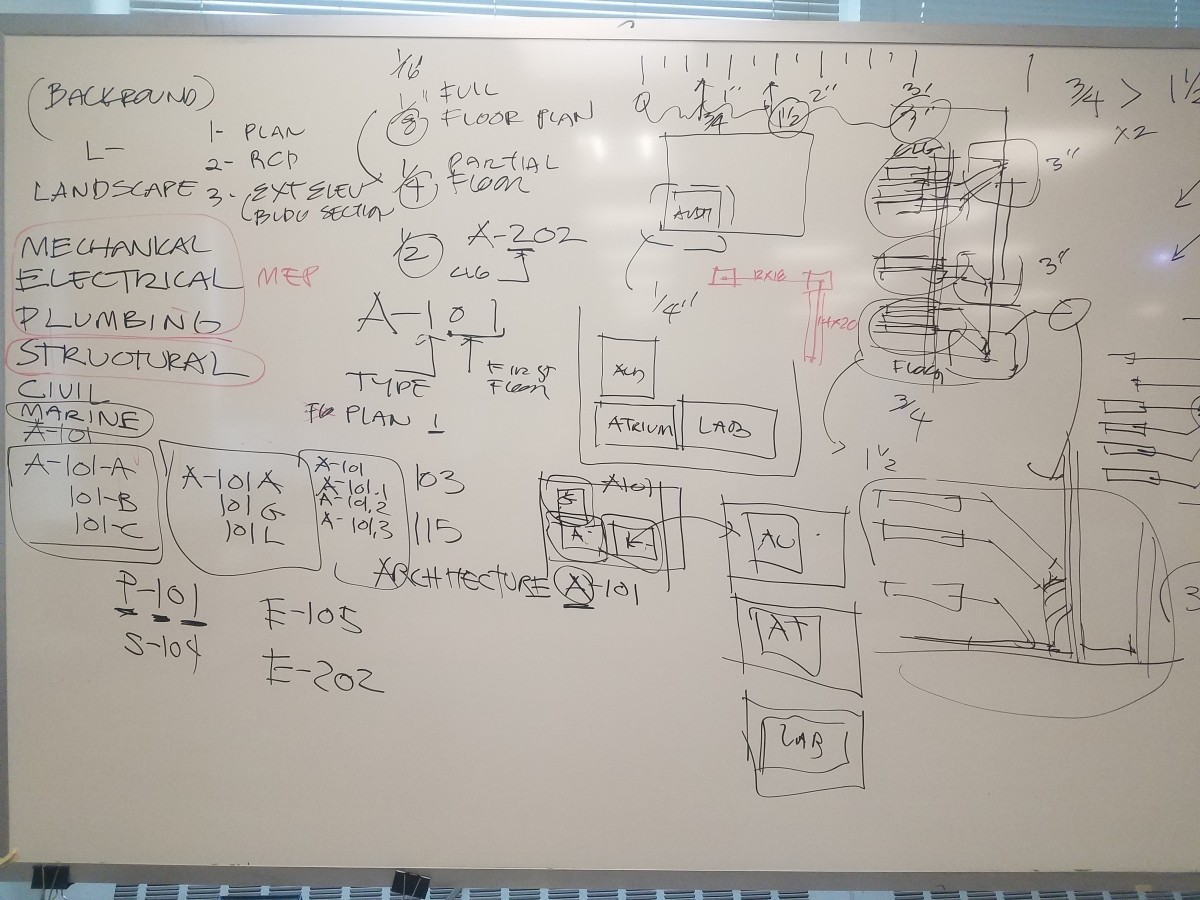
  • Review of Sheet Naming and Numbering Strategies
    • Discussion of Sheet Naming Quiz
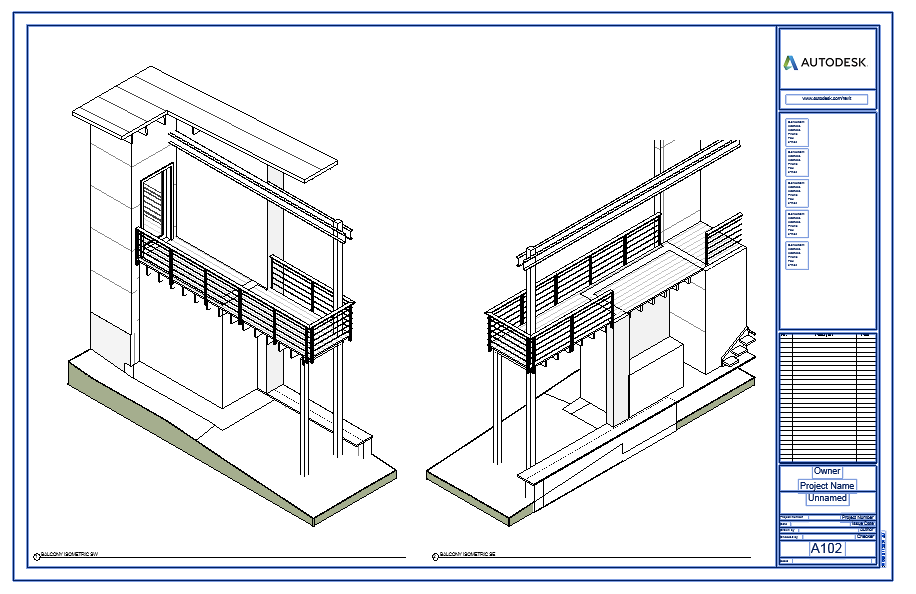
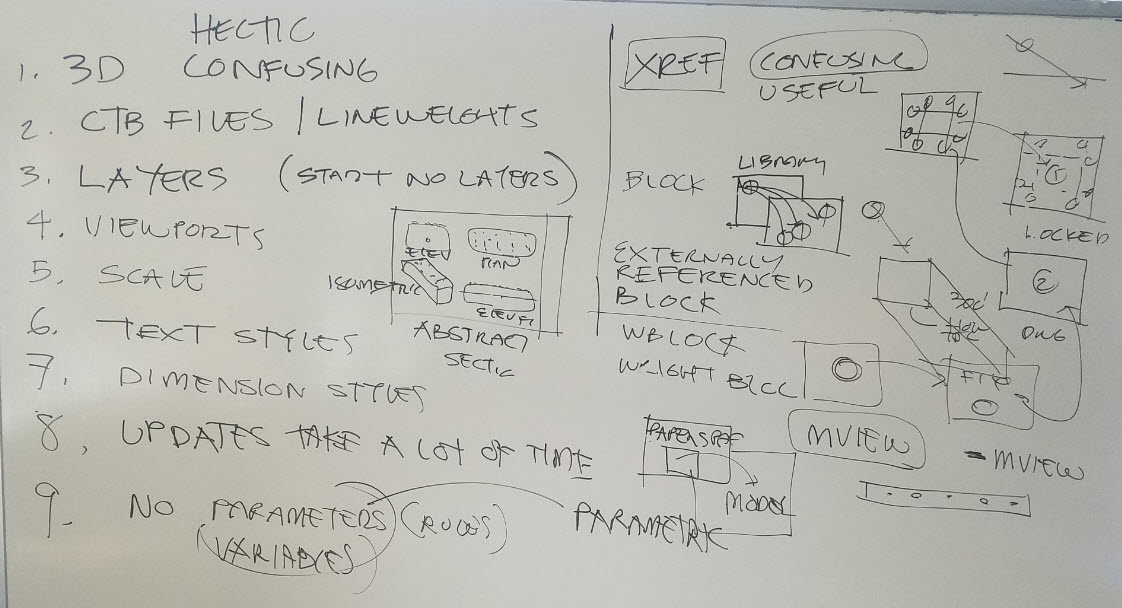
  • Revit Review – Connections Study
    • Review of student work
      • Review of family creation and parameters
      • Review of project file alignment and scales
      • Sheet setup for full connections study (3/4″)
      • Sheet setup for 4 detail studies (1 1/2″)

For Next Class

Scavenger Hunt

  • Redmarked sketch with two grades
  • Fix the sheet
  • Plot the 22 x 34 for next class.
  • Post this sheet and the Revit file on Blackboard.

Steel Connections  (remember its OK to go beyond the minimum)

  • READ THE CHAPTER FROM CHING
  • create the project file
  • Build a column family with an instance parameter for height
  • Build a beam family with an instance parameter for length
  • Compose together in the project file
  • Create a Titleblock – add three coordinated views (plan/front elevation/section or side elevation) and an isometric
  • Next Step  – add steel components

Grading Notes for Scavenger Hunt

Clarification of how the scavenger hunt will be graded.:

  • Were good stories or subjects chosen?
  • Were the images describing the chosen subject informative.  Are they good choices to explain and understand and are they shown at the correct scales (1/2″ or 3/4″)?
  • Were the minimum number of images included?  This would include coordinated plan, front elevation and side elevation or section as well as isometric.
  • Were additional callout images at larger scale (1 1/2″ or 3″) included?
  • Were the sheets well formatted?  Are images aligned with each other, are they named well?
  • Is annotation – both notes with leaders and dimensions included? Are the the correct size (3/16″)
  • Are the title blocks names correctly?  Do they include the subject, a photo of the author and the authors name?
  • Are they plotted correctly?  Sheets should be printed at 100% size formatted to 22 x 34″ – not plotted to fit.  They must be in a single PDF.
  • Were both the Revit File and the PDF file uploaded to Blackboard?
  • Was the assignment handed in on time?
  • Was the Revit file well done – organized with good naming conventions in the project browser, for the sheets, etc.  Were the files well named?

Day 3 Plotting Notes

The following short tutorial will help you plot your Scavenger Hunt assignment.  You are to upload both the Revit file and the PDF to Blackboard by tonight midnight.  In addition select your best sheet only and print it on 11 x 17 before class for pinup – remember just your best sheet.

Name your files   Scavenger_Hunt_FirstName_LastName.RVT and .PDF

Select this link to download instructions as a PDF

DAY 2 CASE STUDY REVIEW & SCAVENGER HUNT

For next class:  FOR THE INDIVIDUAL

For next class:  FOR THE TEAM

  • Email me the name of your project and your team member names
  • Use the schedule template.  Create your own schedule and then create the team schedule.  When will you meet?  When will you work?   Schedule Template Blank

For next class:  CASE STUDY

  • Create a team OpenLab Project site.  Email me the link.
  • Complete Team interviews – ask each other three questions.   Write a simple paragraph for each of you based on the answers.  Create a single PowerPoint slide for the team with photos of each of you.   Post this slide on your OpenLab Project Site.
  • Research your case study.  Find out as much as you can about your case study.  Put this in a PowerPoint.  One team member must post the PowerPoint to Blackboard by midnight Sunday night.  Also post this on your team OpenLab site.

For next class:  SCAVENGER HUNT

  • Complete three sheets similar to the samples below.  You should have three different stories you are trying to tell – have one sheet for each of them as a minimum.
  • Scale for first set of views is 1/2″ = 1′-0″ .   Scale for enlarged callouts is 1 1/2″ = 1′-0″
  • For the isometric view use the “Orient to View” command.  See the attached tutorials.
  • Scavenger Hunt Intro & Orient to View
  •  Scavenger Hunt Annotation

Assignments and Contacting me

Email:  Prof.Paul.King@Gmail.com   (recommended)  or    PKing@CityTech.Cuny.Edu

Assignment 1:  Case Studies.  Select 3 potential case study subjects.  Format each on a separate 11 x 17 sheet for a total of 3 sheets.  Print before class.  Pinup in corridor outside the classroom.  (bring pins)

You do not have to visit these buildings yet.  Just look to see how much information you can gather between now and the next class.  Put this on your board.  Do not be concerned if you cannot find complete information.

  • Must be located in NYC (One of the 5 boroughs) so you can visit it often.
  • Steel frame building
  • Has public access (CUNY Buildings, Museums, Commercial buildings)
  • Multistory (4 or more stories)
  • Large public lobby space (must be at least a double height space)
  • Monumental or public stair in the public lobby (optional)
  • Two or more materials on the facade.  For example glass curtain wall and metal panels.

Assignment 2:  The Scavenger Hunt:  Select 3 things that interest you in the project file.  Create three views (plan, elevations,section) all of the same scale for each for a total of 9 views.  A good scale to use is 1/2″ = 1′-0″.  Do not print.  Bring your project file to class.  Rename the project file as follows:   LastName_Firstname-ScavengerHunt.RVT